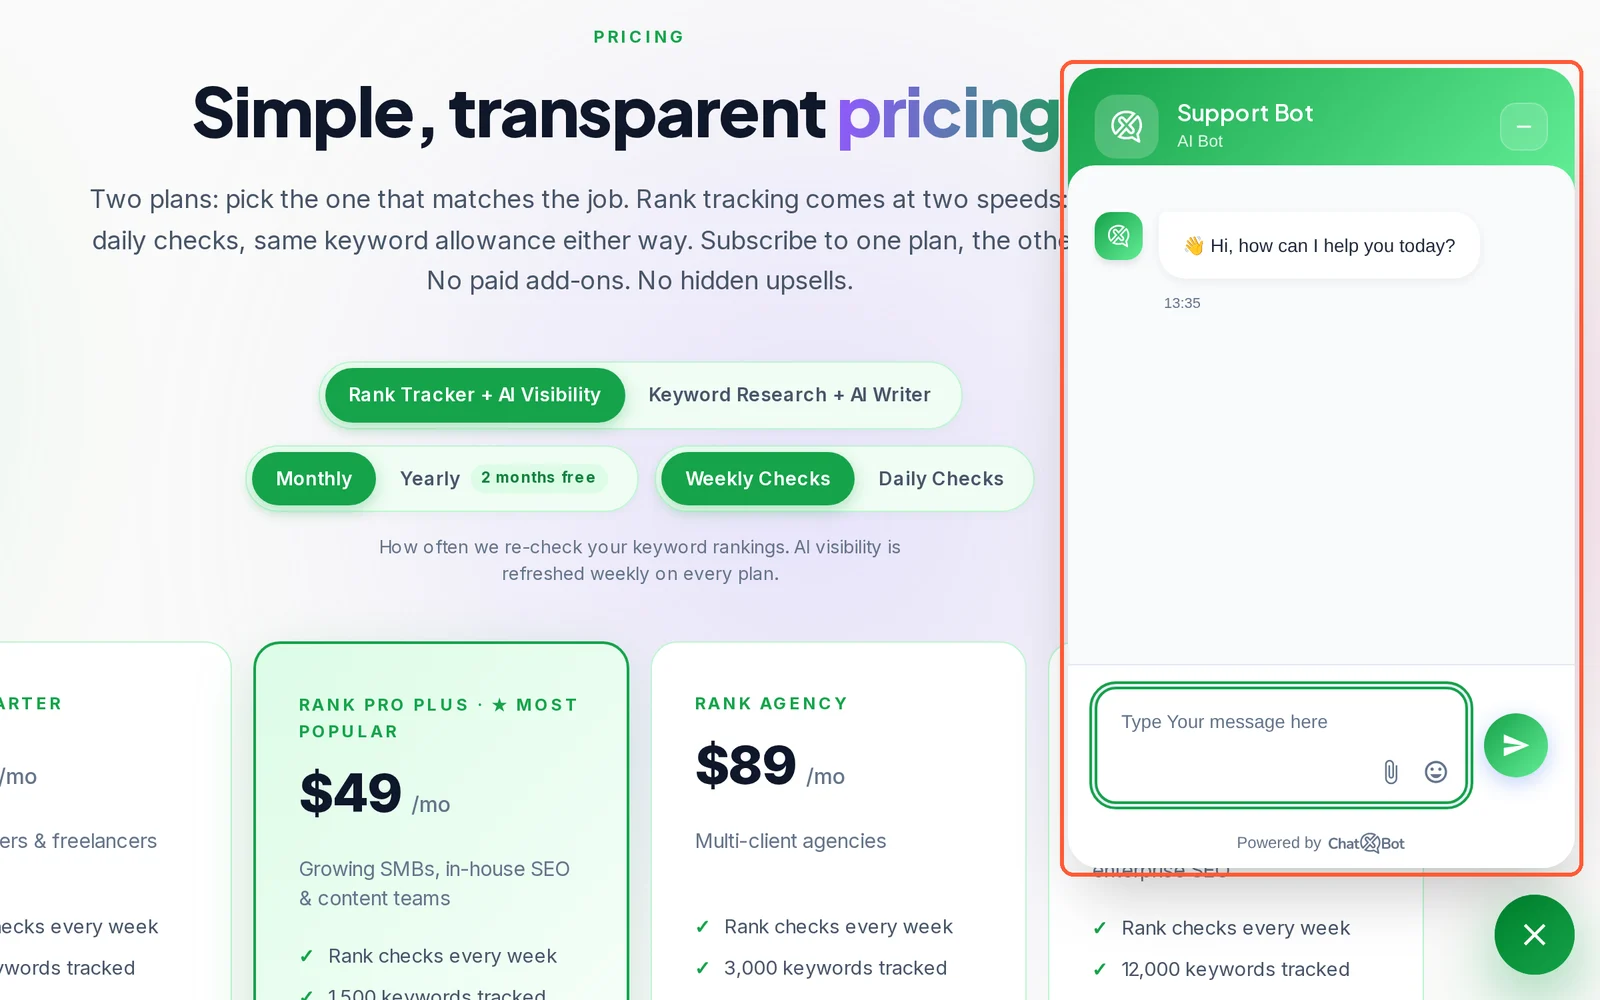
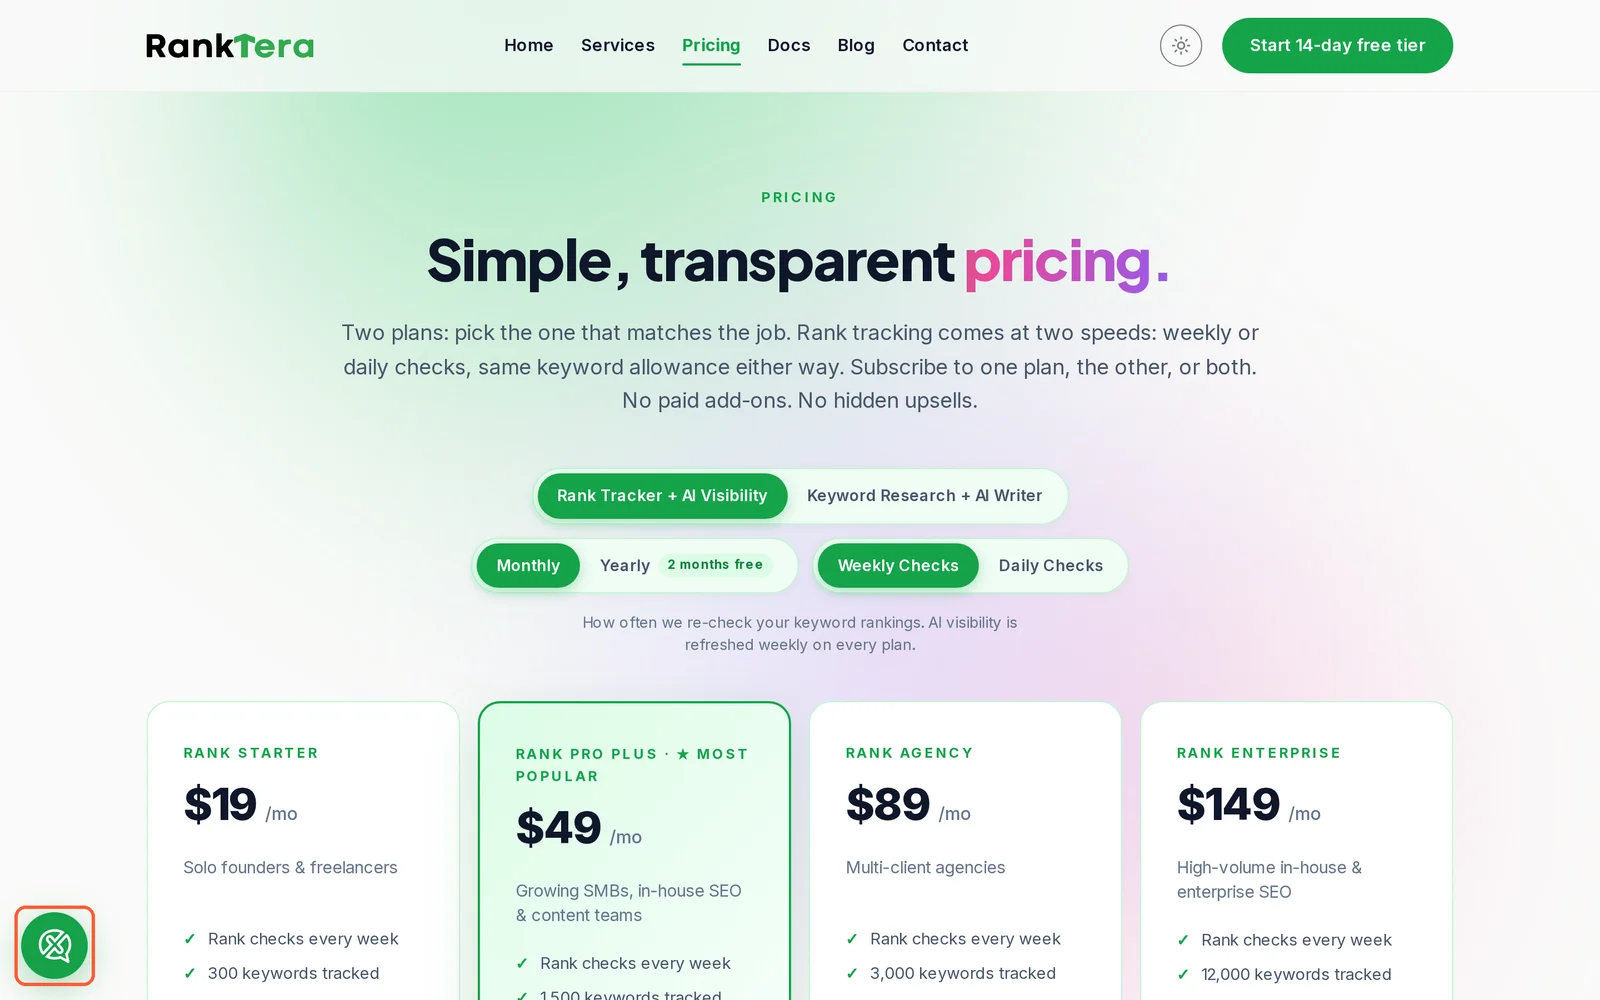
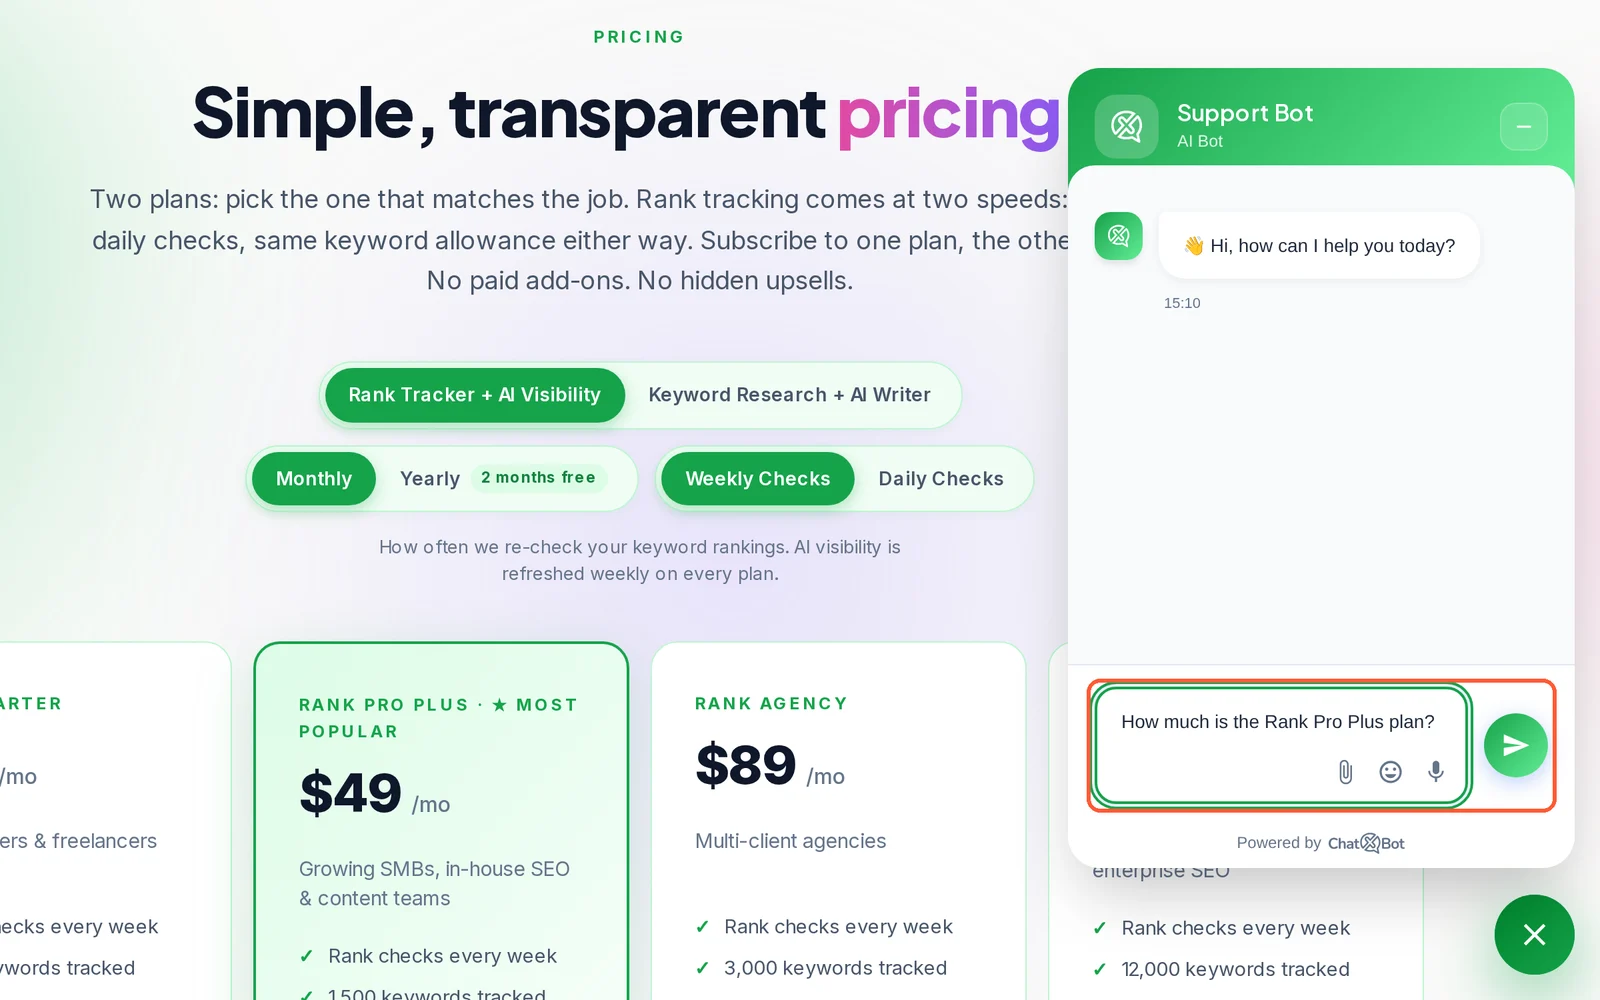
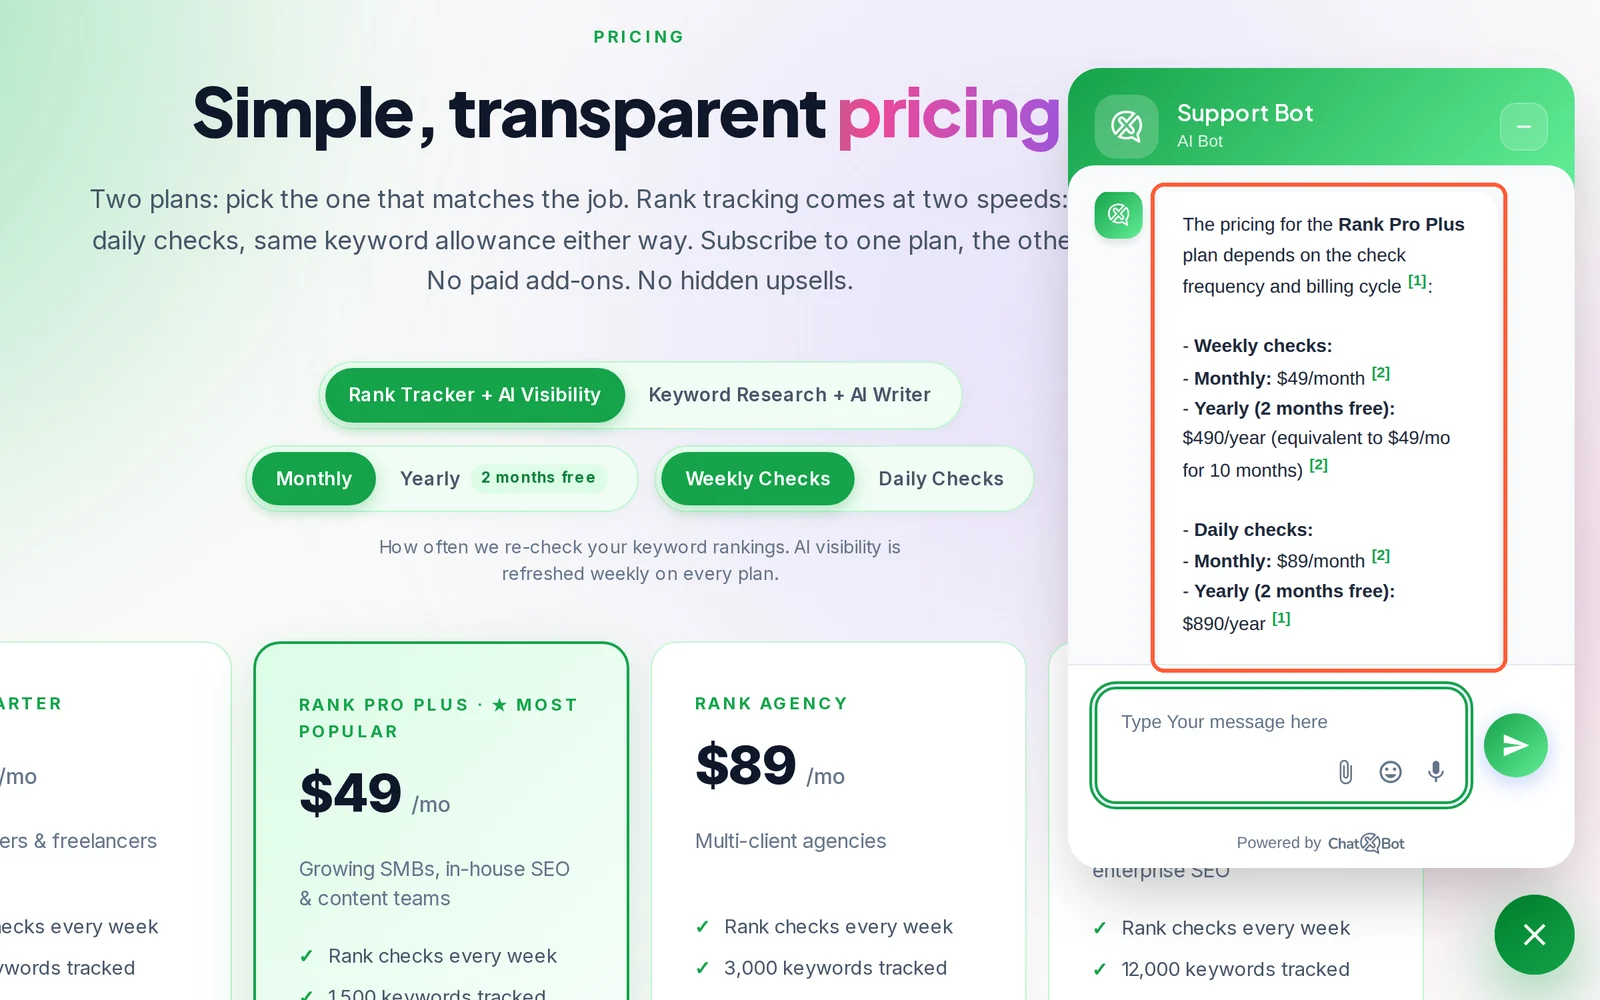
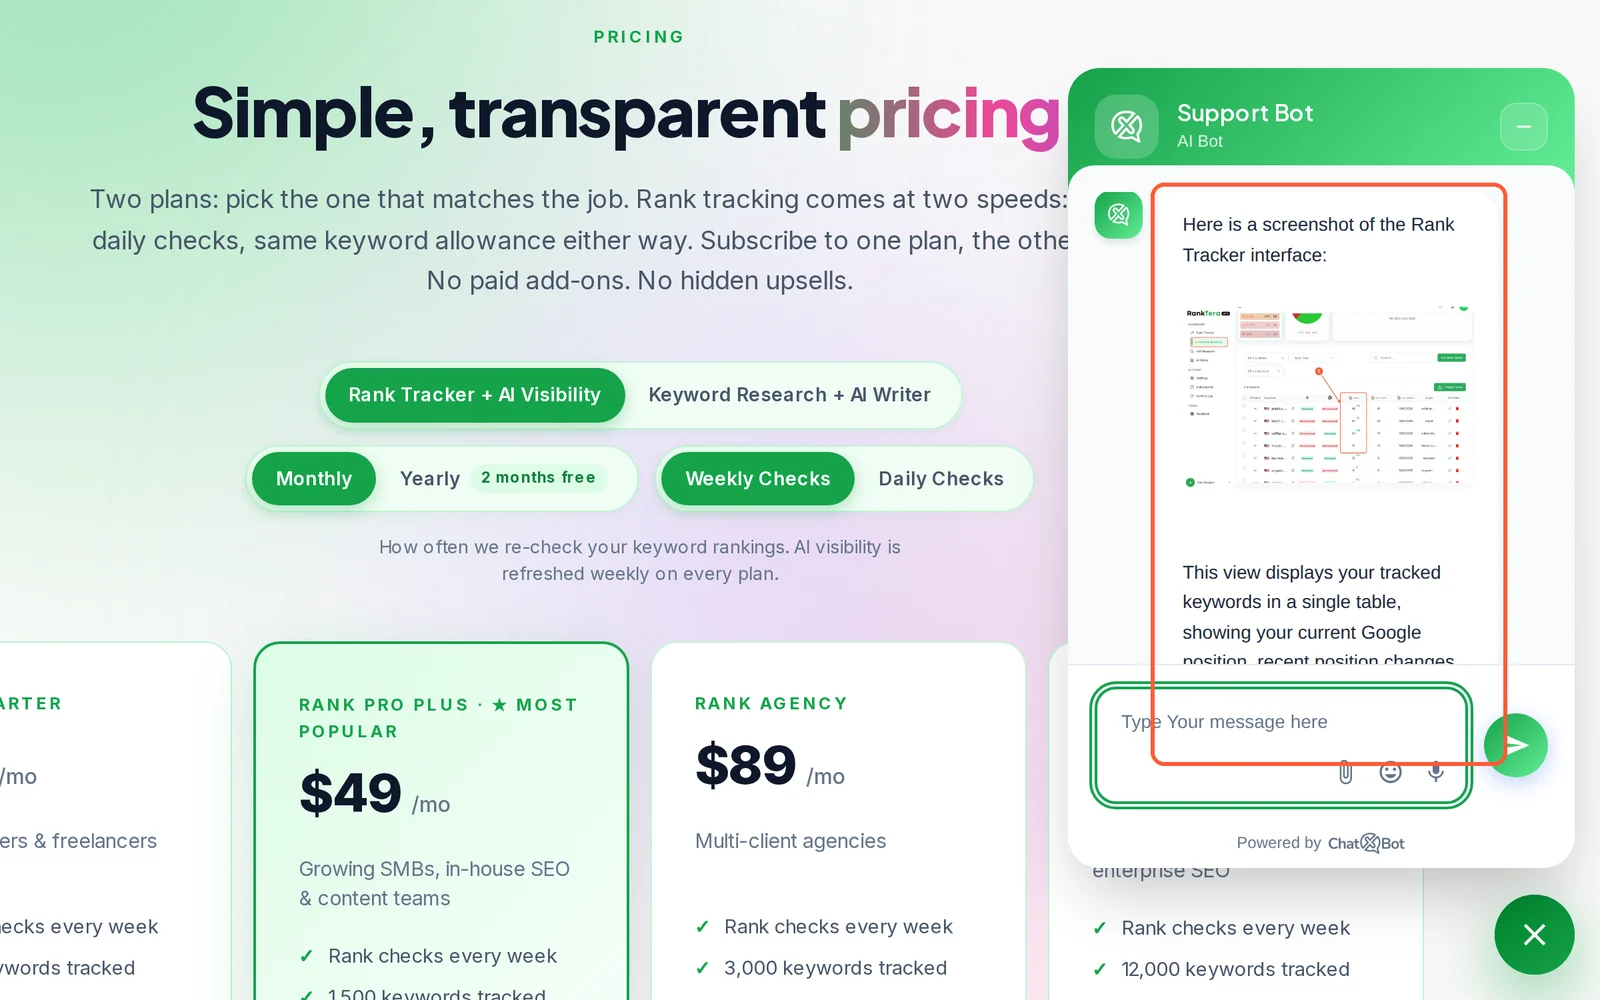
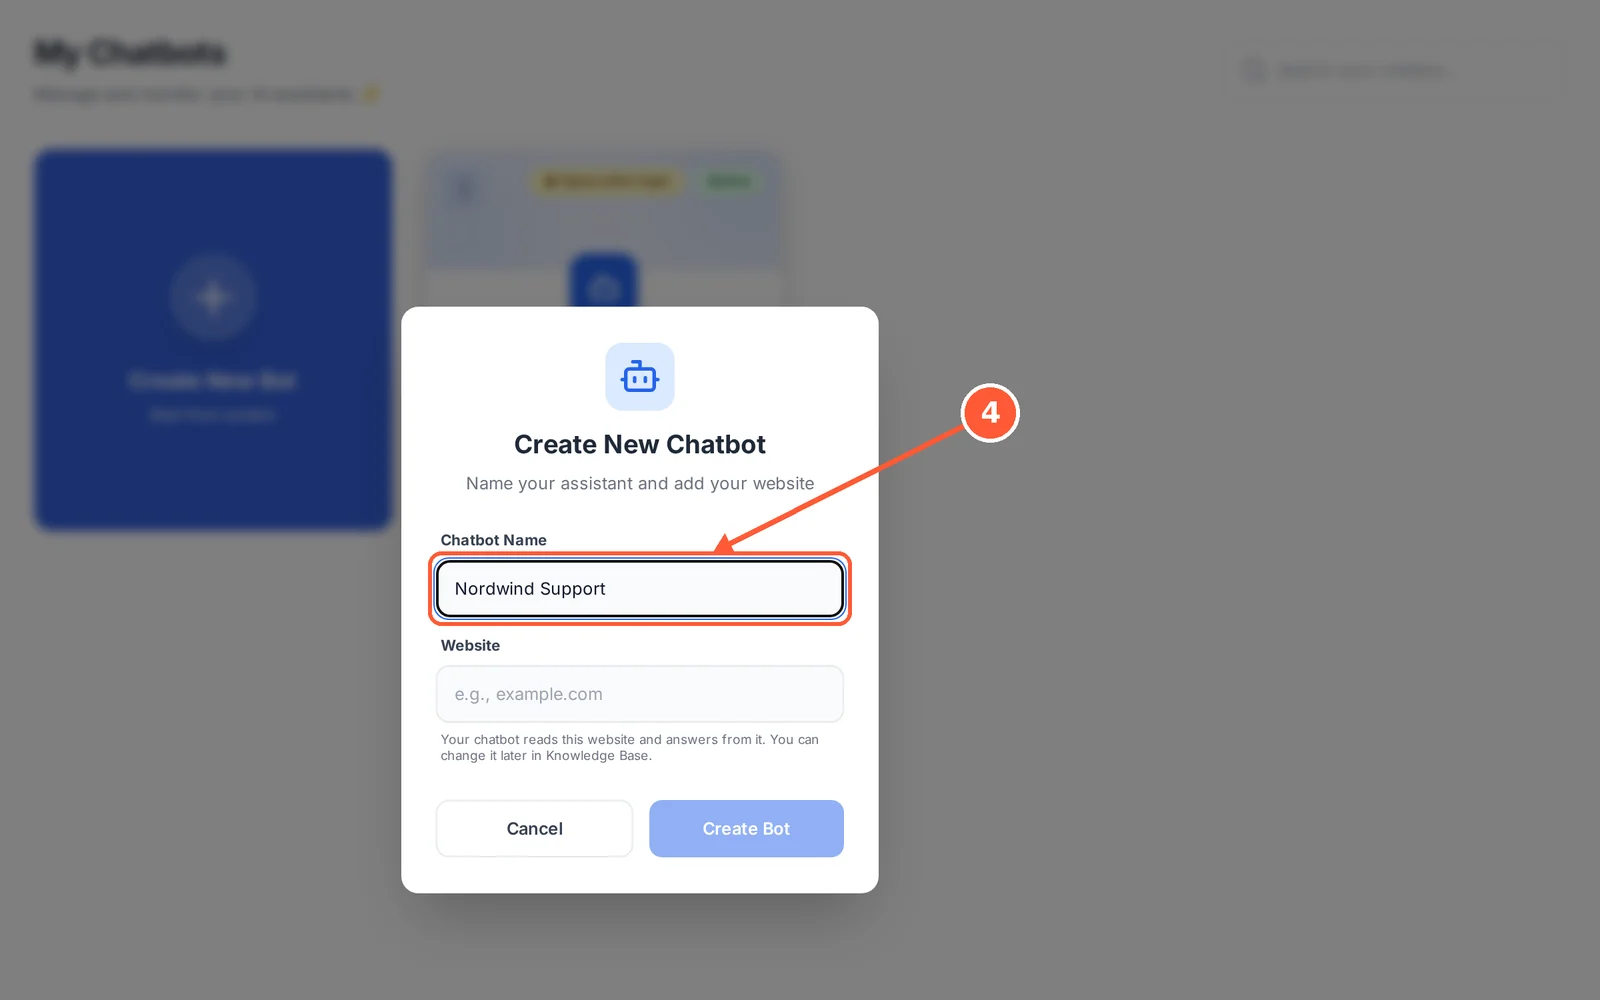
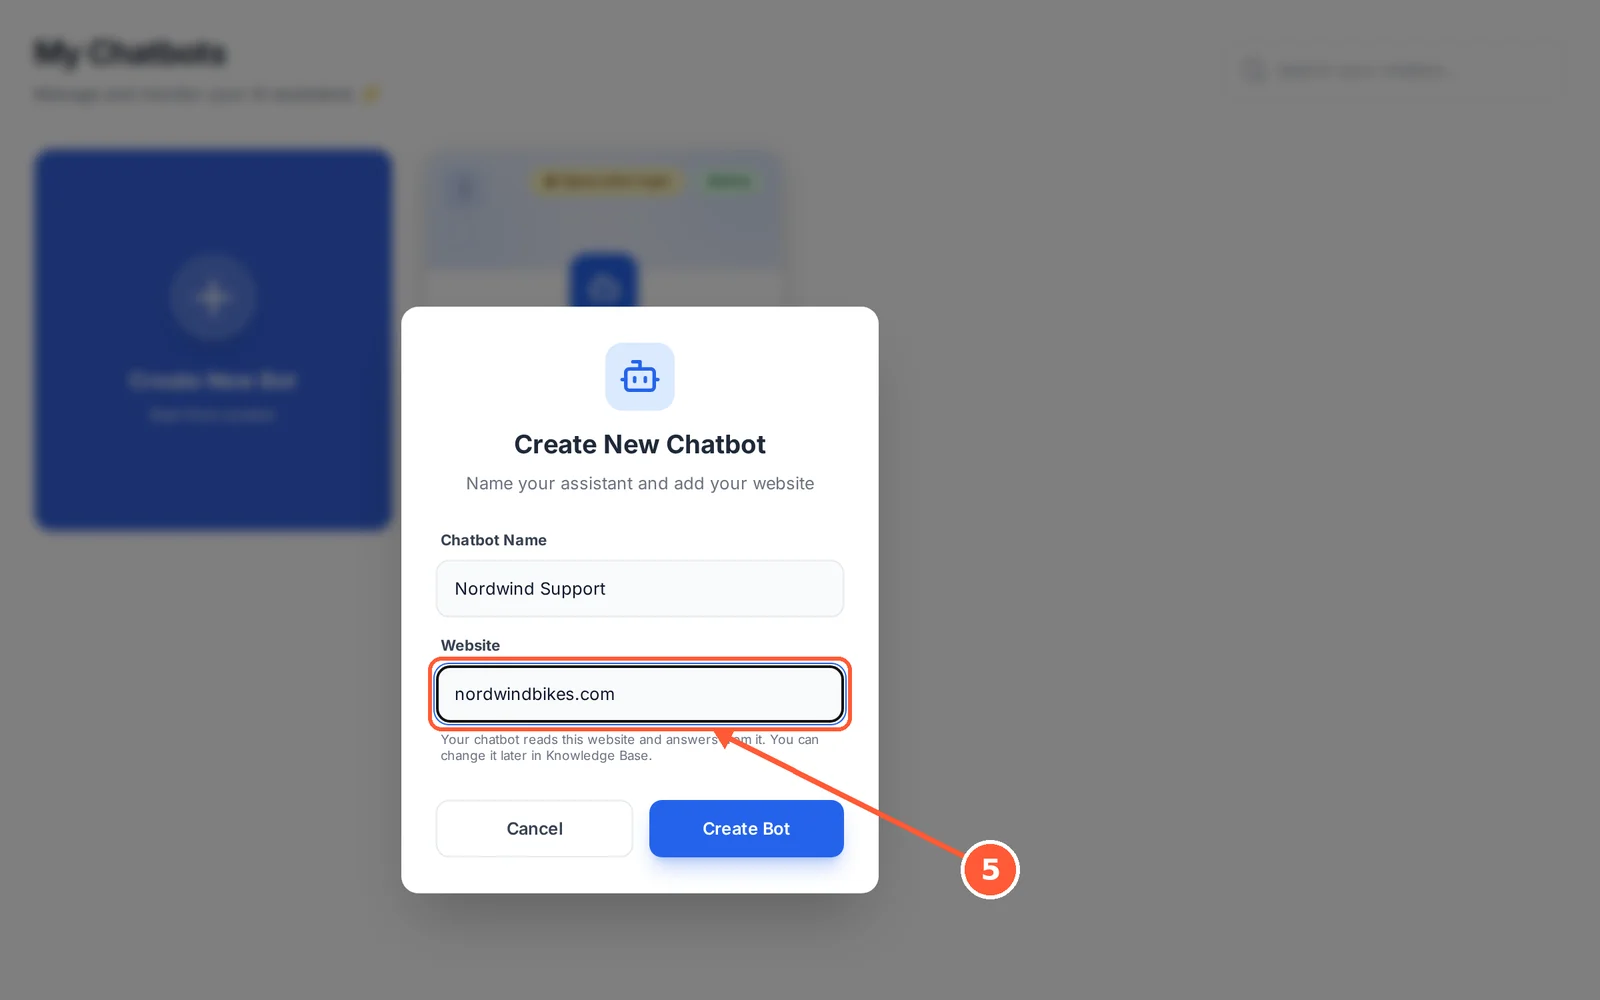
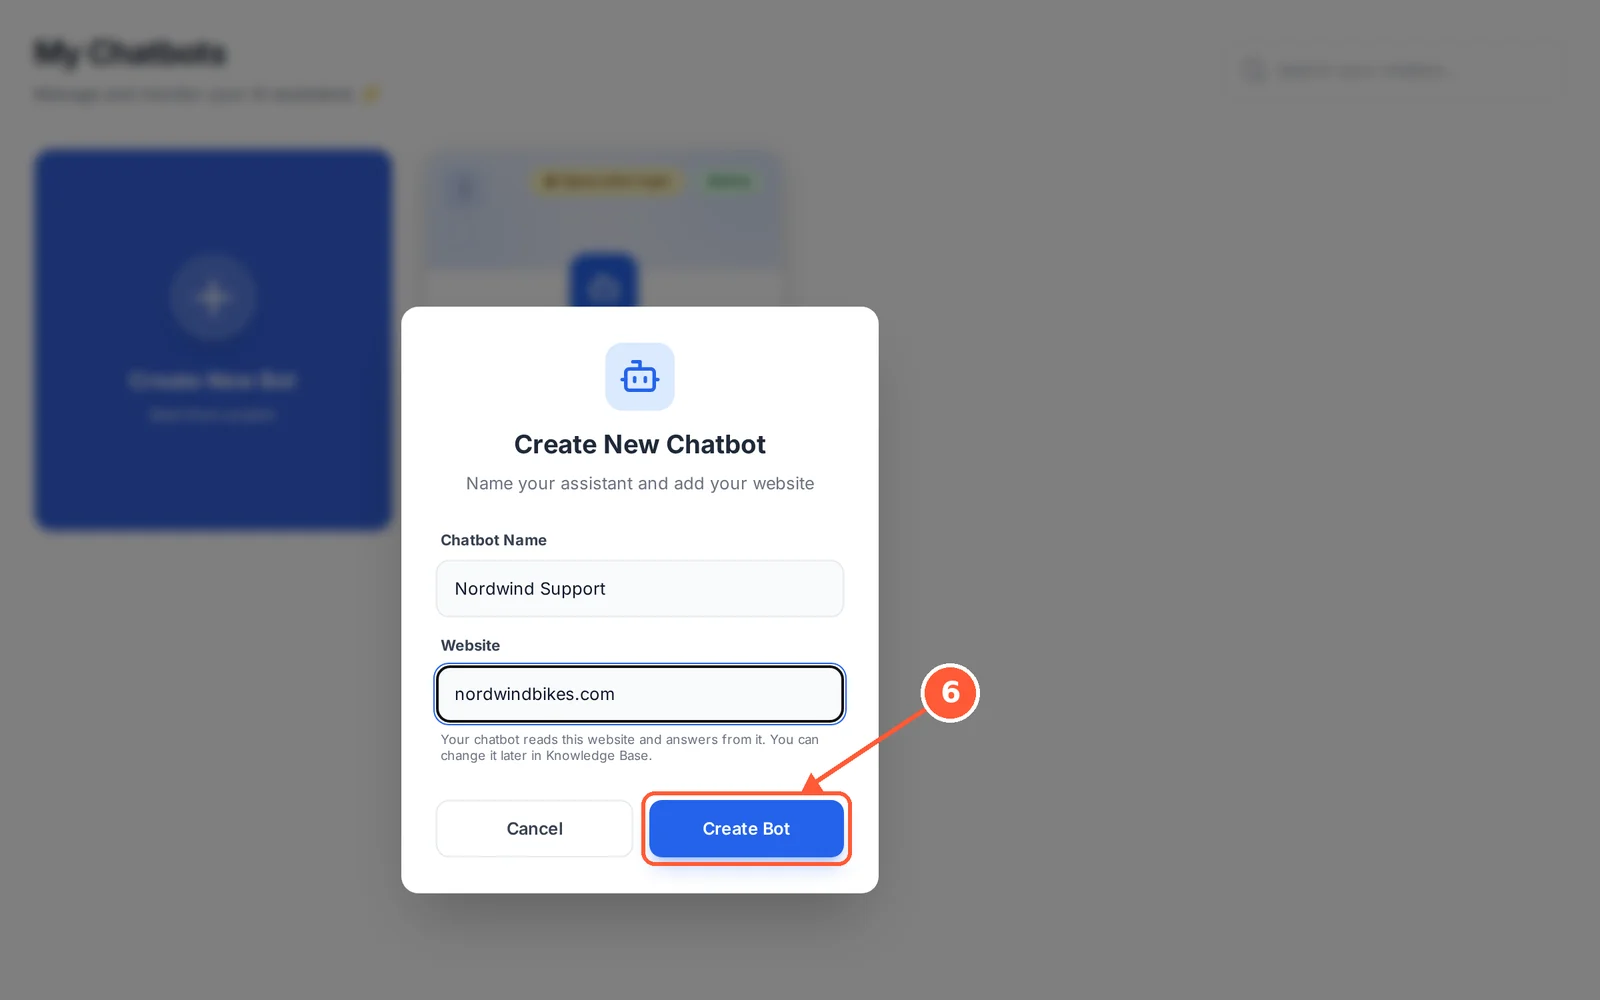
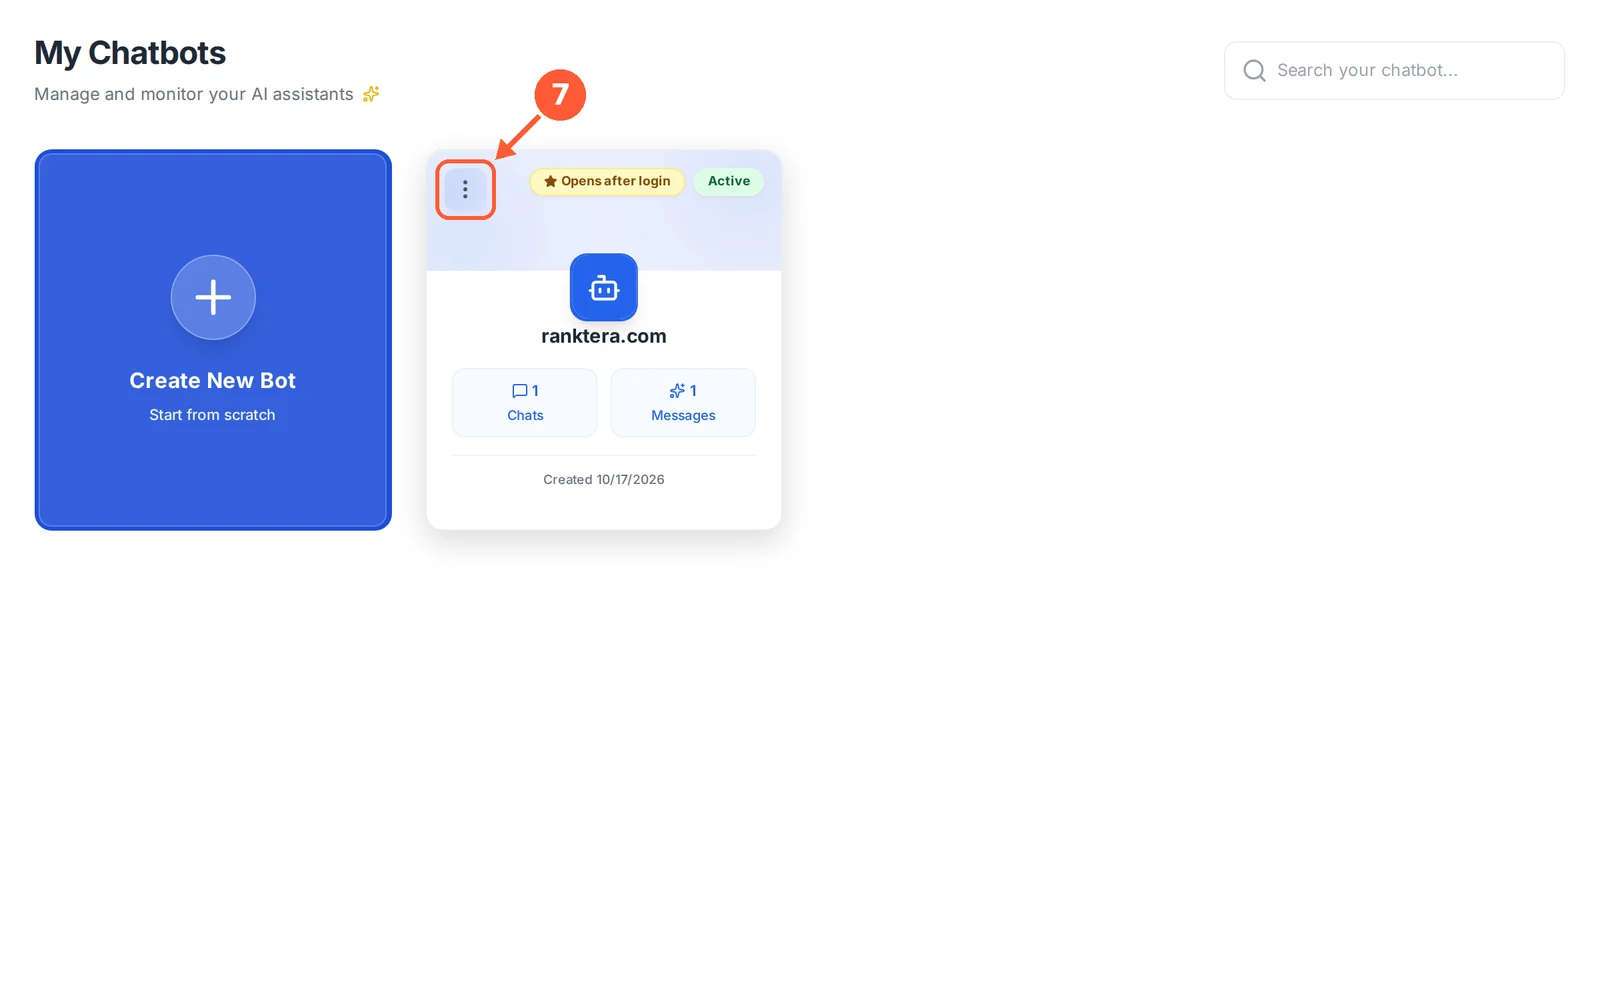
Step-by-step help for every feature. Use the arrows, or click the right or left side of a picture, to move between steps.
Create Your Account
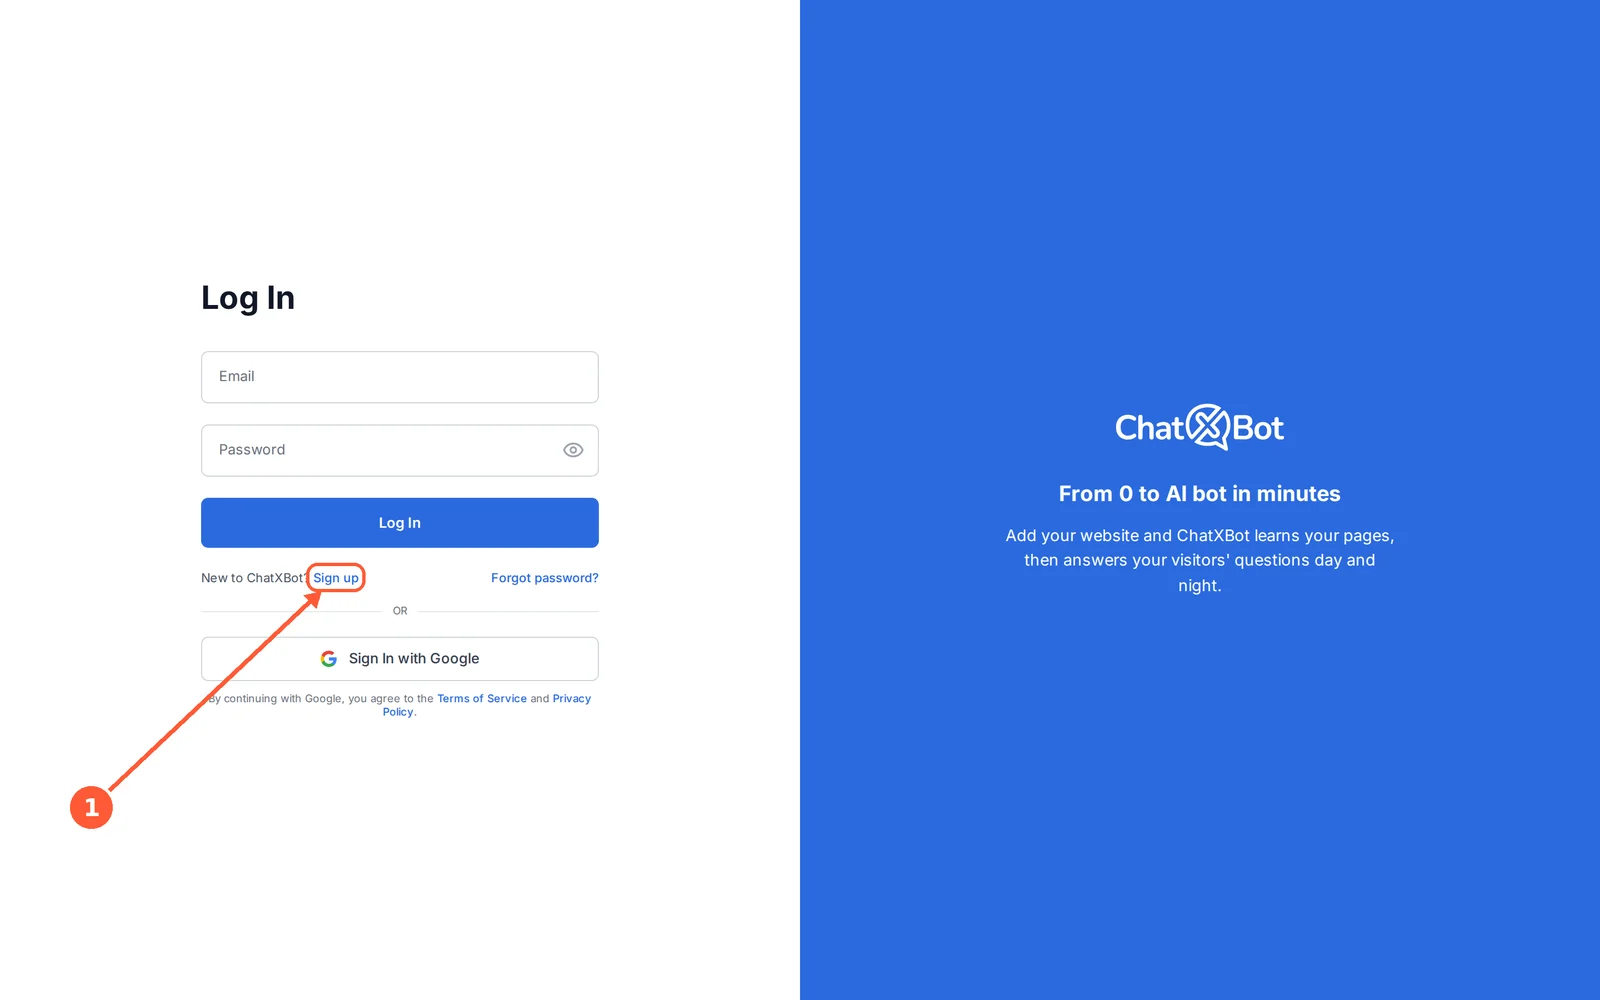
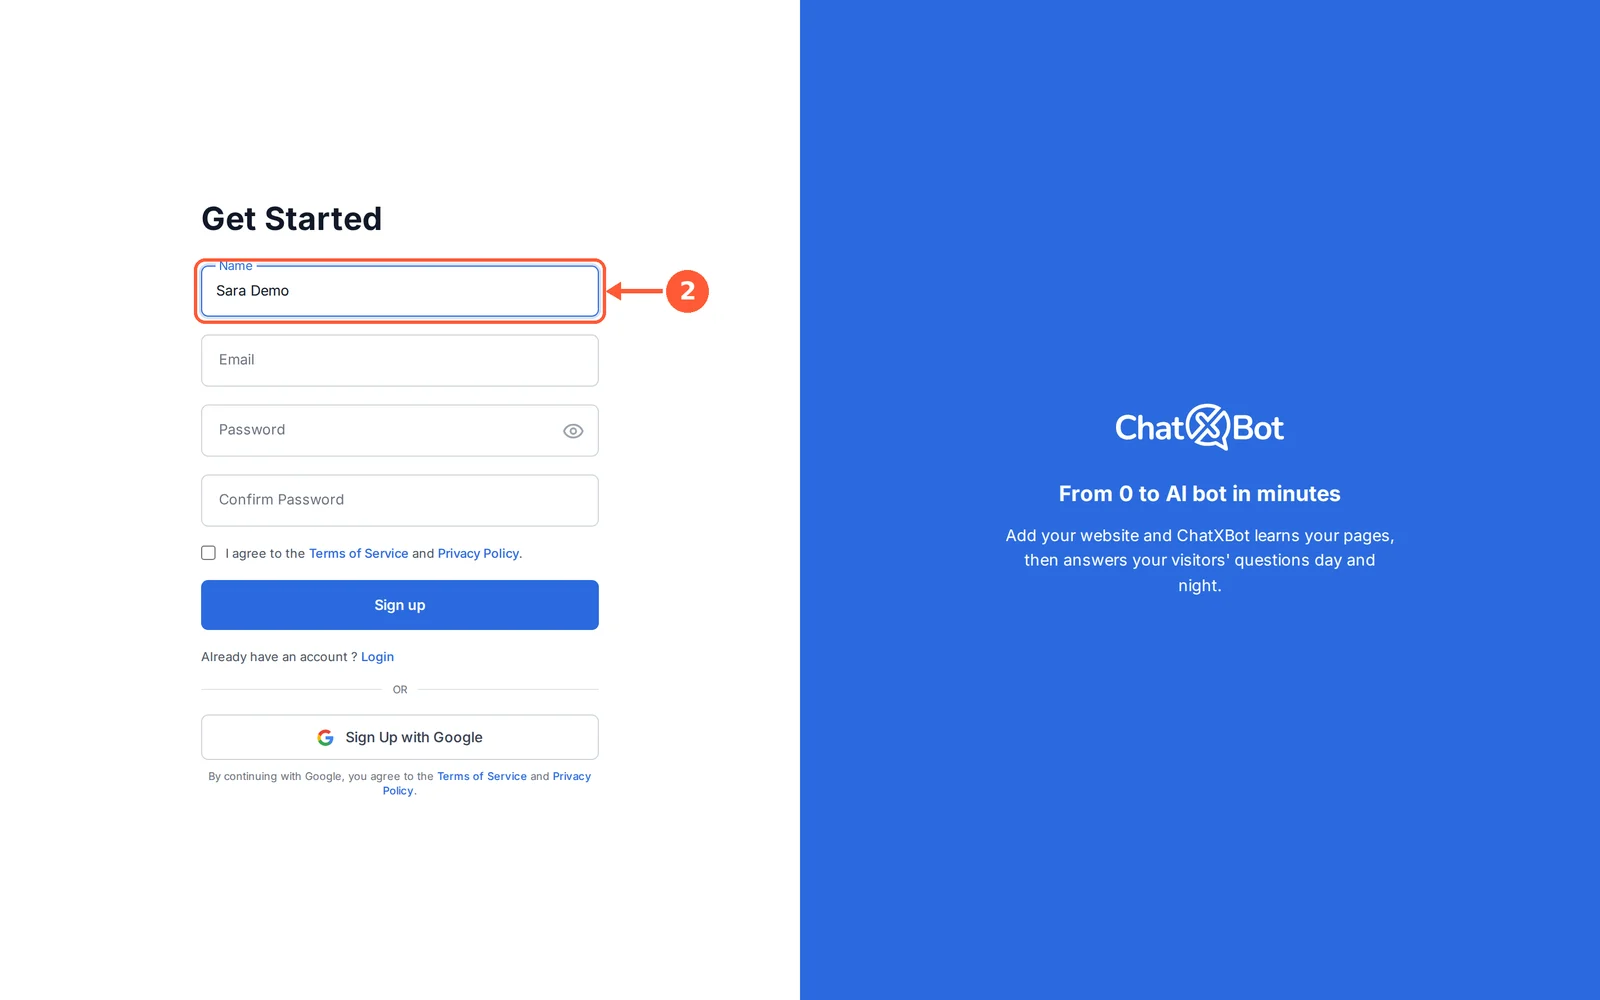
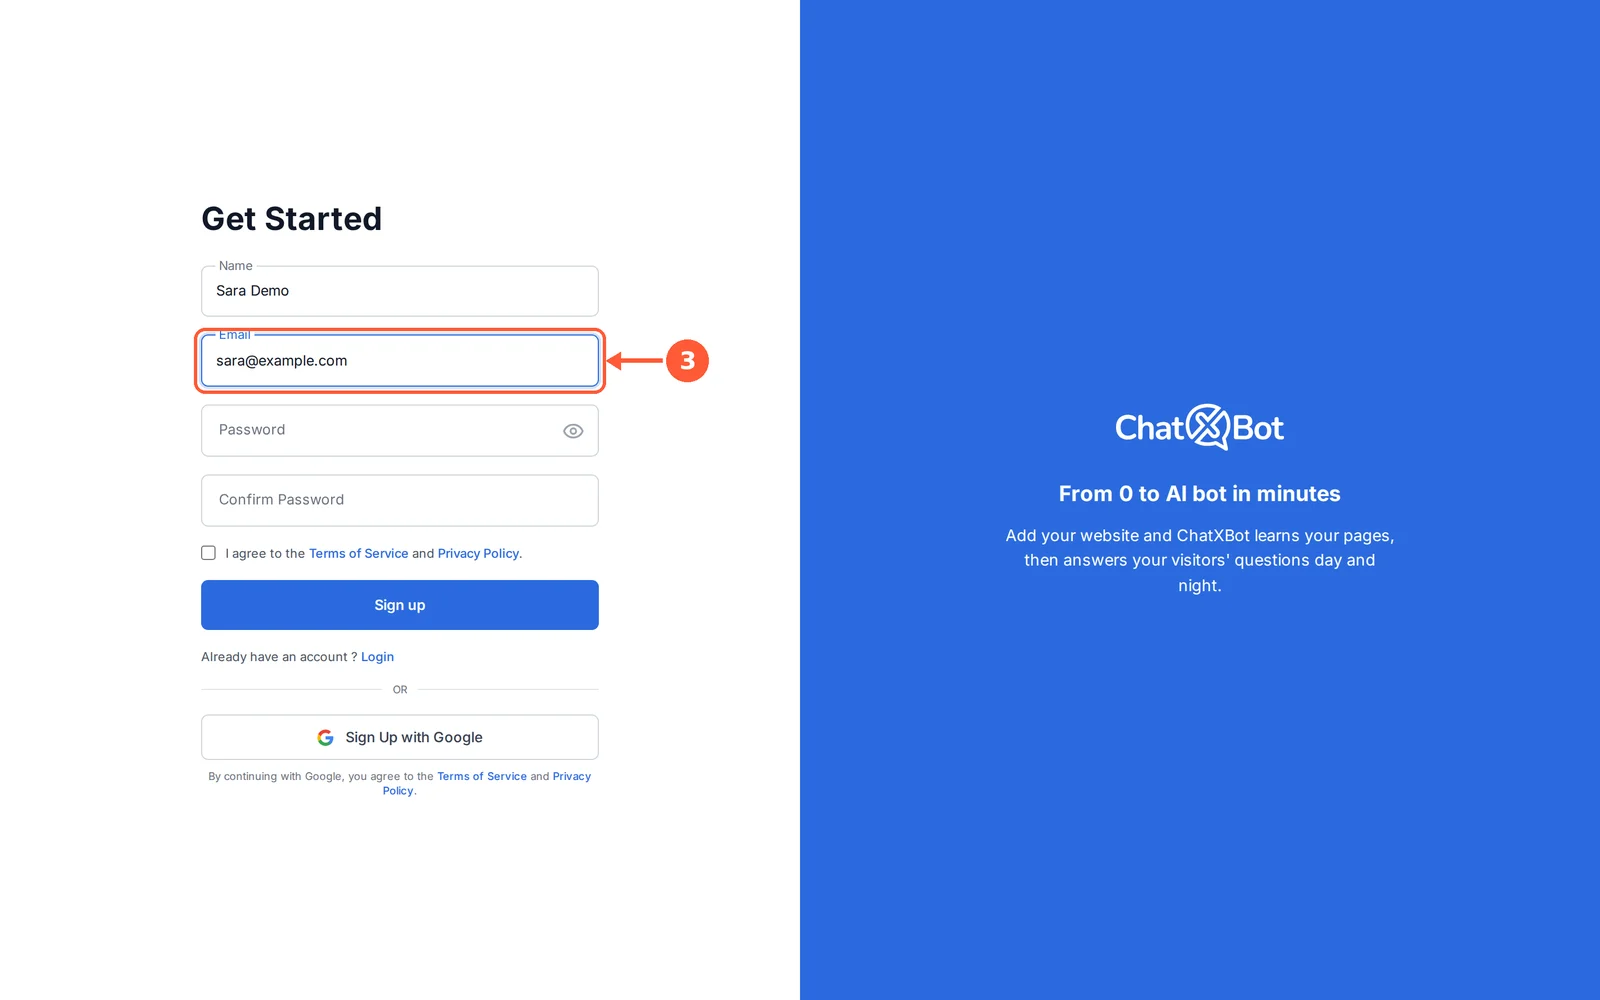
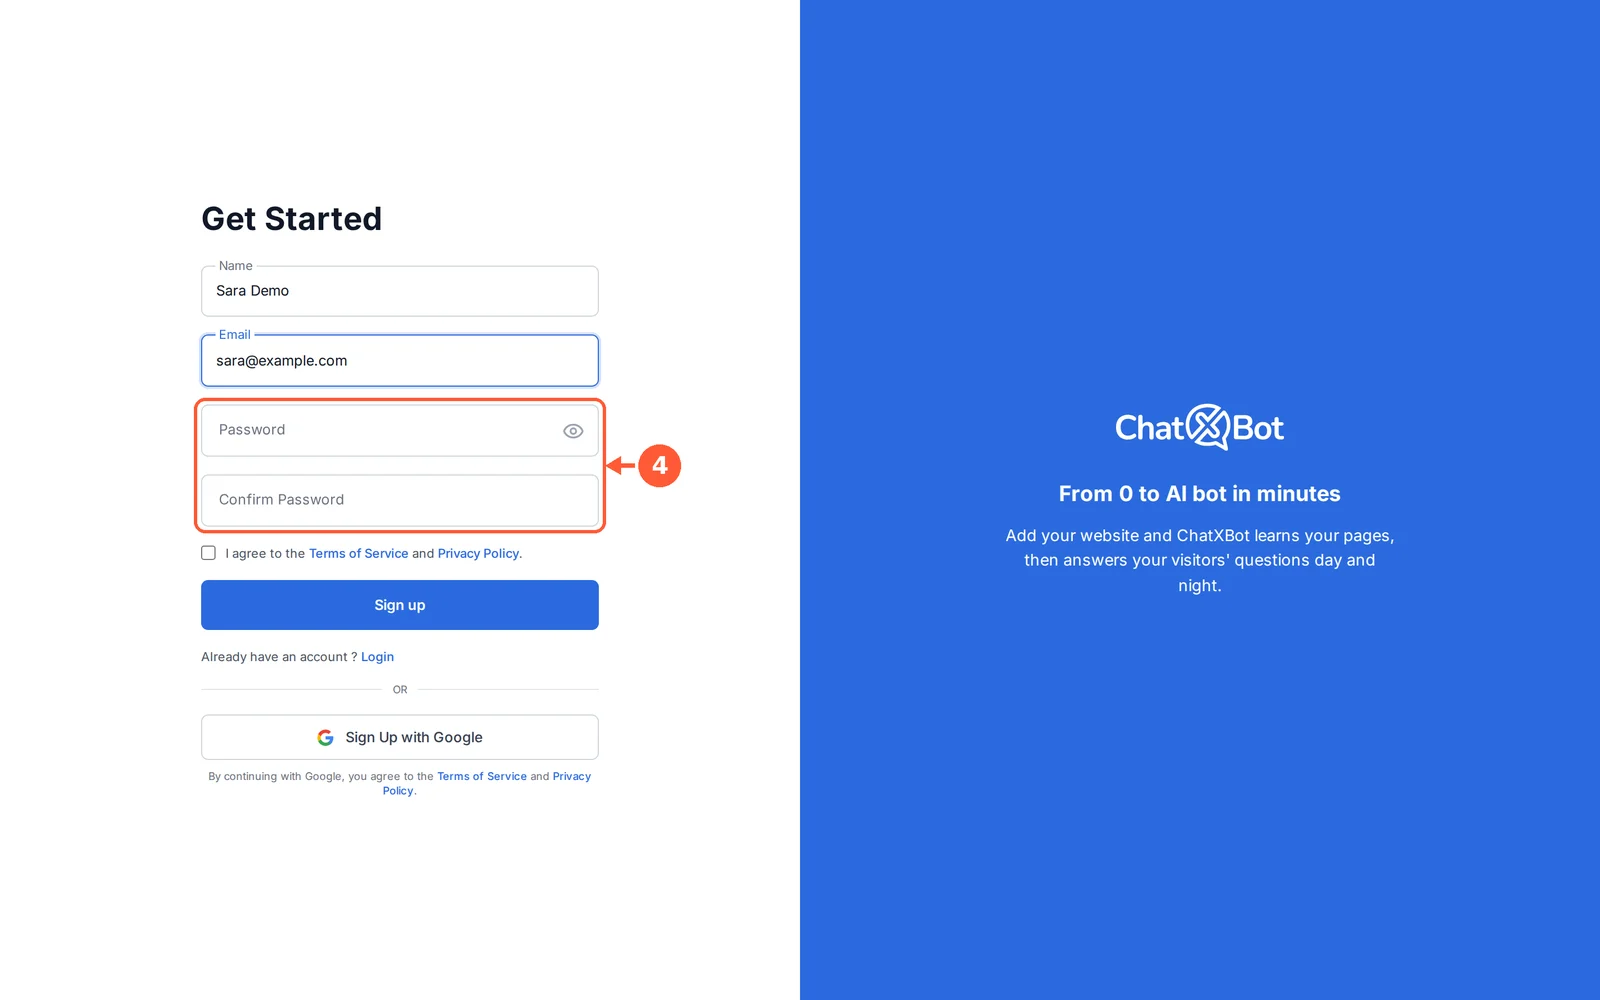
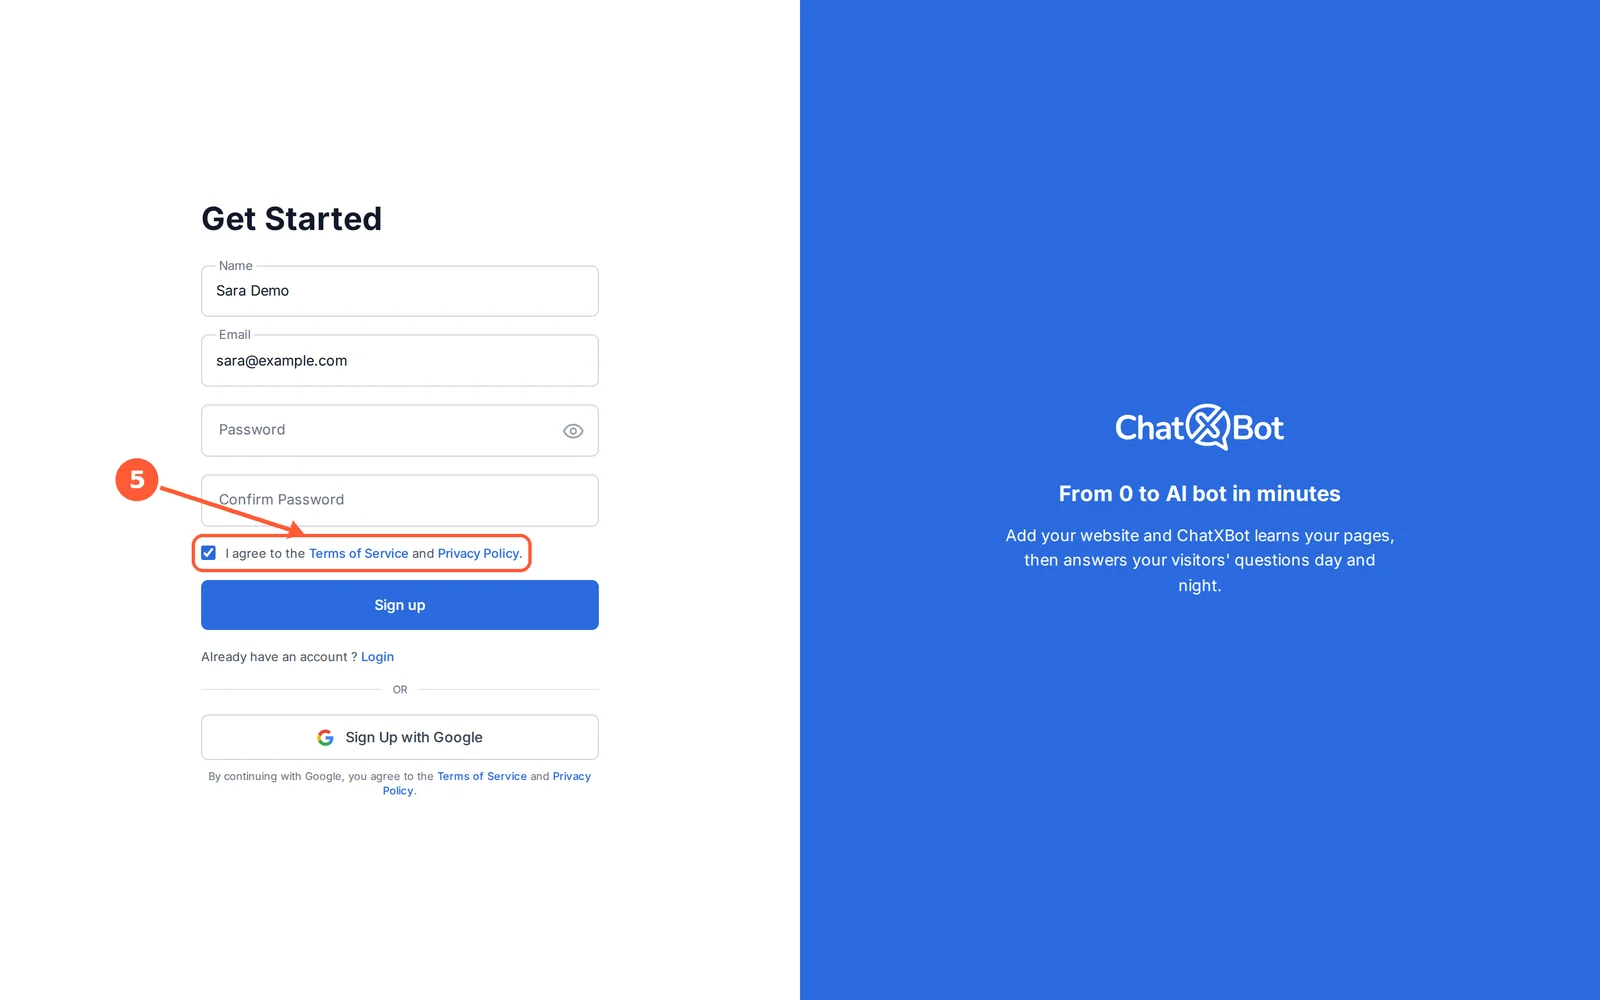
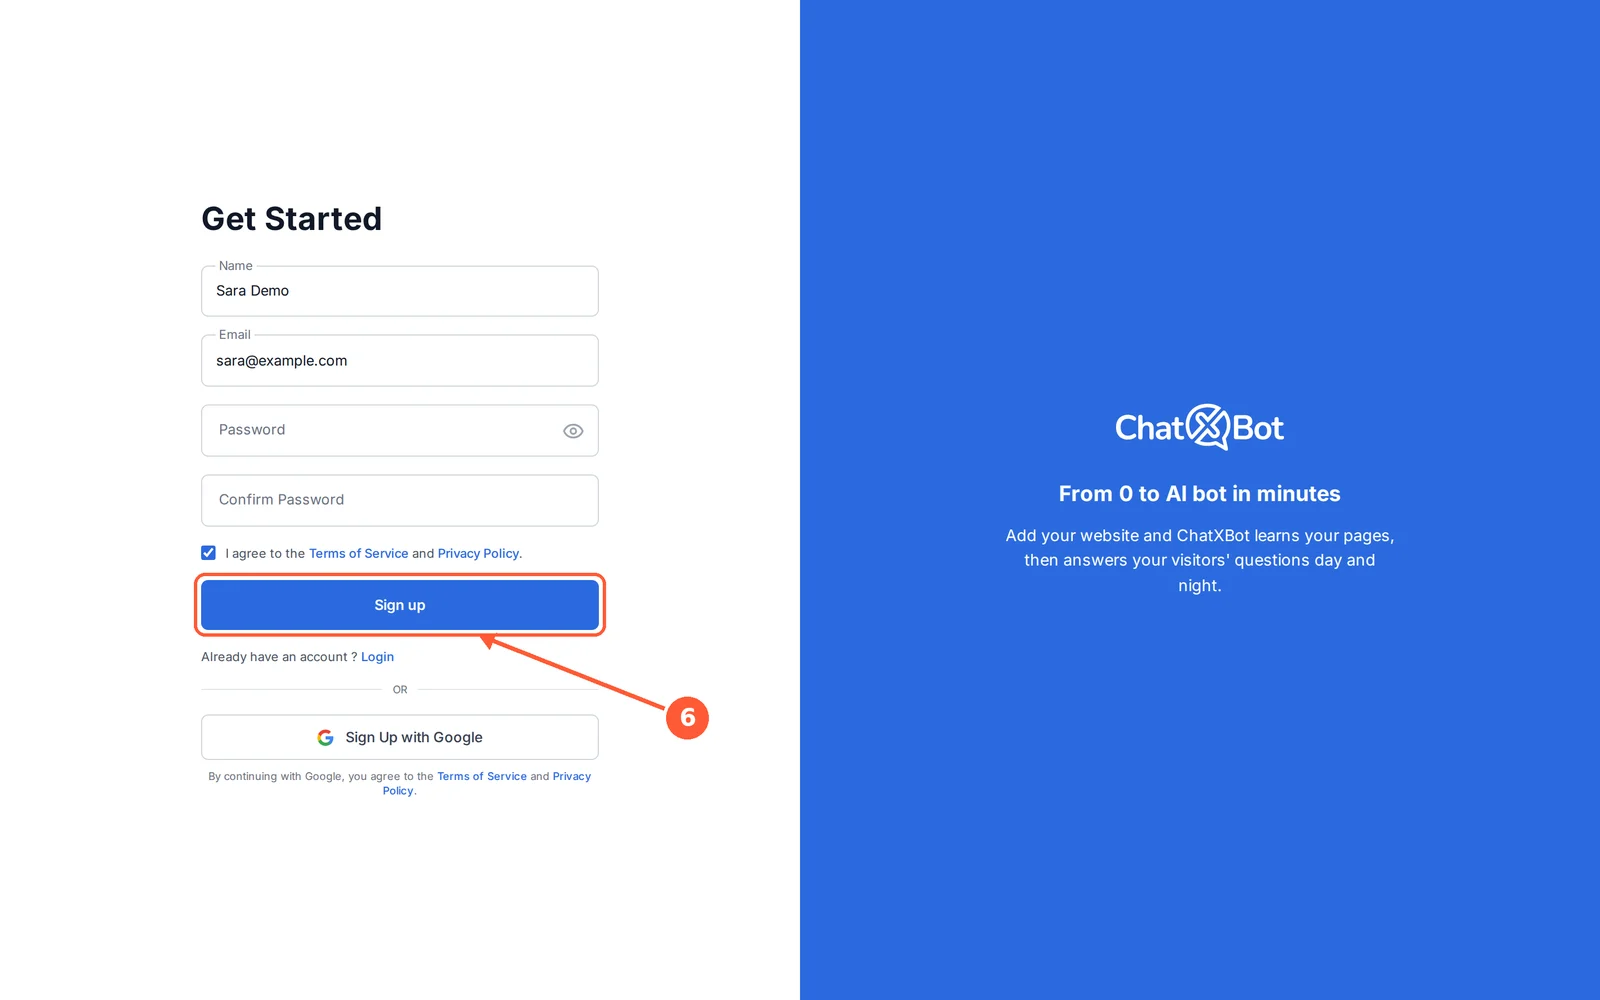
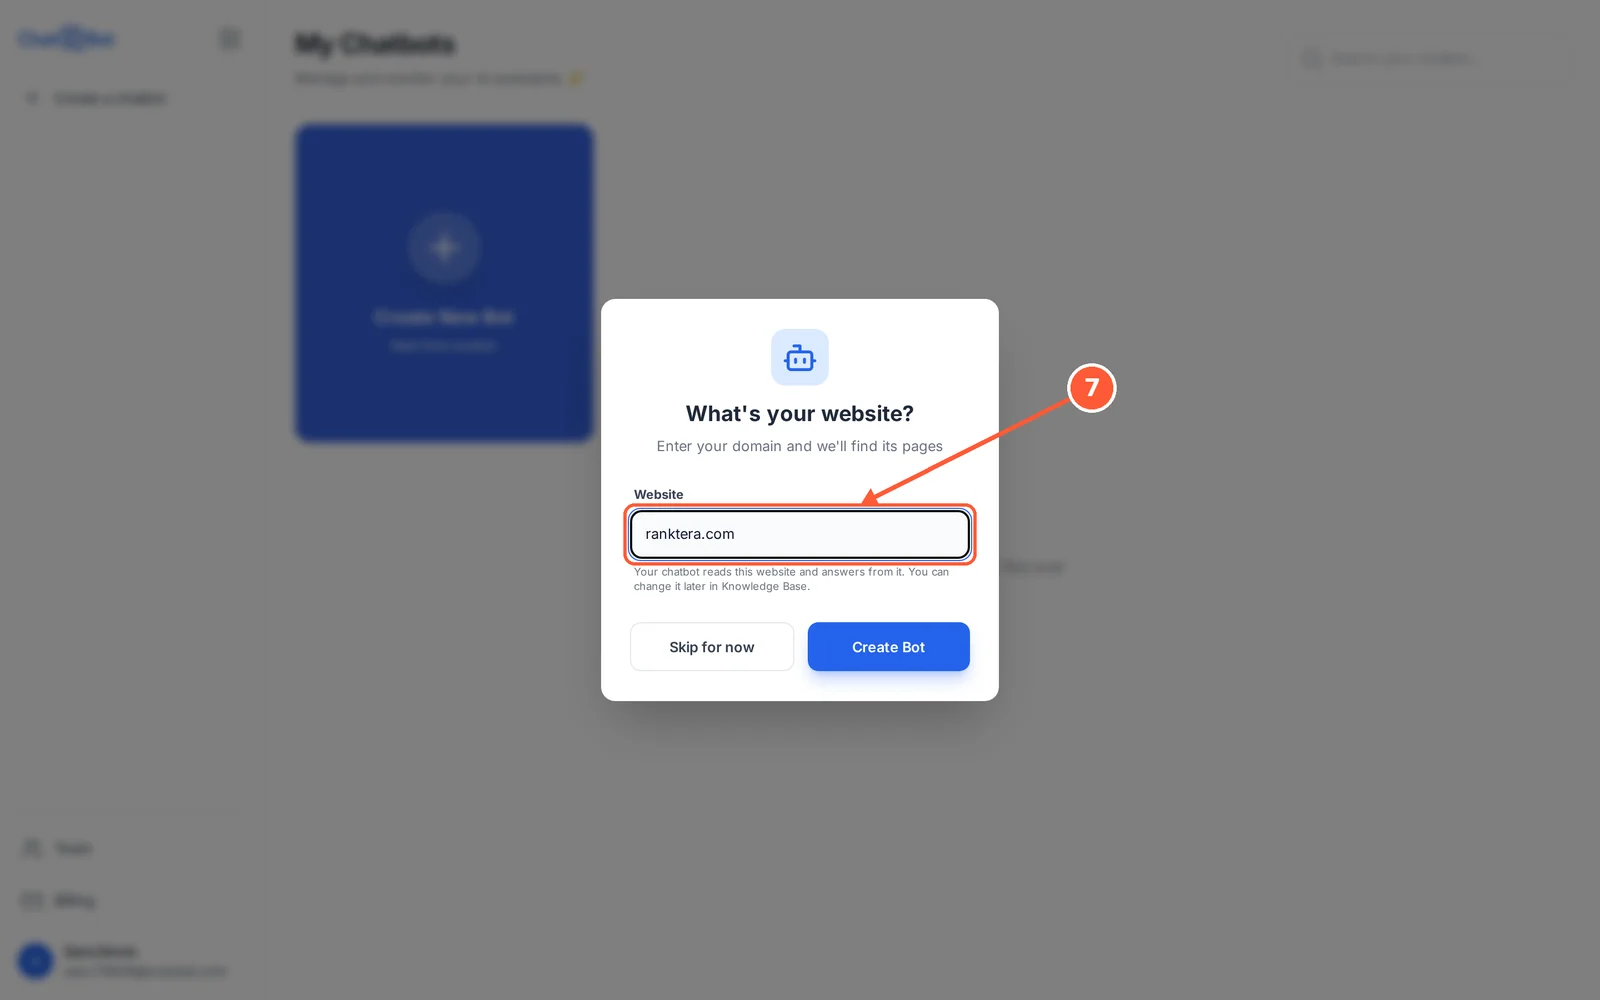
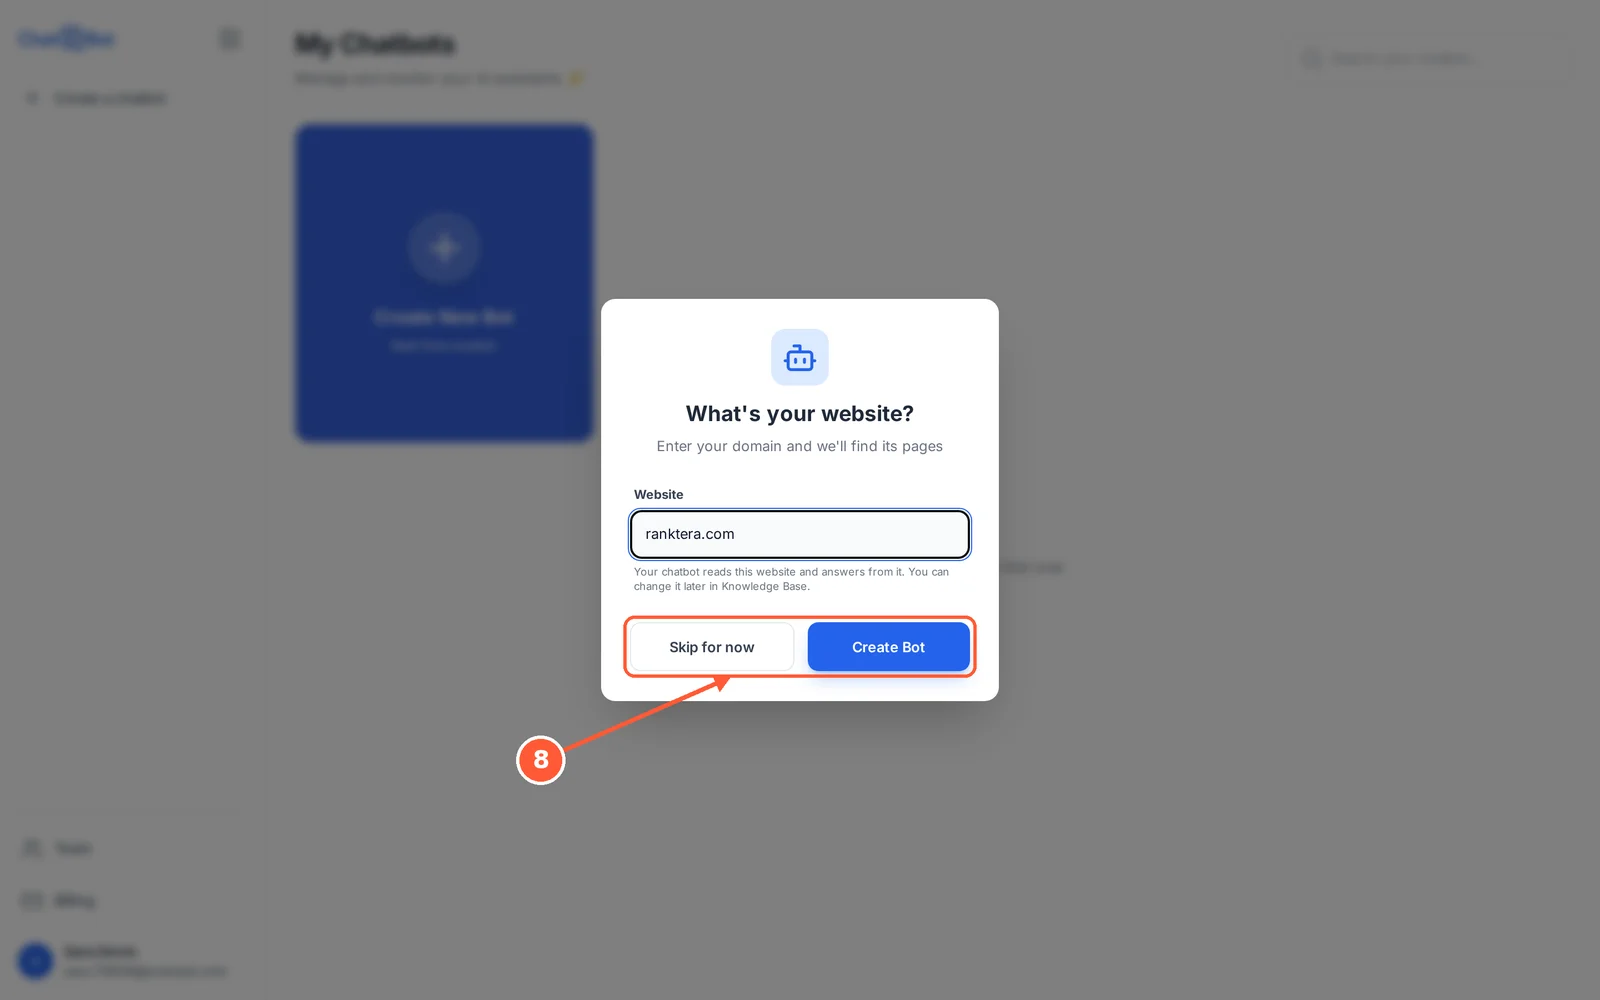
Sign up in under a minute with your email, then tell ChatXBot your website.
⏱ About 1 minute • 📍 app.chatxbot.com
1Go to app.chatxbot.com and click Sign up.1 / 8
💡 Good to Know
Prefer Google? Click Sign Up with Google instead: your account is created in one click (by continuing, you agree to the Terms of Service and Privacy Policy), then ChatXBot asks for your website.
Not ready yet? Click Skip for now. ChatXBot asks again each time you come back, until you have a chatbot.
Verify Your Email
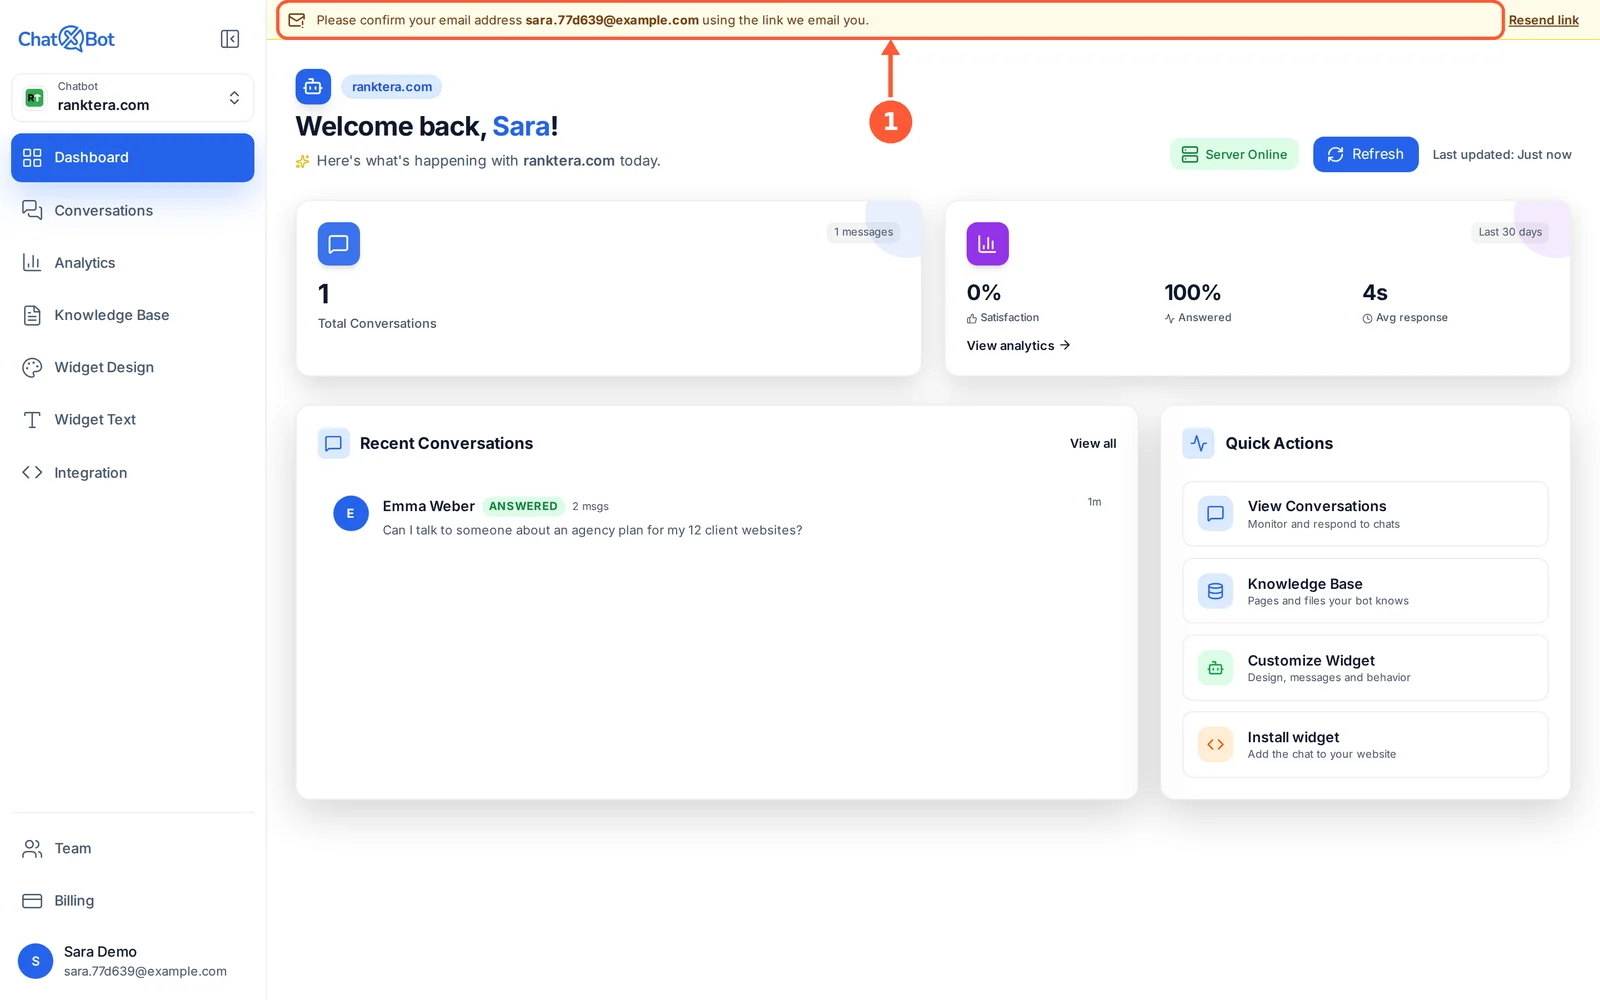
Confirm your email address so we know it’s really you and can reach you about your account.
⏱ 30 seconds • 📍 Your inbox
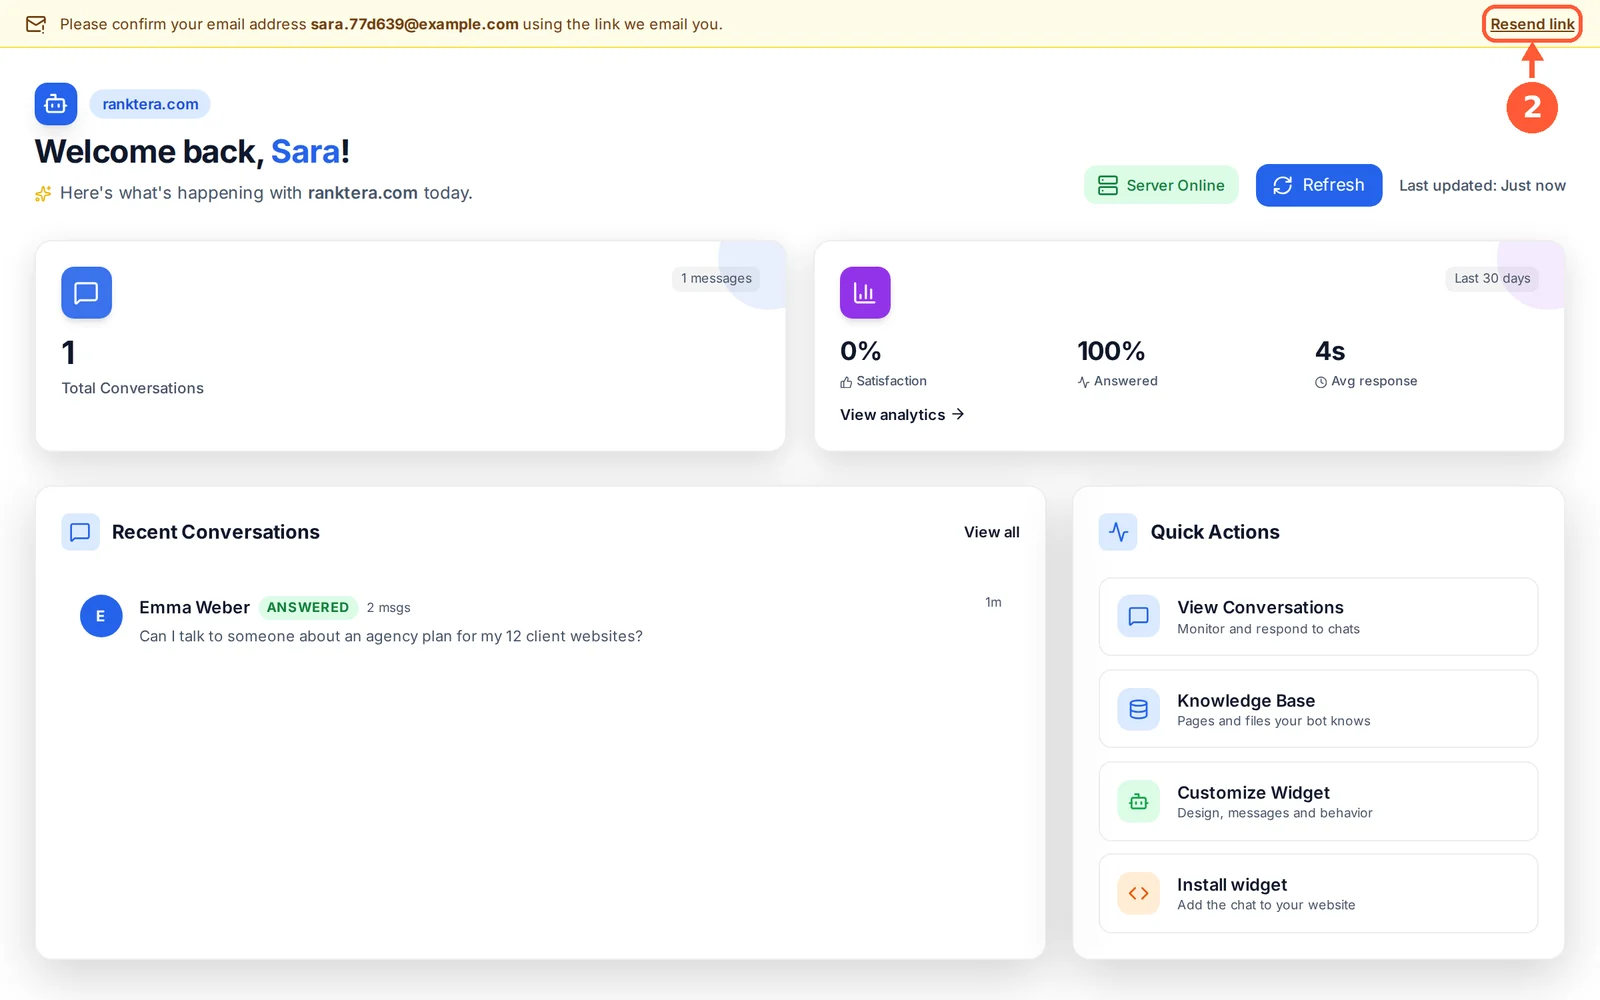
1After signing up, a yellow bar at the top reminds you to confirm your email. Open your inbox and click the link in our email.1 / 2
💡 Good to Know
Once your email is confirmed, the yellow bar disappears.
Next: teach your chatbot your website, so it can answer your visitors.
Teach Your Chatbot Your Website
Your chatbot answers questions using your own website. Add your site once, and ChatXBot reads your pages so it can give your visitors accurate answers.
⏱ About 2 minutes • 📍 Knowledge Base › Sources
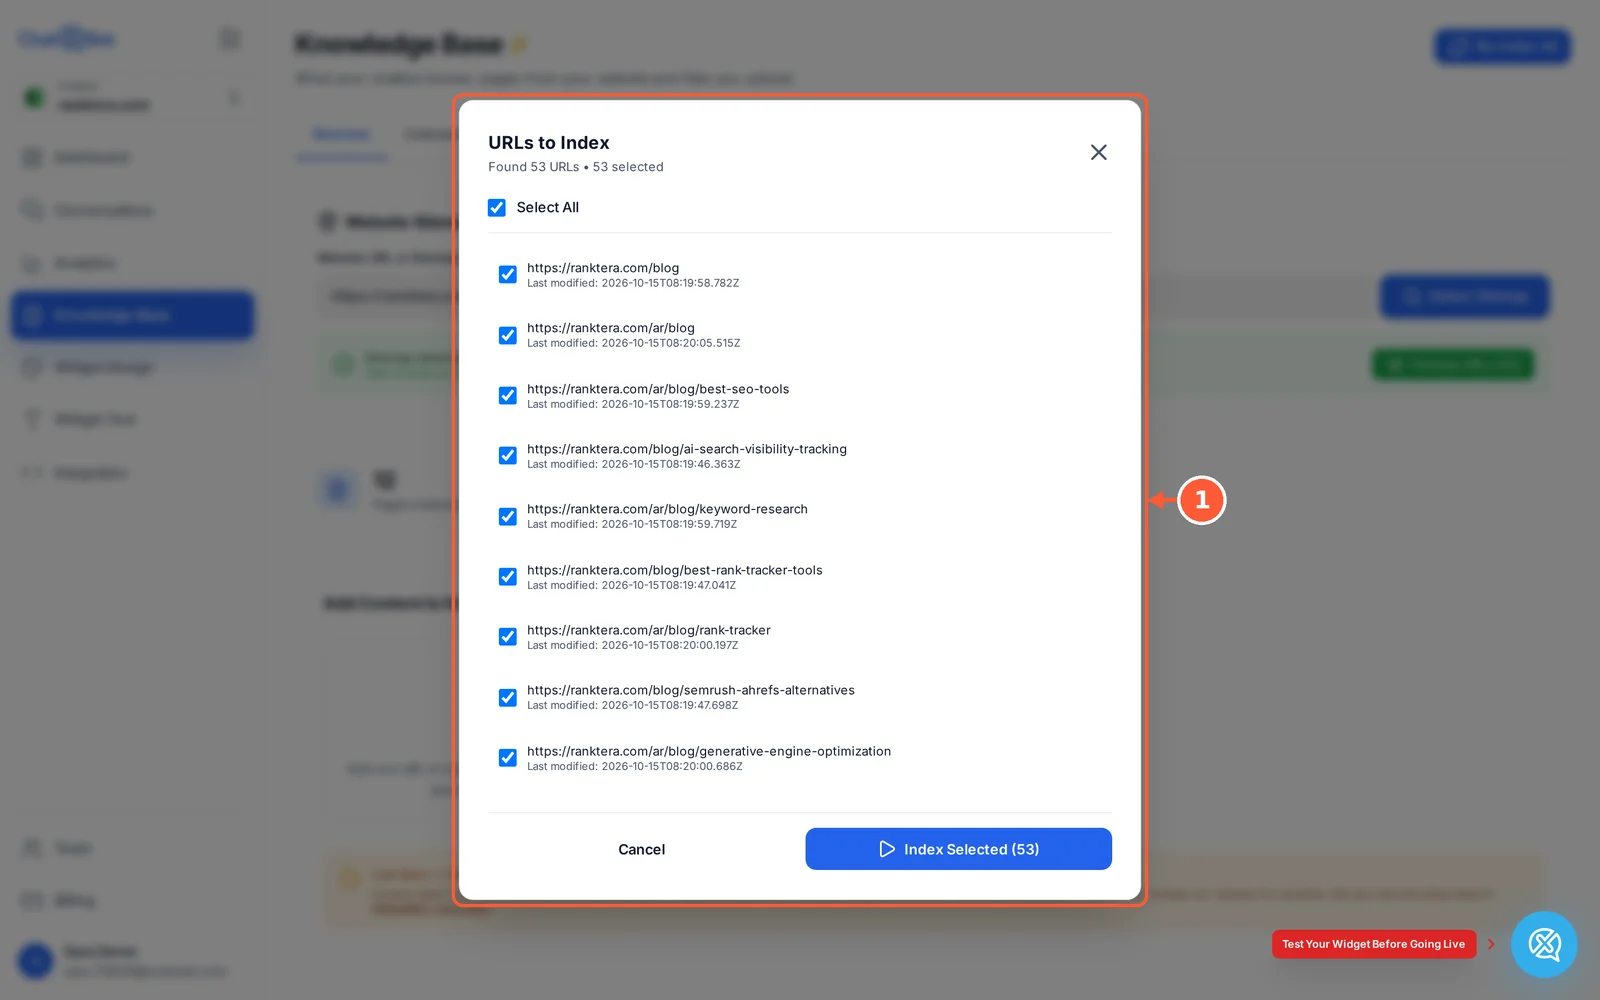
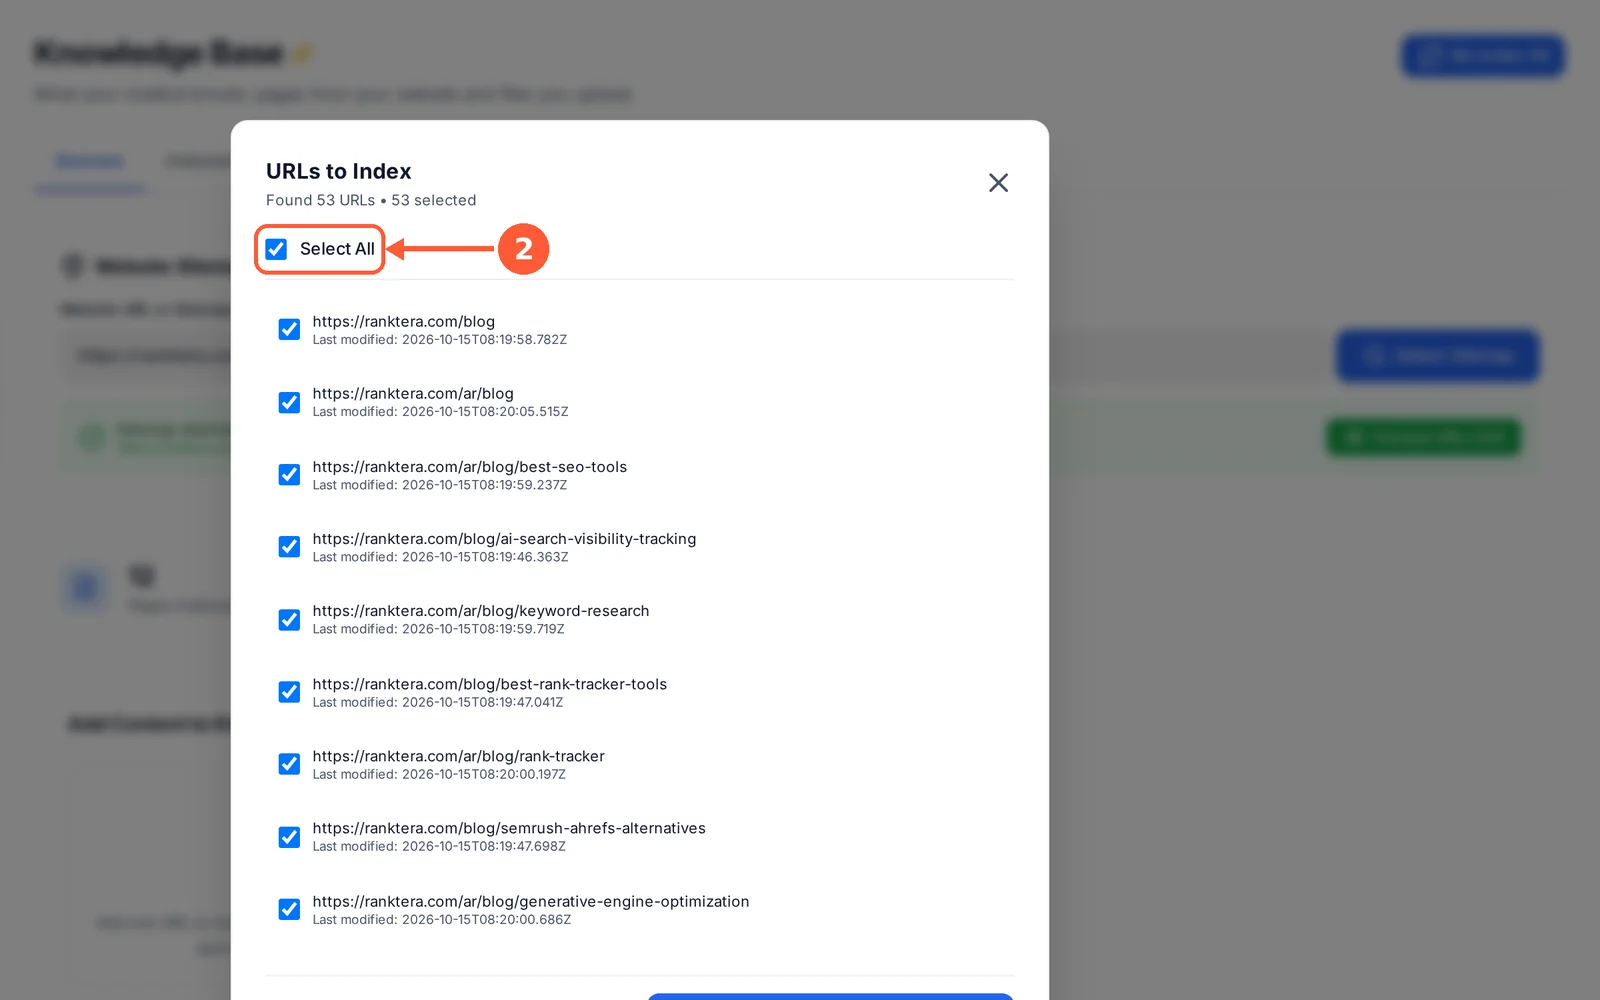
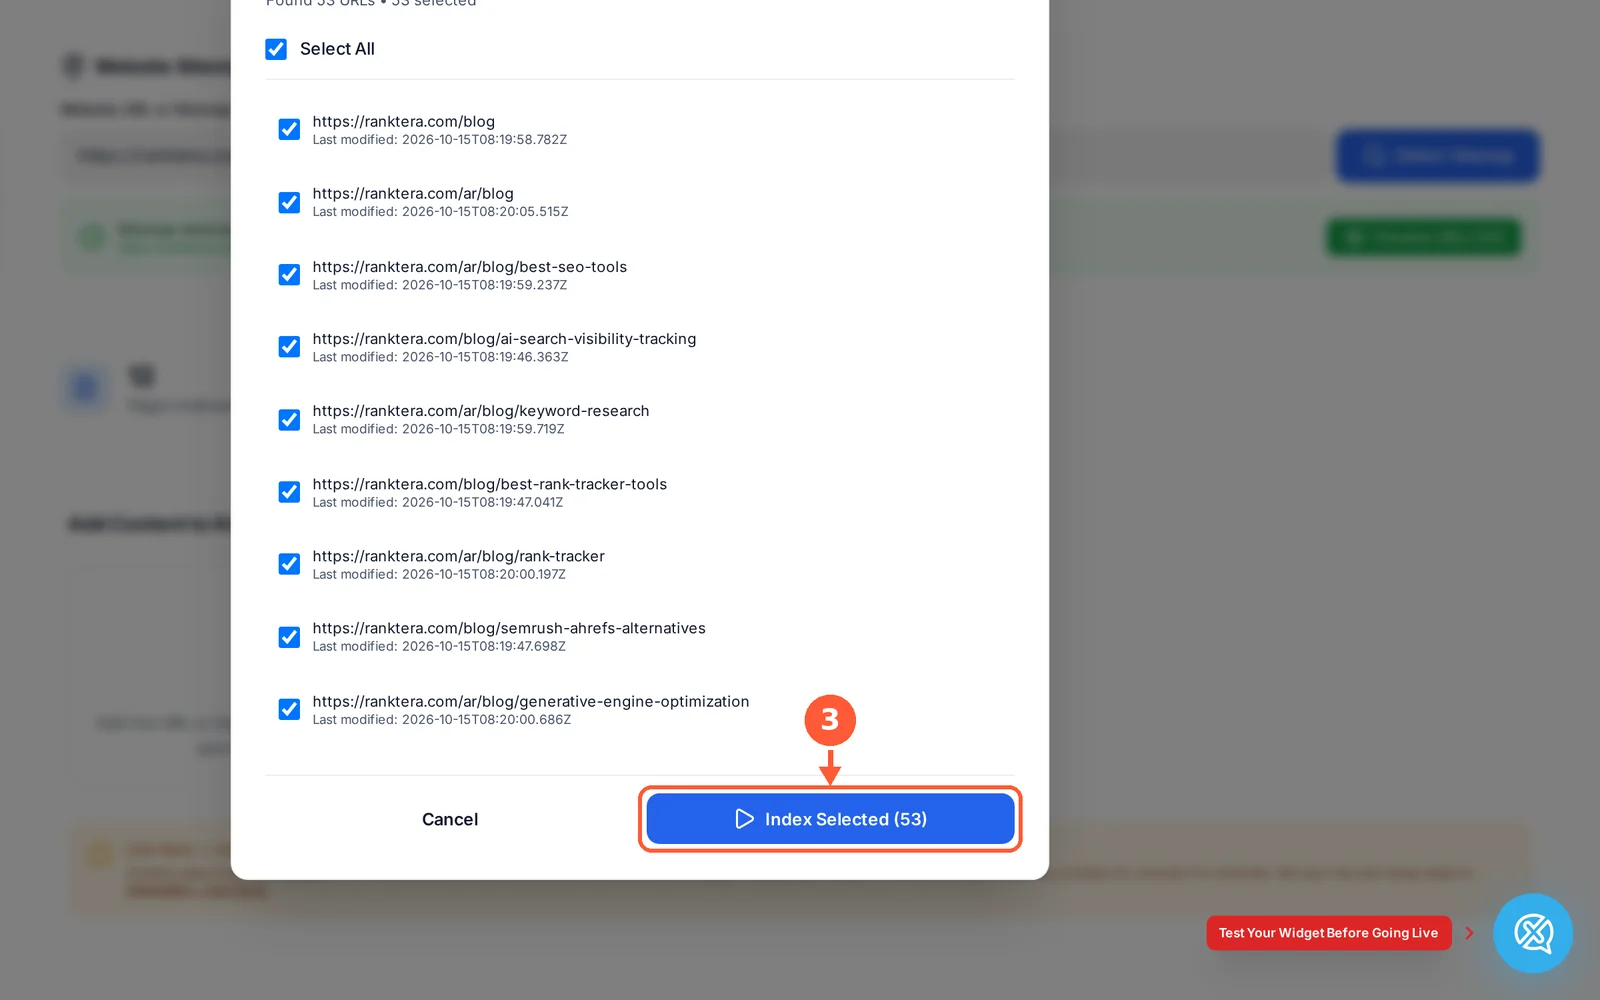
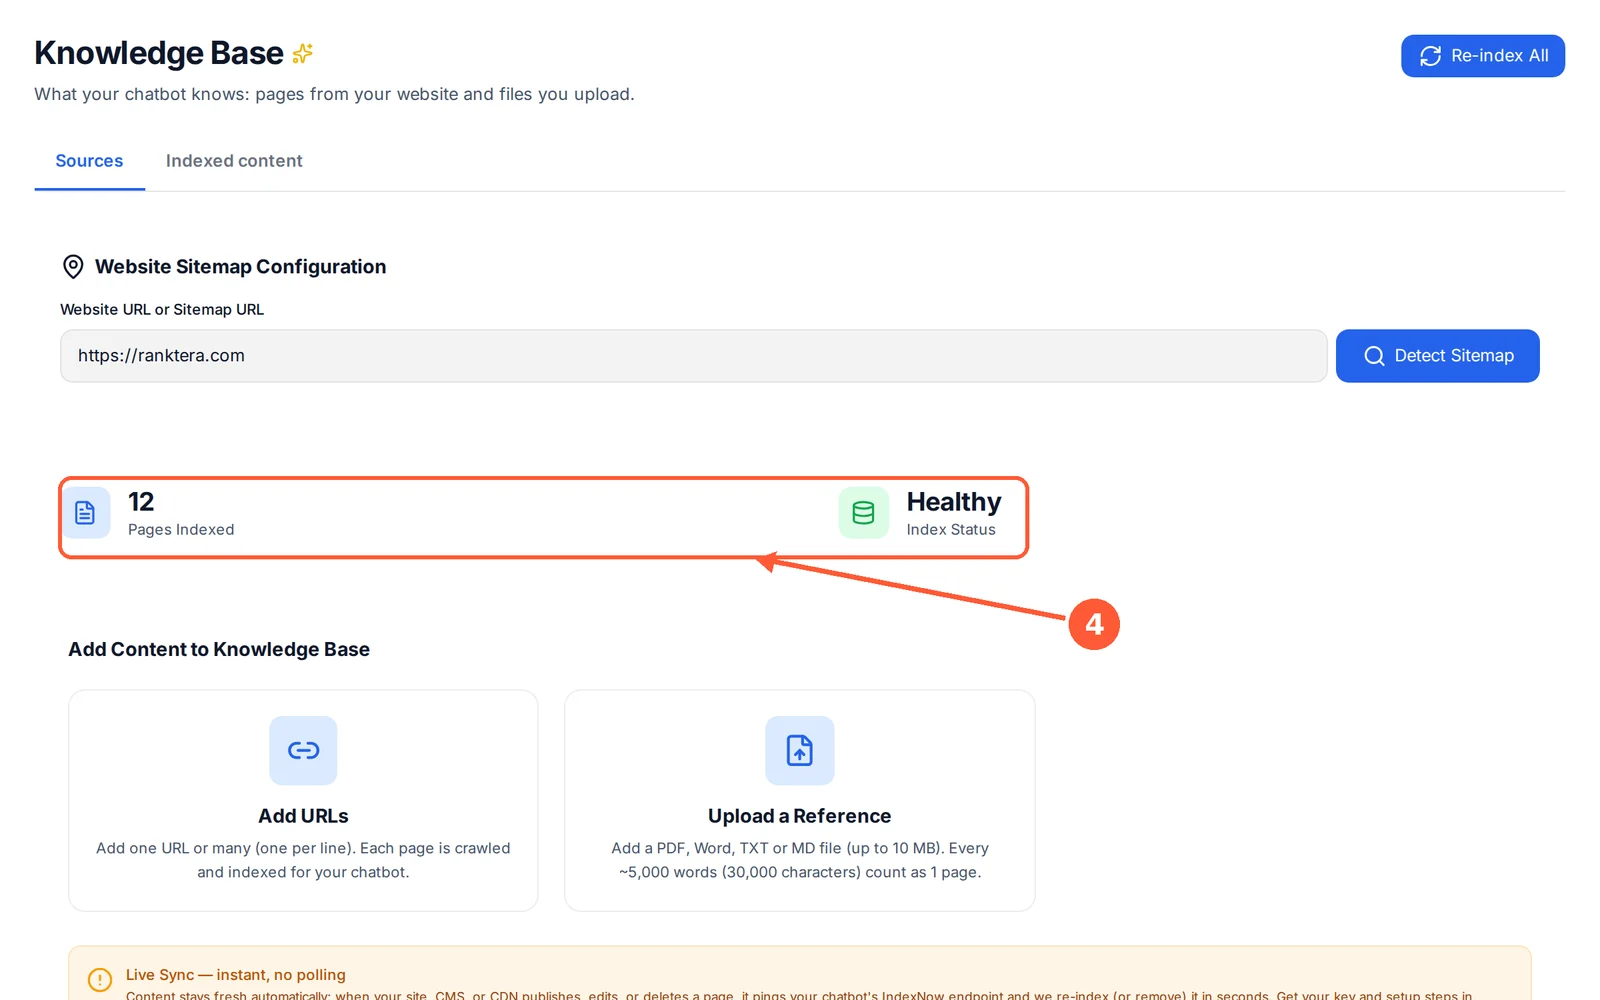
1After you create your chatbot, its Knowledge Base opens and finds your website’s pages (its sitemap) for you, all selected.1 / 4
💡 Good to Know
Changed a lot of pages? Click Re-index All at the top right to refresh everything.
While your pages are being read, the progress bar shows how many pages were checked and about how much time is left.
To use another website later, open Knowledge Base, type its address and click Detect Sitemap.
Files your pages link to (PDF, Word, Excel, PowerPoint, CSV or text) are read too: the chatbot answers from them and shares the file’s link, with its app’s icon (PDF, Word, Excel or PowerPoint), when a visitor asks for it.
When a visitor asks to see something, the chatbot can show a picture from your pages.
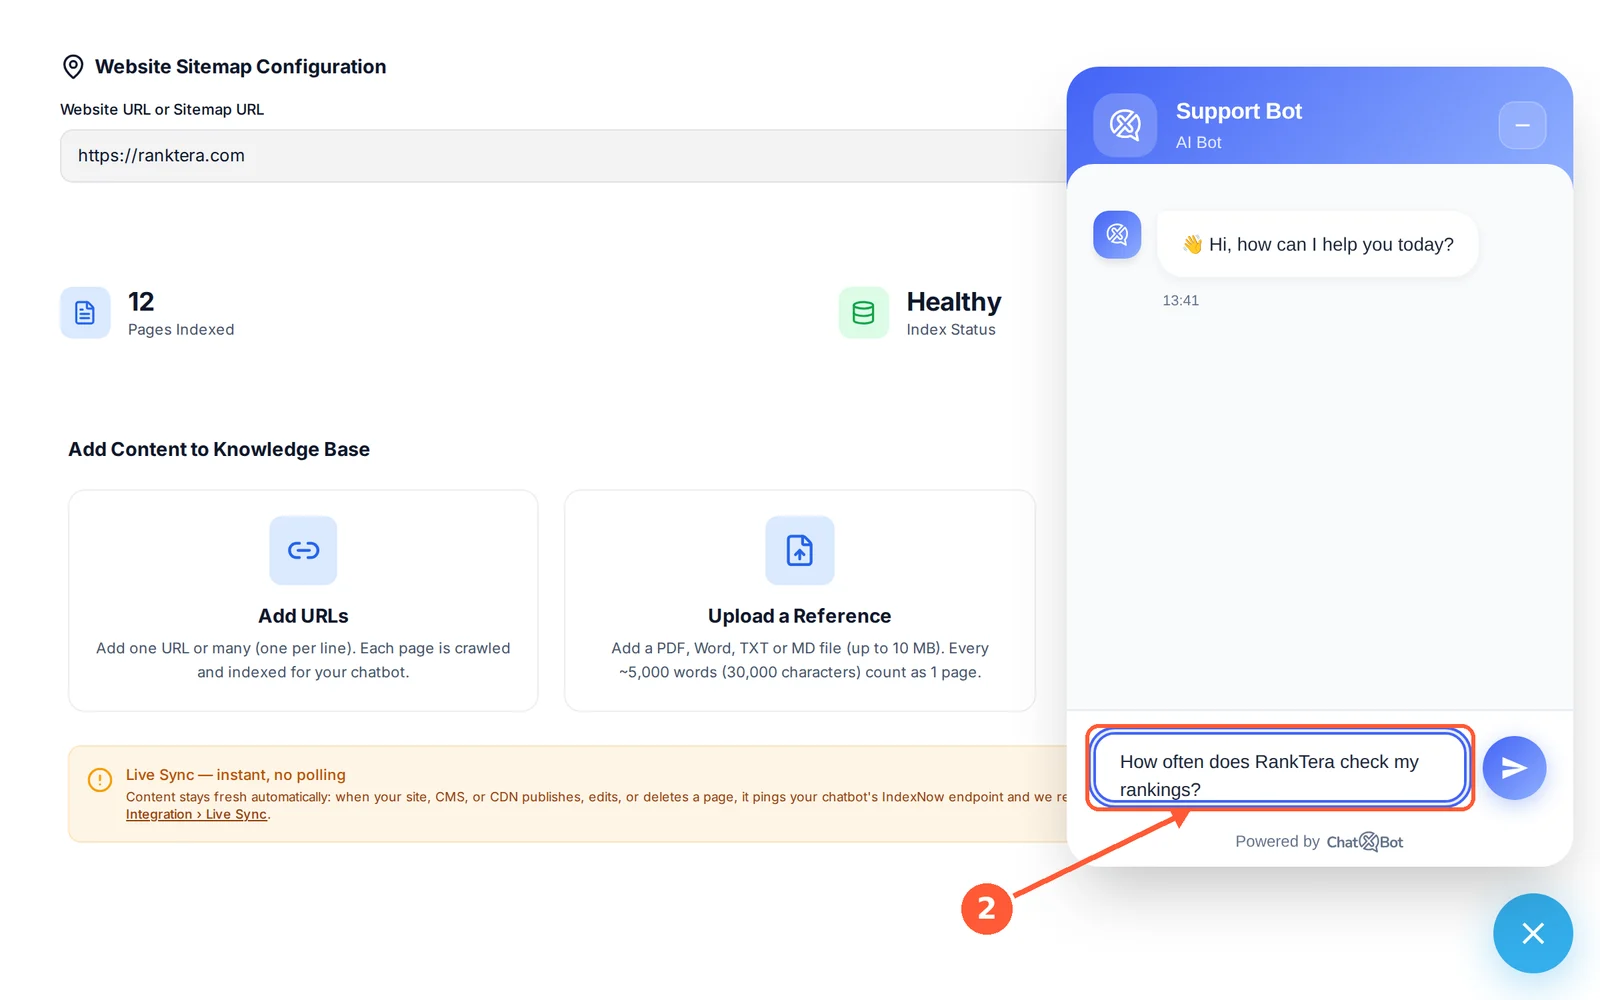
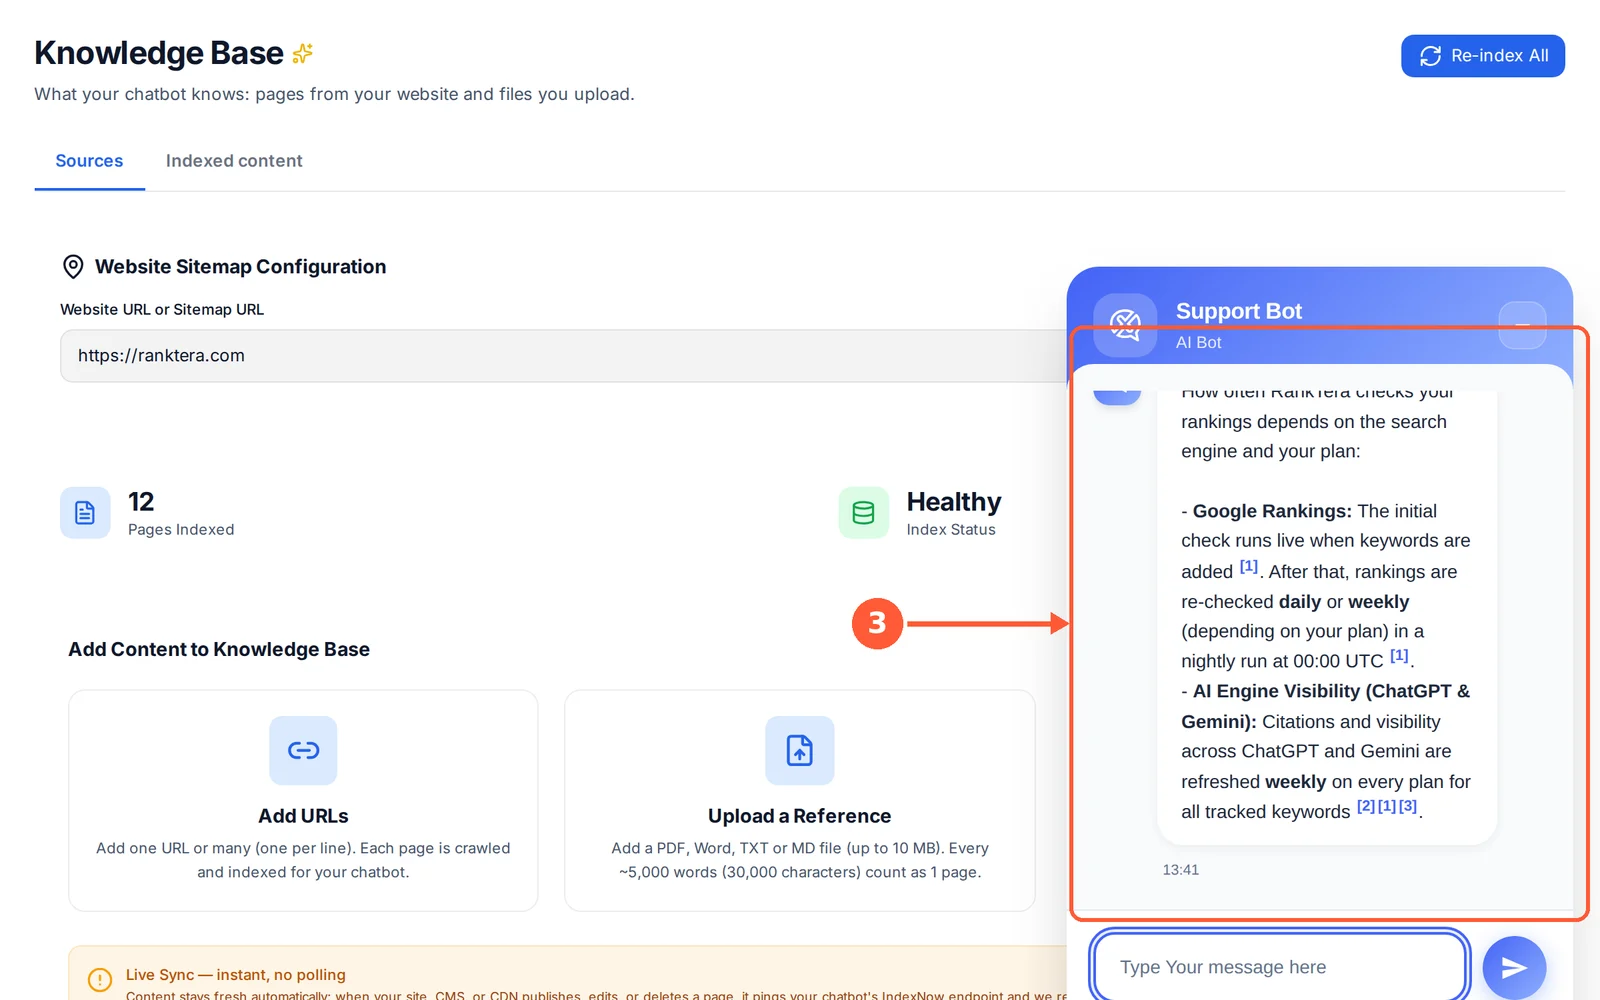
Test Your Chatbot
Try your chatbot yourself before your visitors do.
⏱ About 1 minute • 📍 Knowledge Base, bottom-right corner
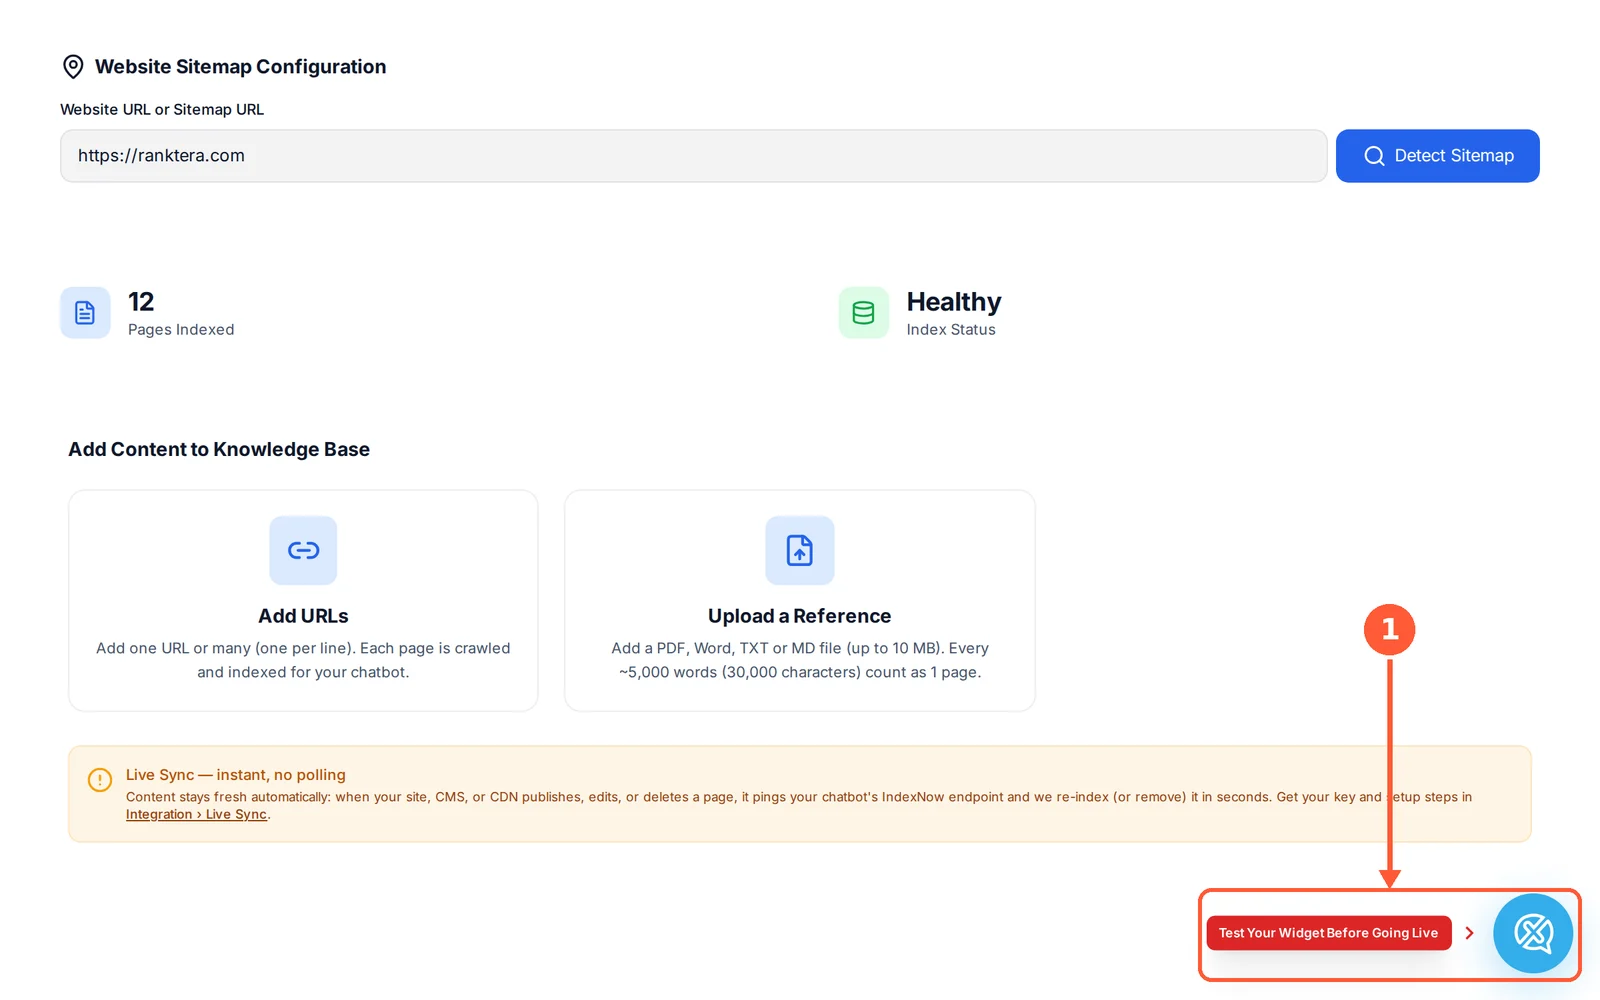
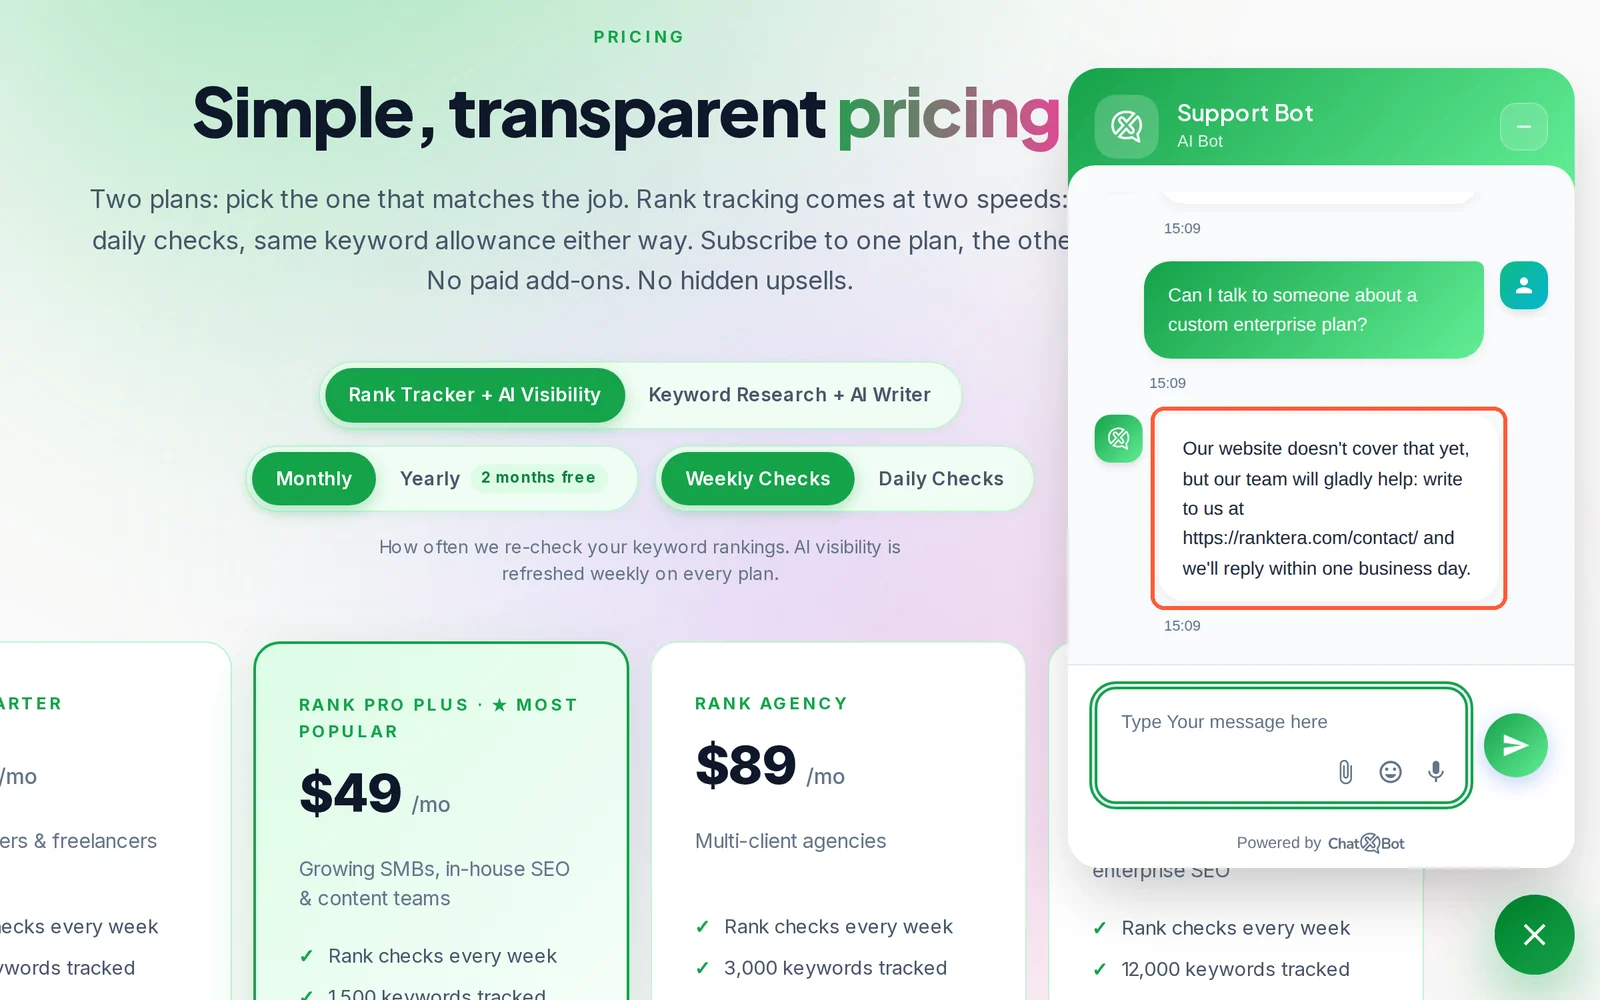
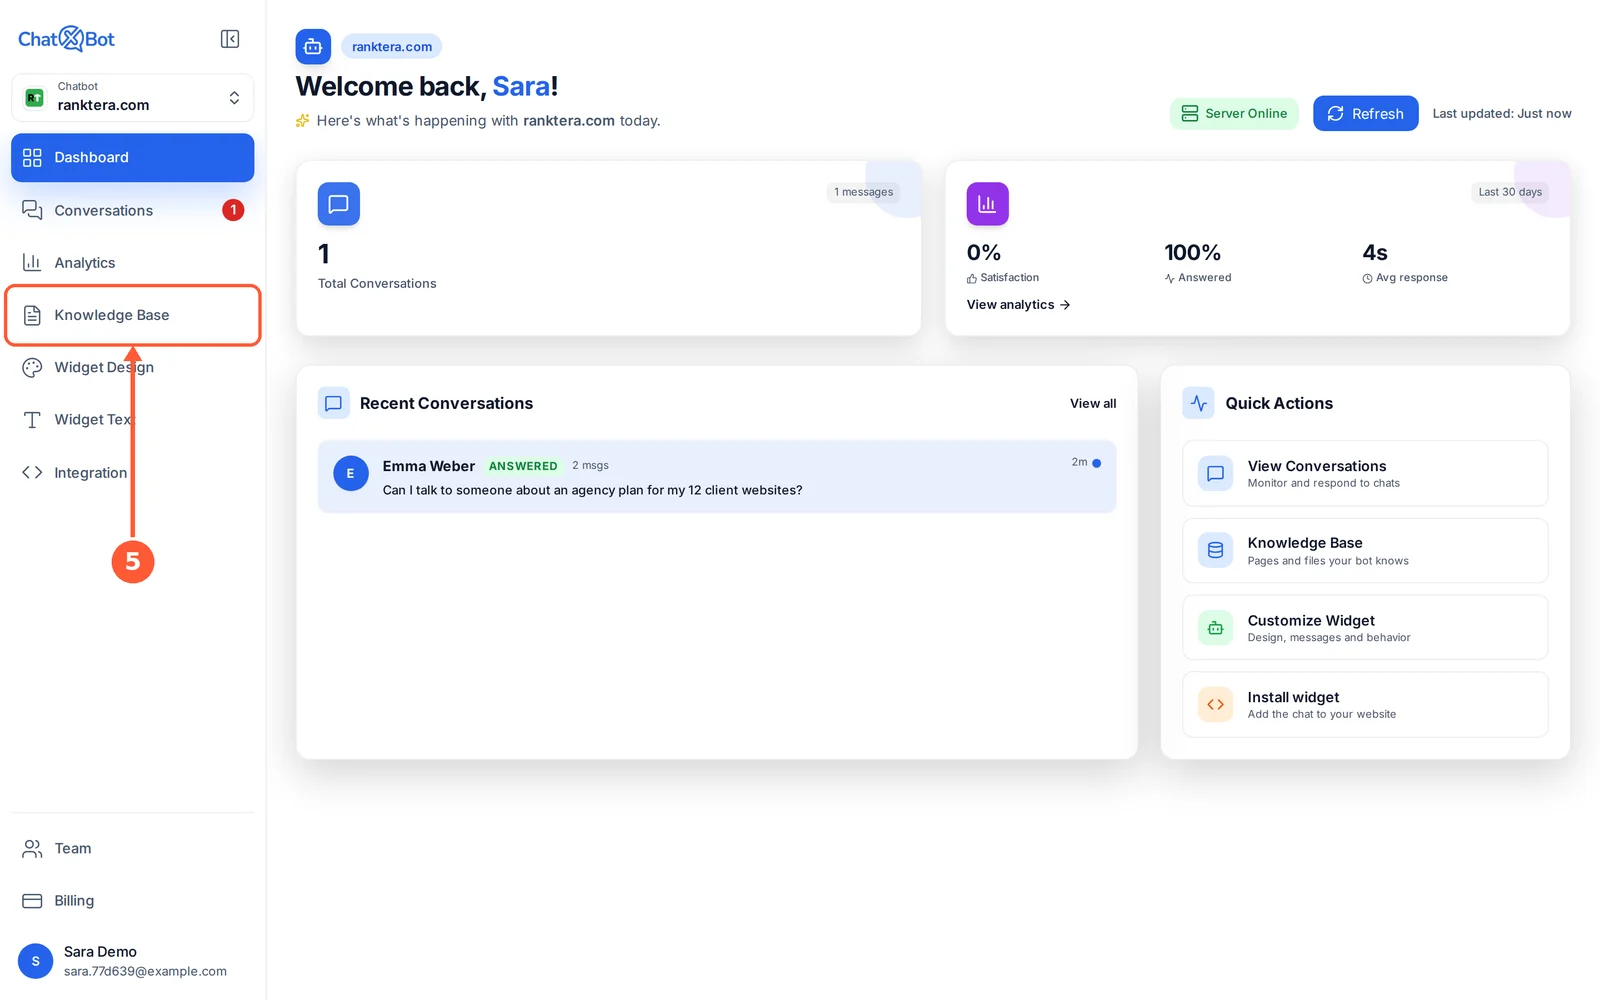
1Open the Knowledge Base and click the chat button in the bottom-right corner, next to Test Your Widget Before Going Live.1 / 3
💡 Good to Know
Missing or wrong answer? Add the page that covers it in the Knowledge Base, then ask again.
Your test chats also appear in Conversations.
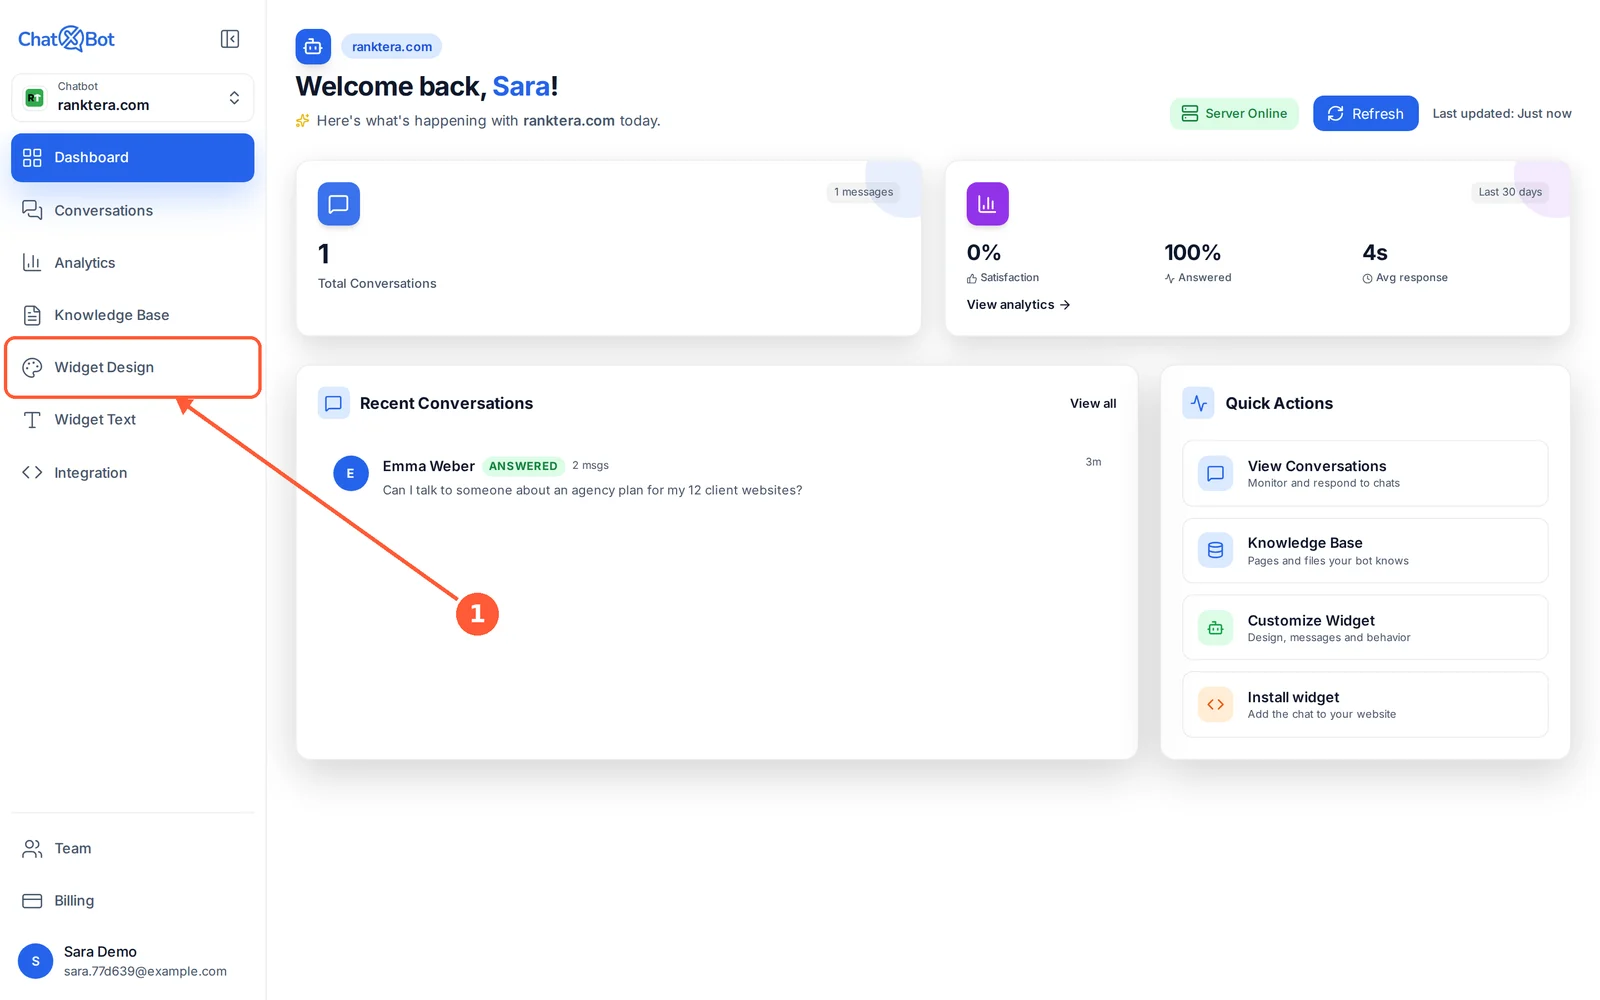
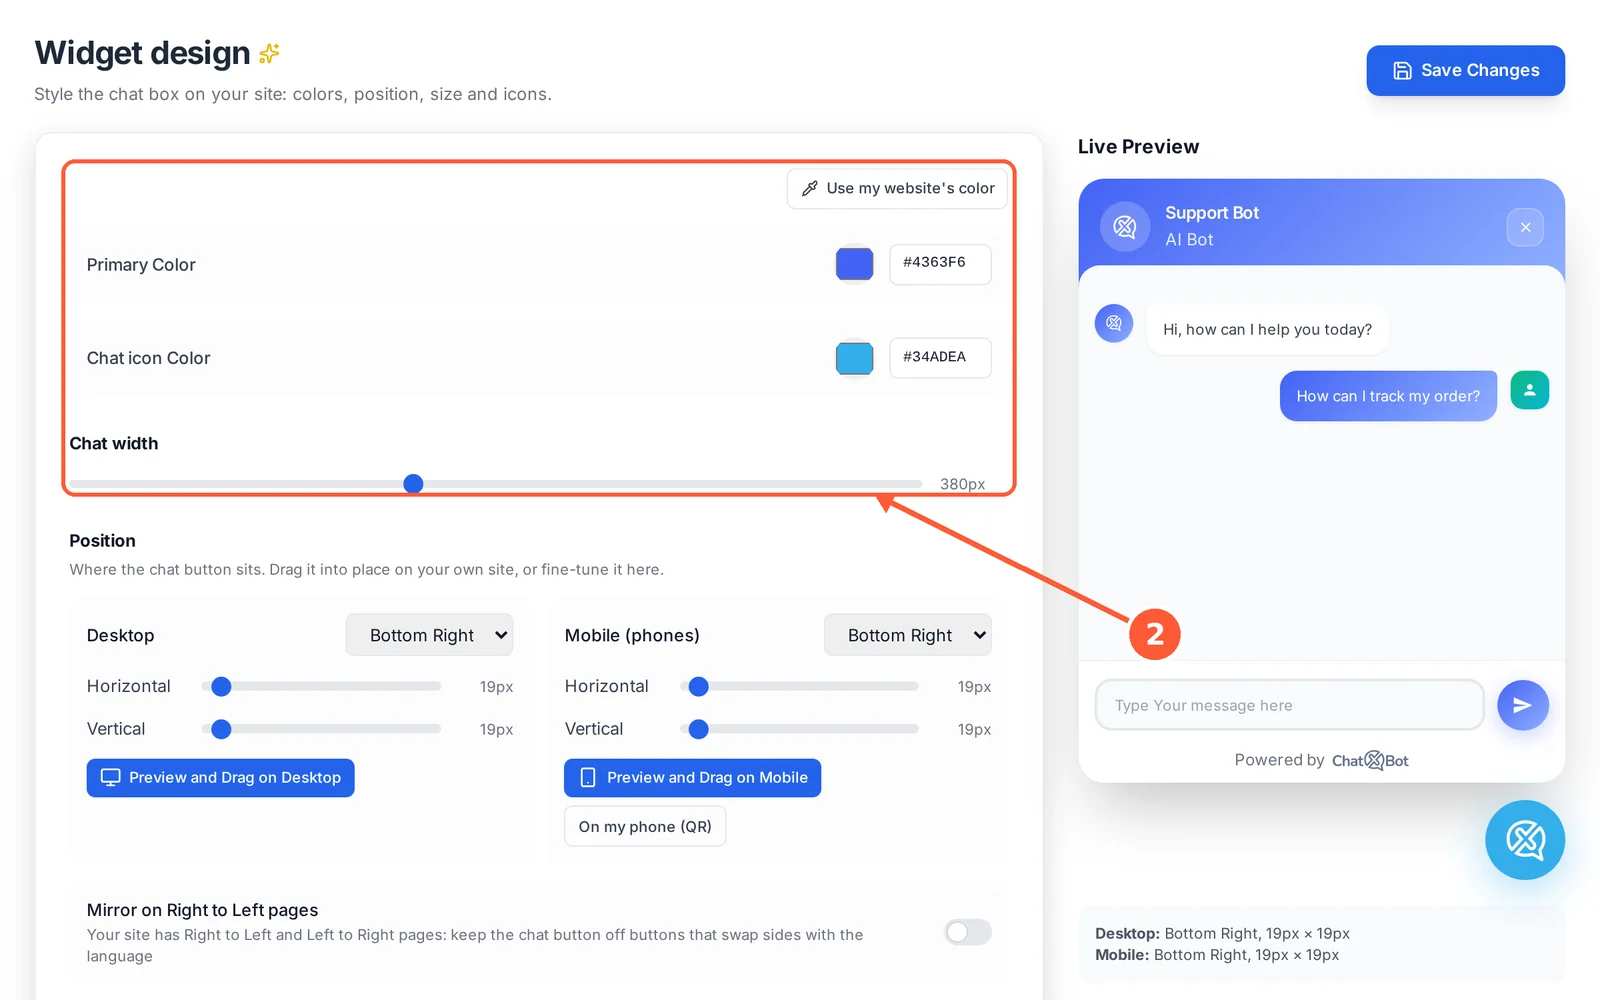
Design Your Chat Widget
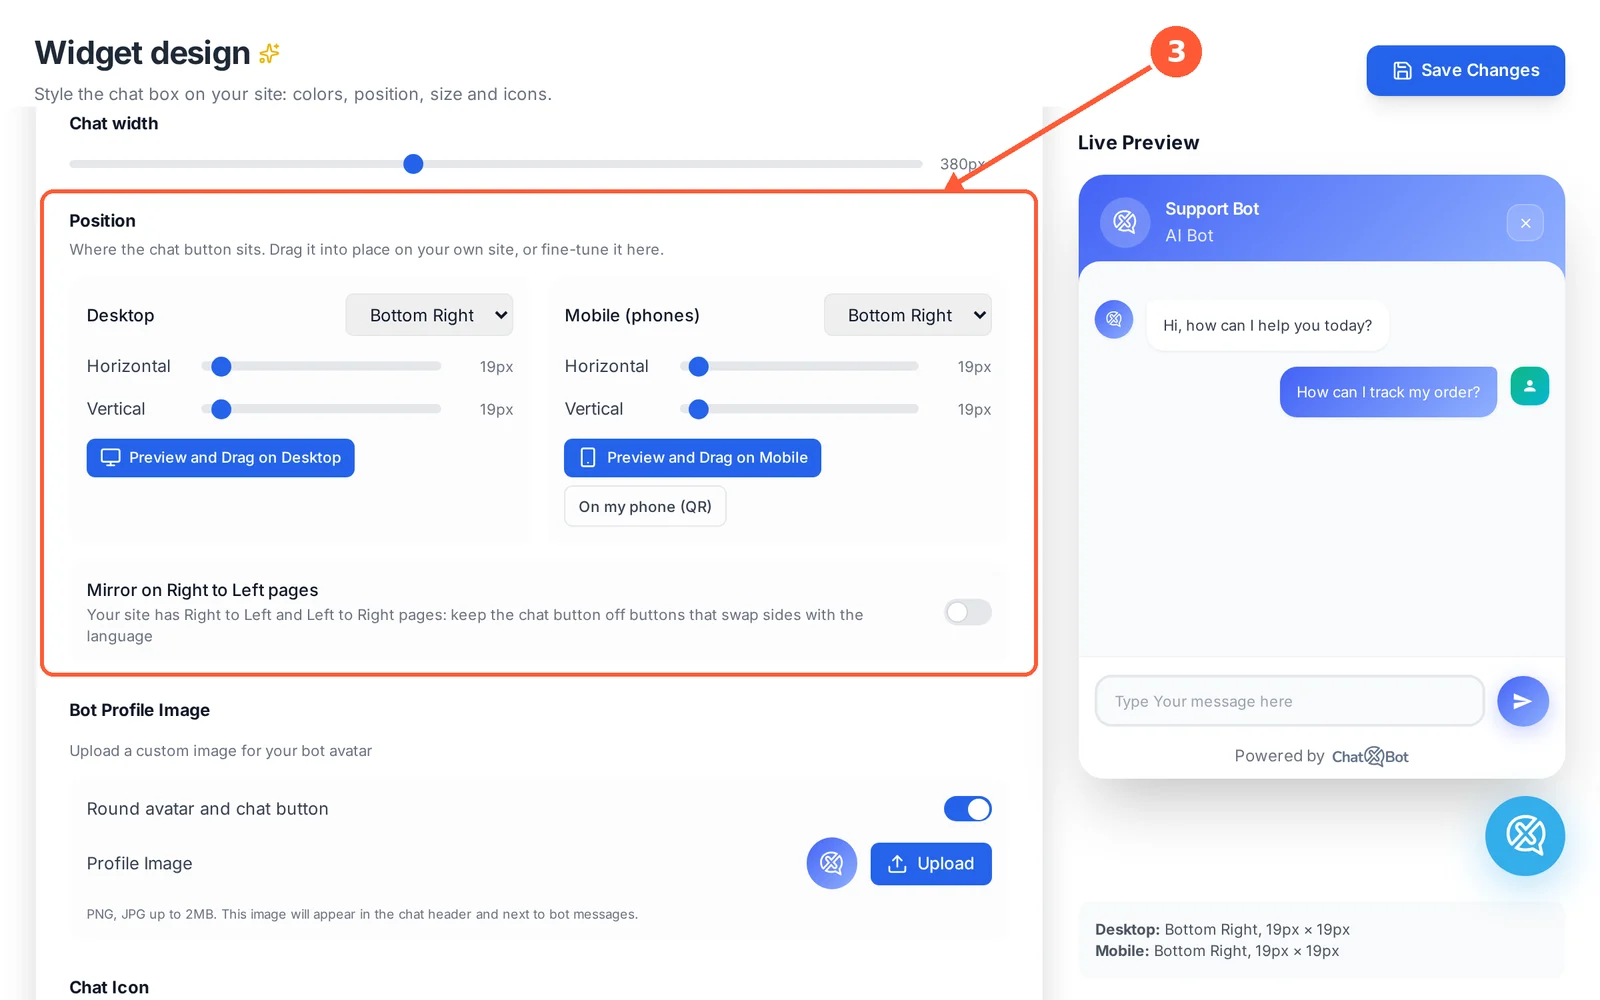
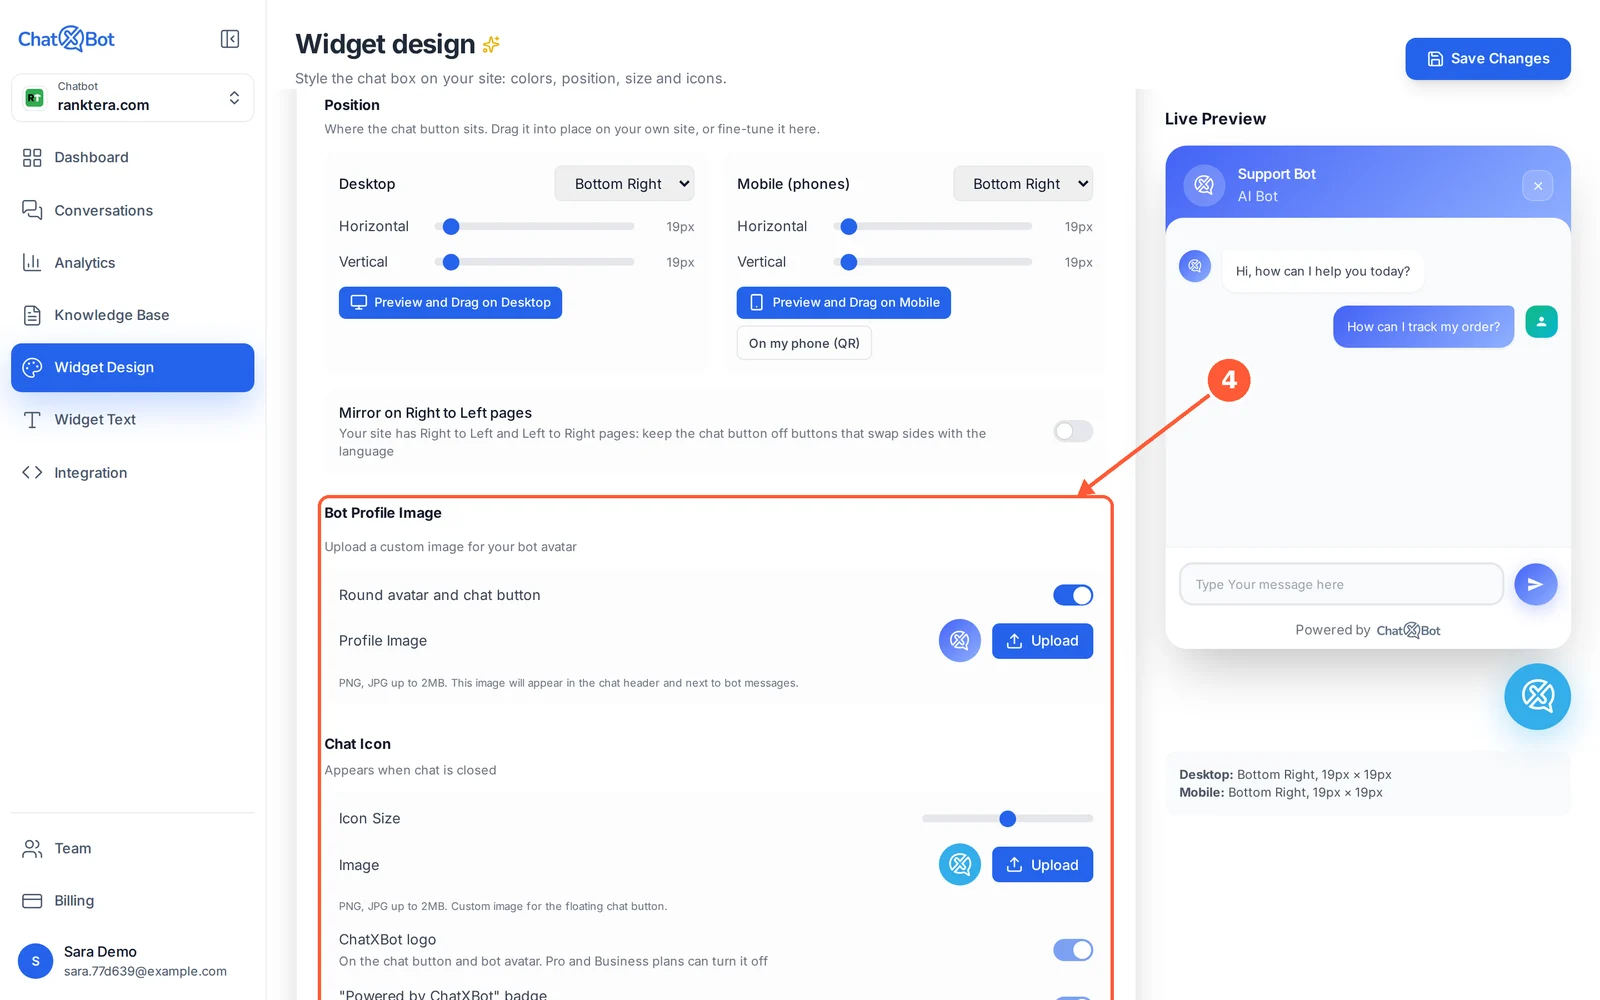
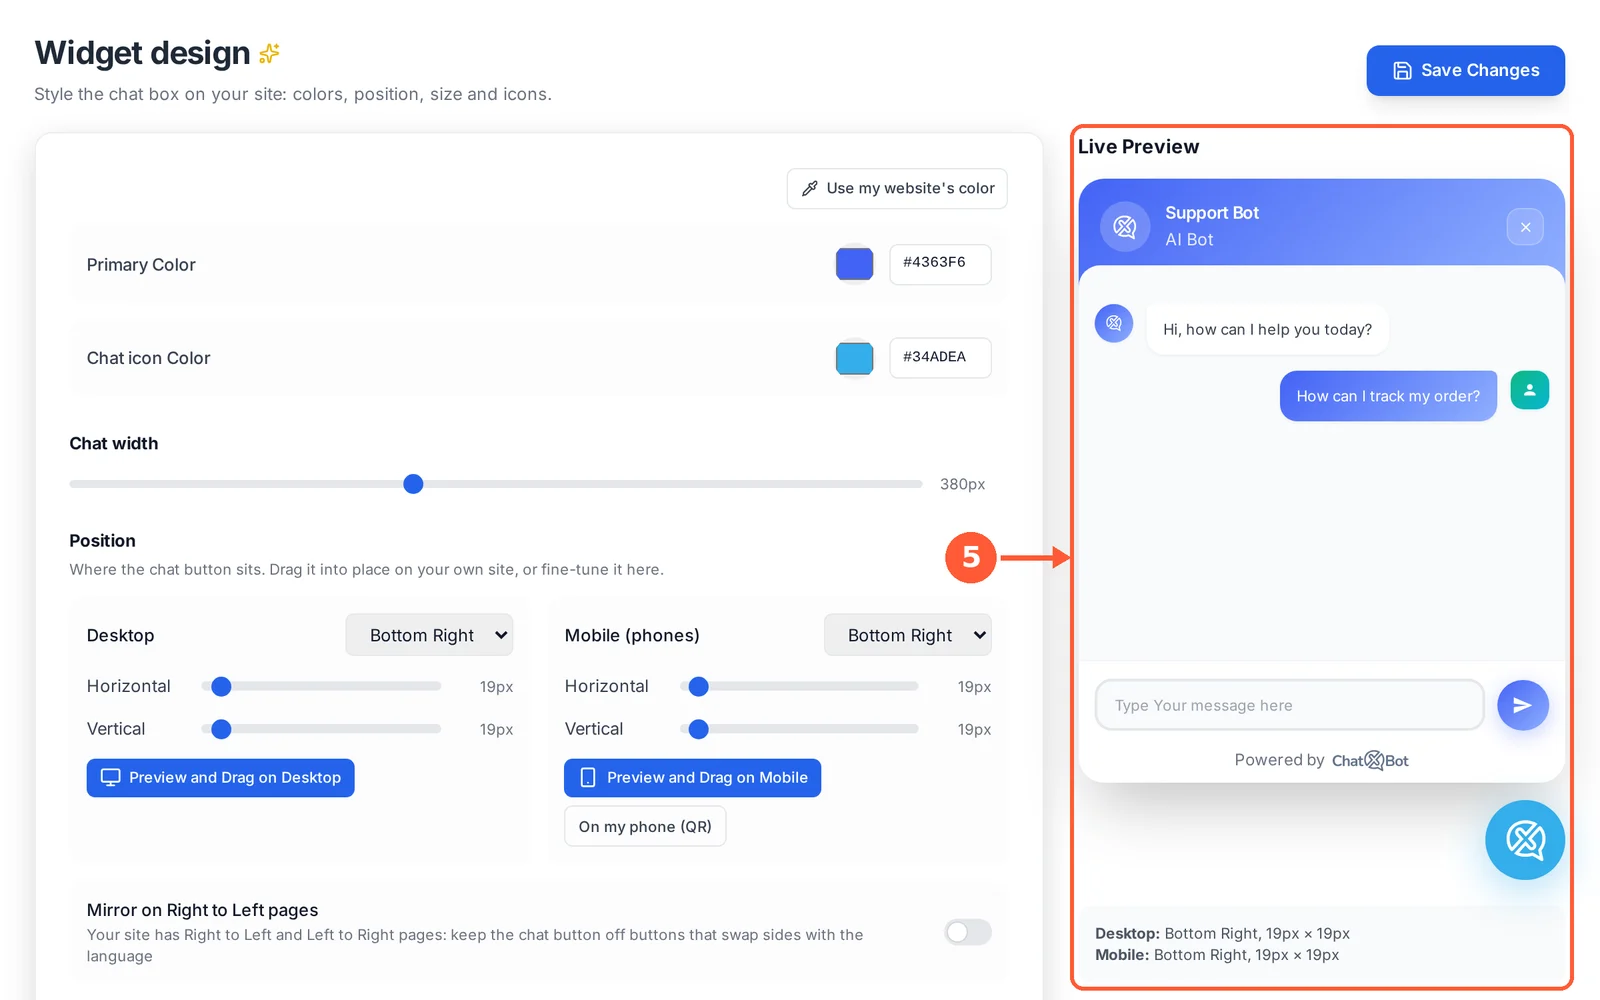
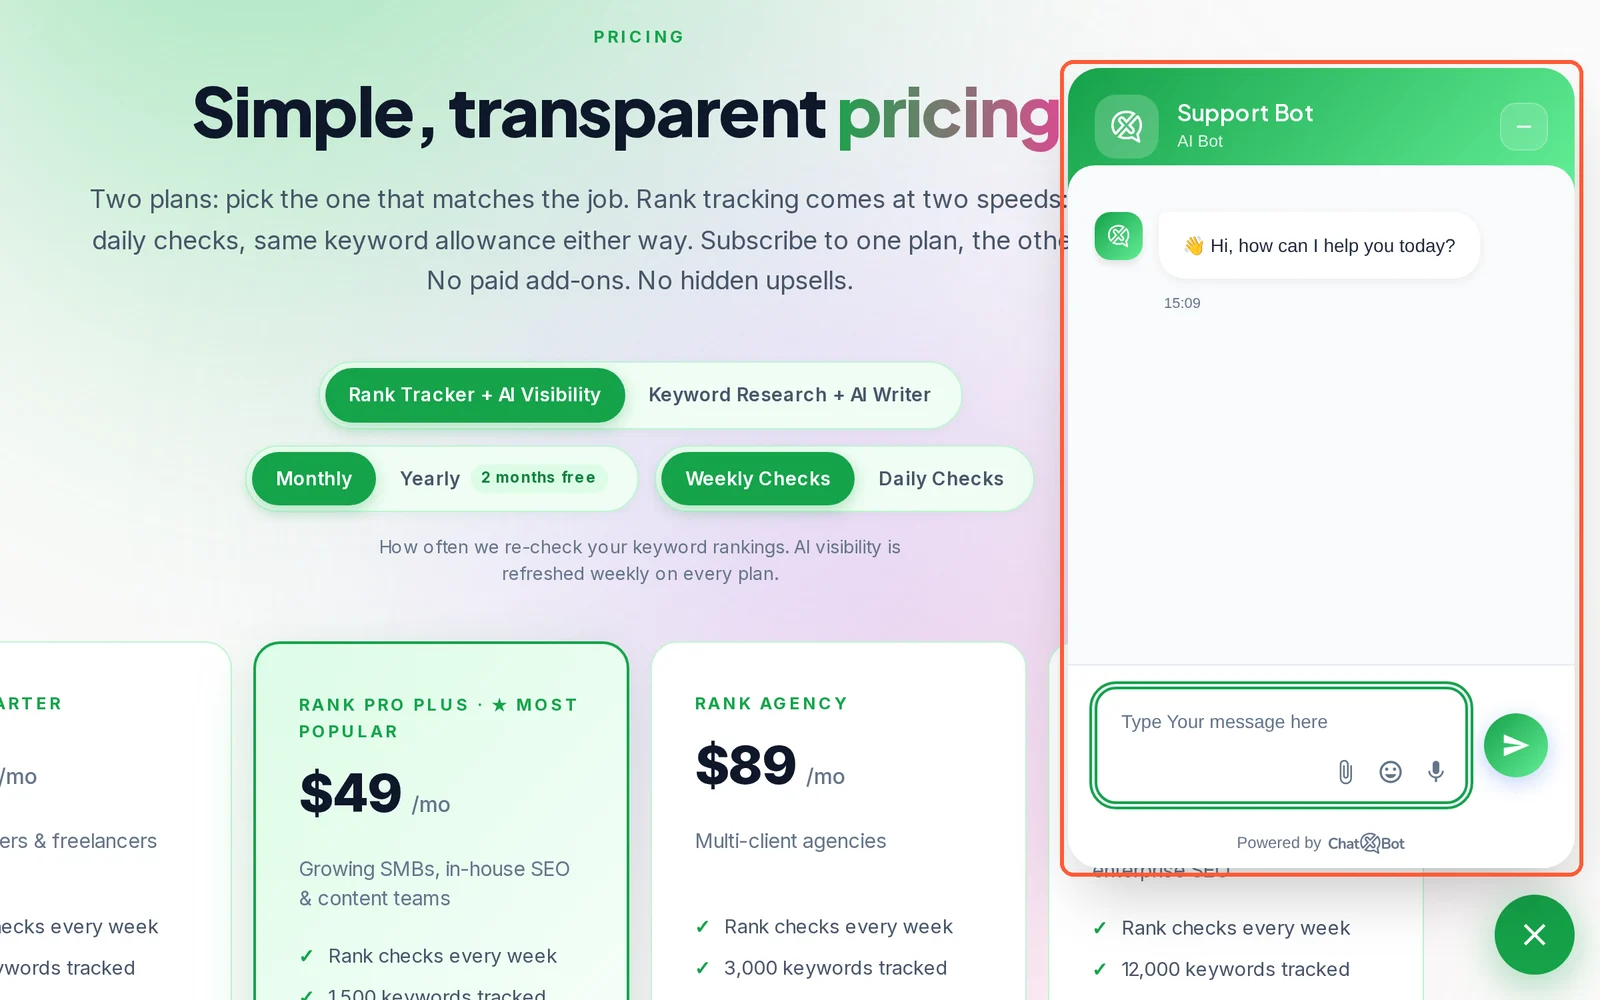
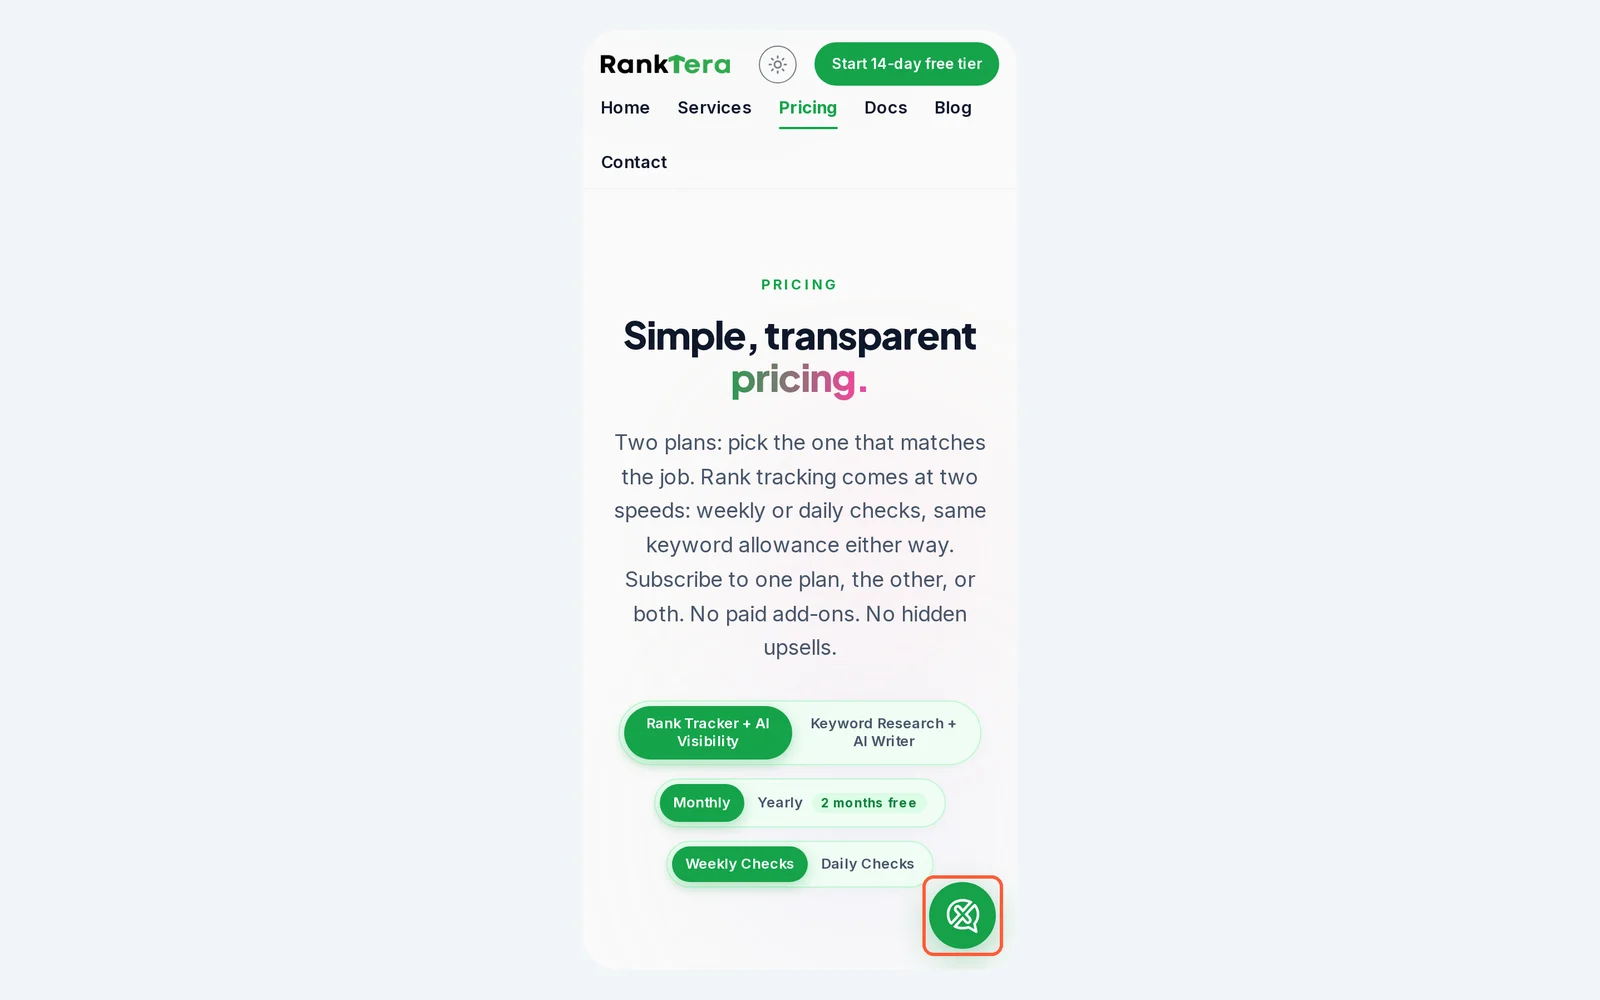
The widget is the chat box visitors see on your website. Make it match your brand: colors, size, position and pictures.
⏱ About 2 minutes • 📍 Widget Design
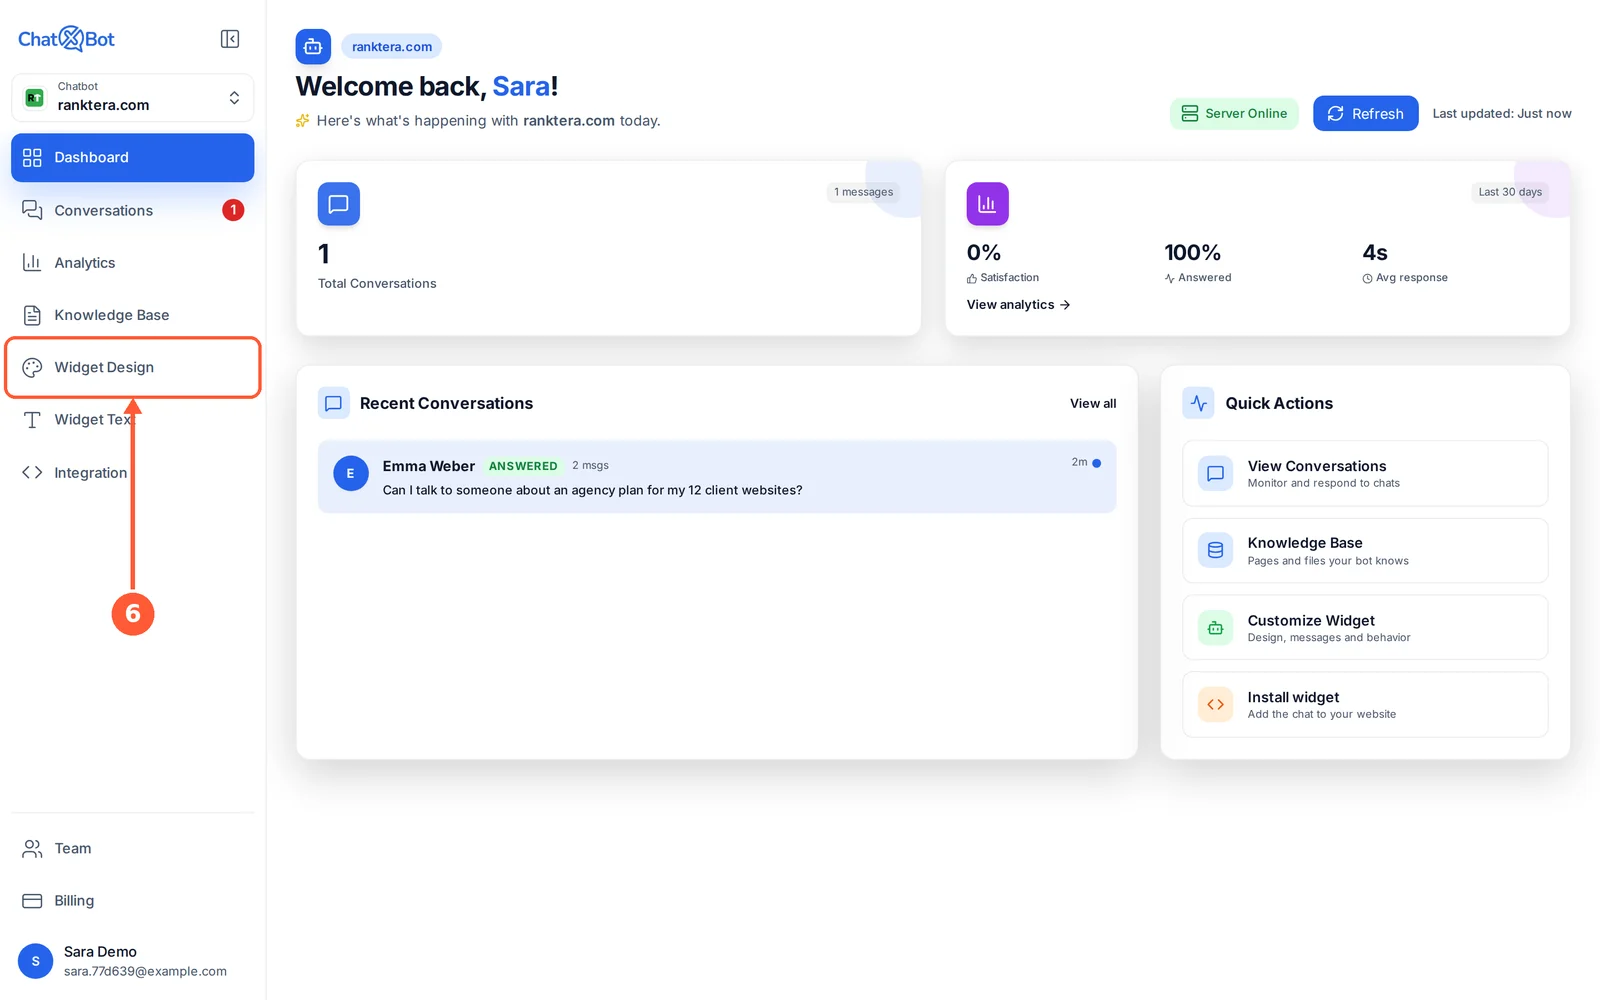
1Click Widget Design in the menu.1 / 10
💡 Good to Know
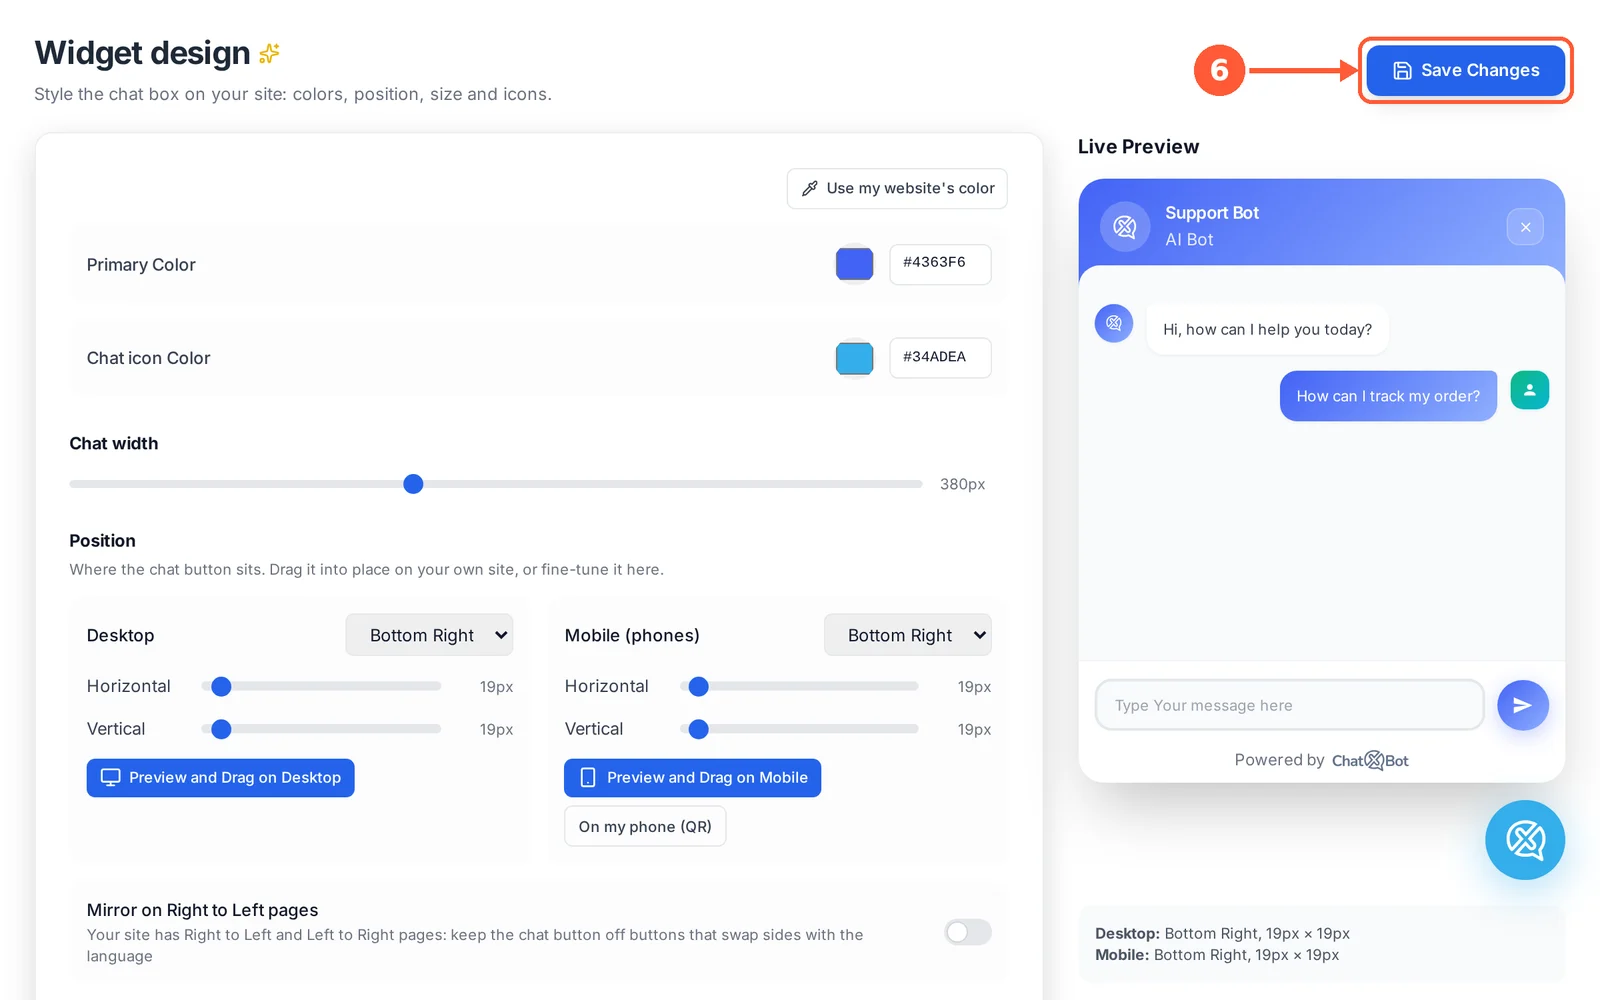
Always click Save Changes before you leave. If you leave with unsaved edits, ChatXBot lists them and asks: Stay, Leave without saving or Save.
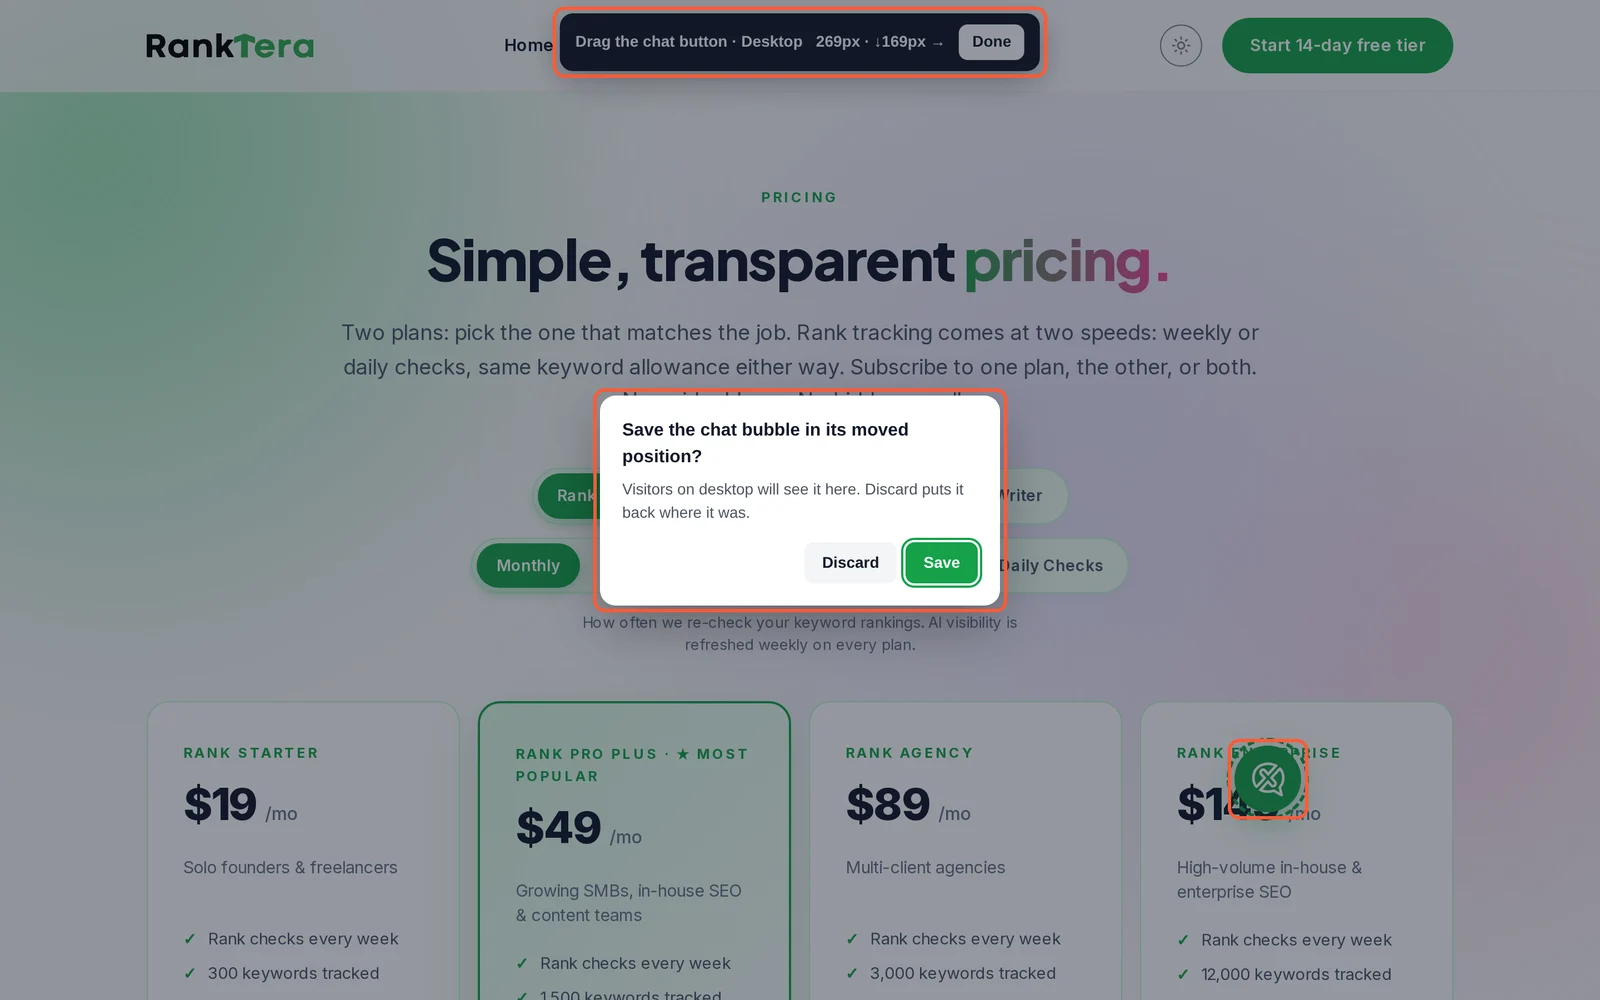
To place the button with your own phone, click On my phone (QR) and scan the code. The link works for 15 minutes.
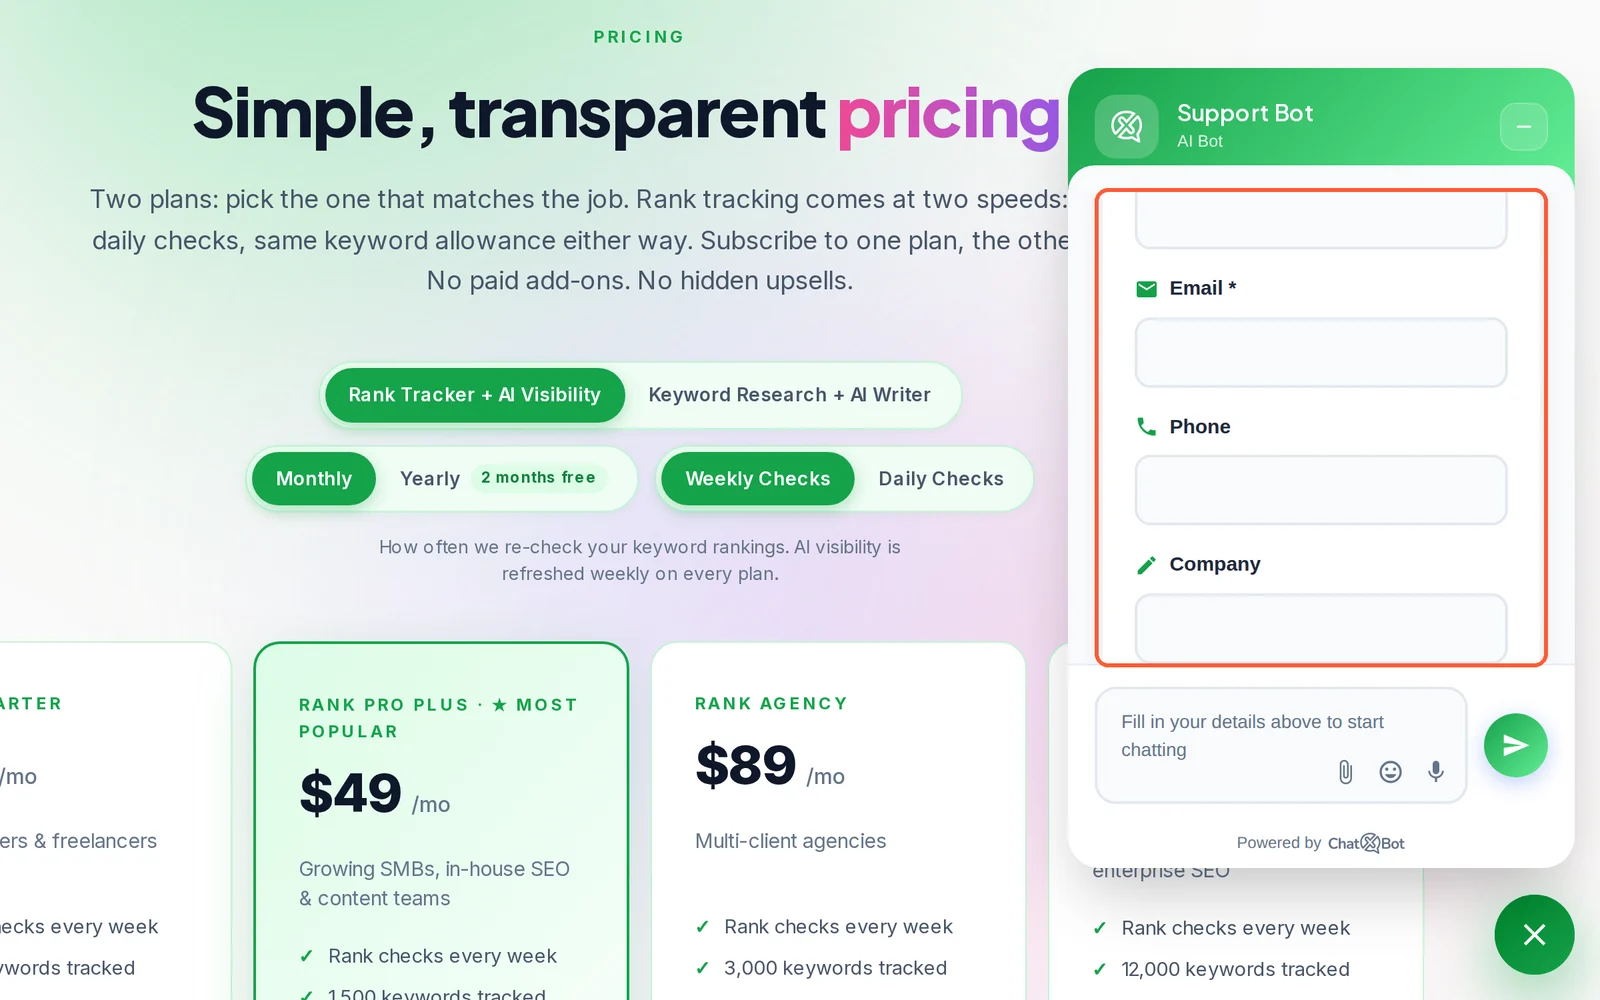
On Pro and Business you can turn off the ChatXBot logo and the “Powered by ChatXBot” badge at the bottom of this page.
Set Your Widget’s Texts
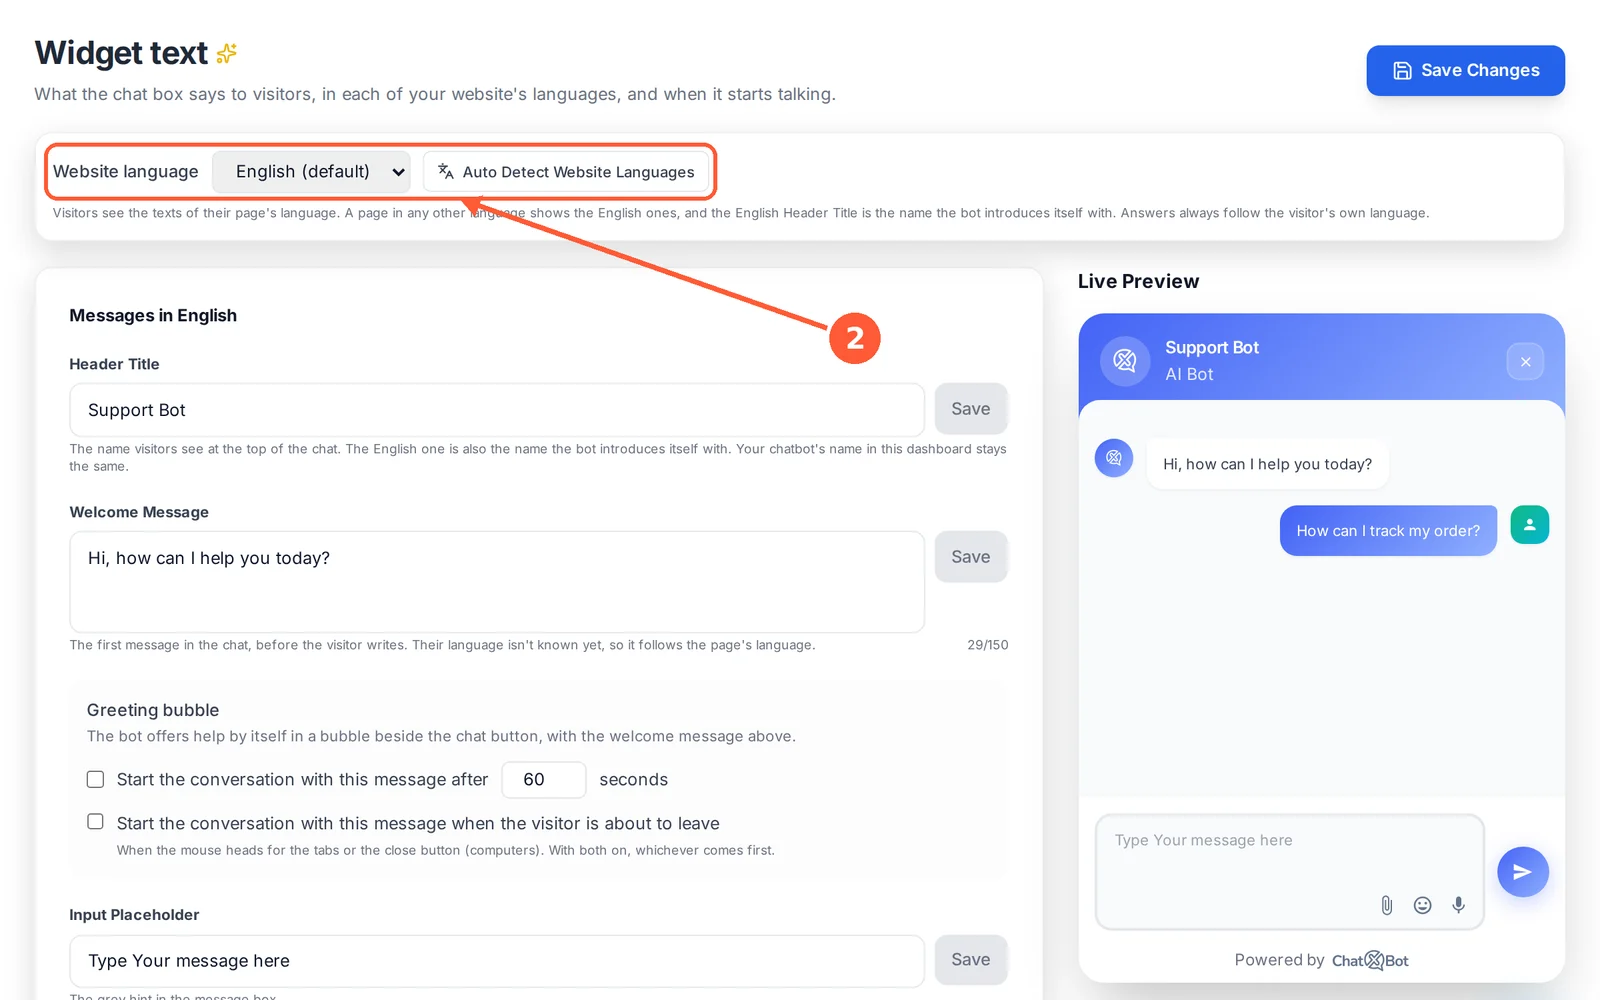
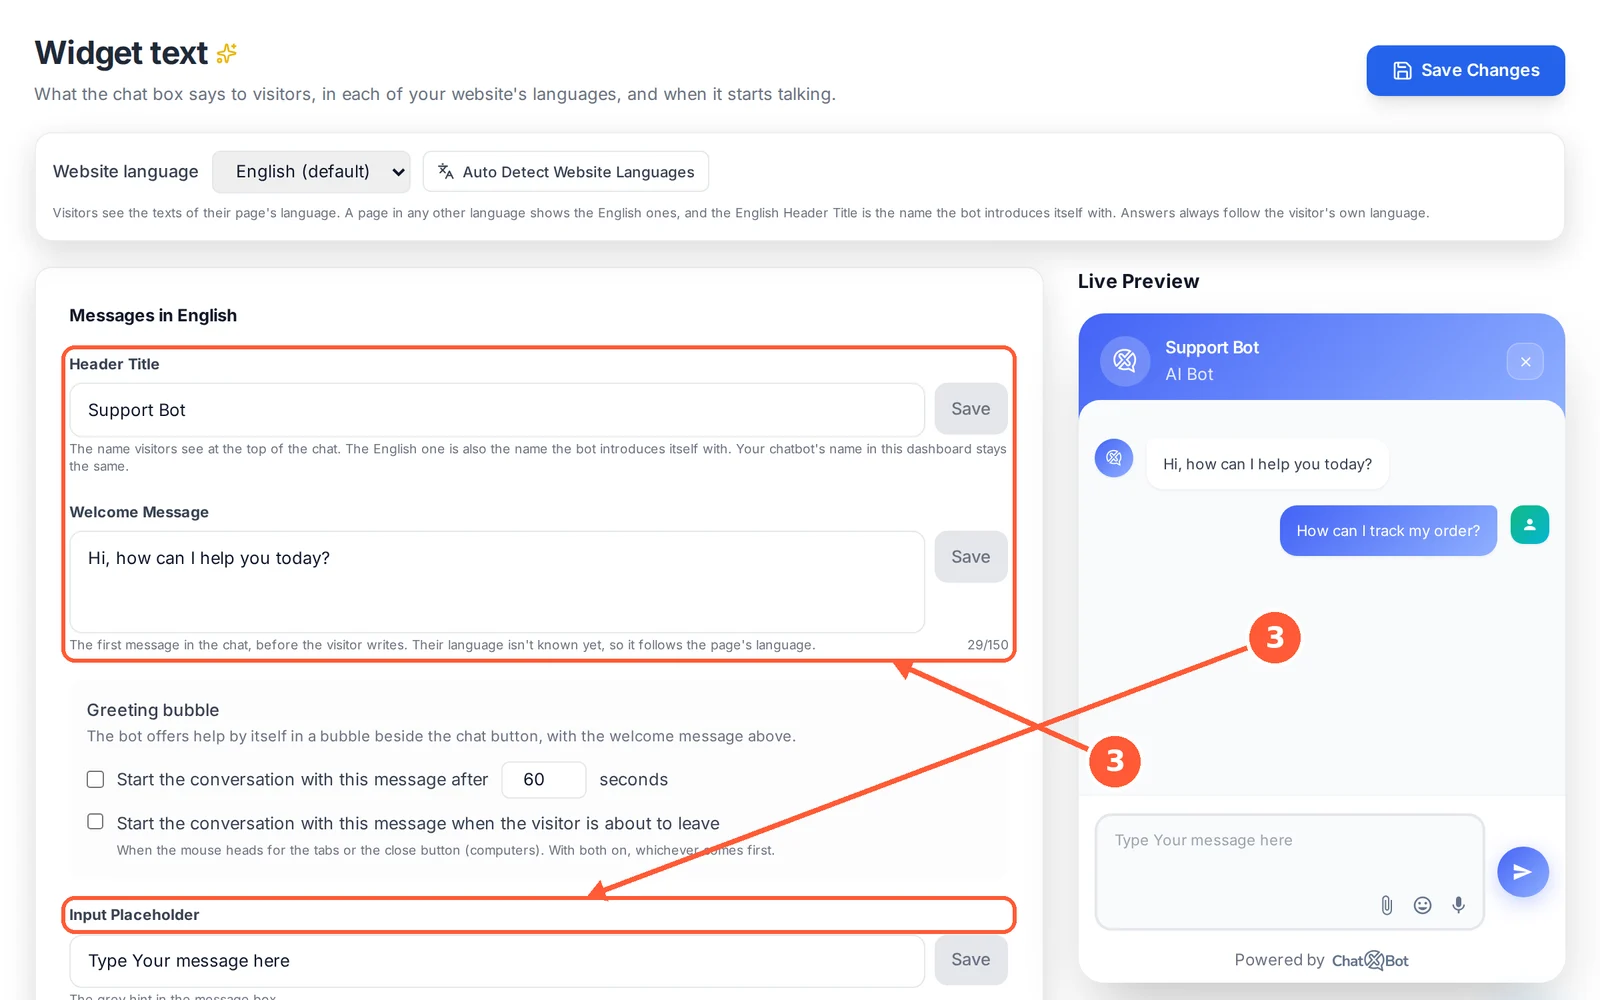
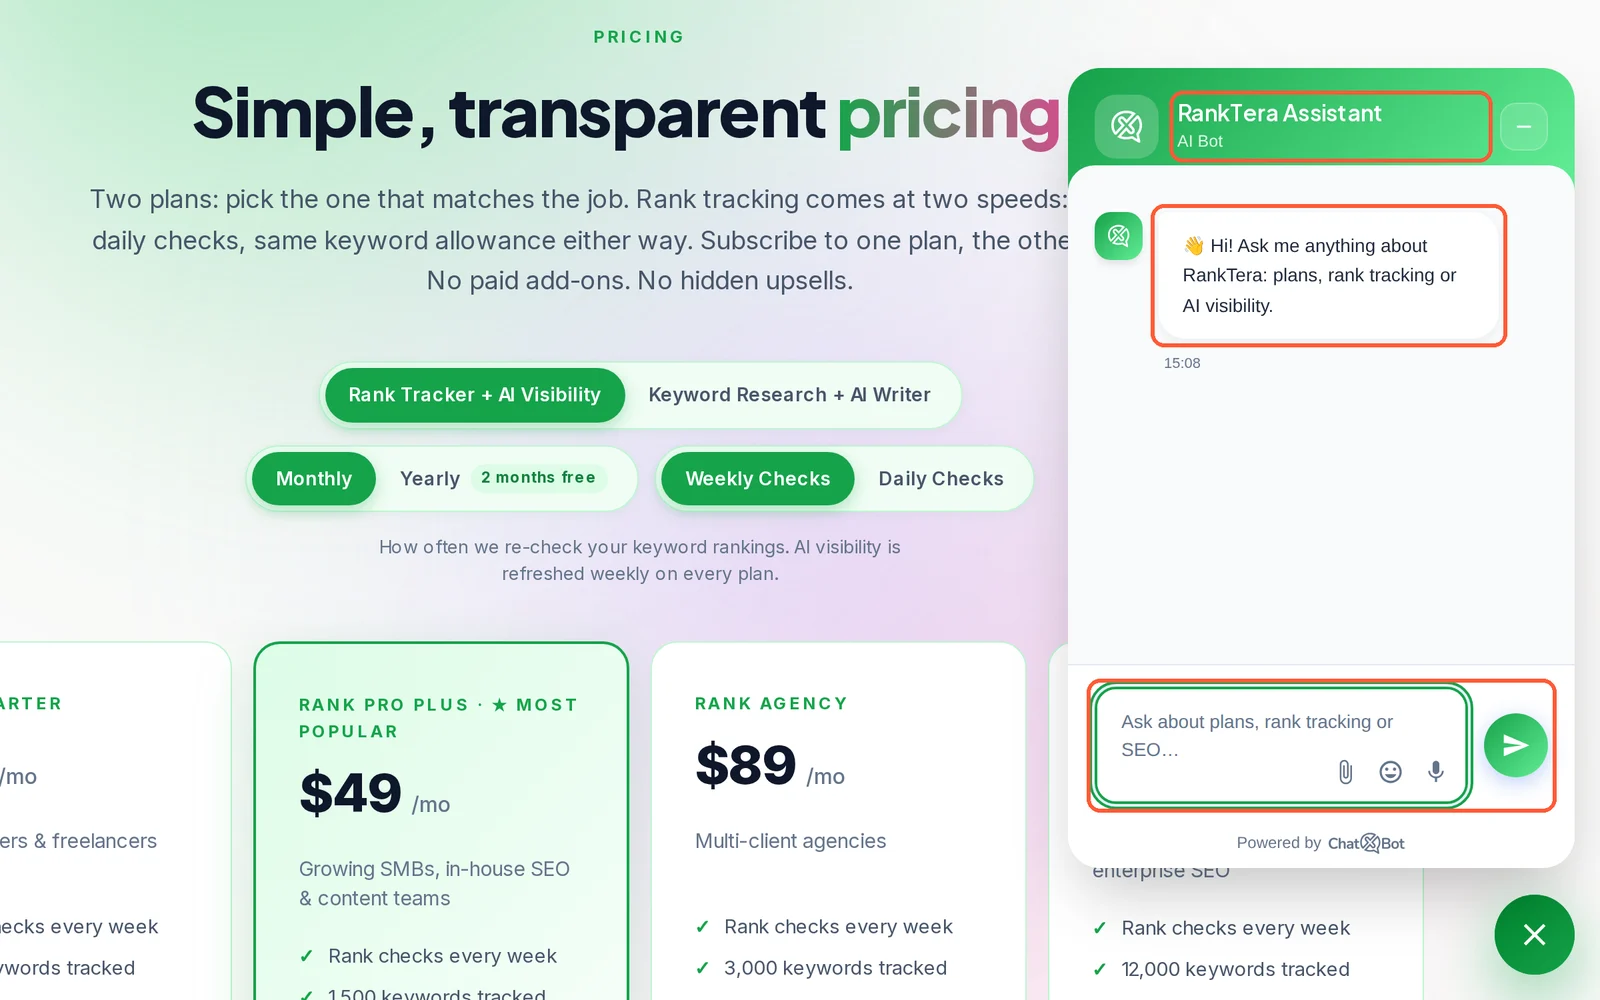
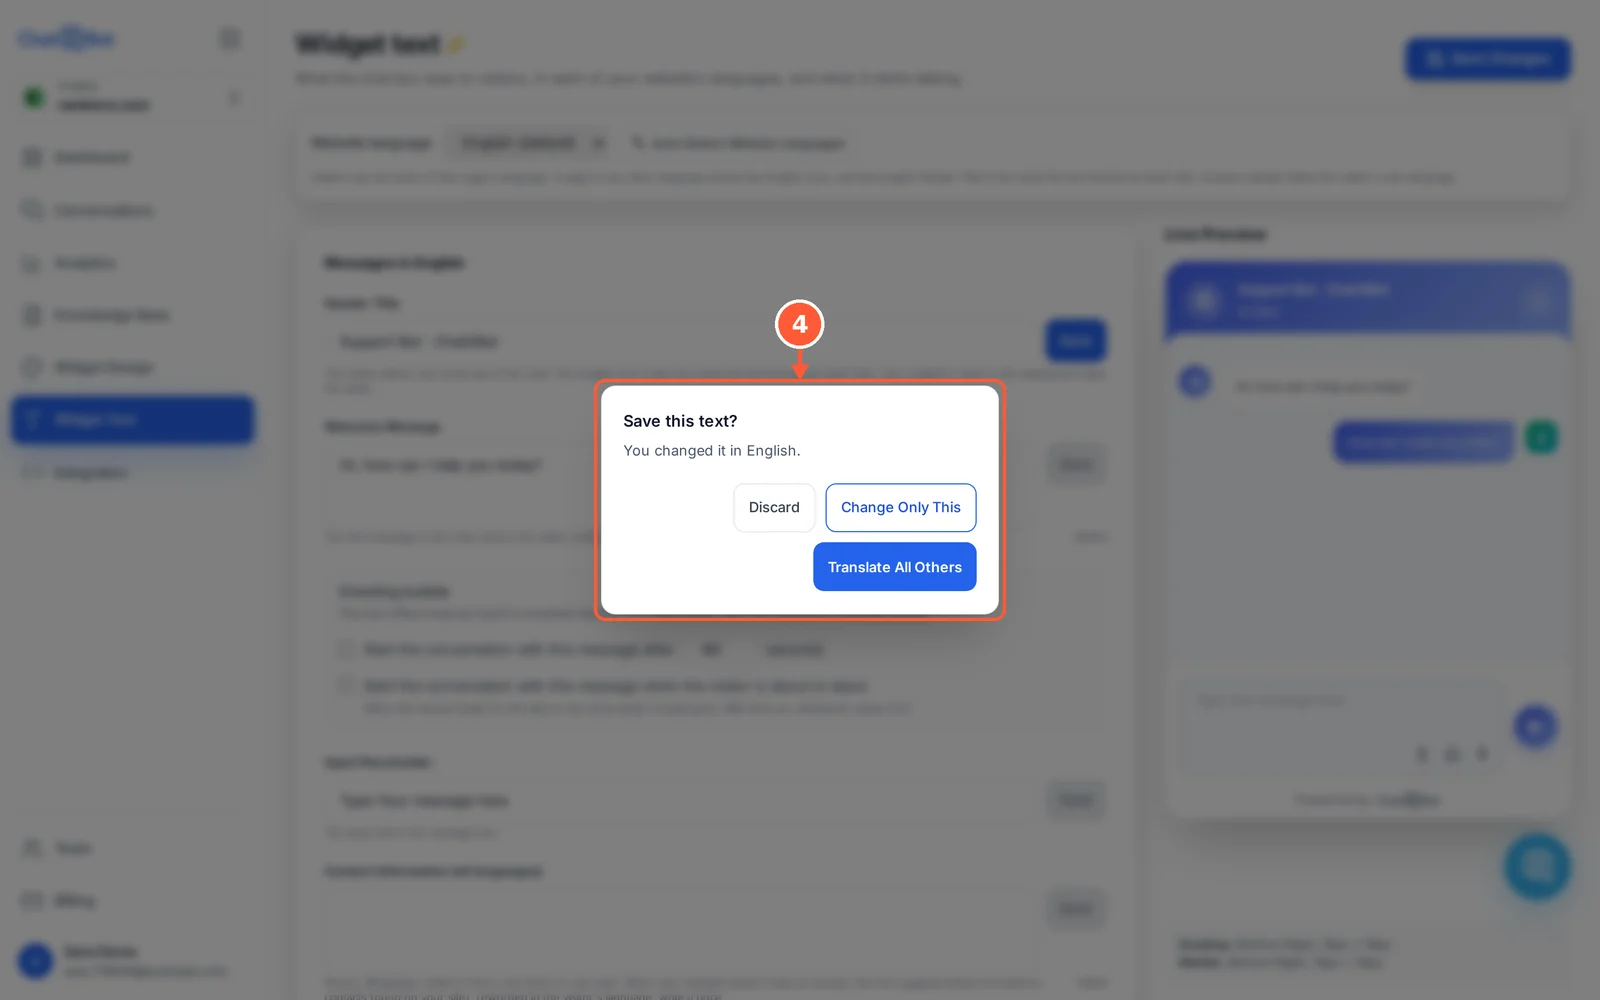
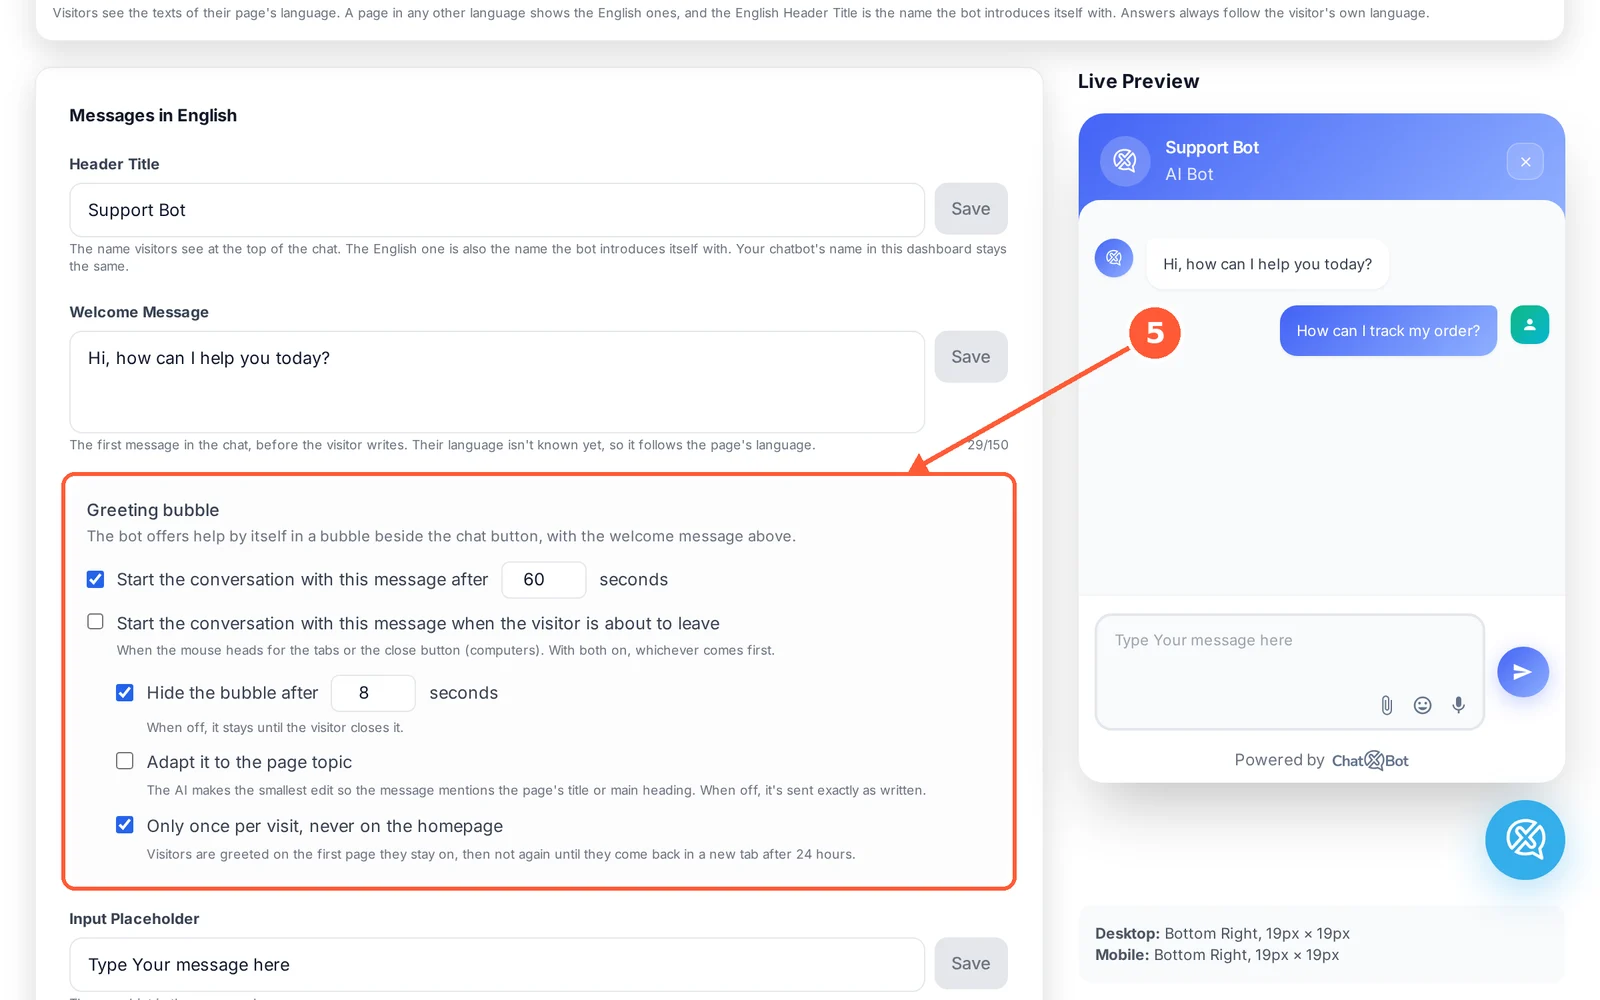
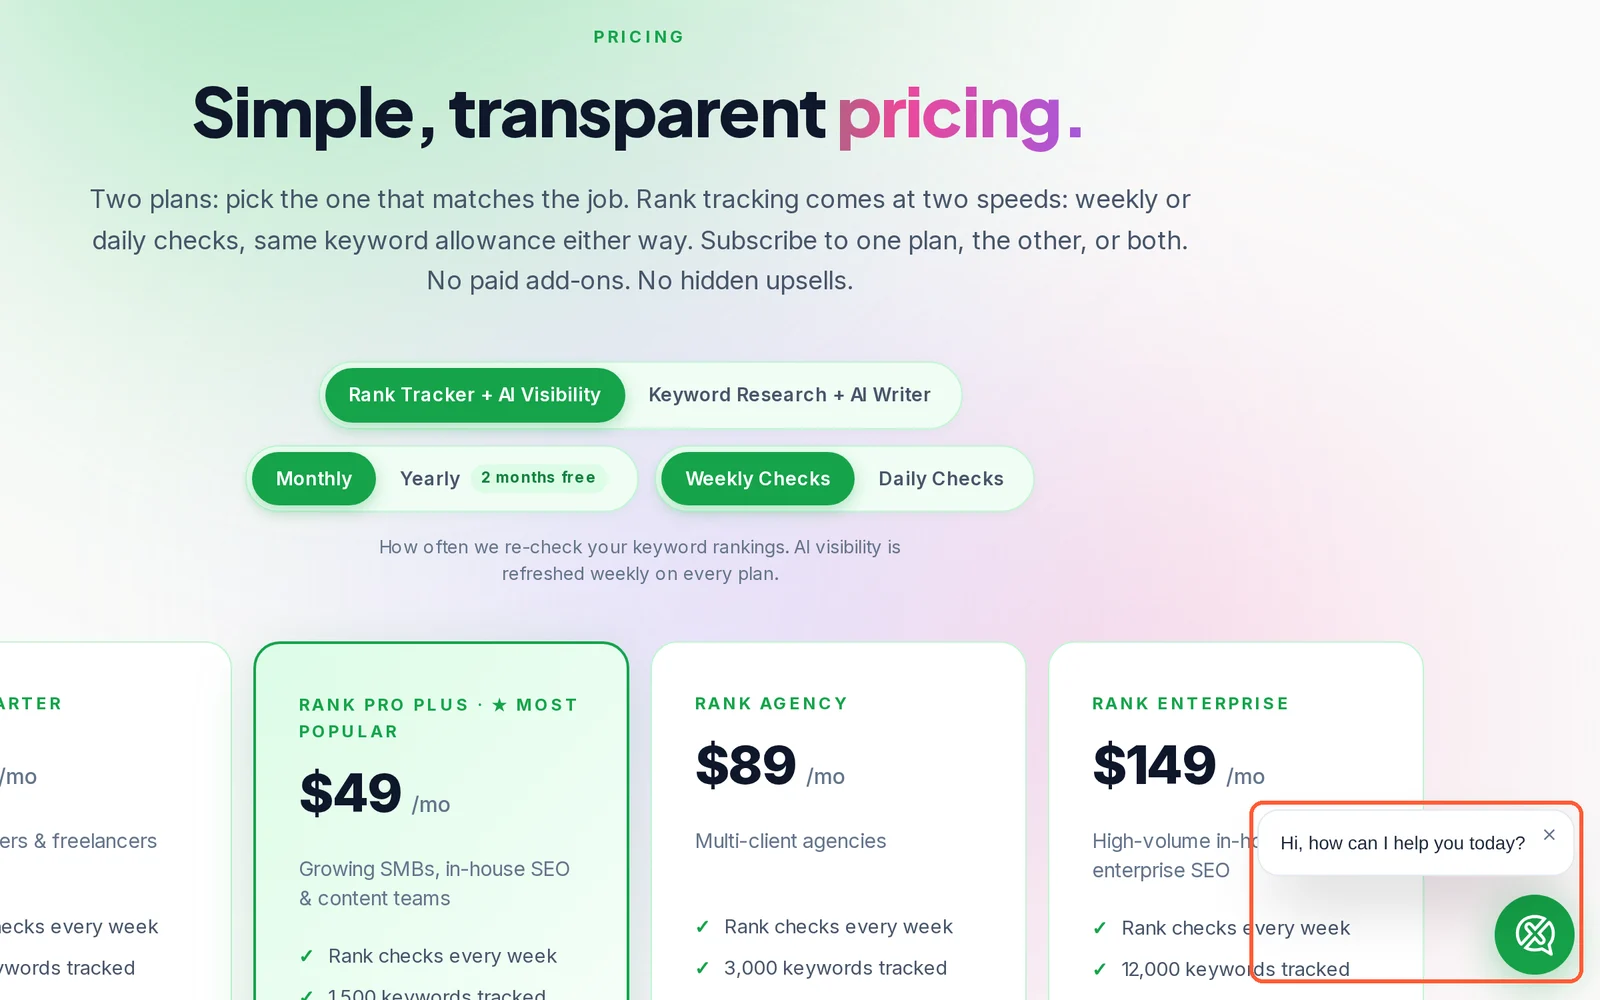
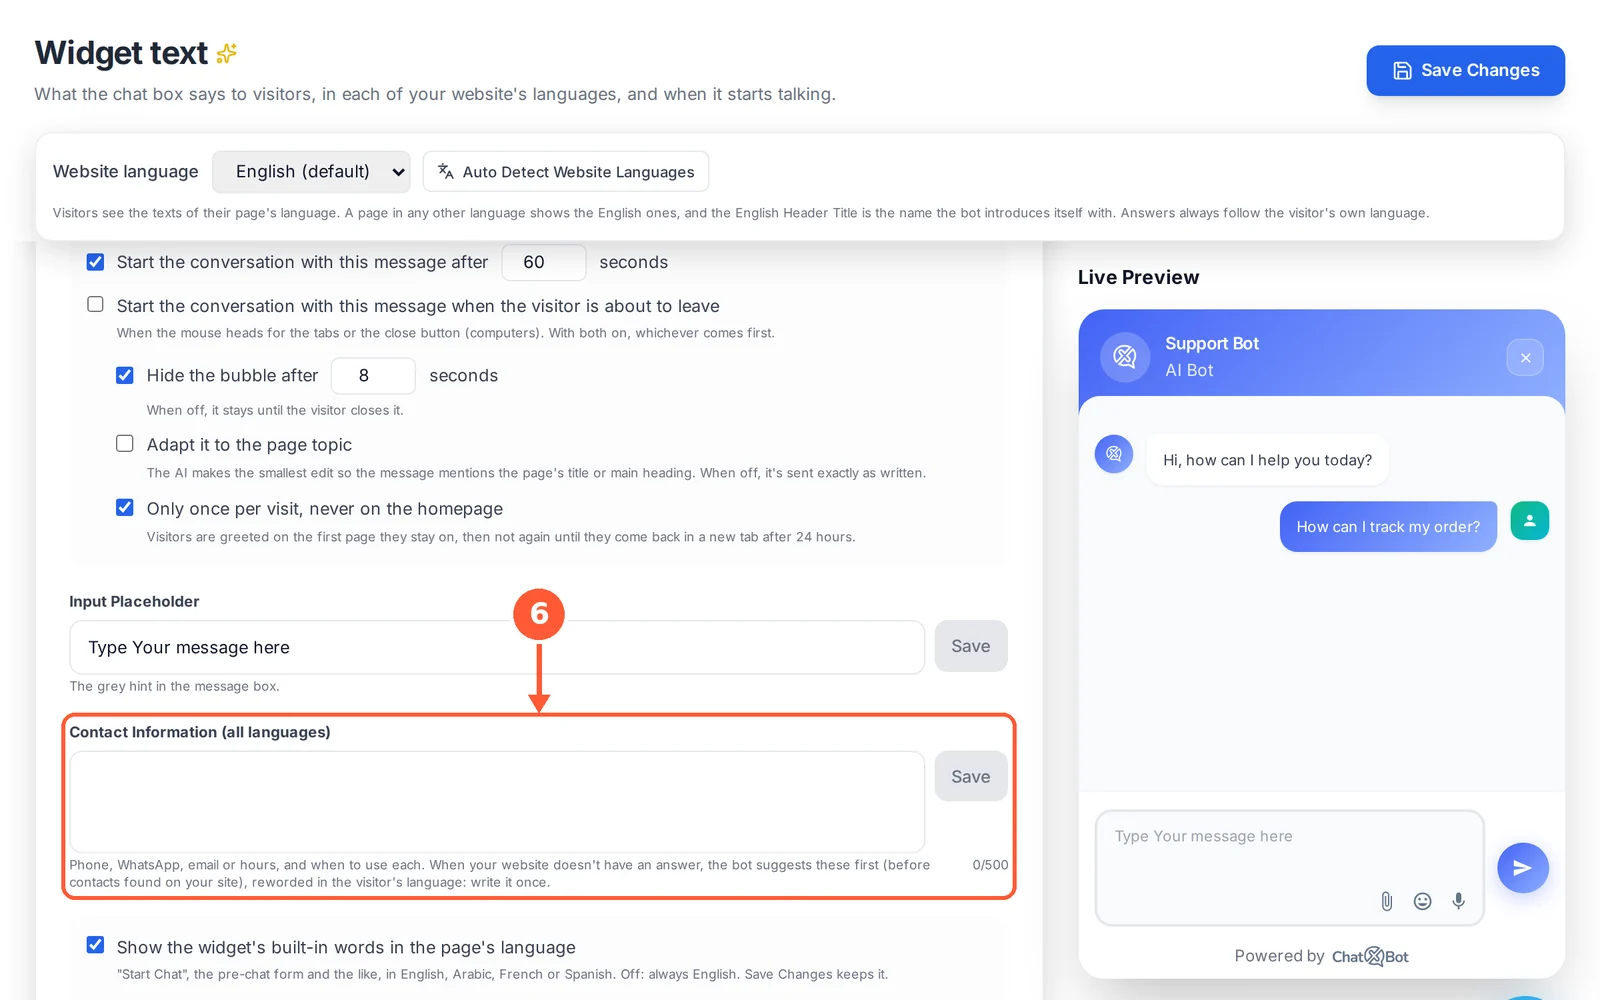
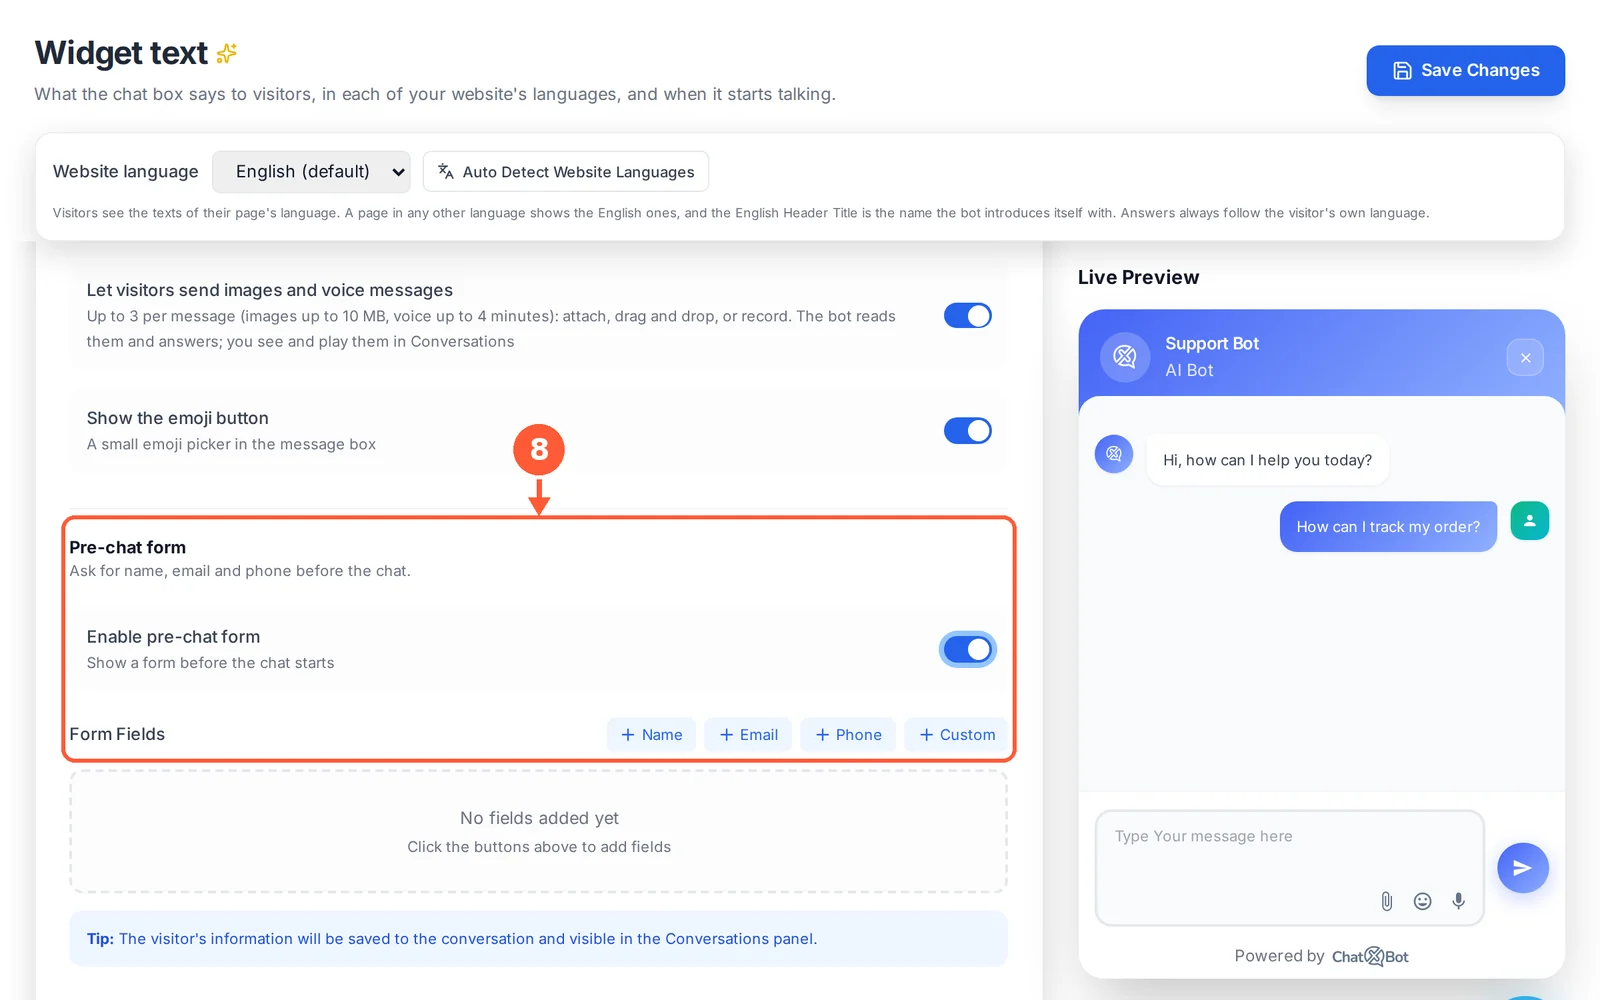
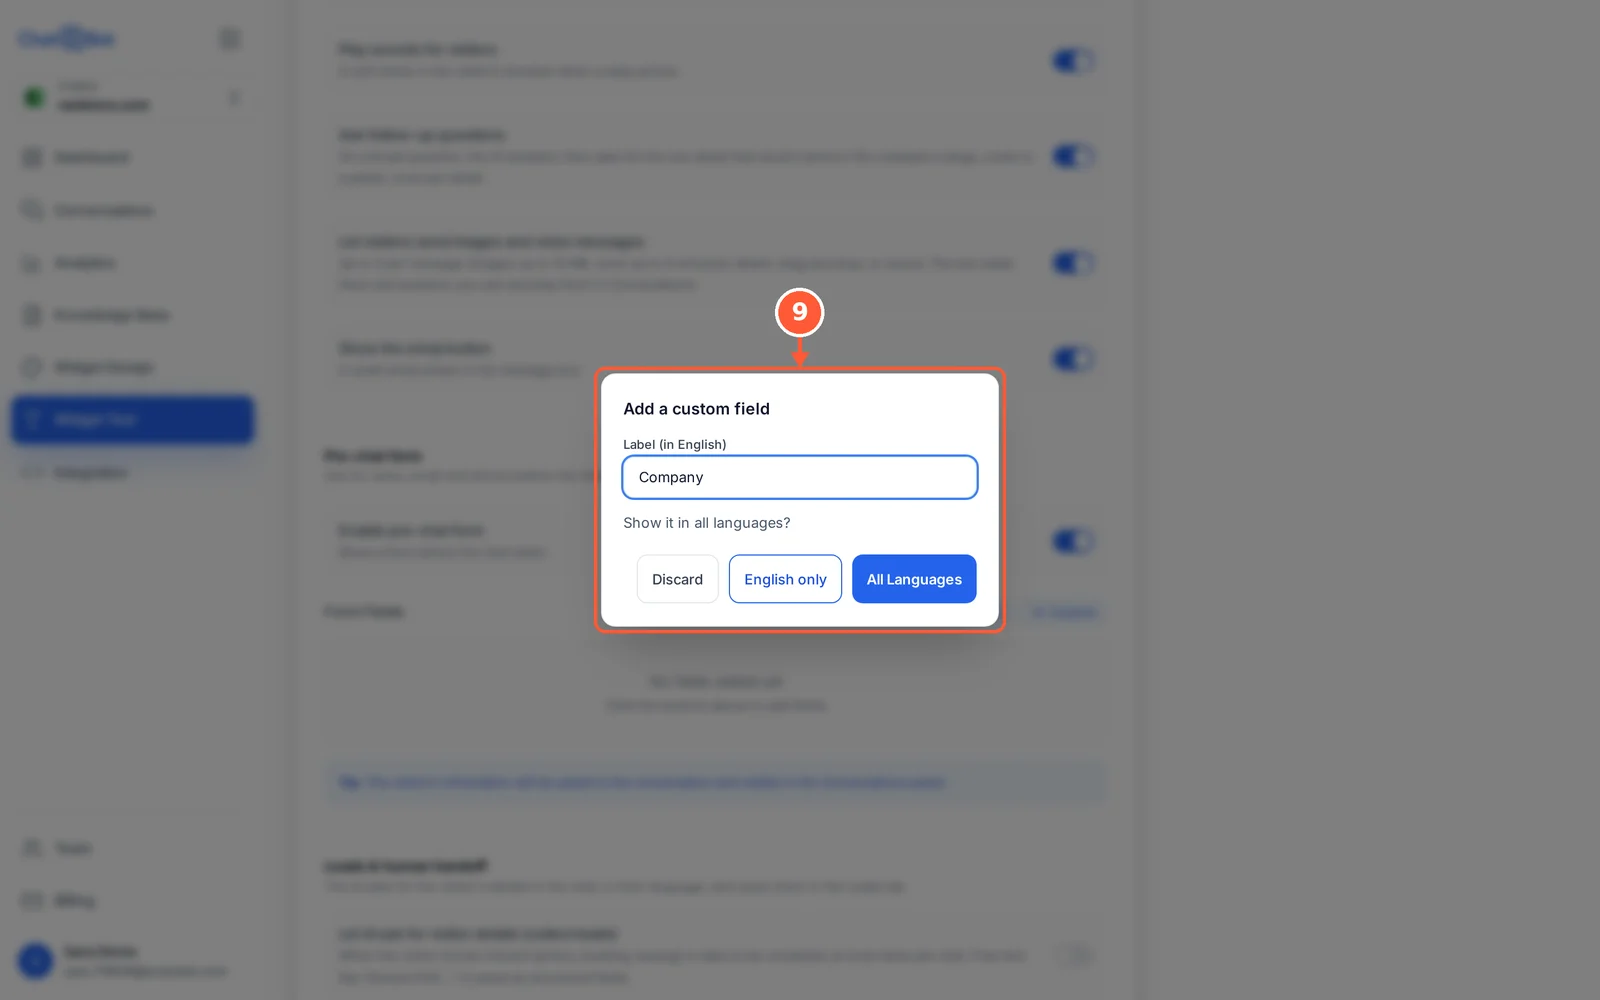
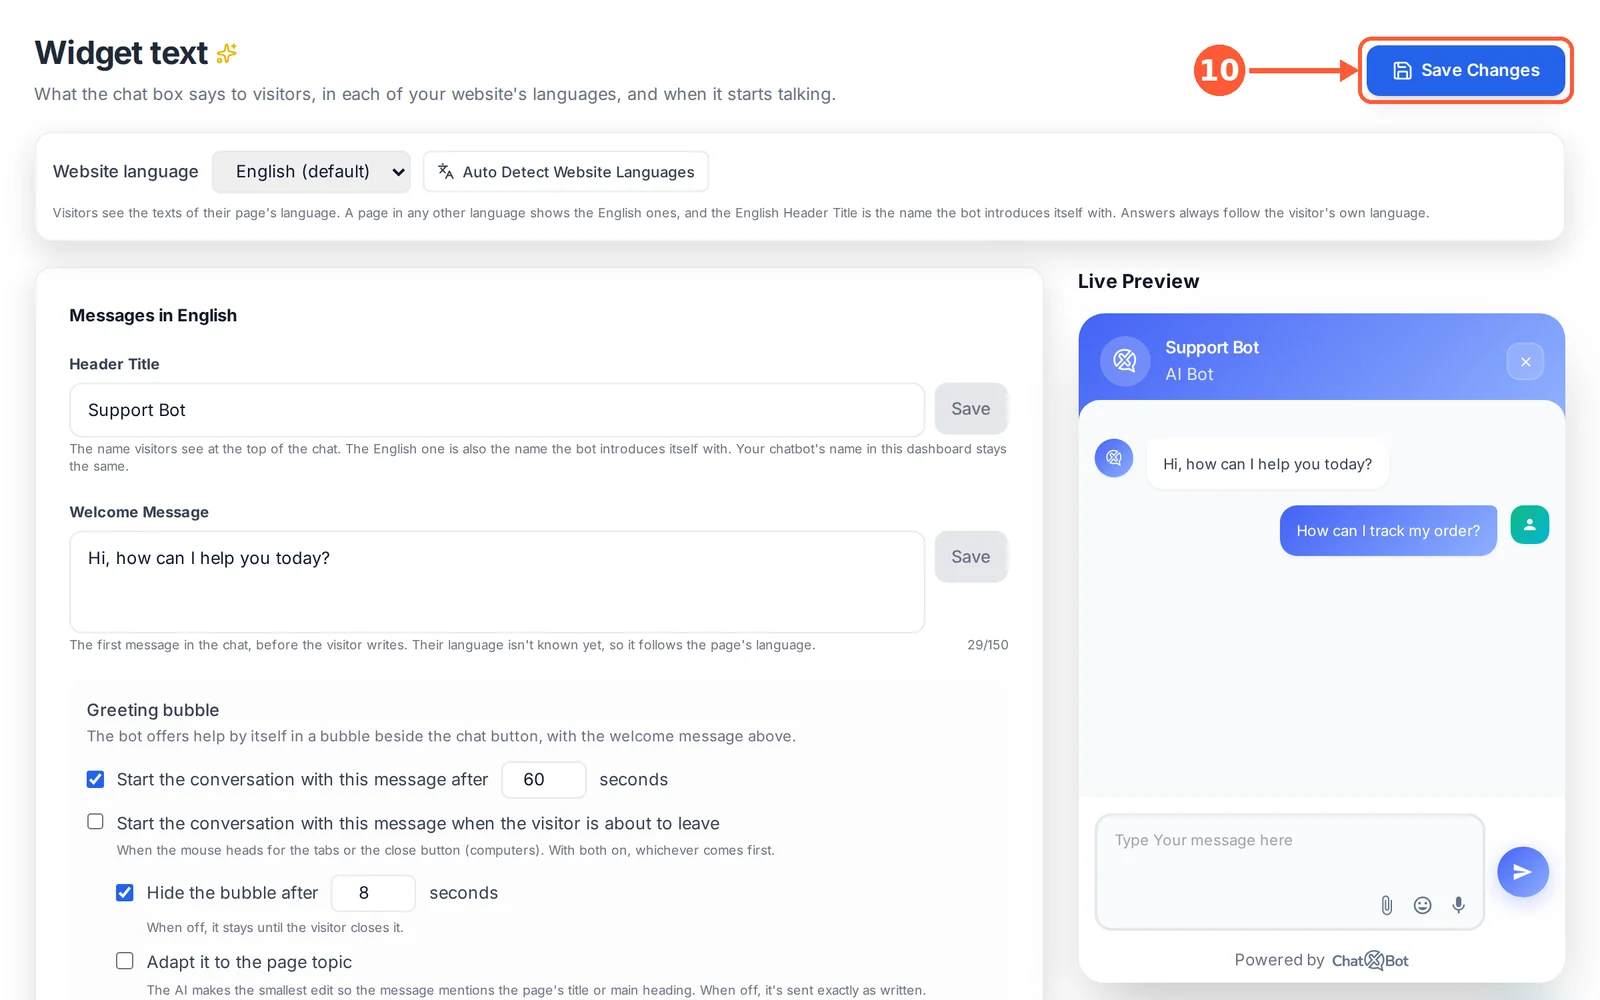
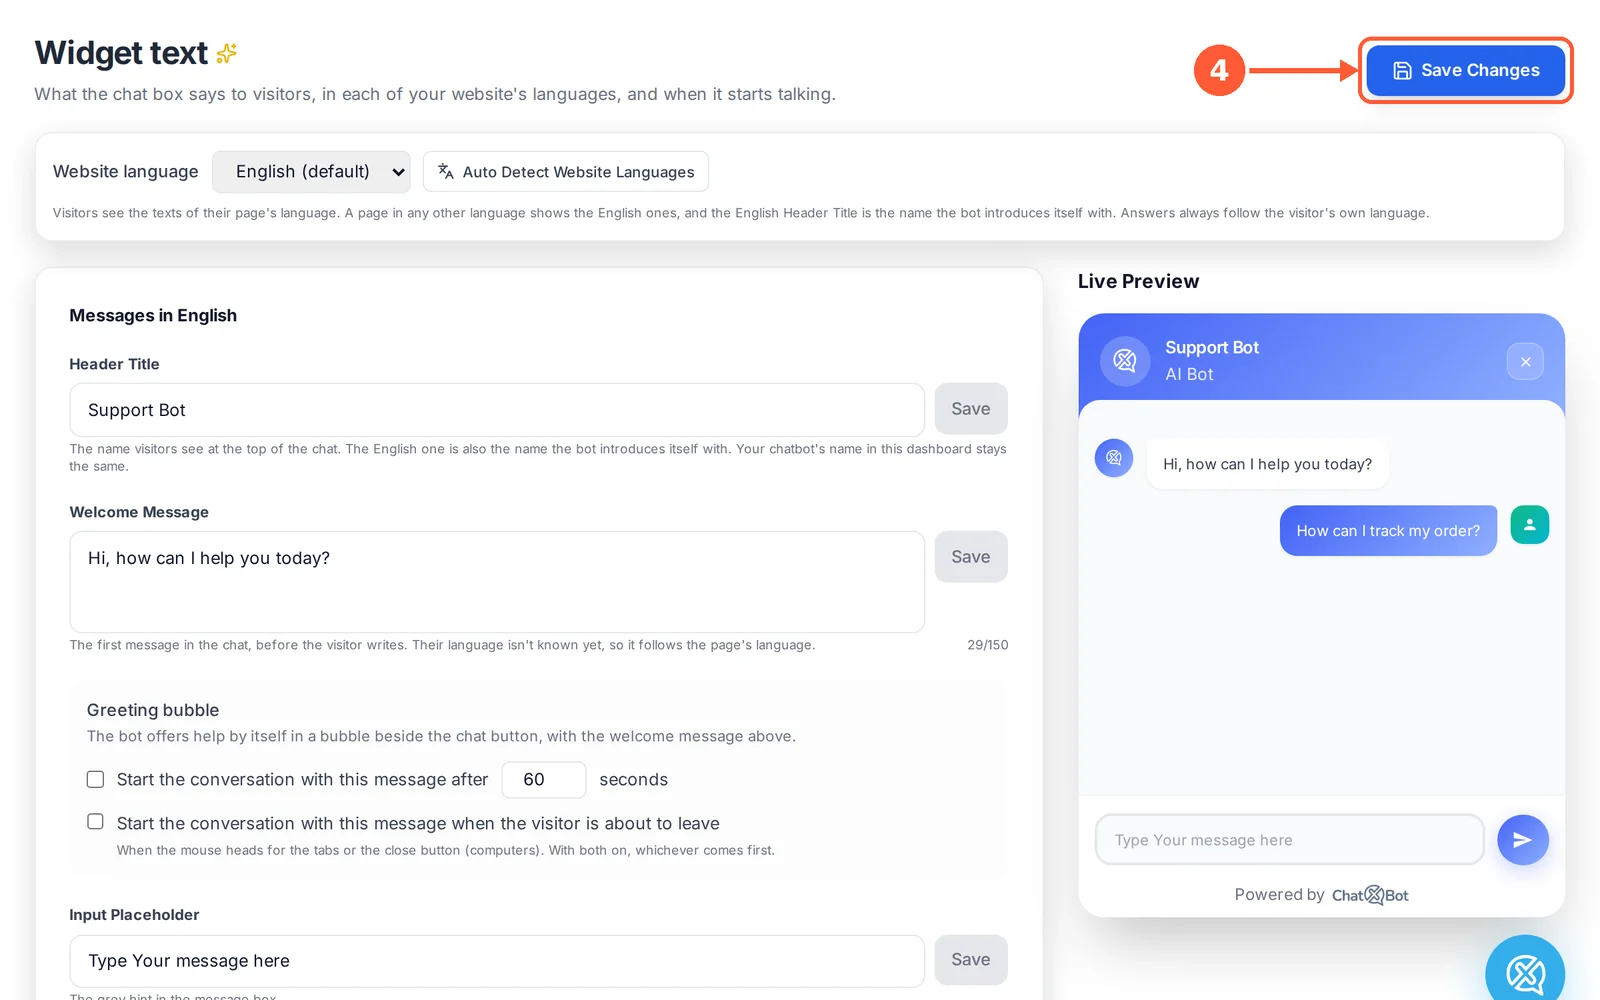
Choose what the chat box says to visitors, in each of your website’s languages, and when it starts talking.
⏱ About 3 minutes • 📍 Widget Text
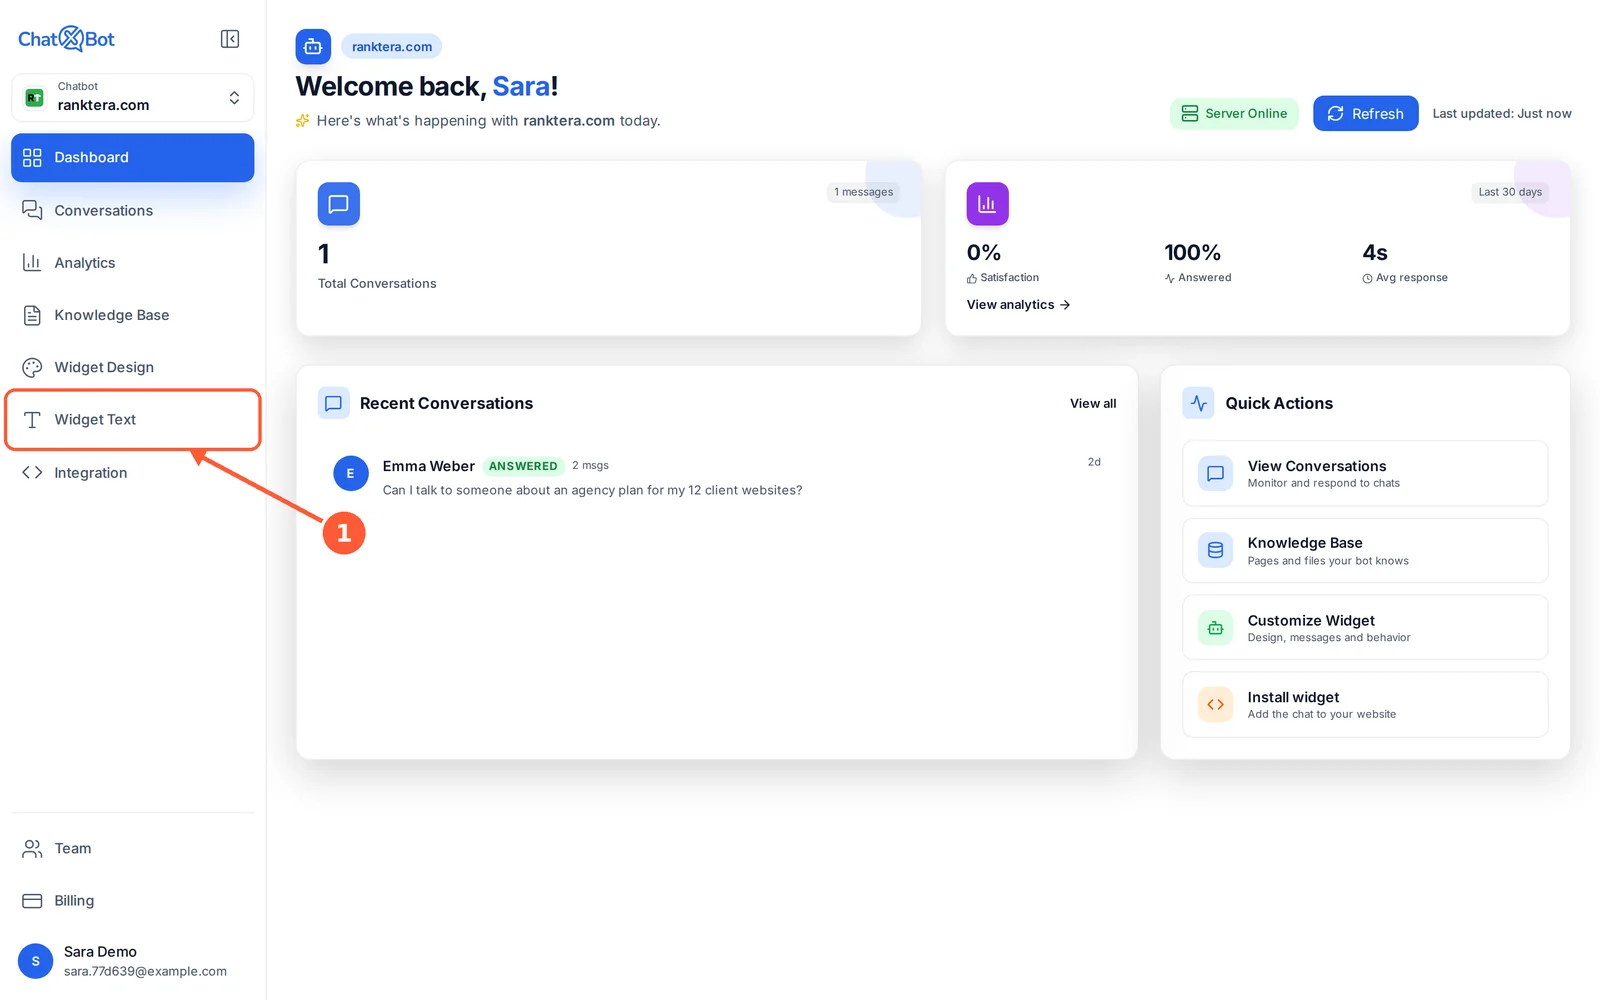
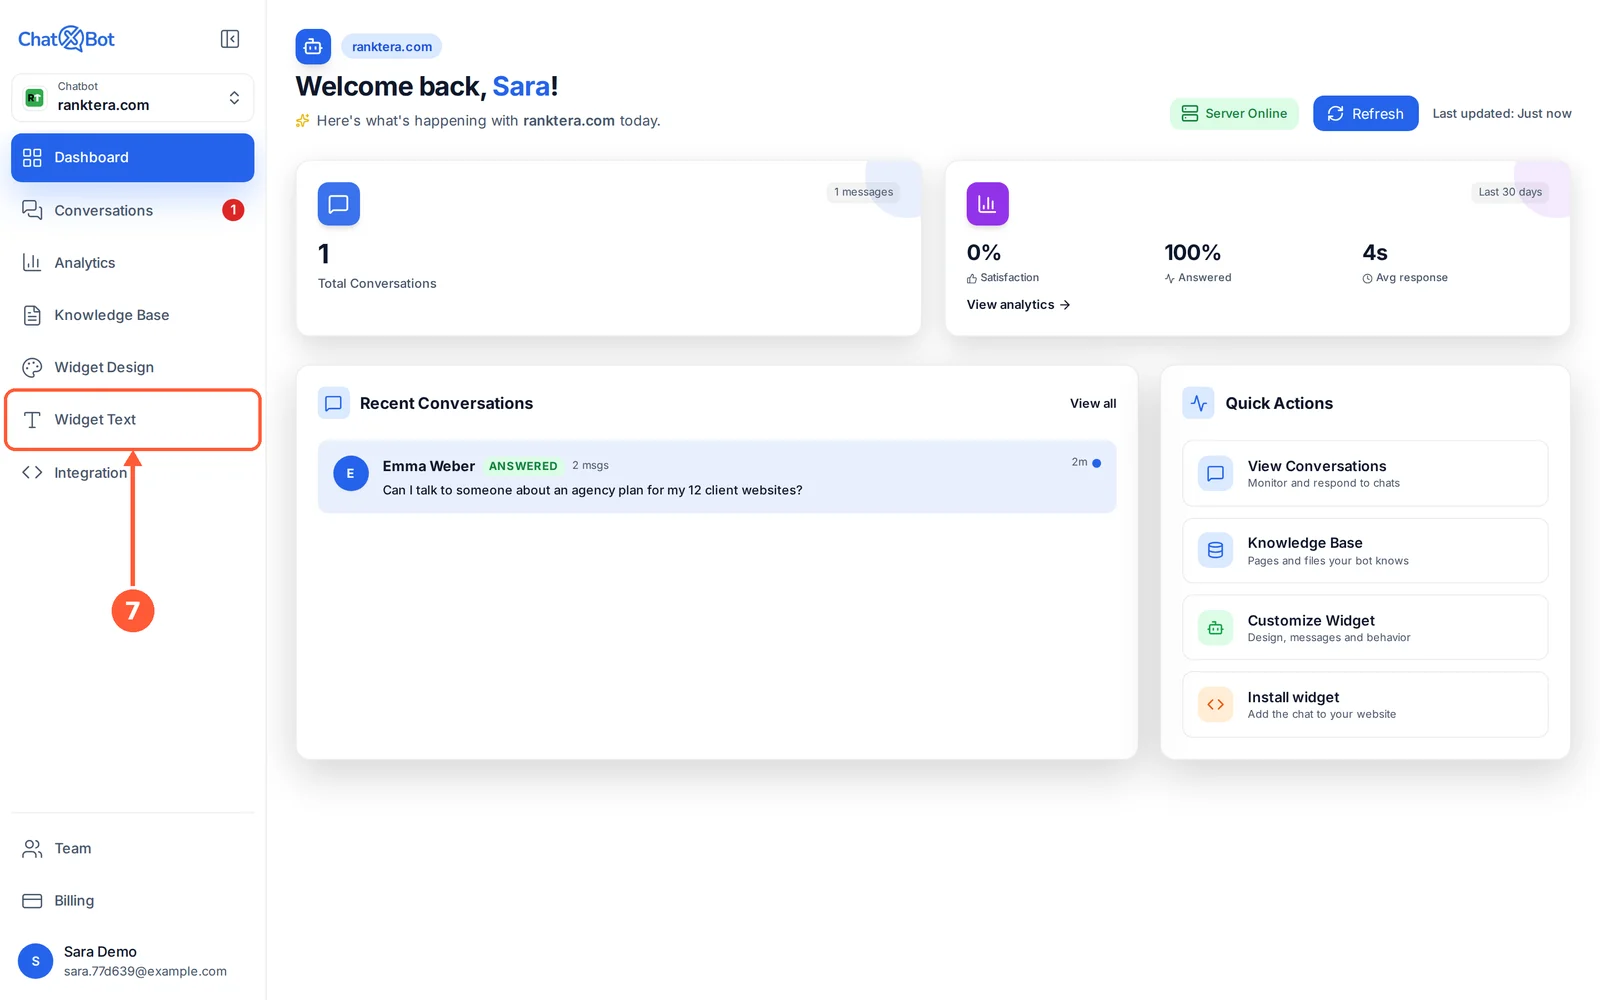
1Click Widget Text in the menu.1 / 18
💡 Good to Know
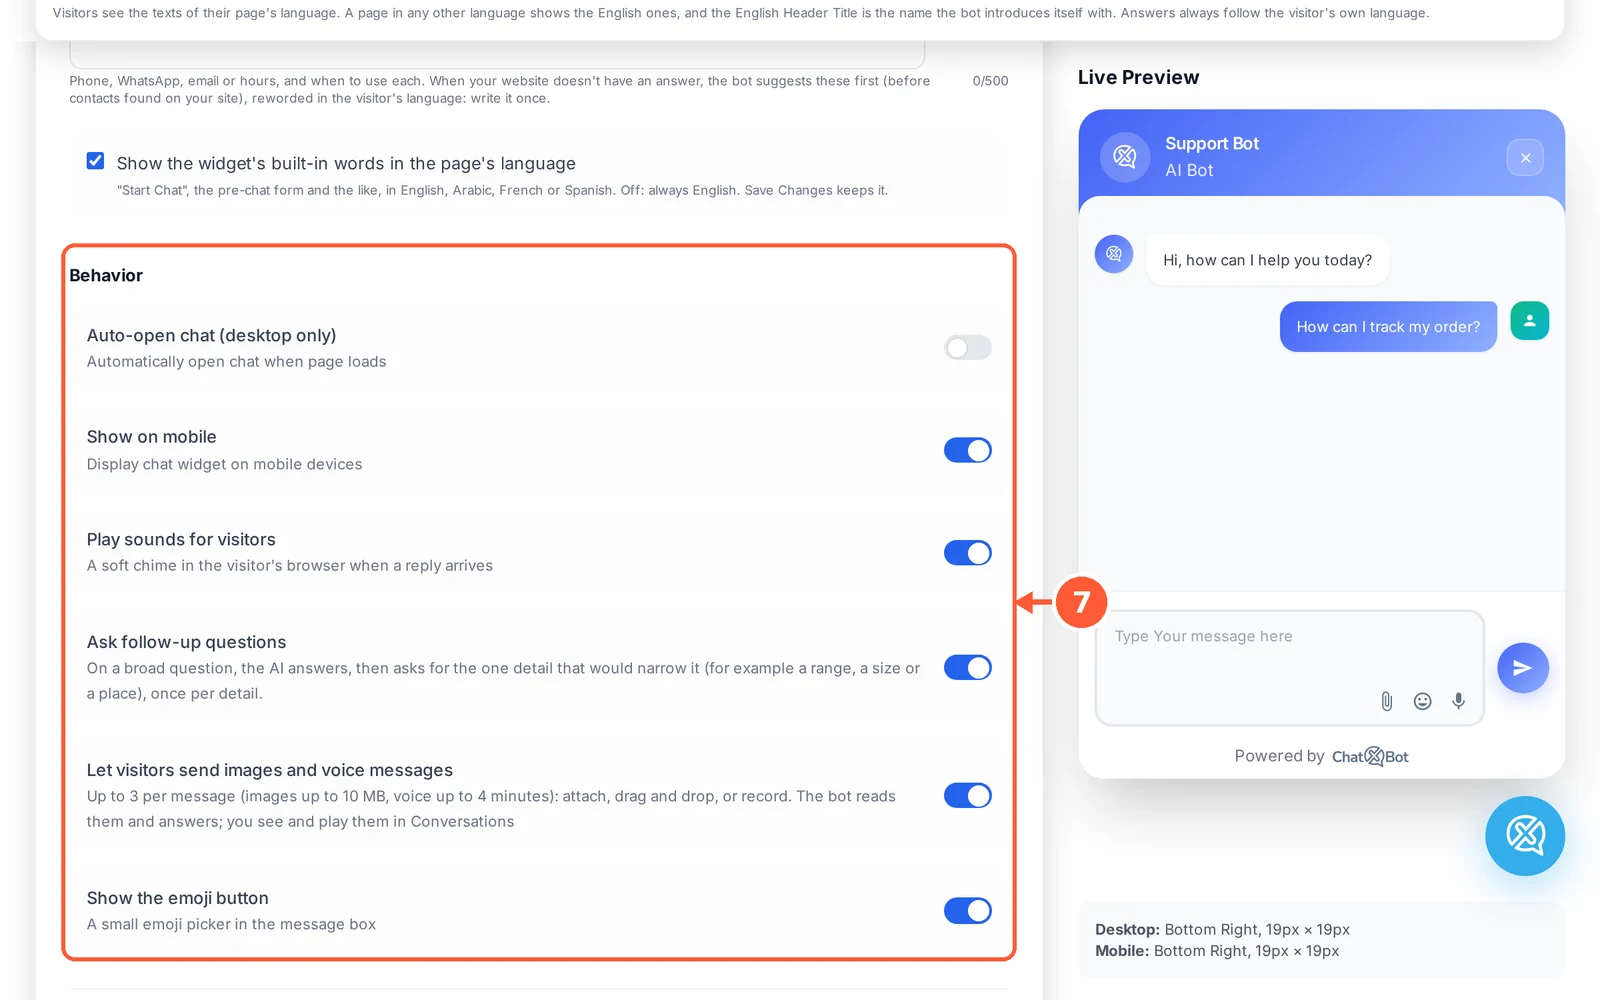
Visitors see the texts of their page’s language; a page in any other language shows the English ones. The chatbot’s answers always follow the visitor’s own language.
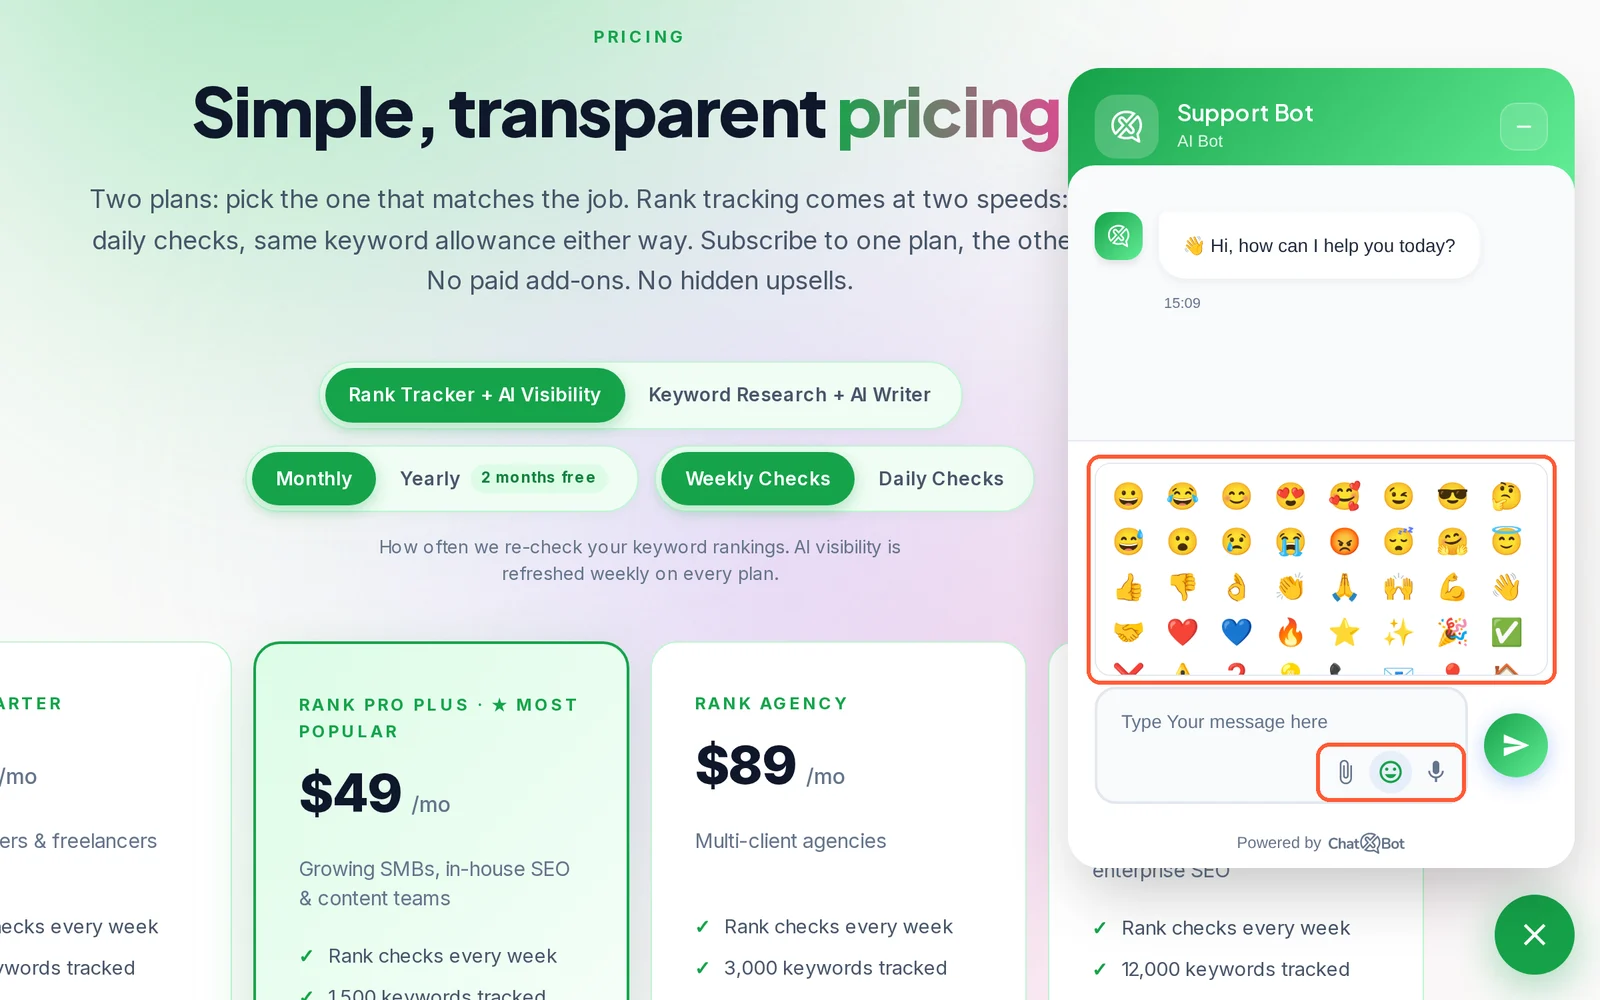
Show the widget's built-in words in the page's language shows words like “Start Chat” in English, Arabic, French or Spanish to match the page.
If you leave this page with unsaved edits, ChatXBot lists them and asks: Stay, Leave without saving or Save.
Add the Chatbot to Your Website
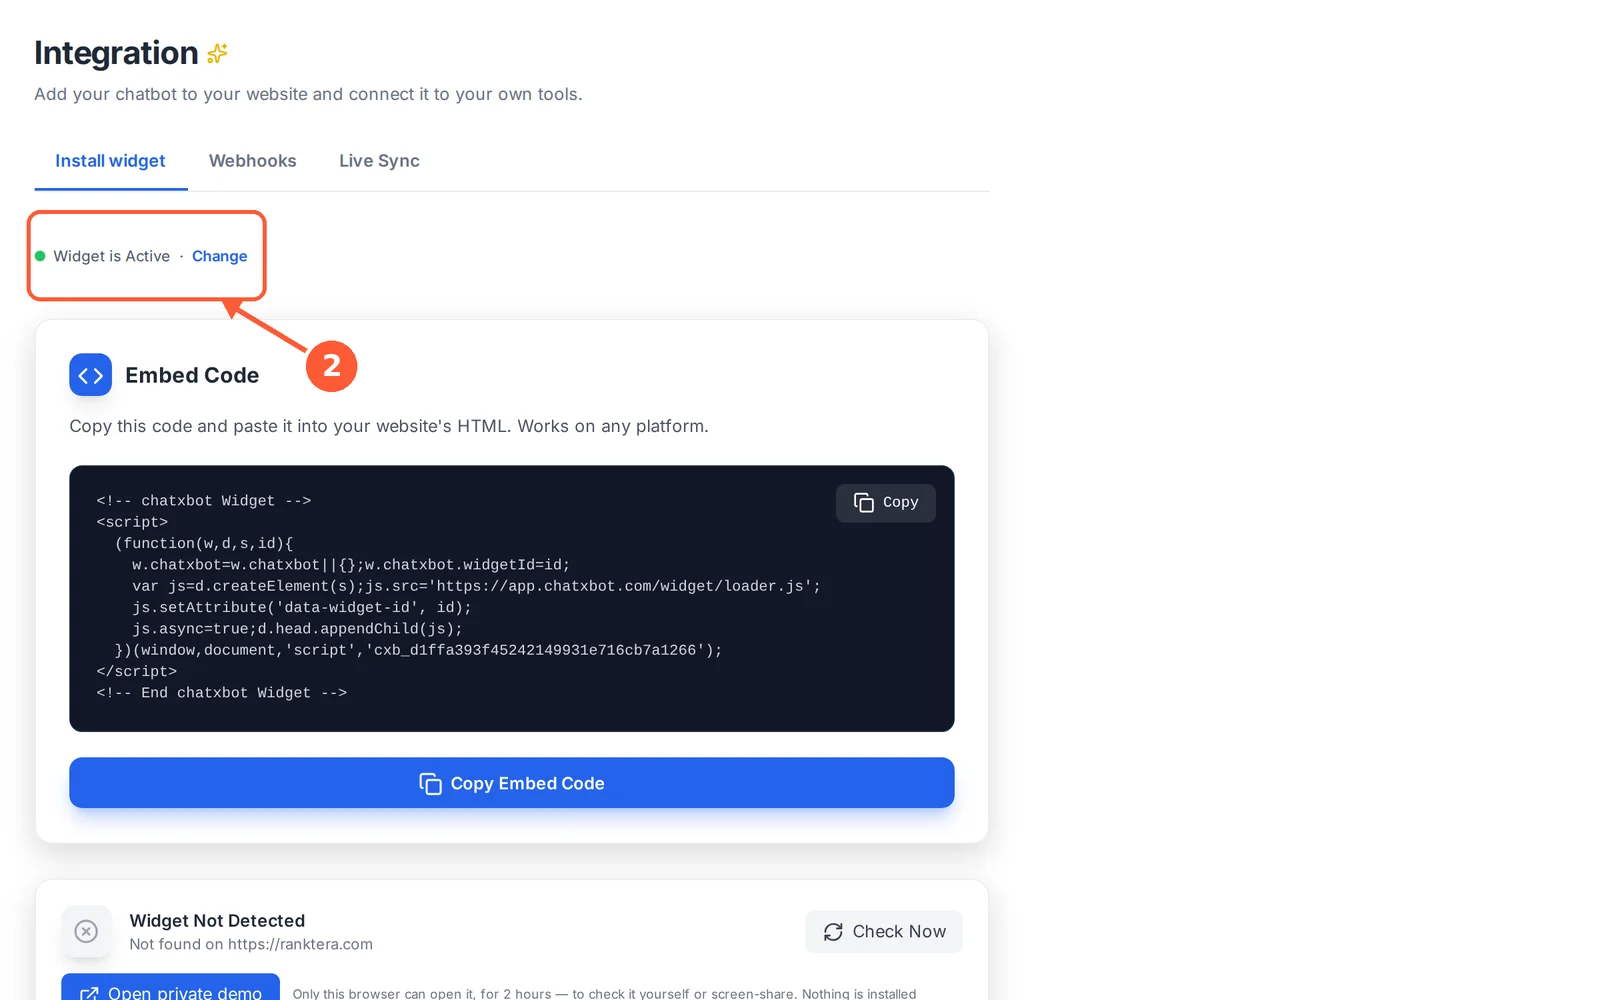
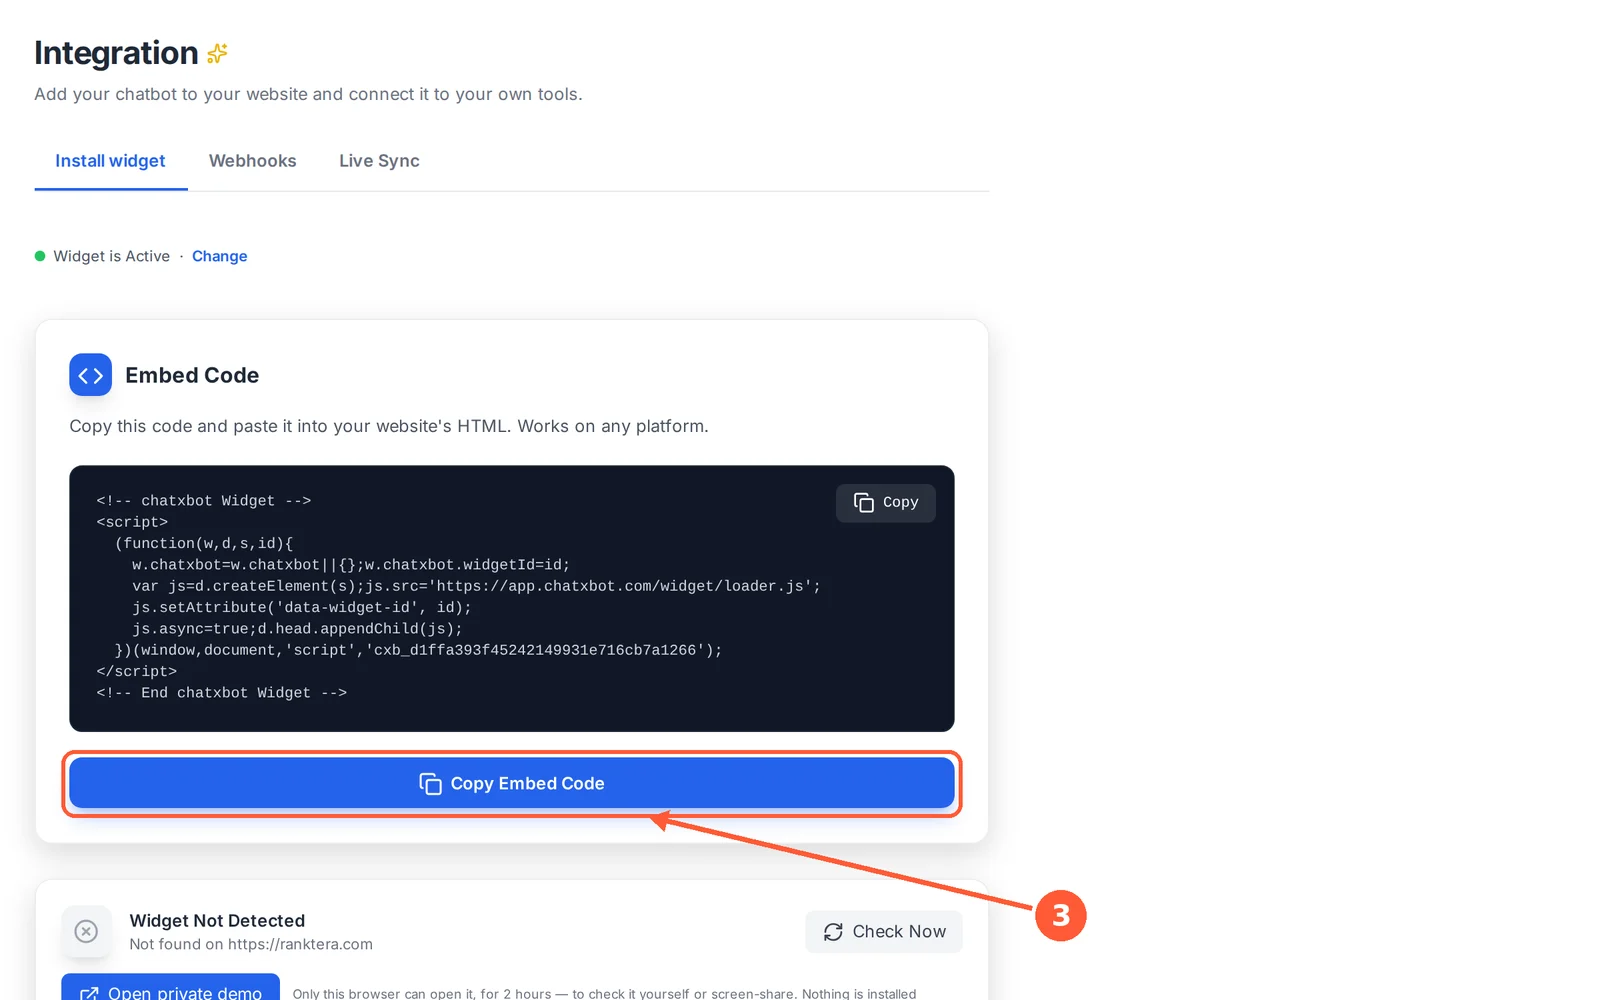
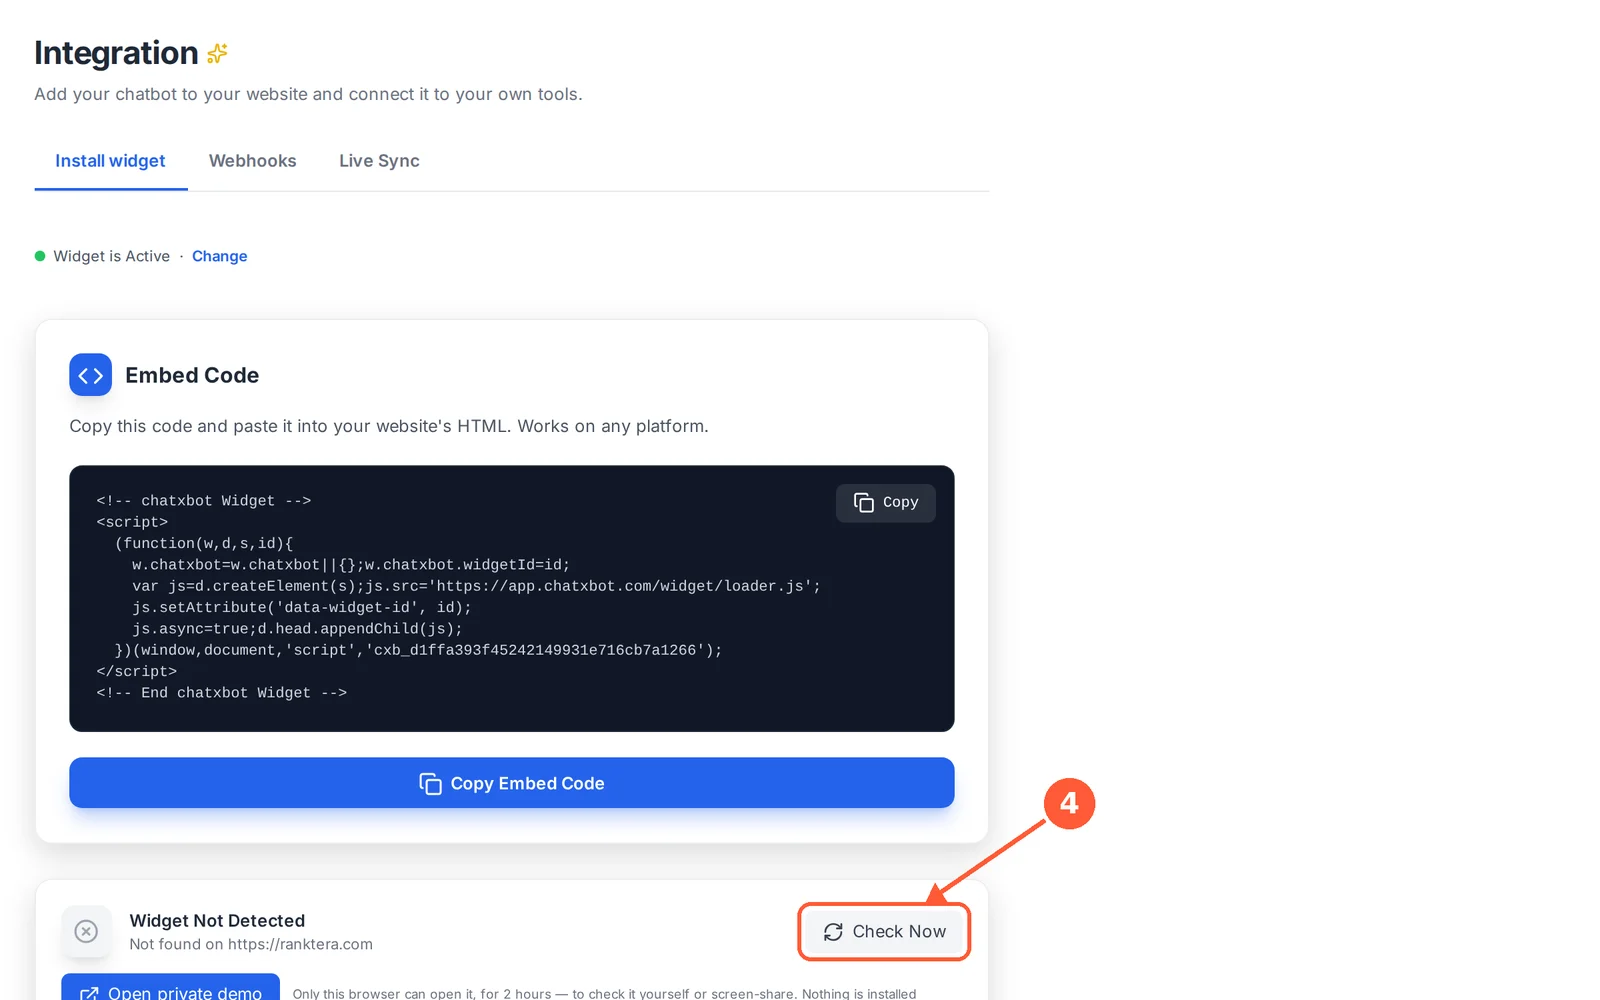
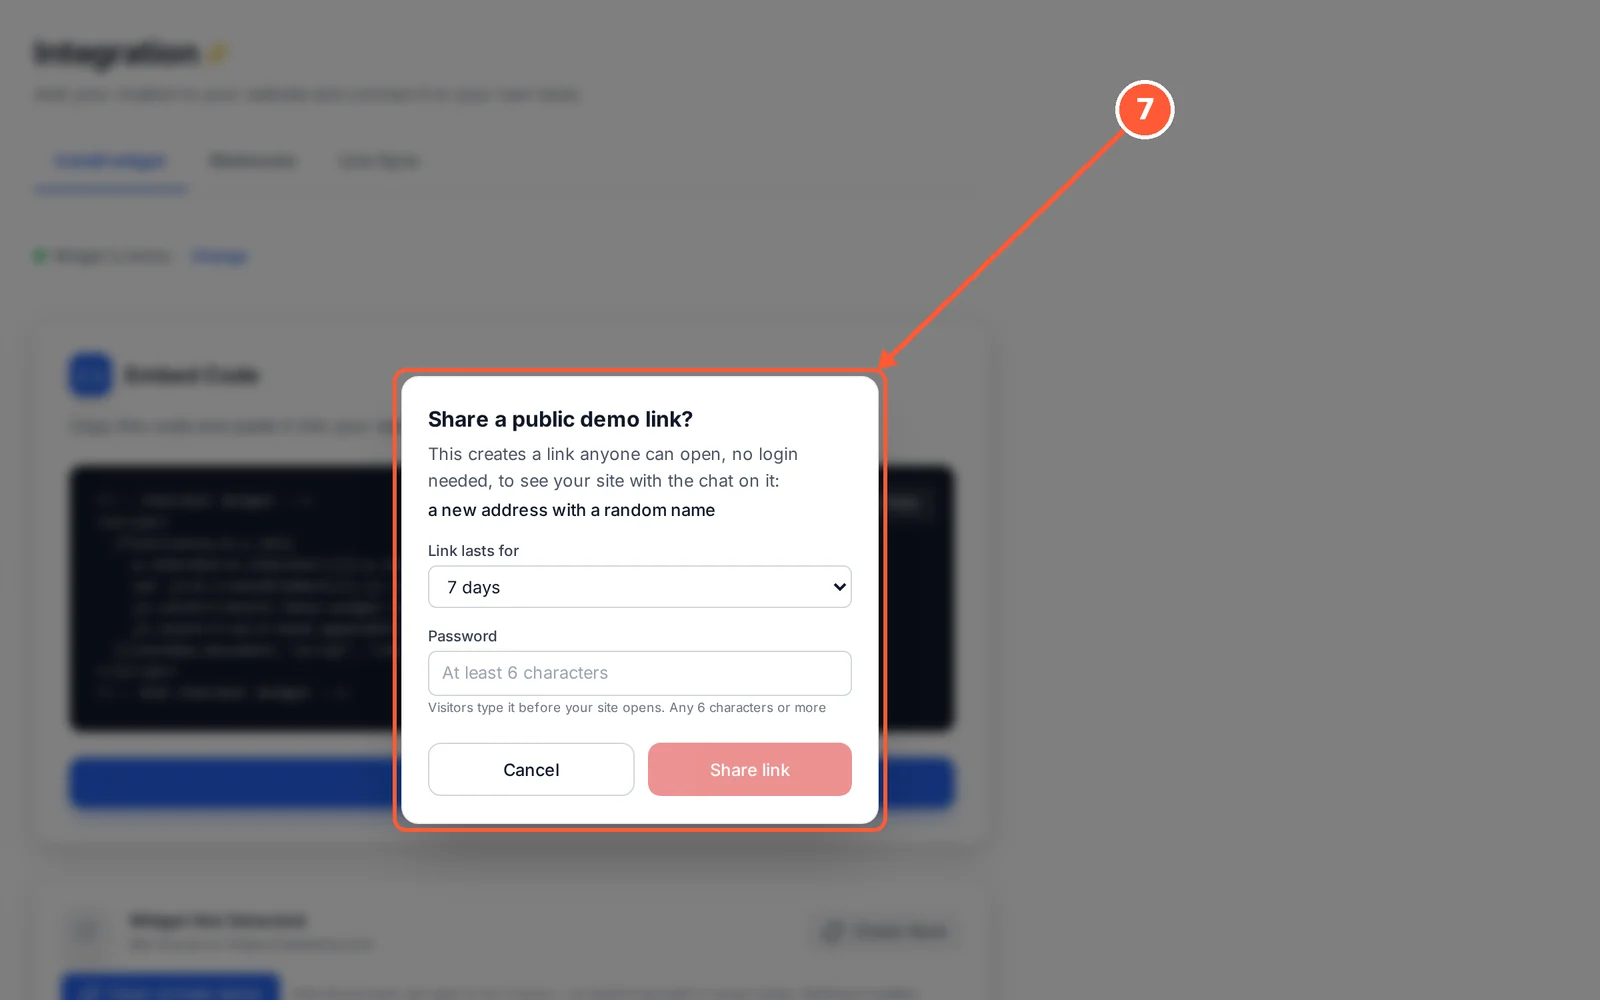
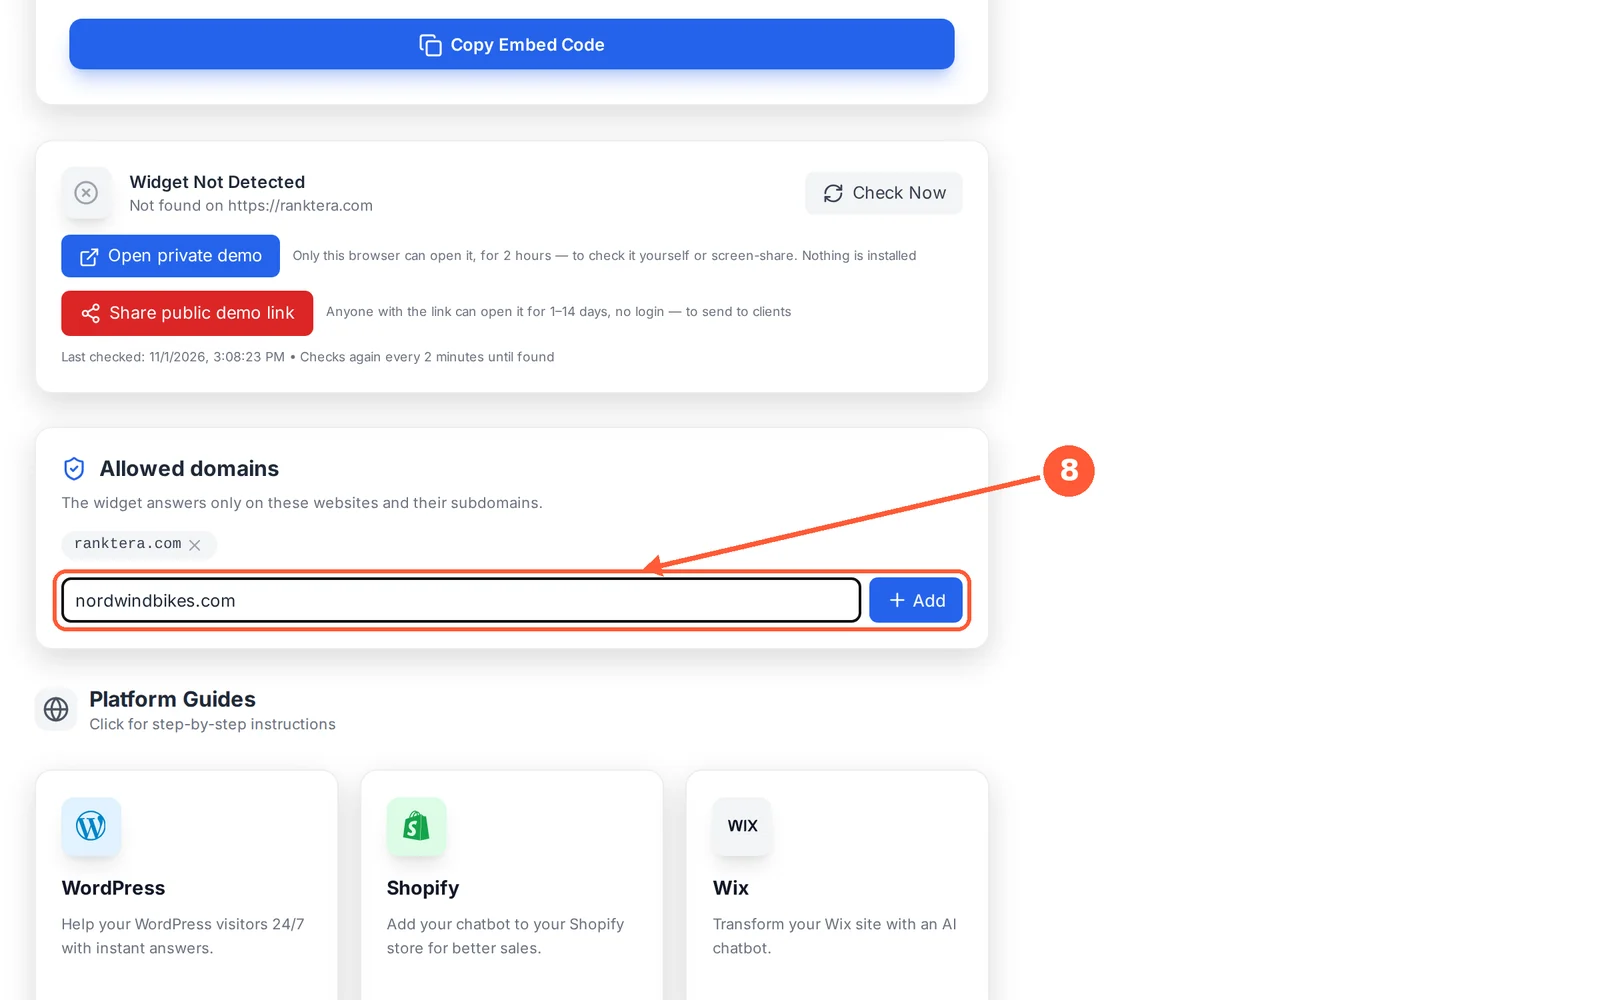
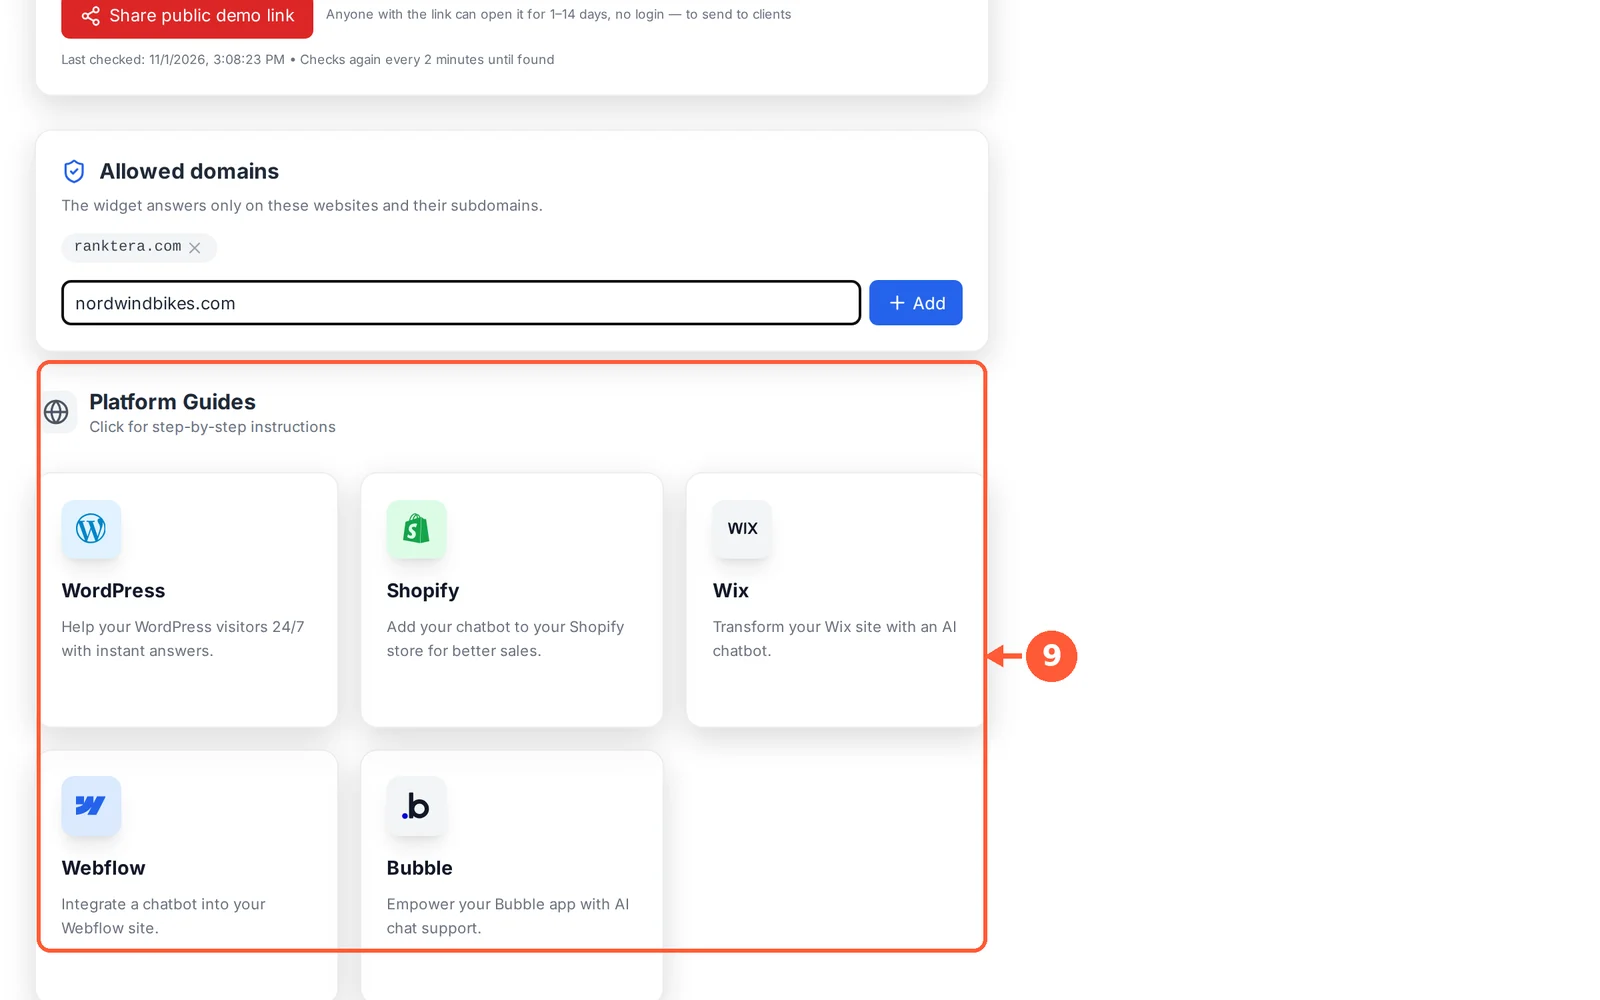
Paste one small piece of code into your website and your chatbot goes live.
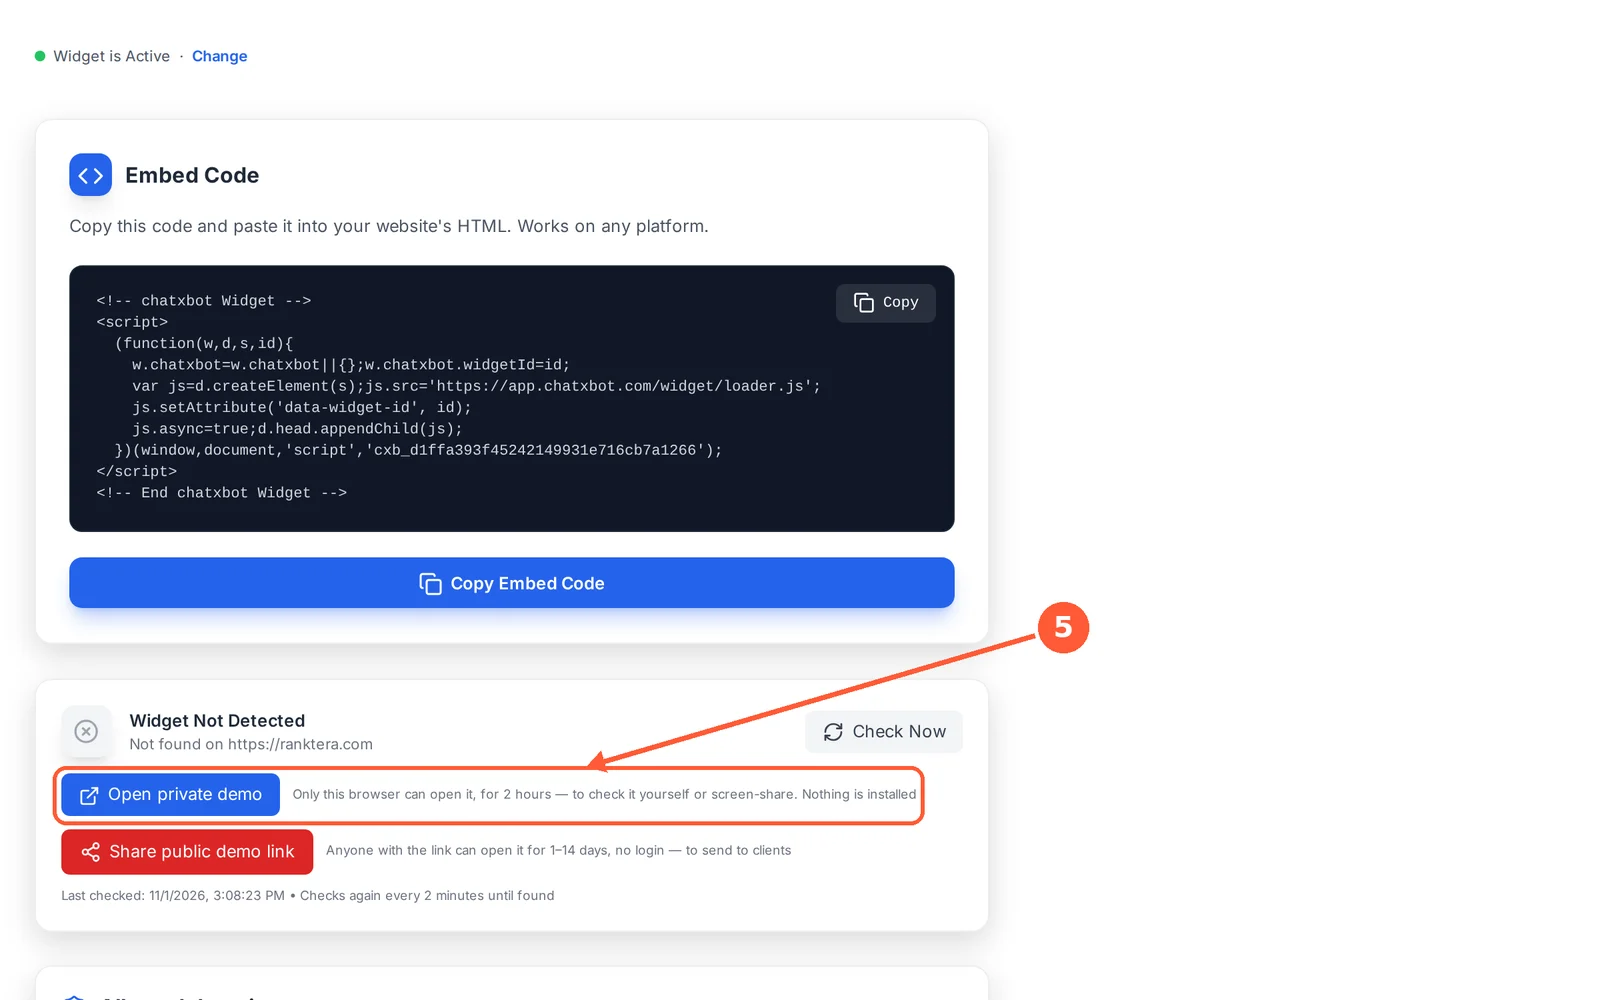
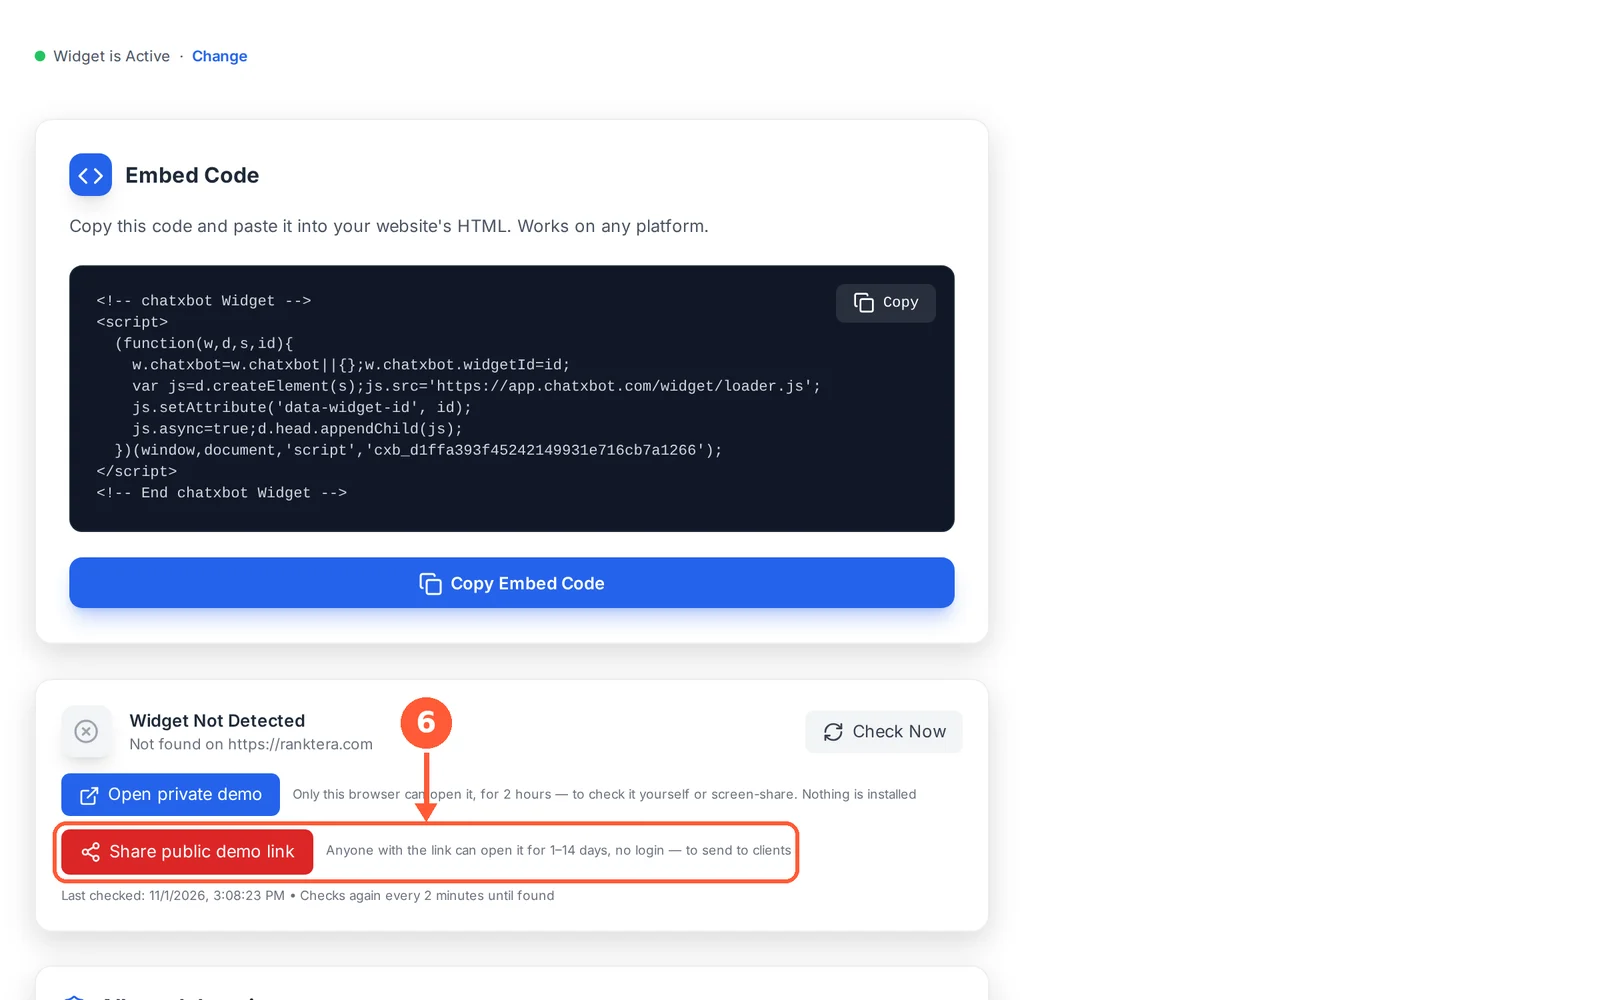
⏱ About 5 minutes • 📍 Integration › Install widget
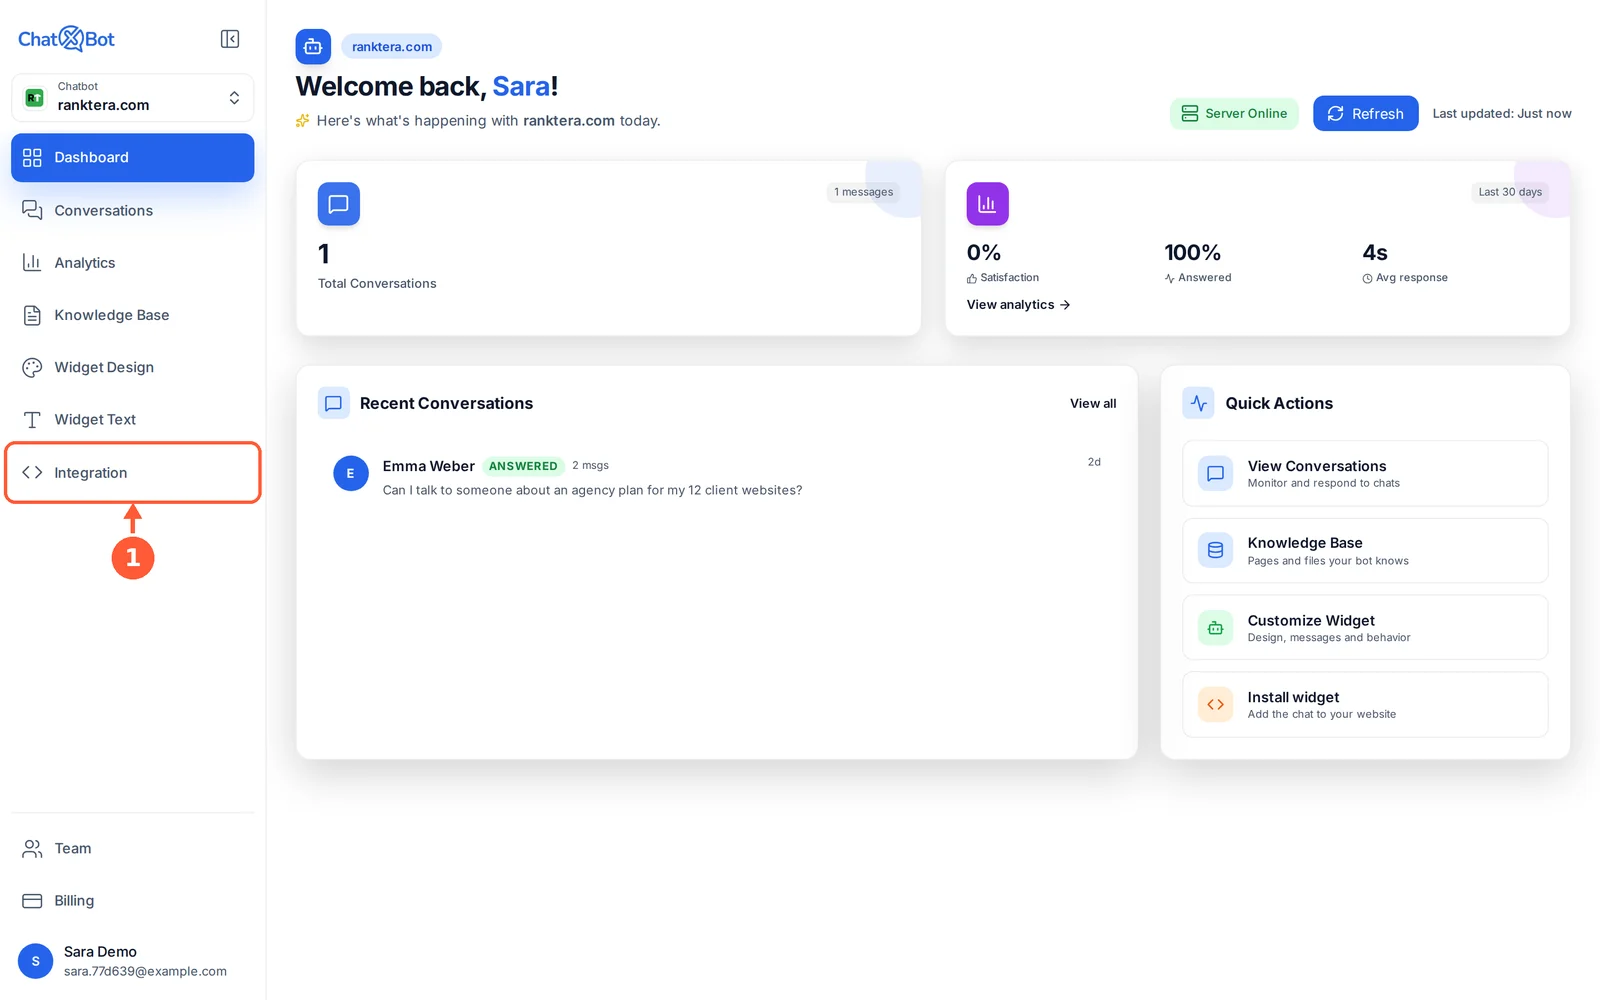
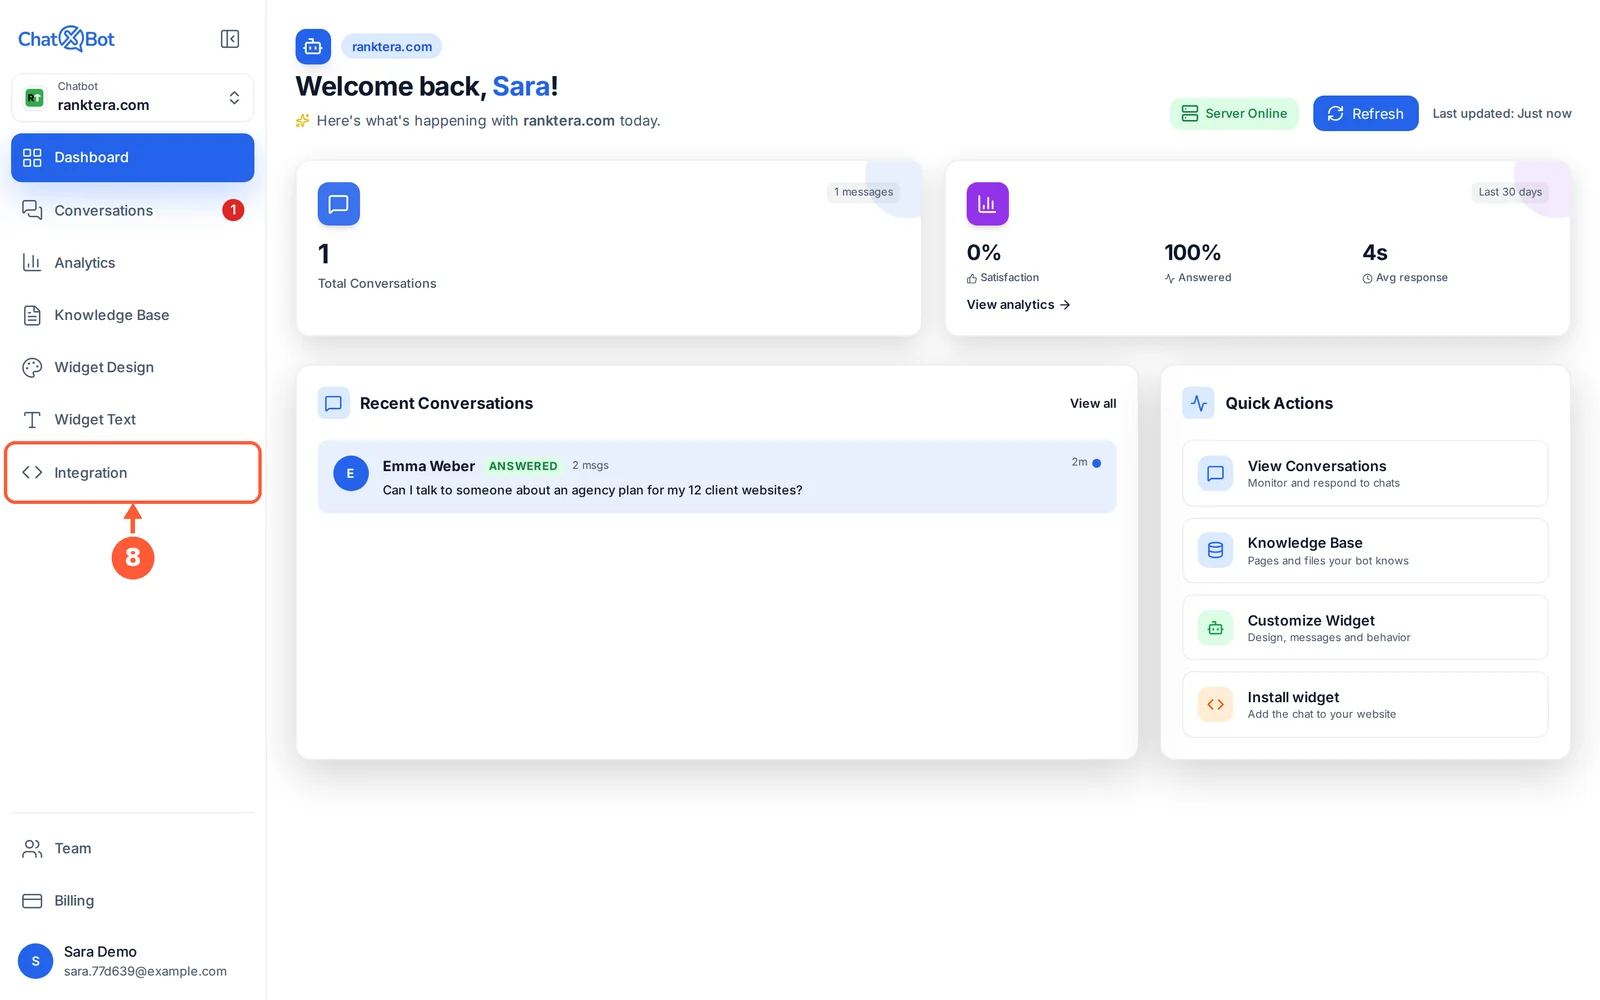
1Click Integration in the menu.1 / 13
💡 Good to Know
Your chatbot only works on the websites listed in Allowed domains, so nobody can copy it to another site.
A demo link shows your site through ChatXBot, so nothing changes on your real website. Once it ends, visitors see “This demo link has ended”.
Send the password with the link: visitors type it once before your site opens, and the top of the page says it is for testing your chatbot. Click Show Password to see it again, or Create Password to add one to an older link.
Next: watch the chats come in on your Dashboard and in Conversations.
Your Dashboard at a Glance
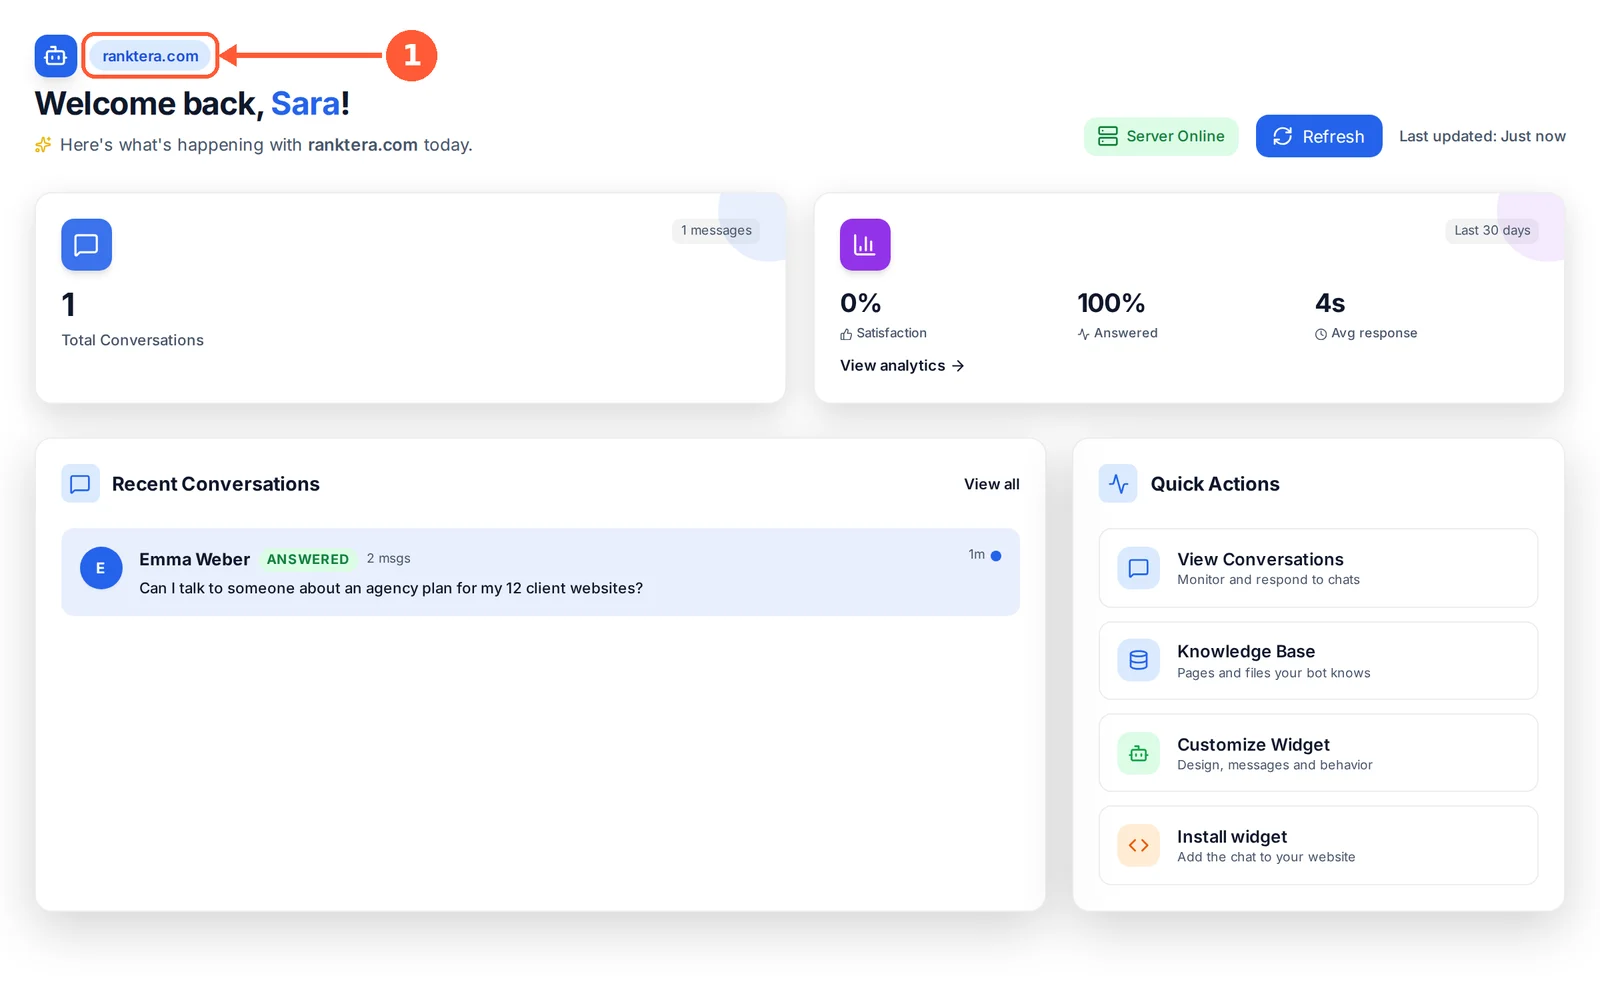
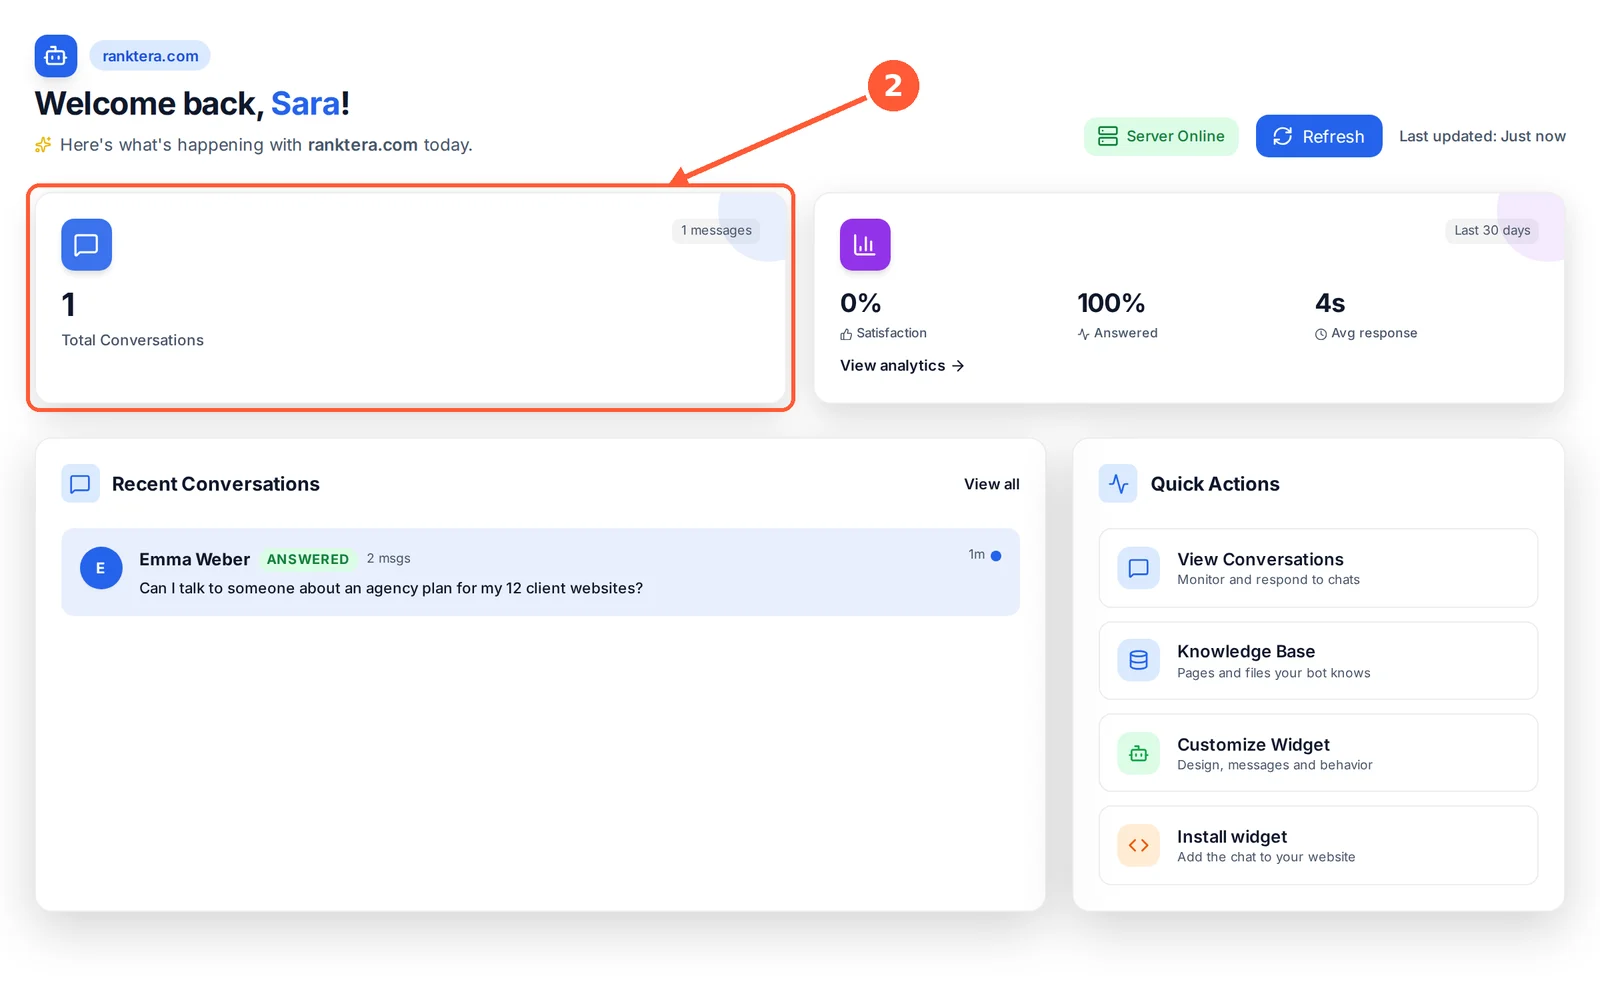
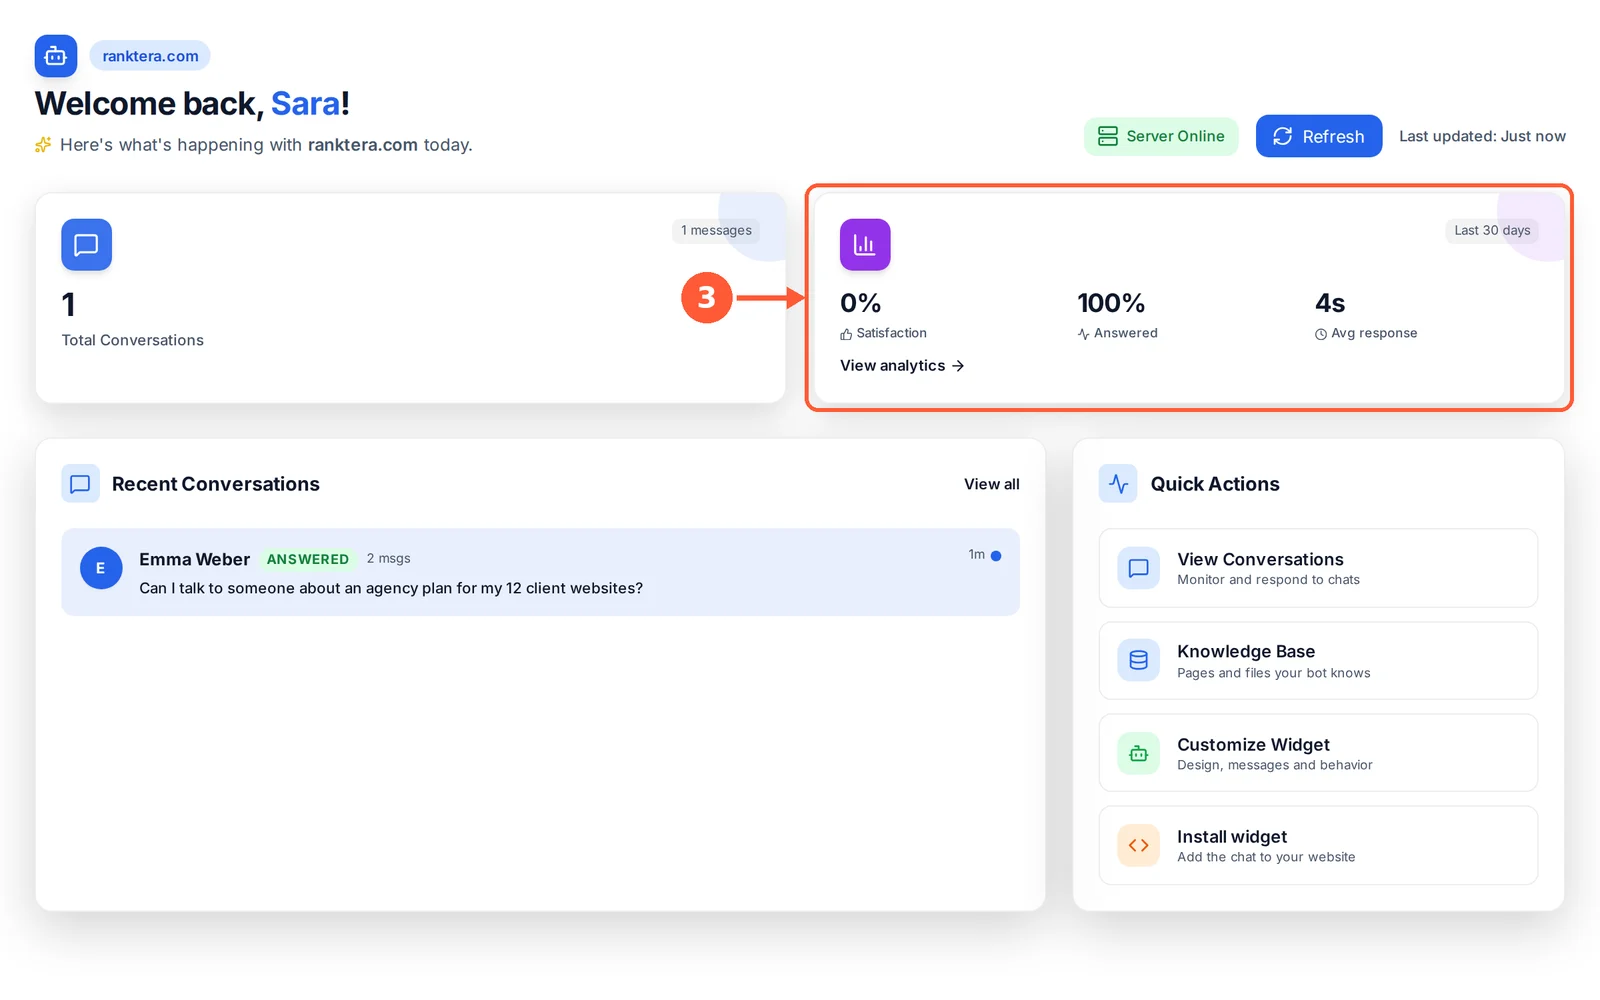
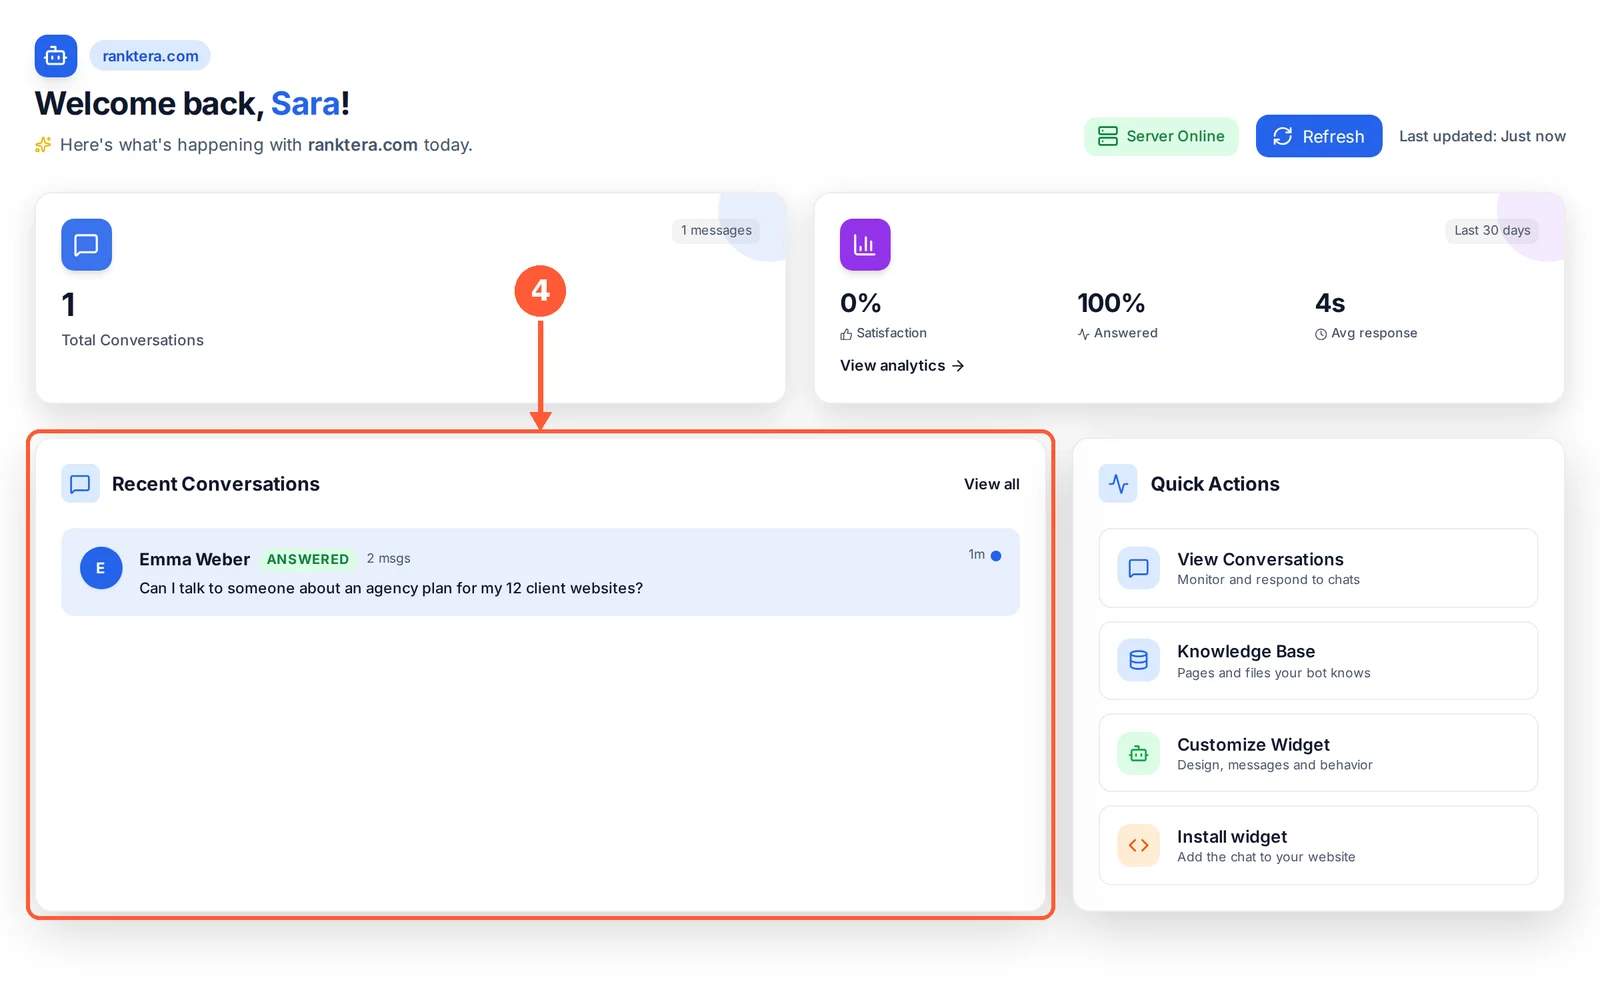
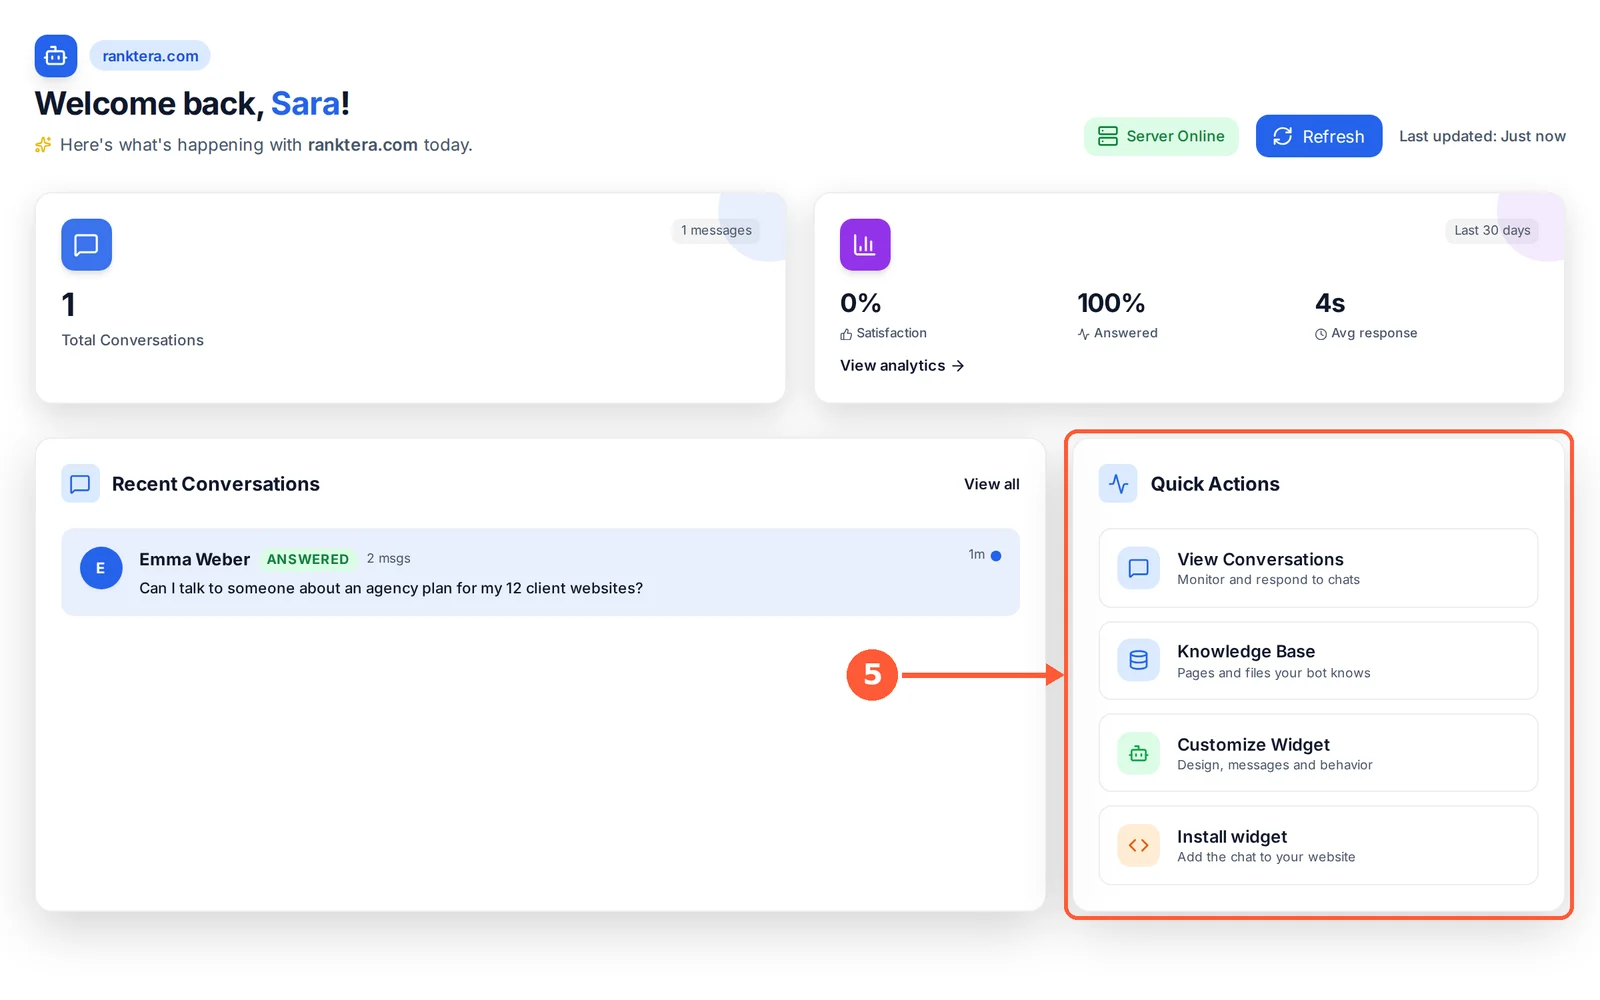
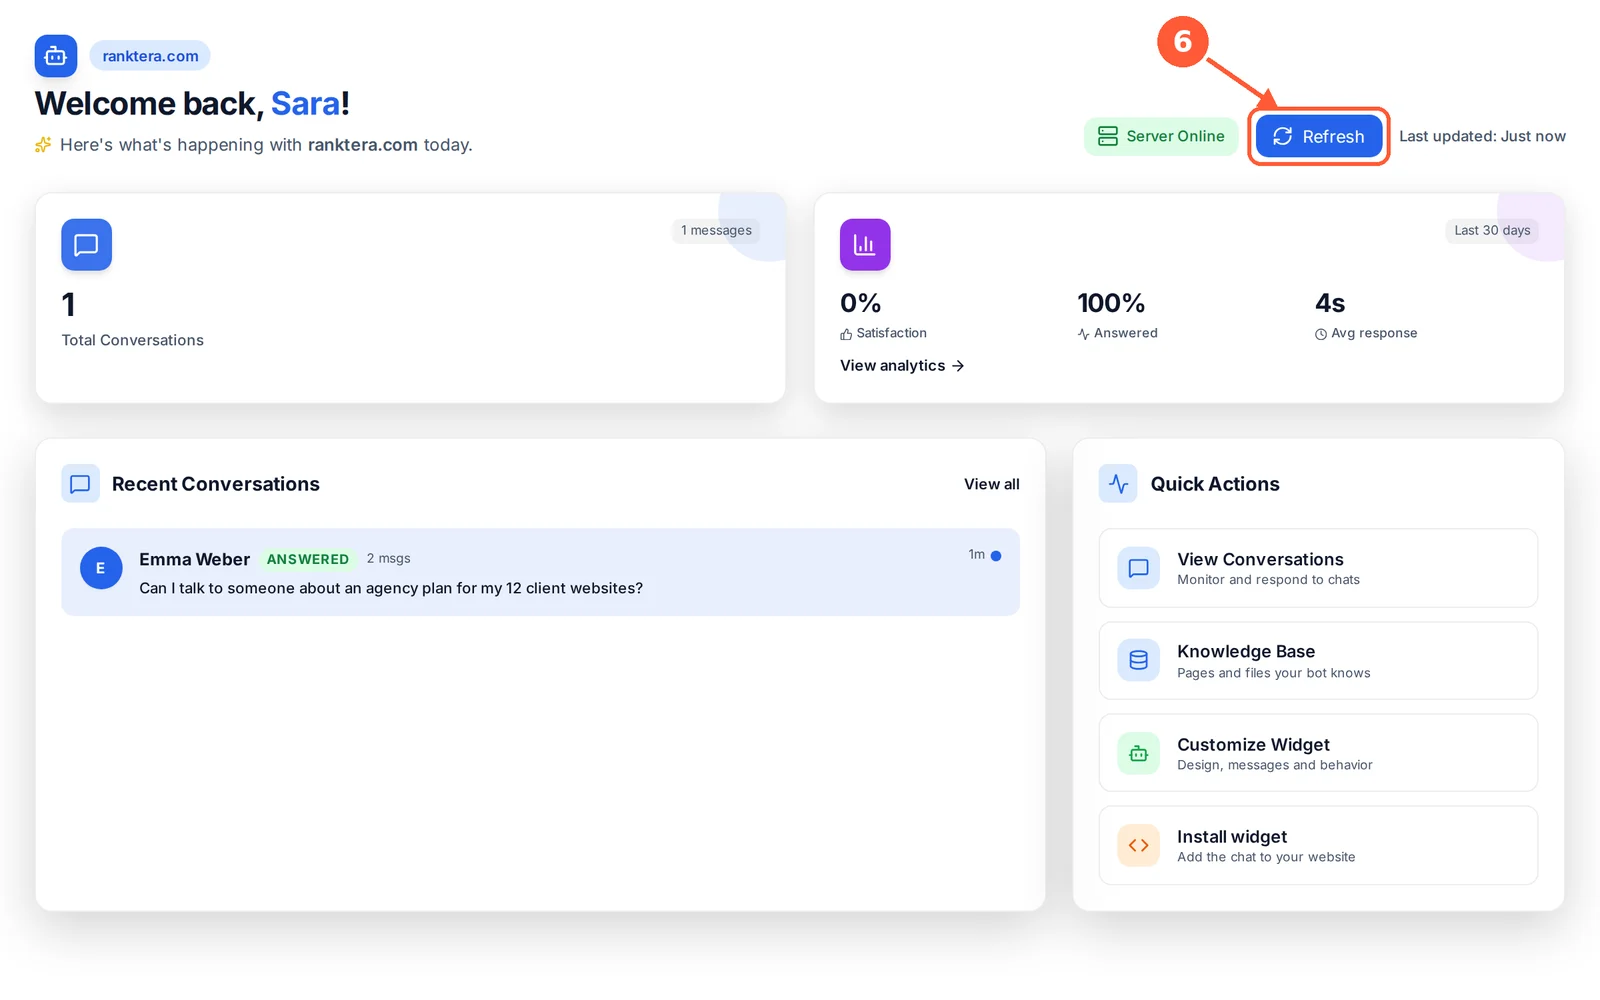
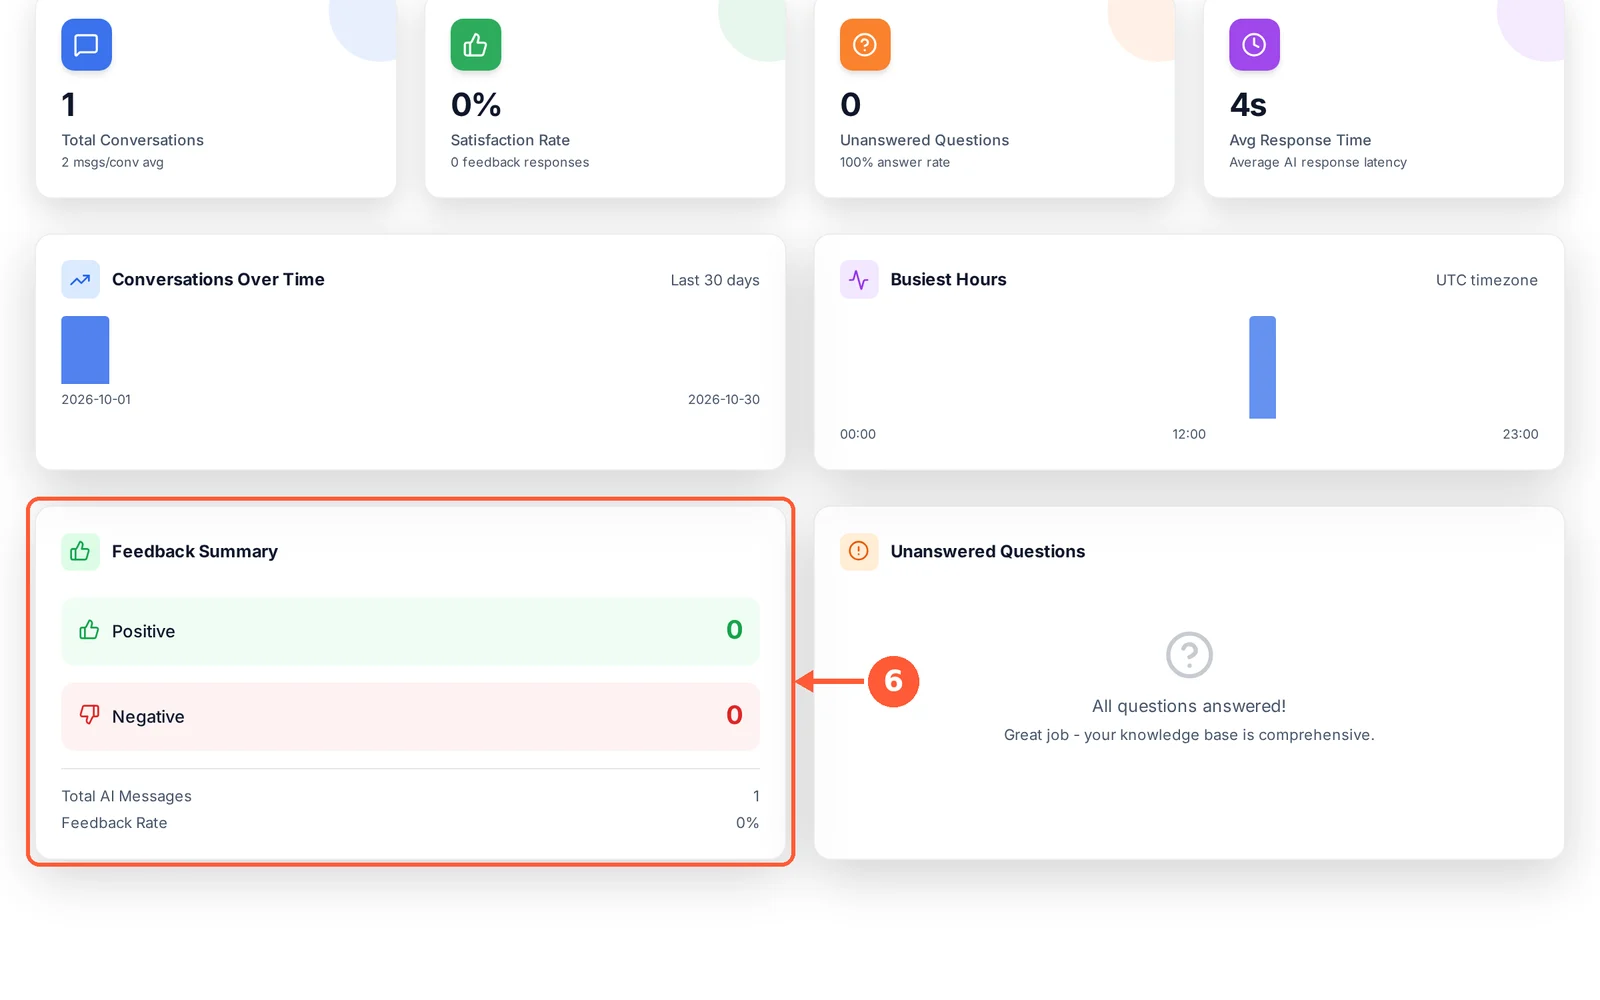
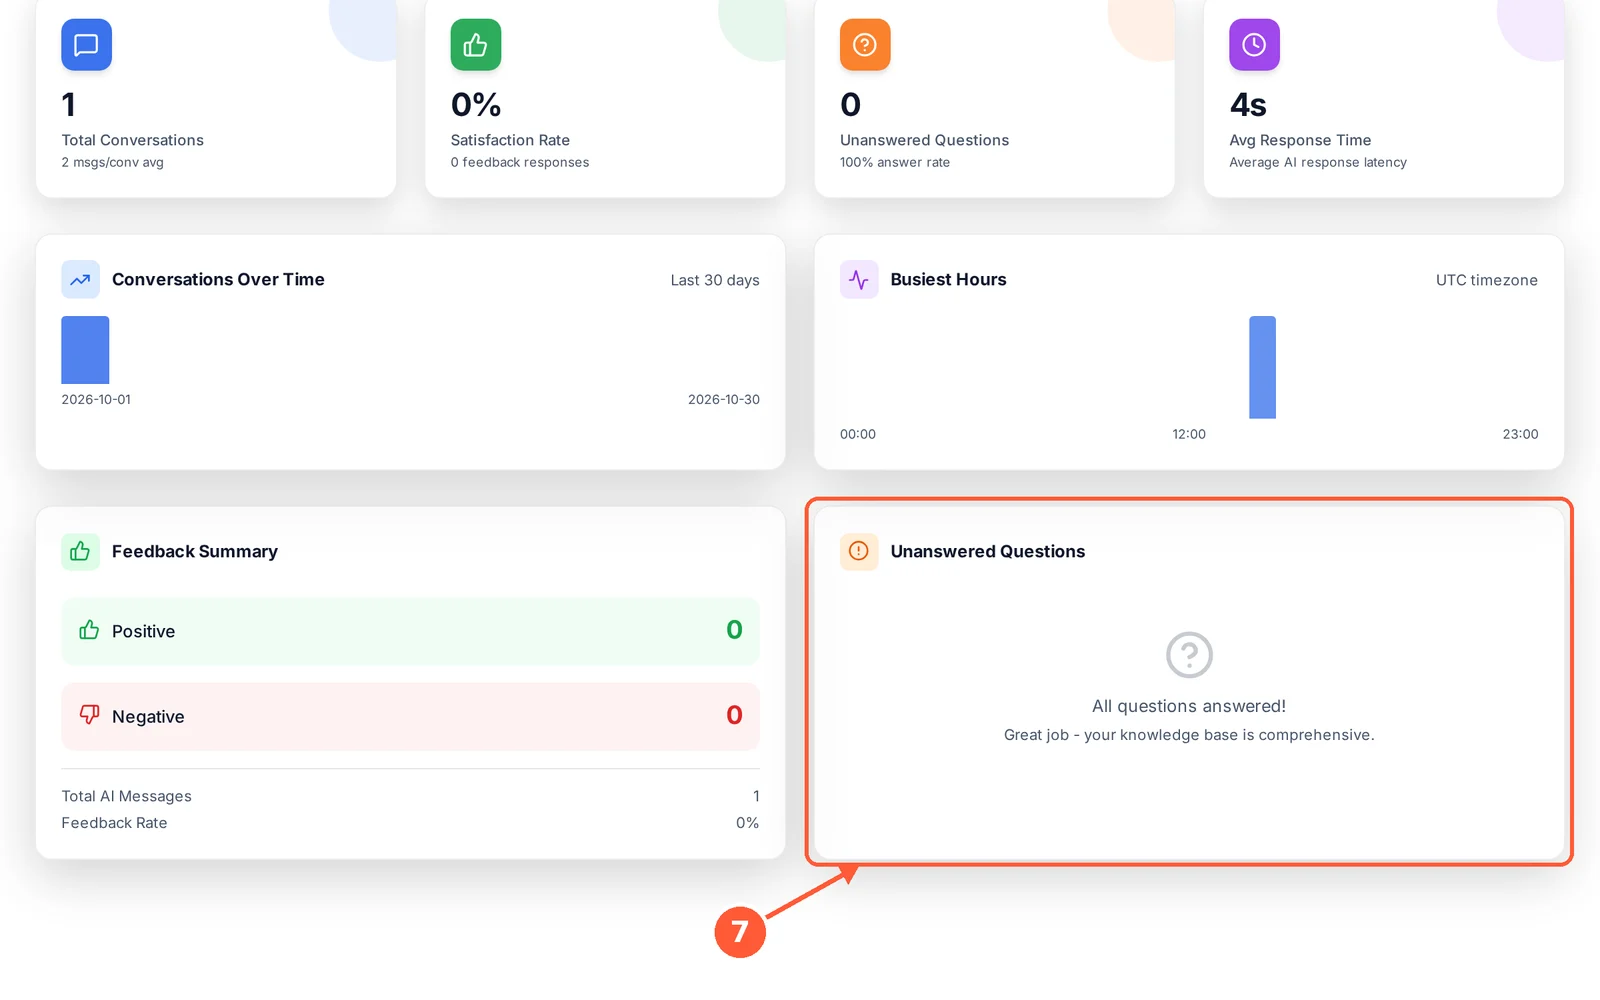
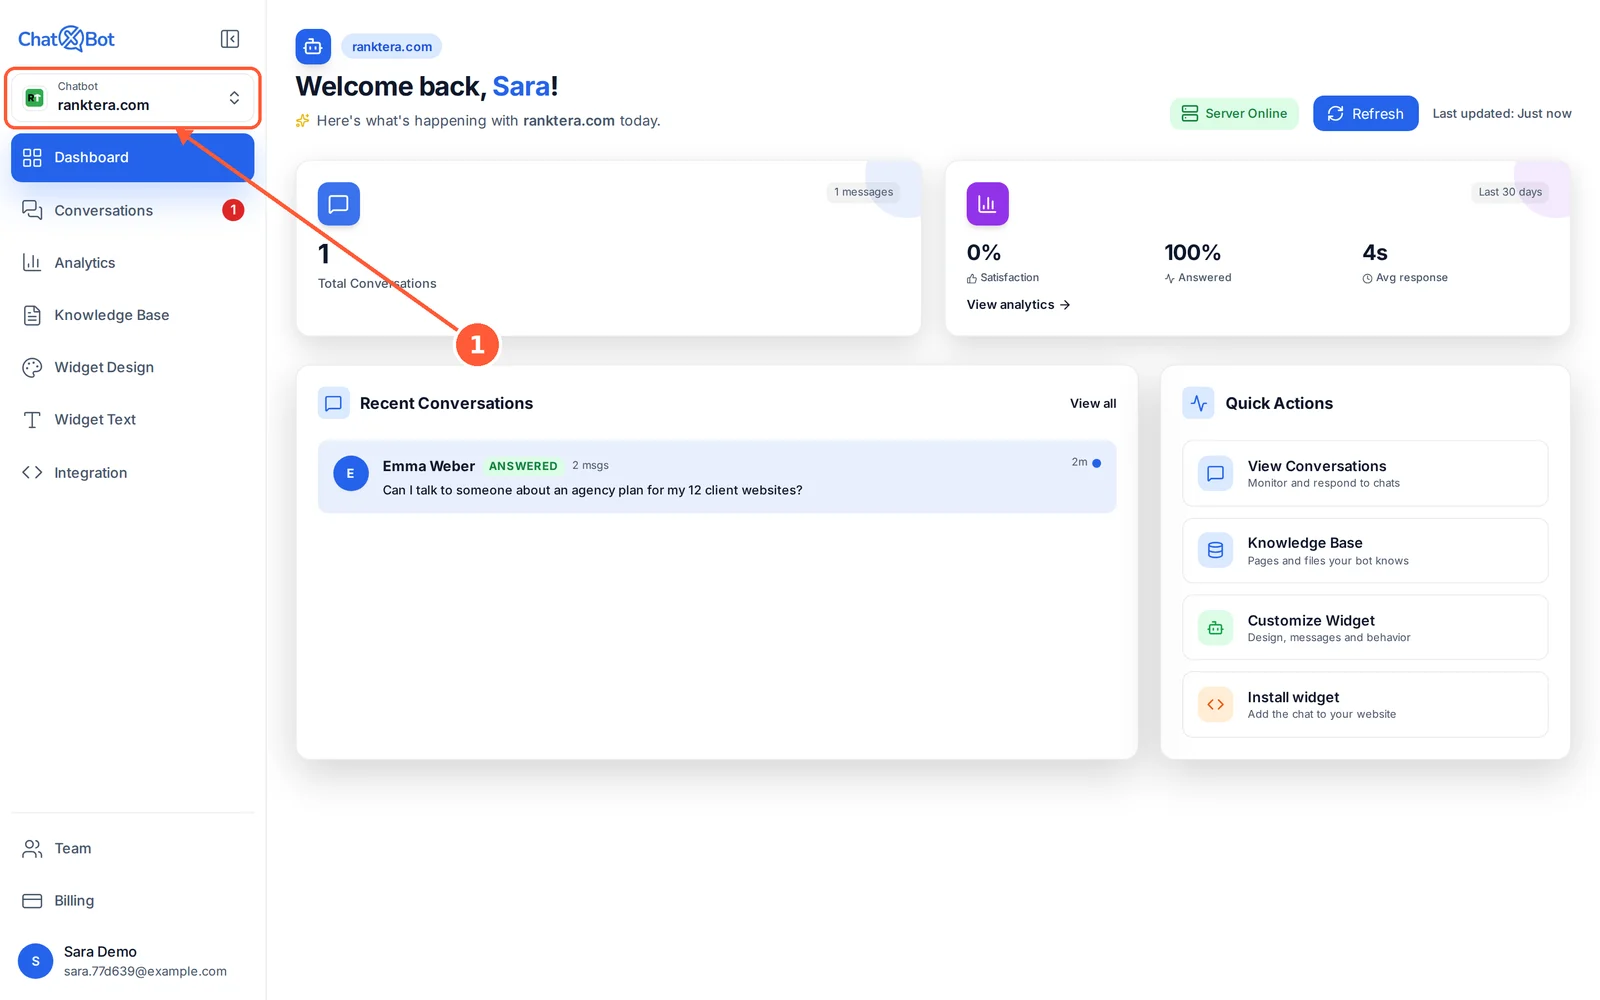
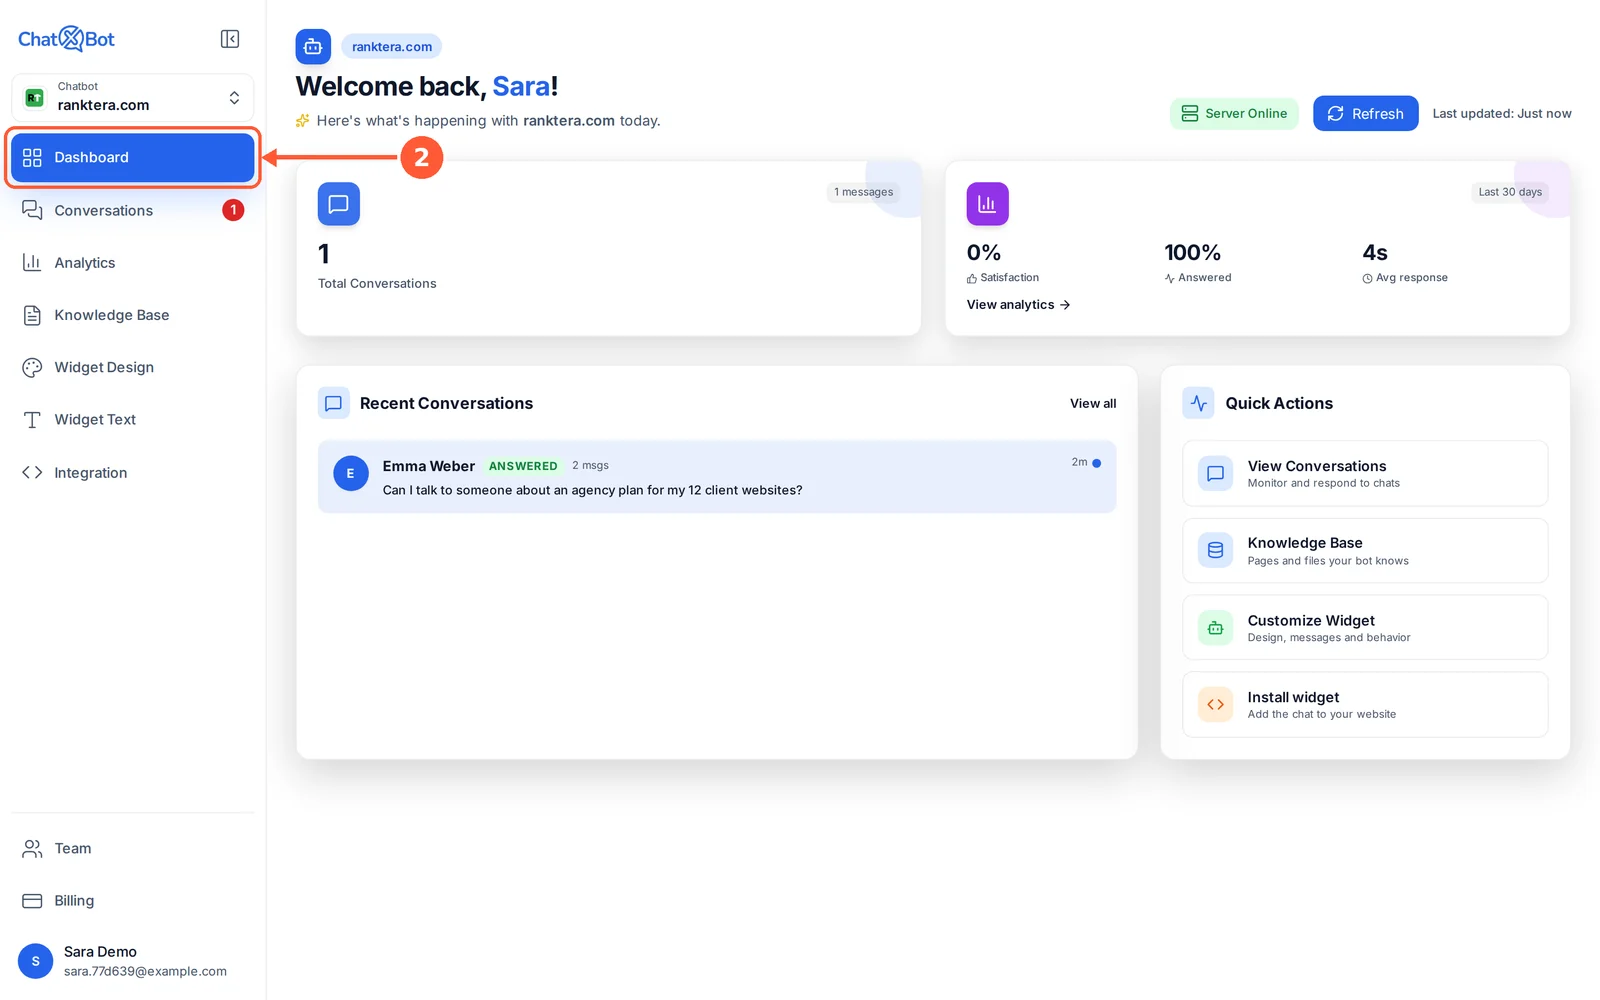
Your Dashboard is the first page you see after signing in: a quick summary of the chatbot you’re working on.
⏱ About 1 minute • 📍 Dashboard
1The chatbot you’re looking at.1 / 6
Read & Reply to Conversations
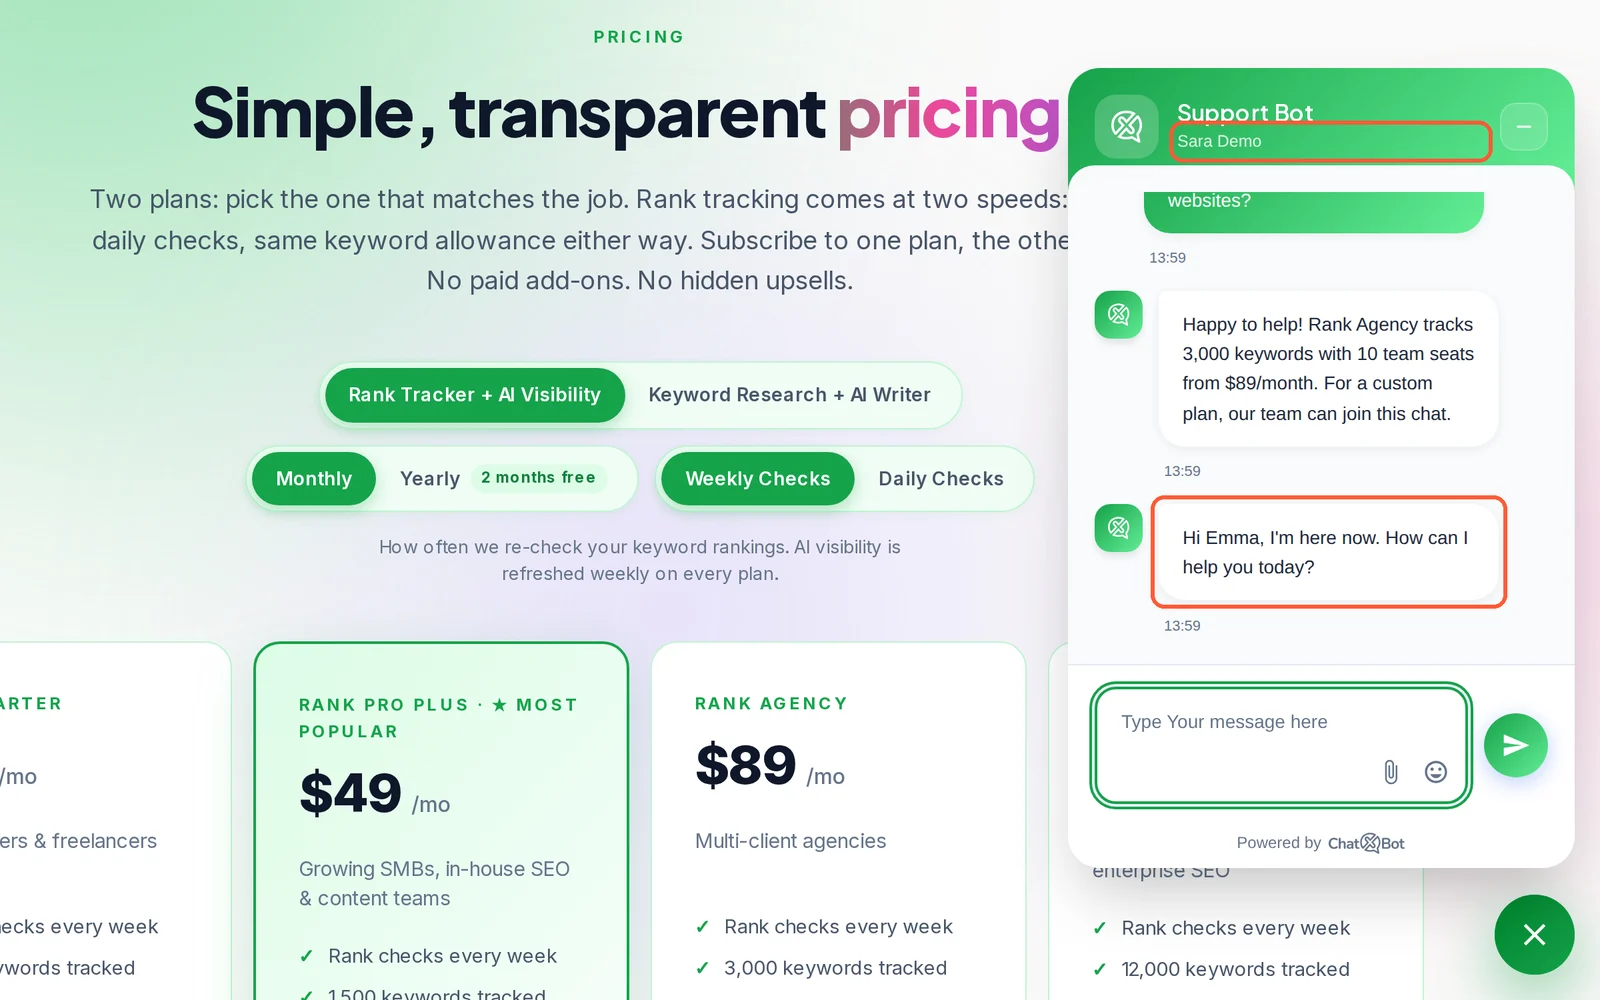
See every chat between your visitors and your chatbot, and step in yourself when needed.
⏱ About 2 minutes • 📍 Conversations
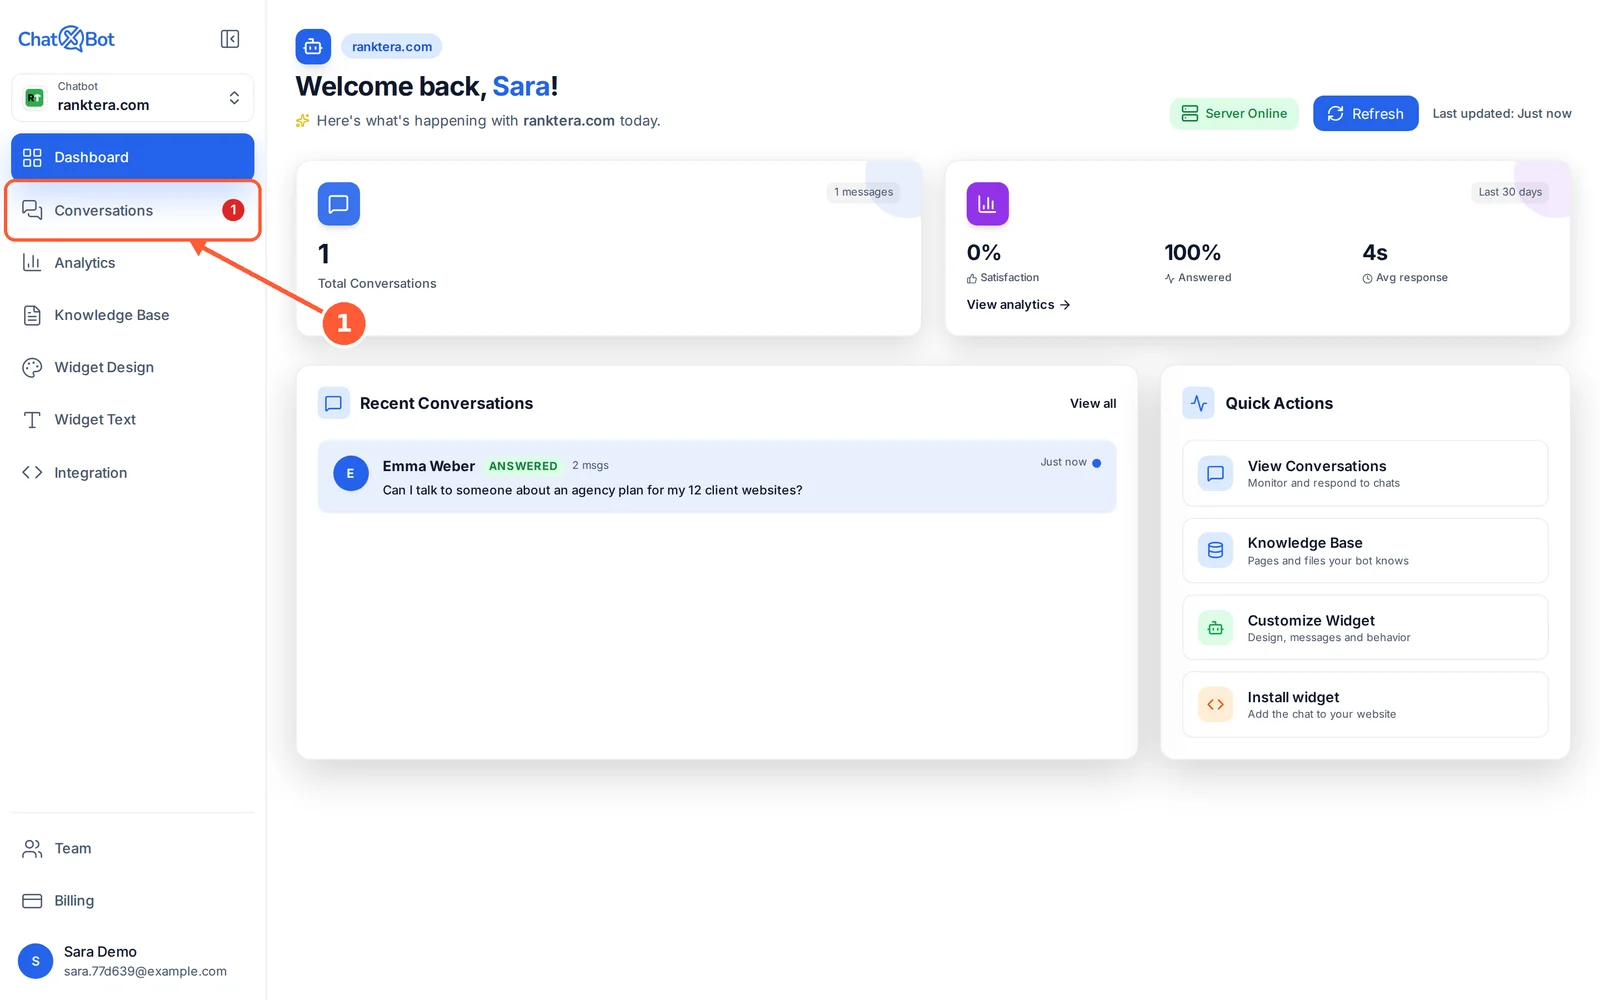
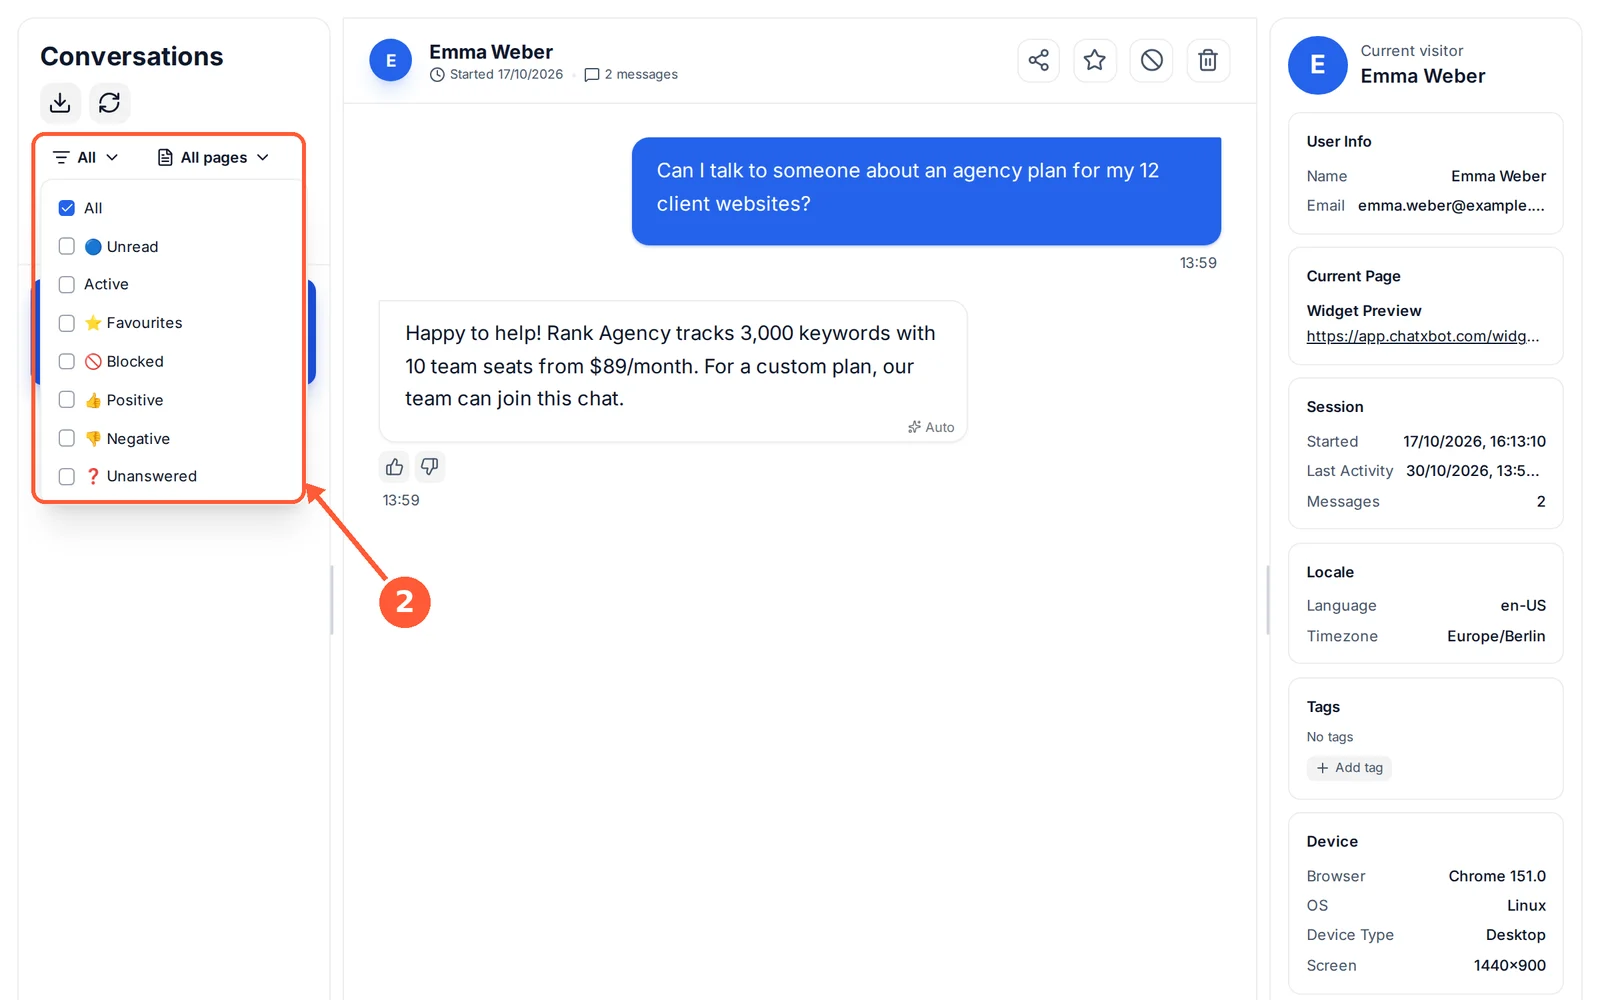
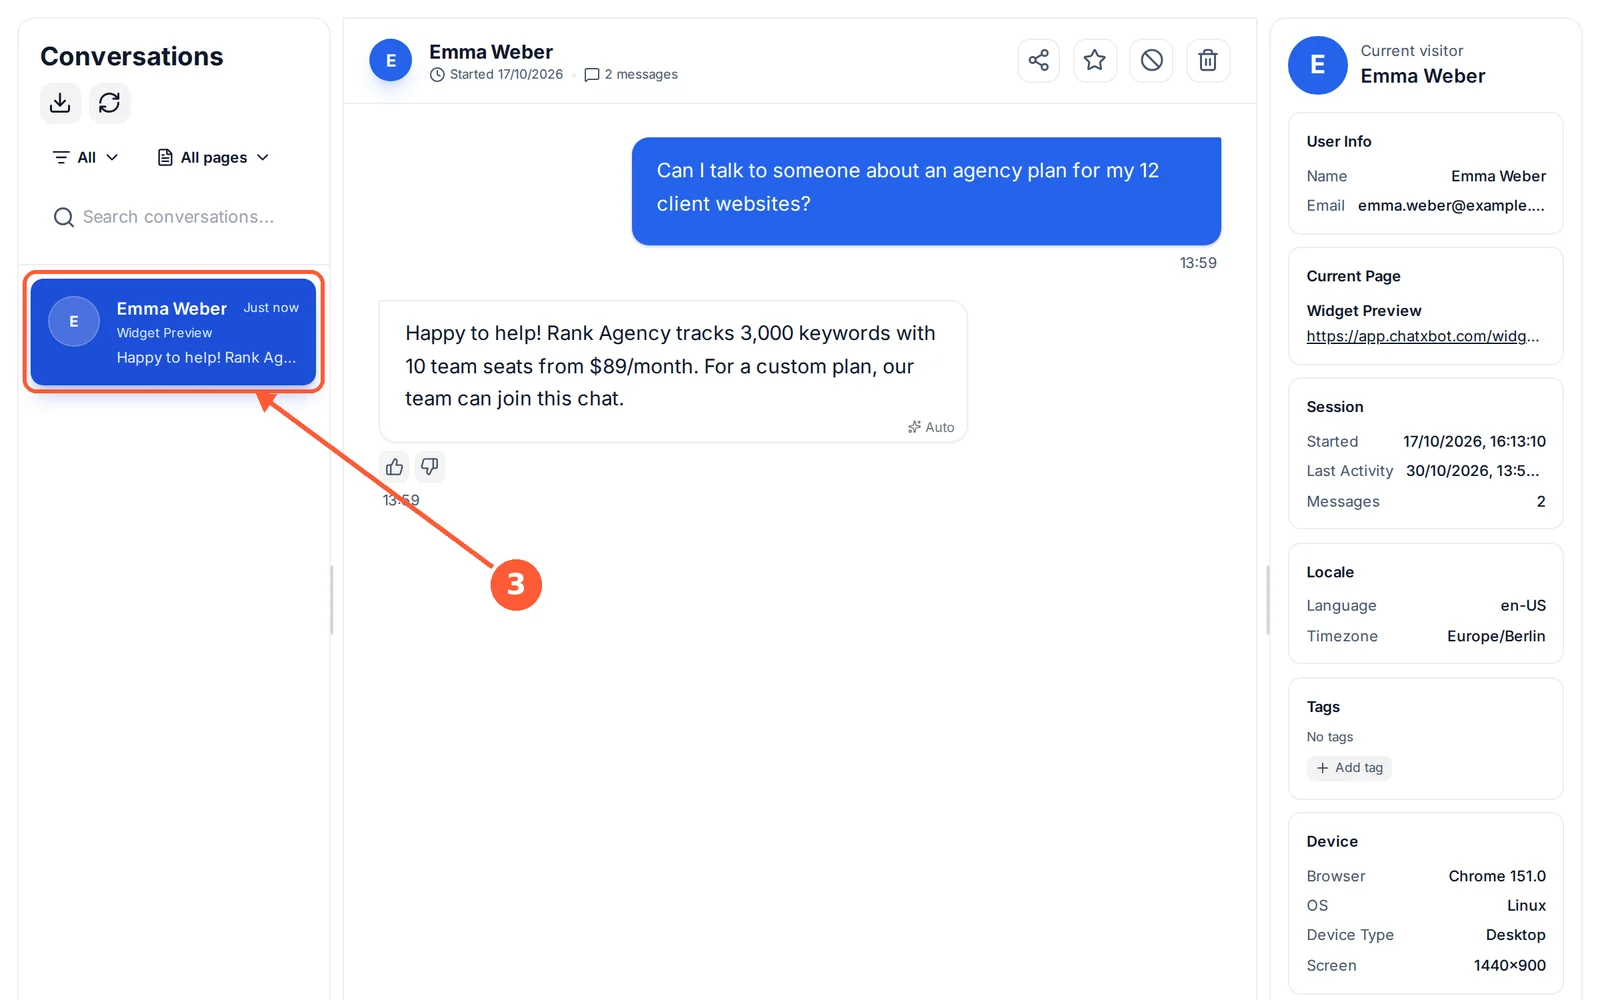
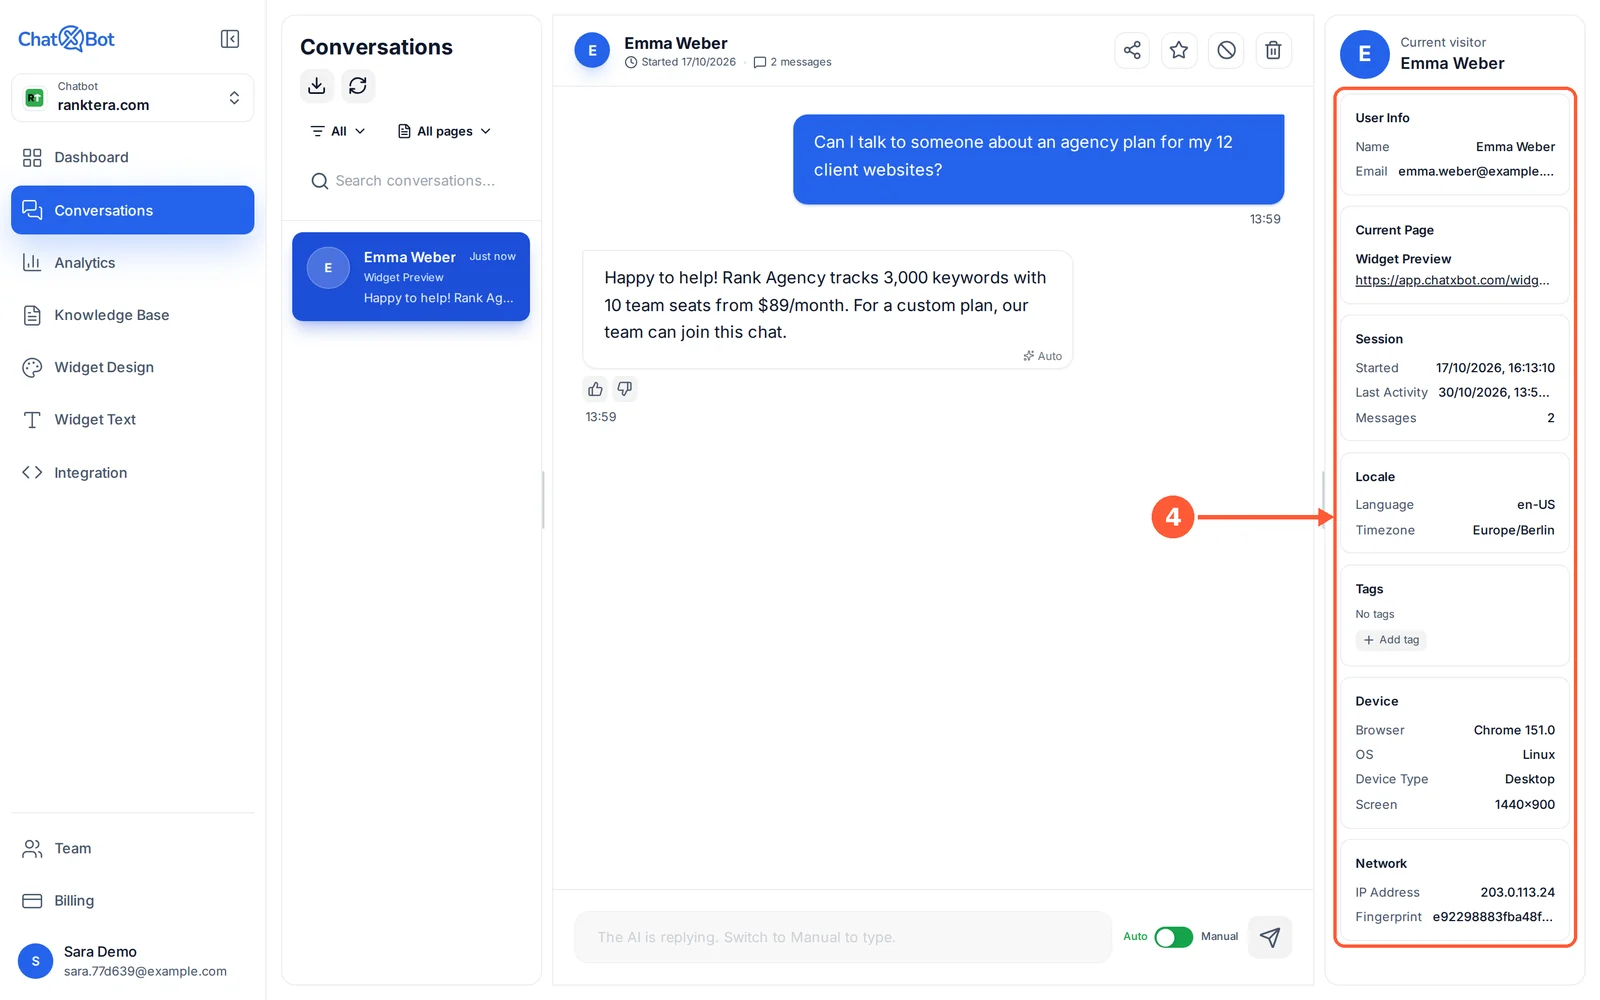
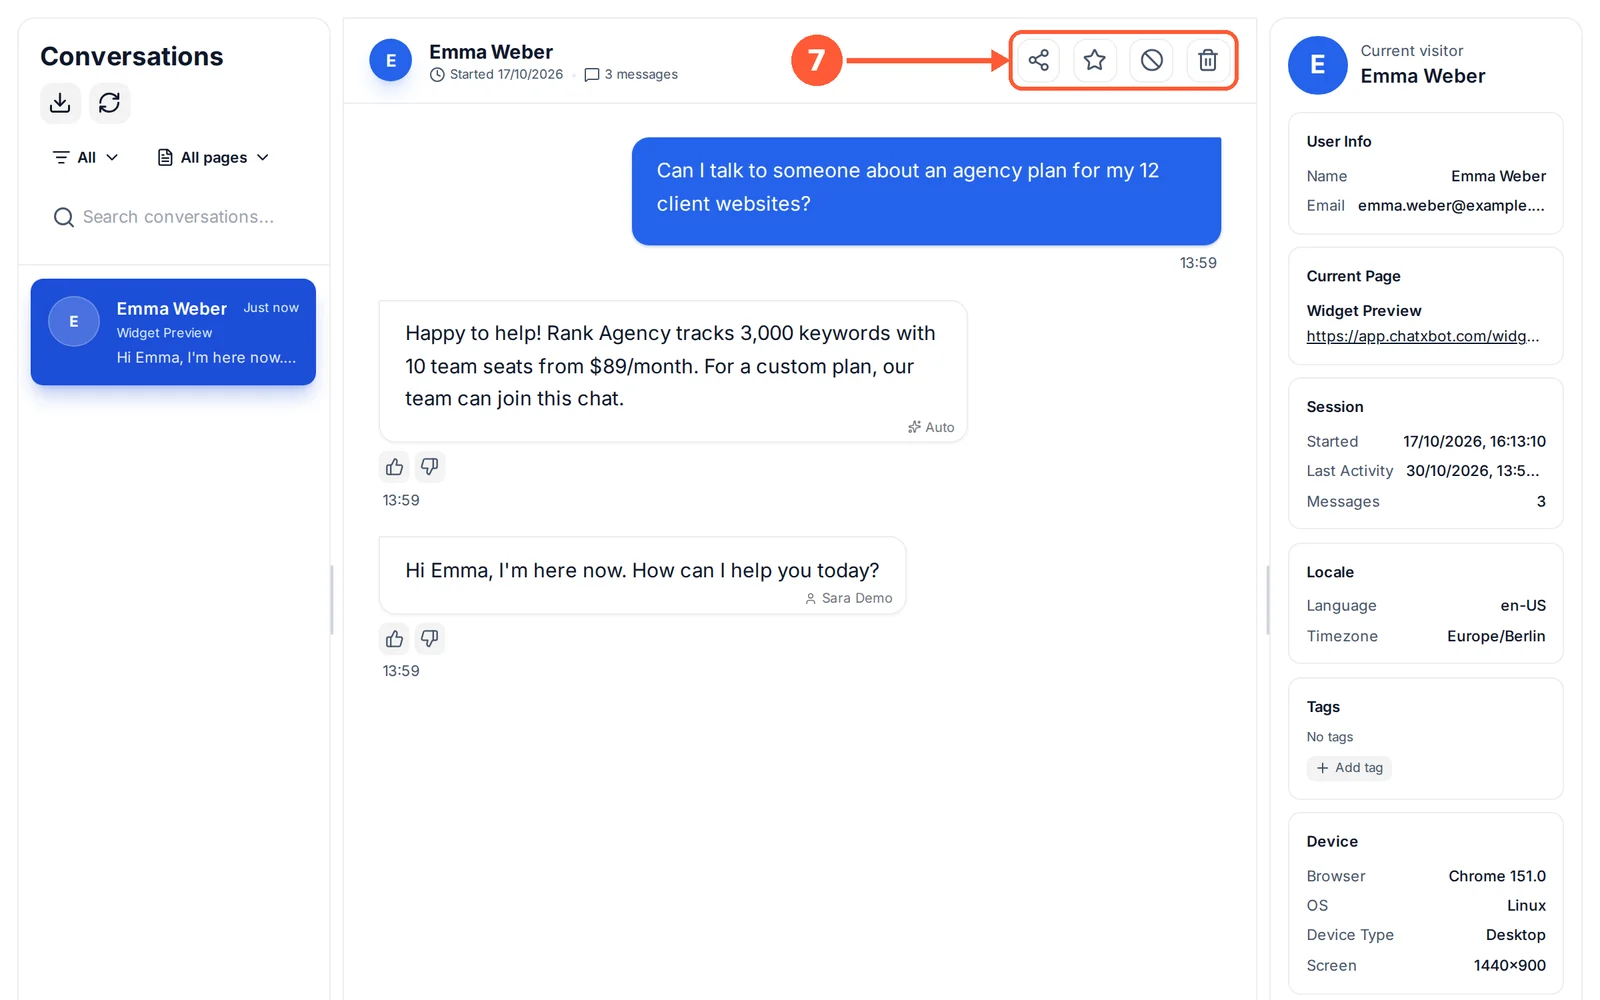
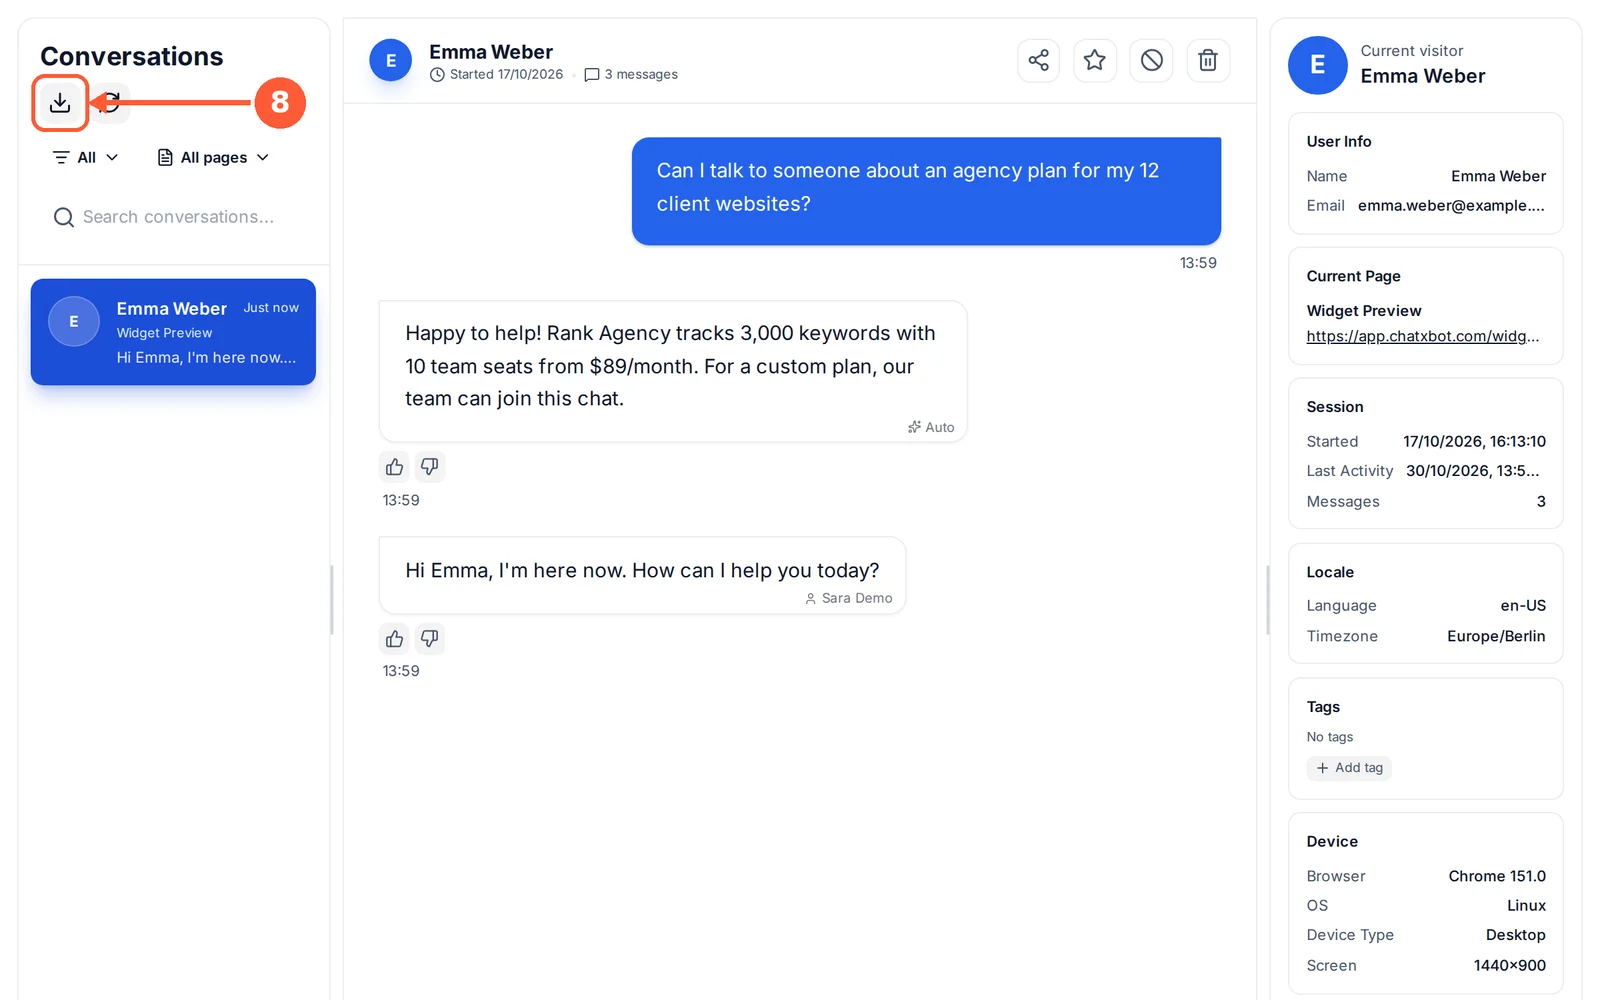
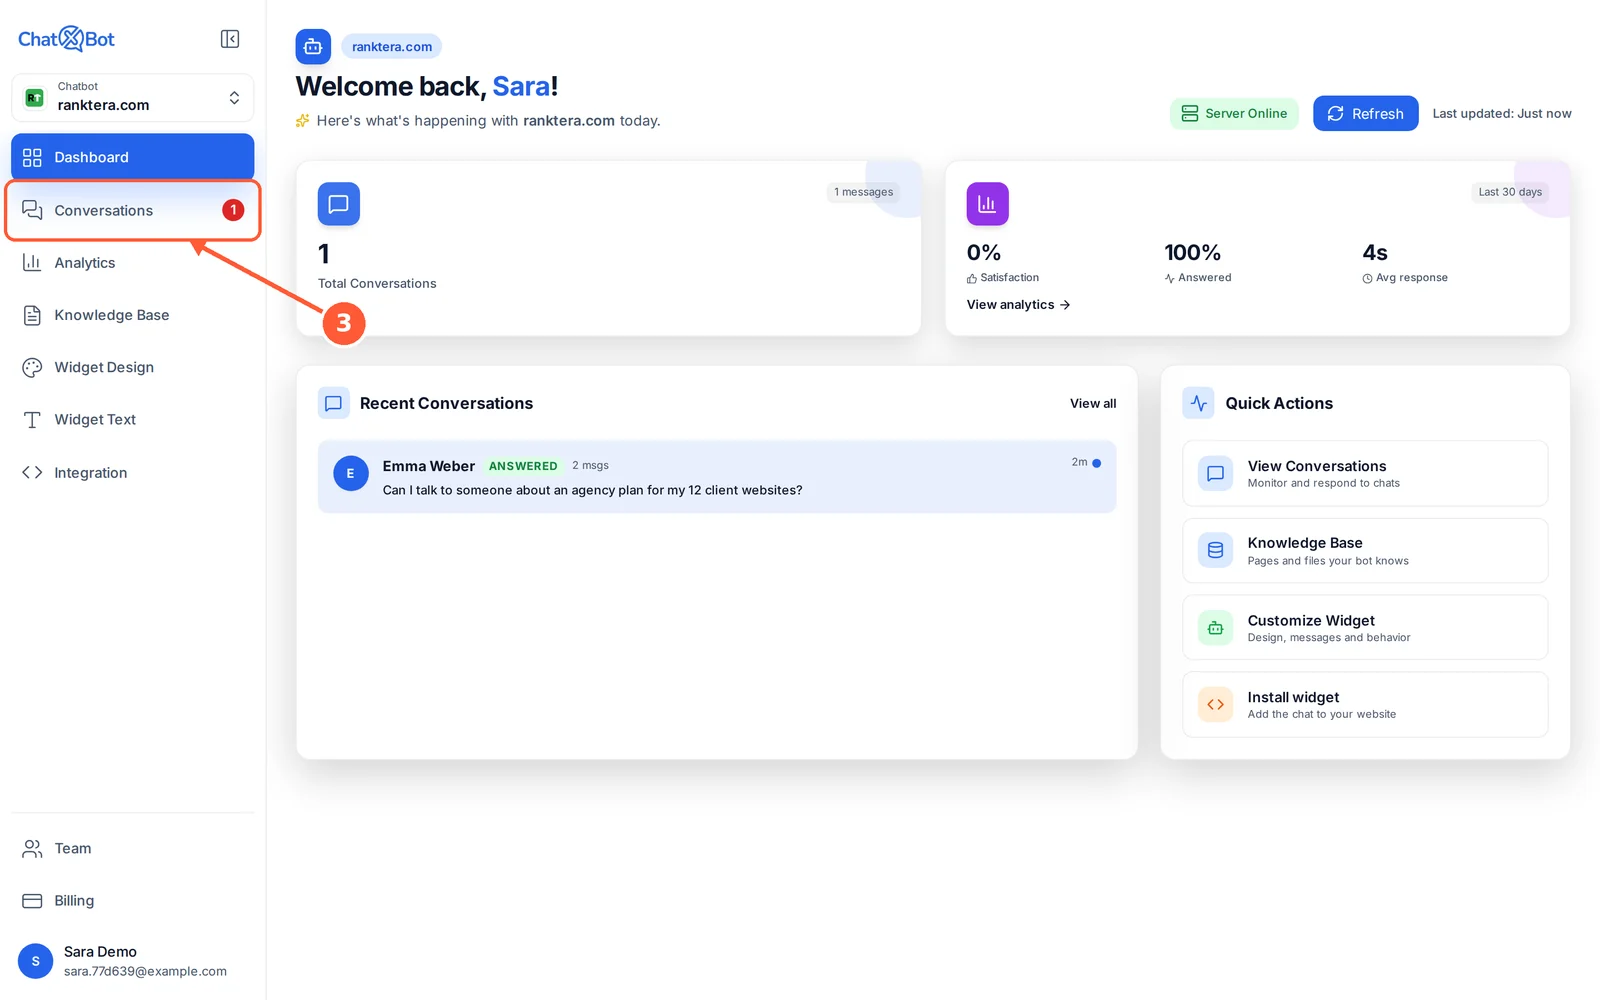
1Click Conversations in the menu. A red number shows how many chats you haven’t read yet.1 / 9
💡 Good to Know
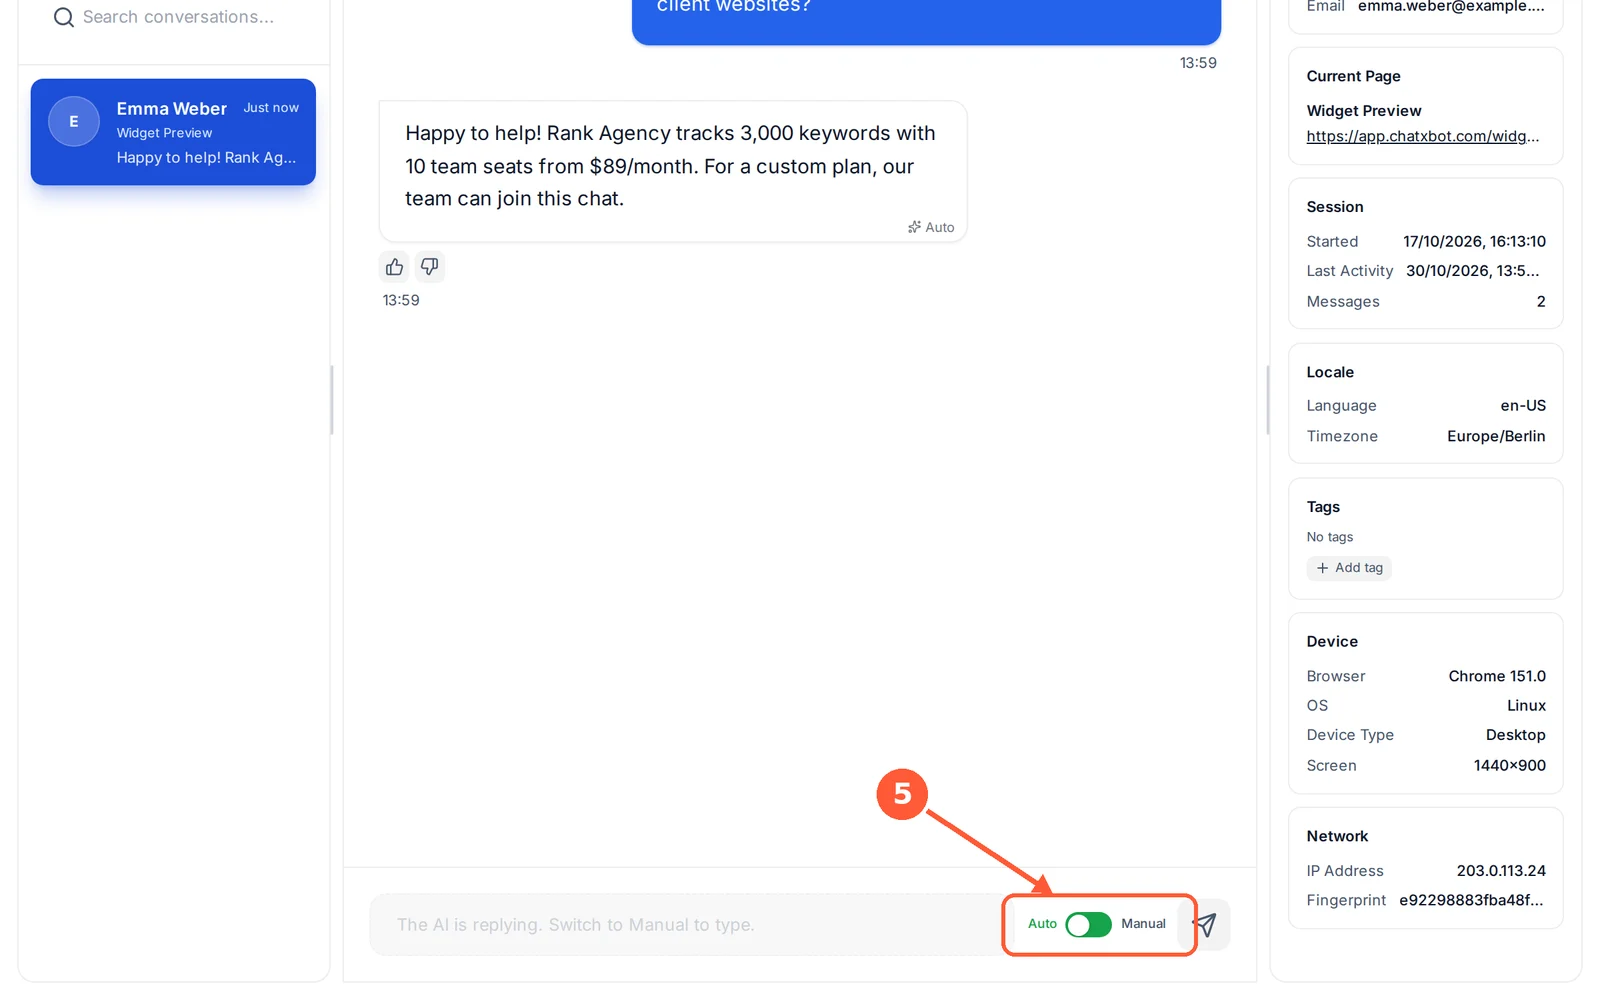
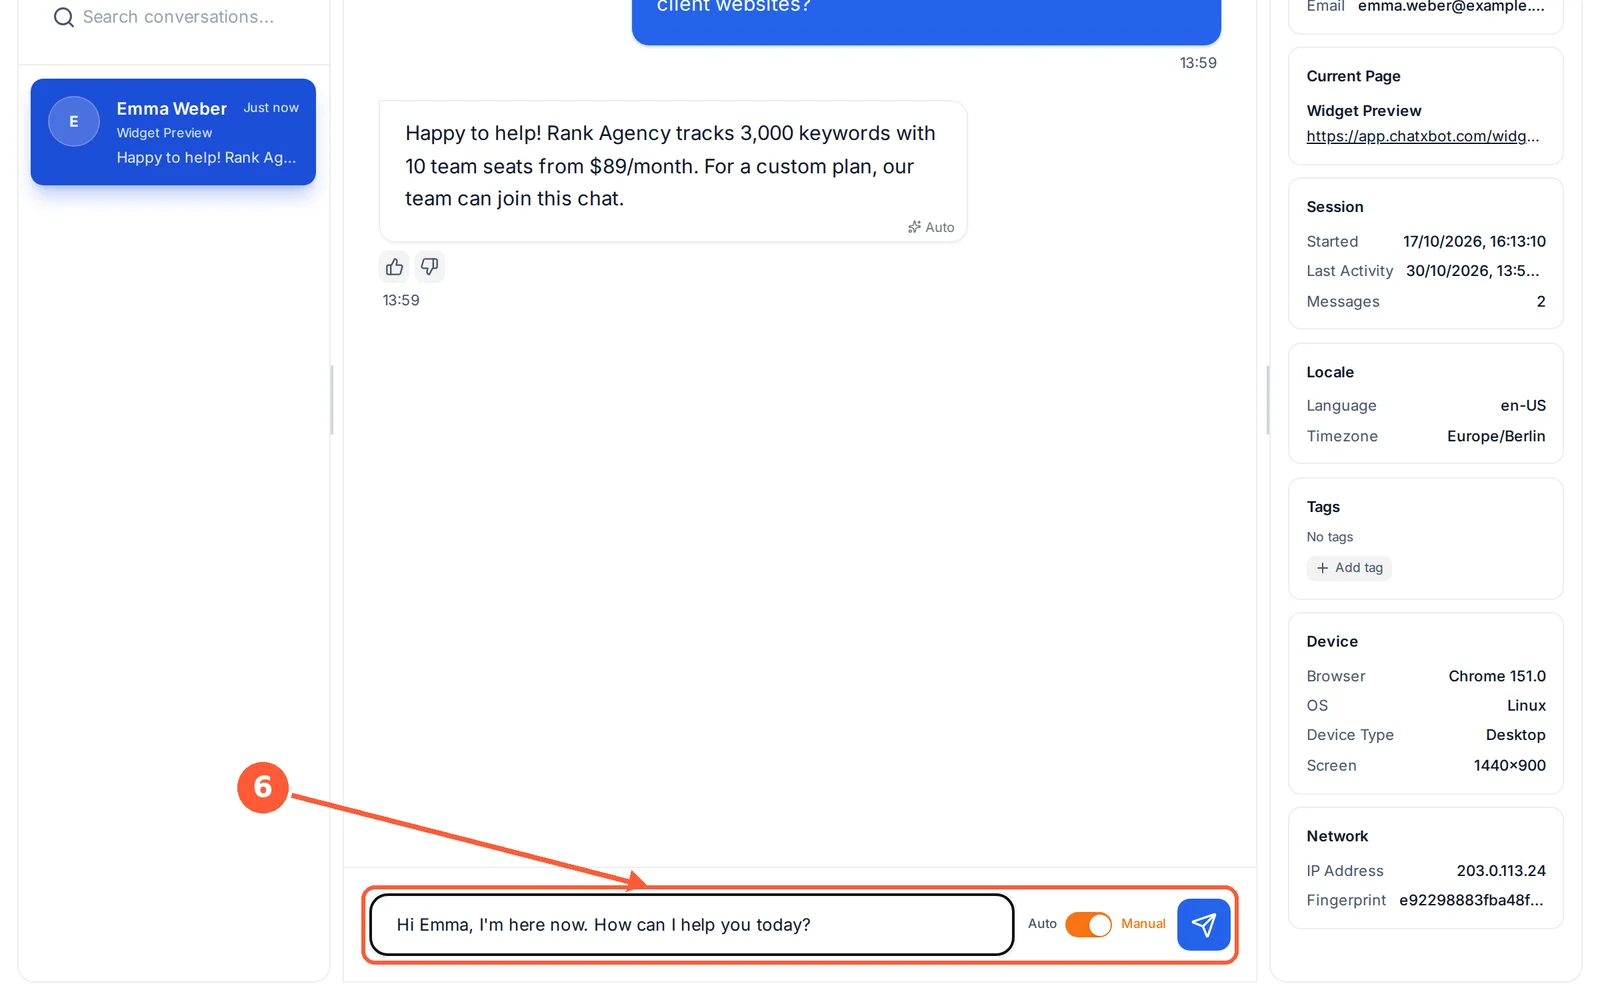
Switch back to Auto when you are done, and the AI answers again.
Live chat works on every plan, including Free. Your own replies don’t count toward your monthly AI answers, and live chat keeps working when they run out.
Use 👍 or 👎 under an answer to mark it helpful or not.
A visitor who shared no name, phone or email shows as Visitor # and a short code (for example Visitor #K7NP4), the same each time they come back on that browser.
Chats that came through a demo link carry a Demo link badge and show the demo page the visitor was on.
Unread chats are bold with a blue dot. Opening a chat marks it read for you only; each teammate keeps their own unread chats.
Images and voice notes your visitors send show in the chat; play a voice note right there, or click Show transcription to read it.
Collect Leads & Hand Over to Your Team
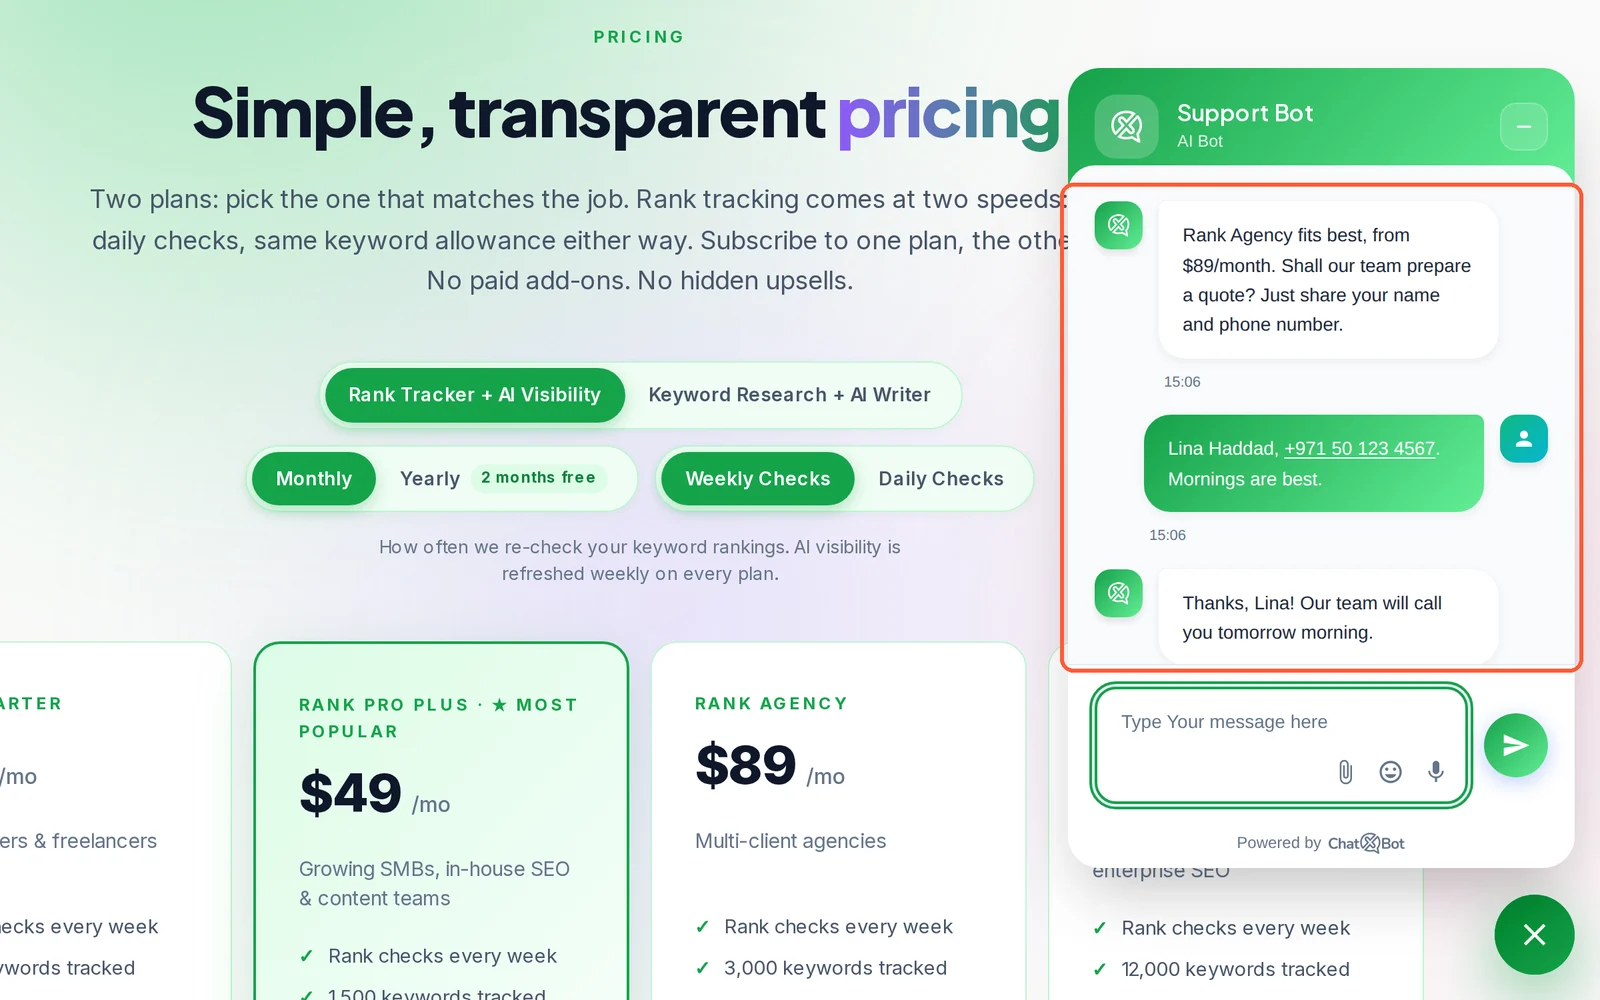
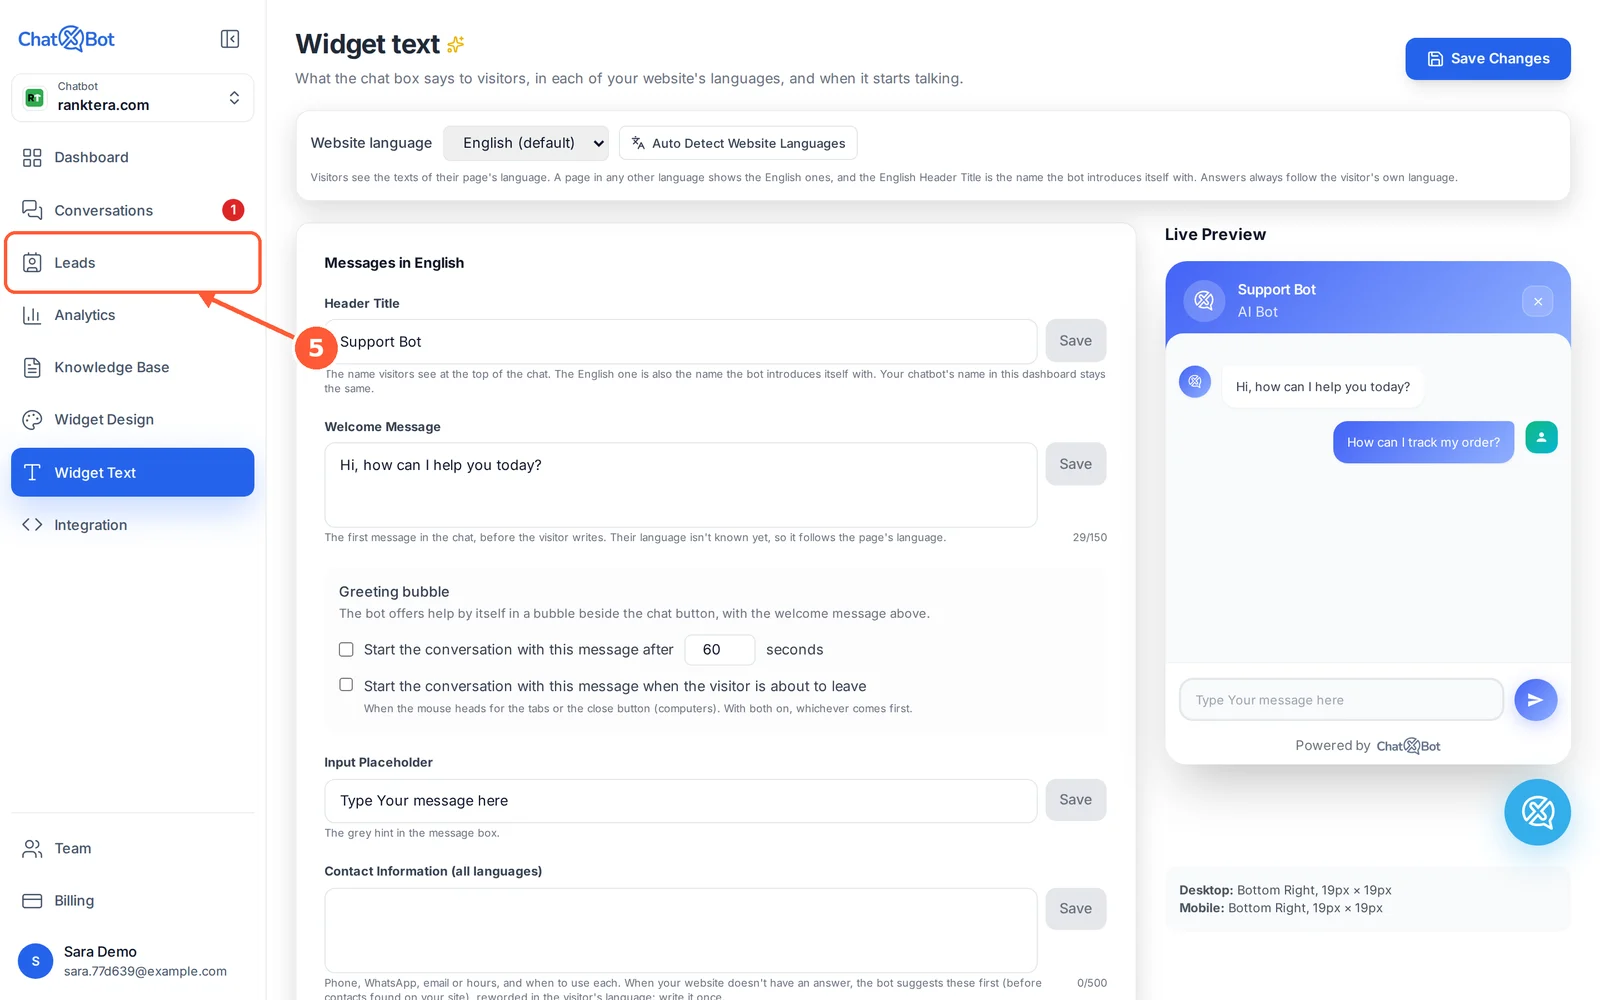
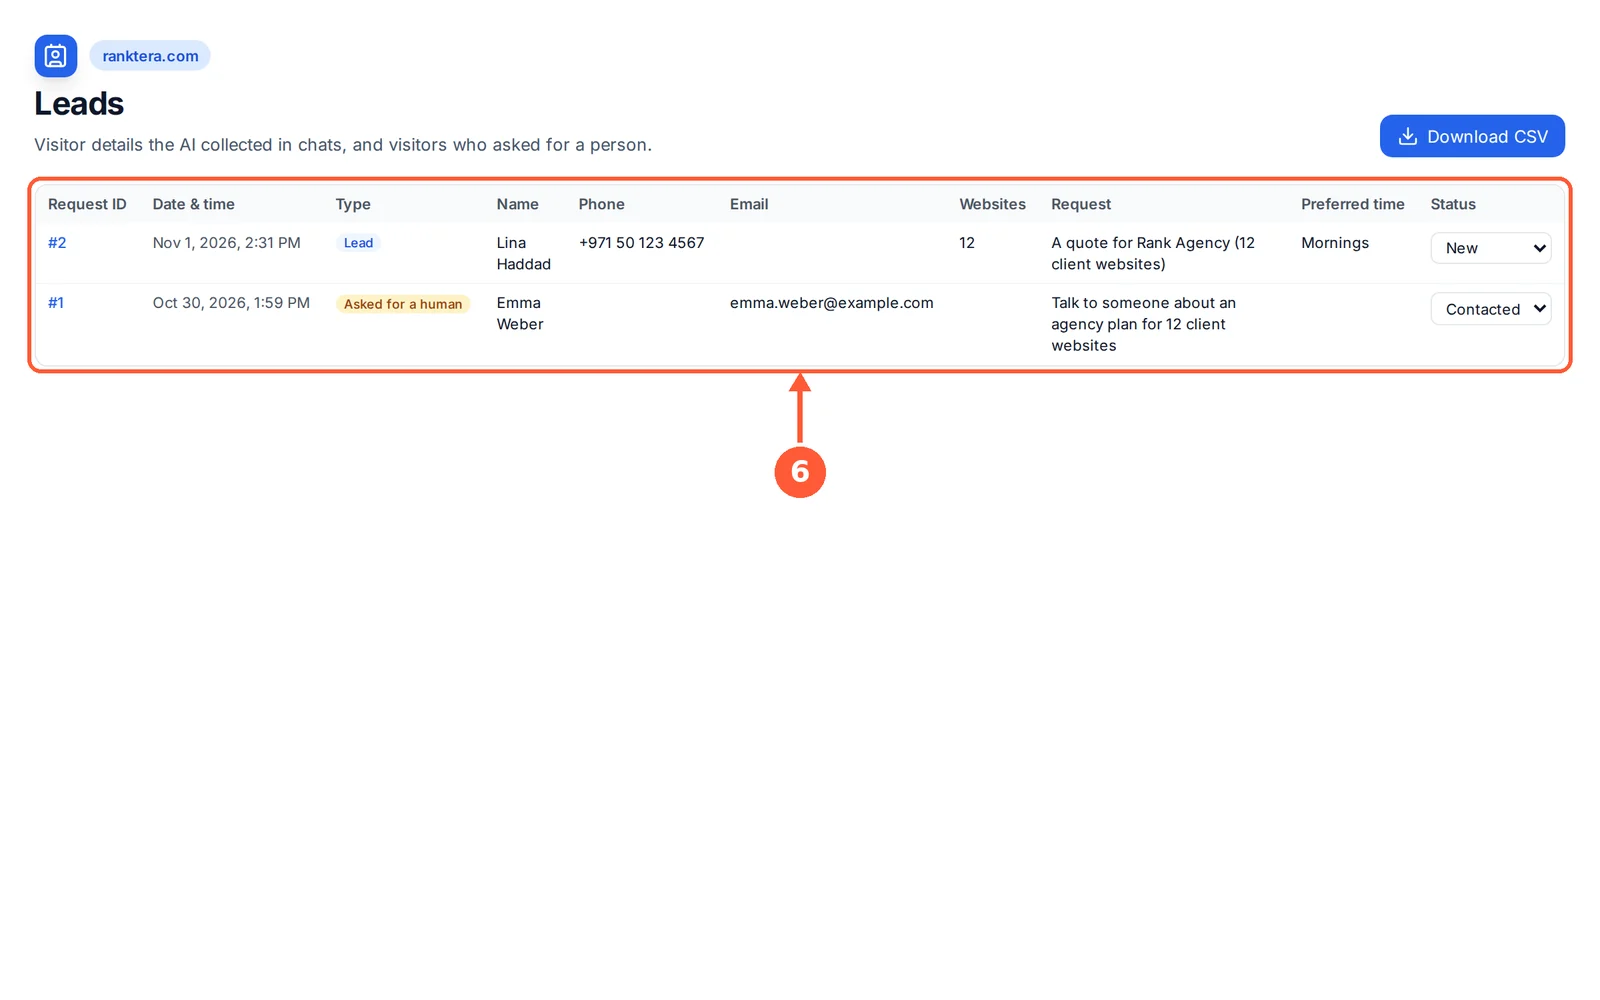
Let the AI ask interested visitors for their details in the chat, and alert your team when a visitor asks for a person.
⏱ About 2 minutes • 📍 Widget Text › Leads & human handoff
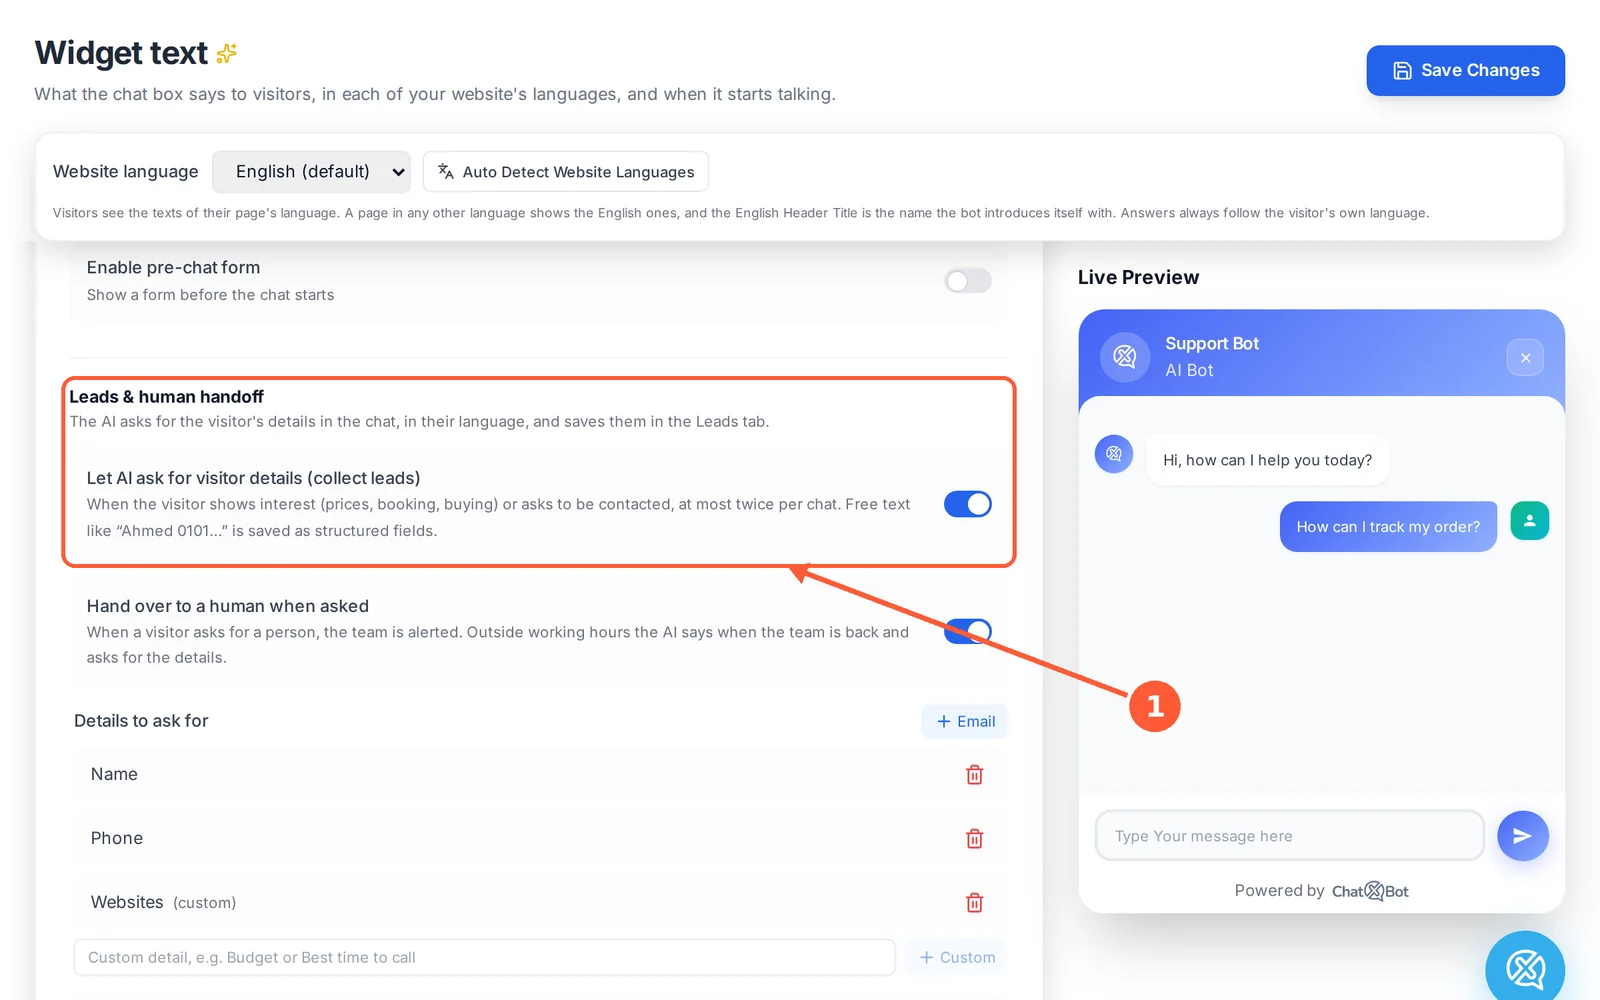
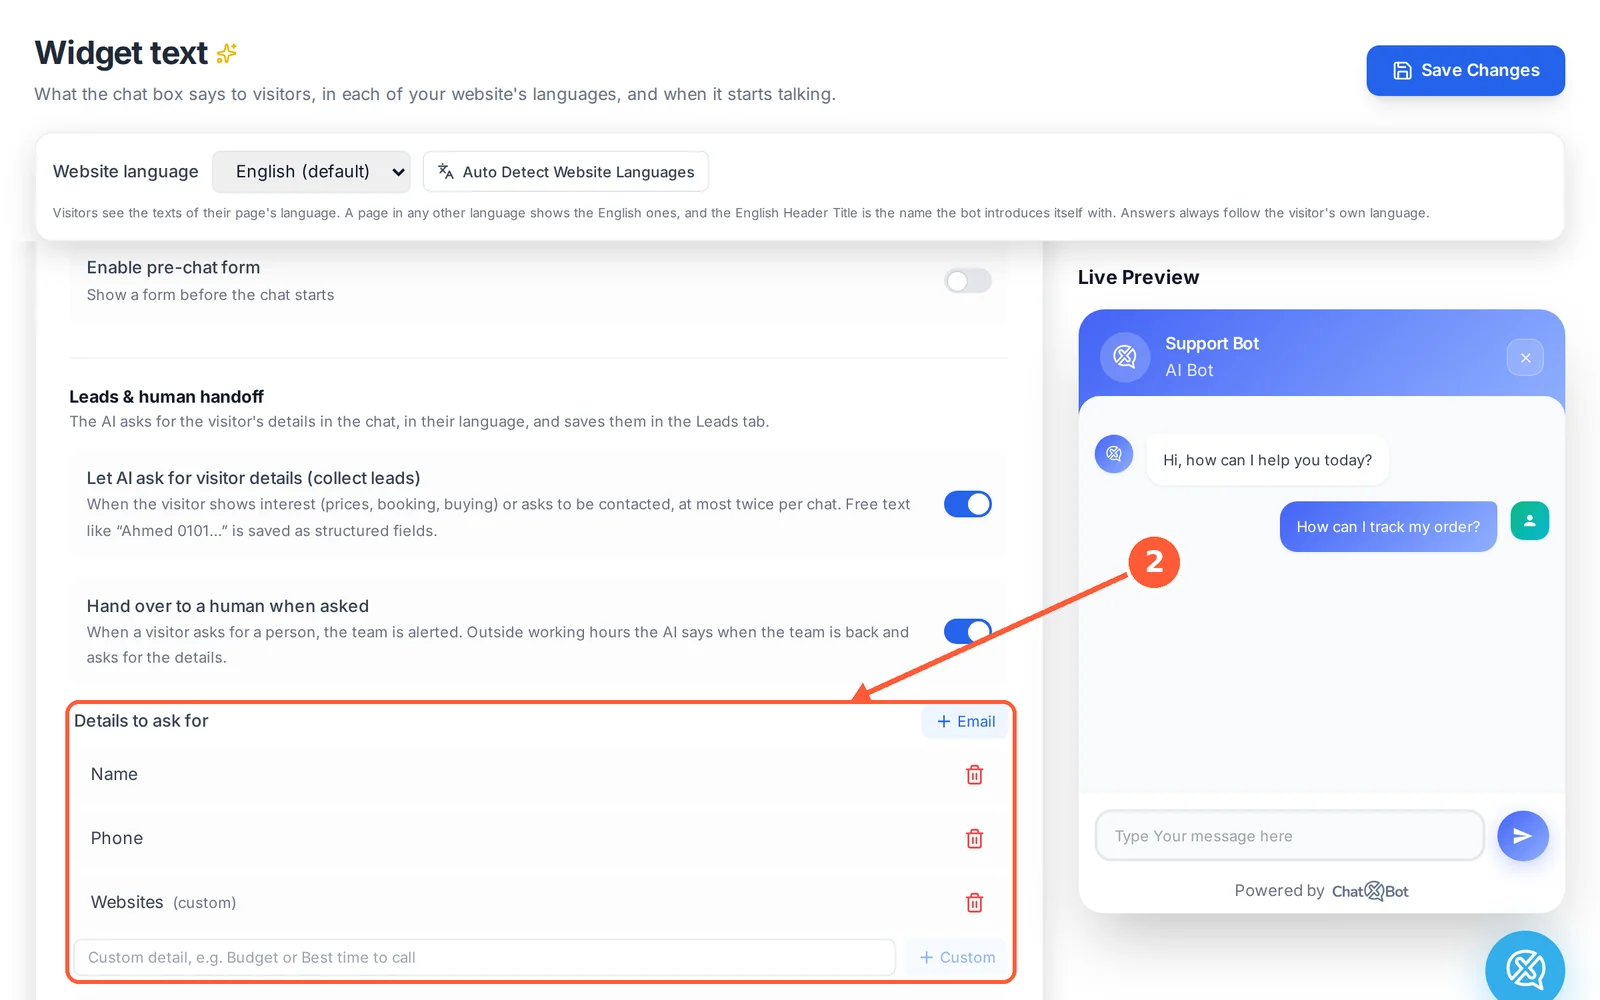
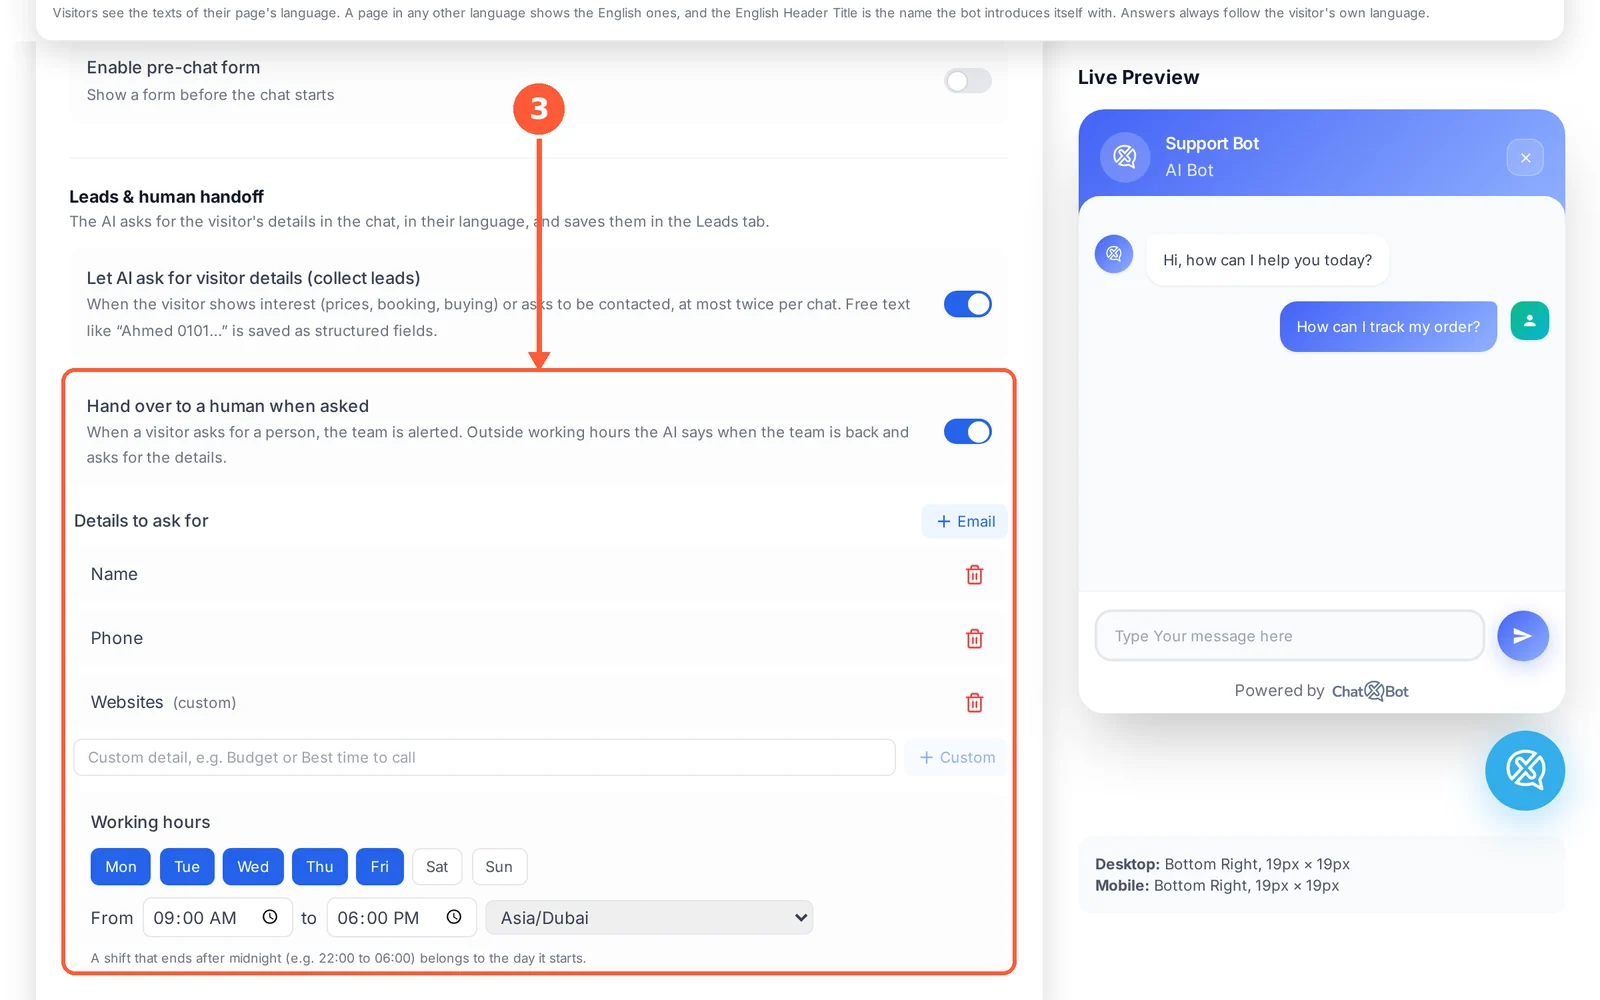
1In Widget Text, scroll down to Leads & human handoff and turn on Let AI ask for visitor details (collect leads).1 / 9
💡 Good to Know
The AI asks only when a visitor shows interest (prices, booking, buying) or asks to be contacted, at most twice per chat, and always in the visitor’s language.
No details picked? The AI asks for the name and phone number.
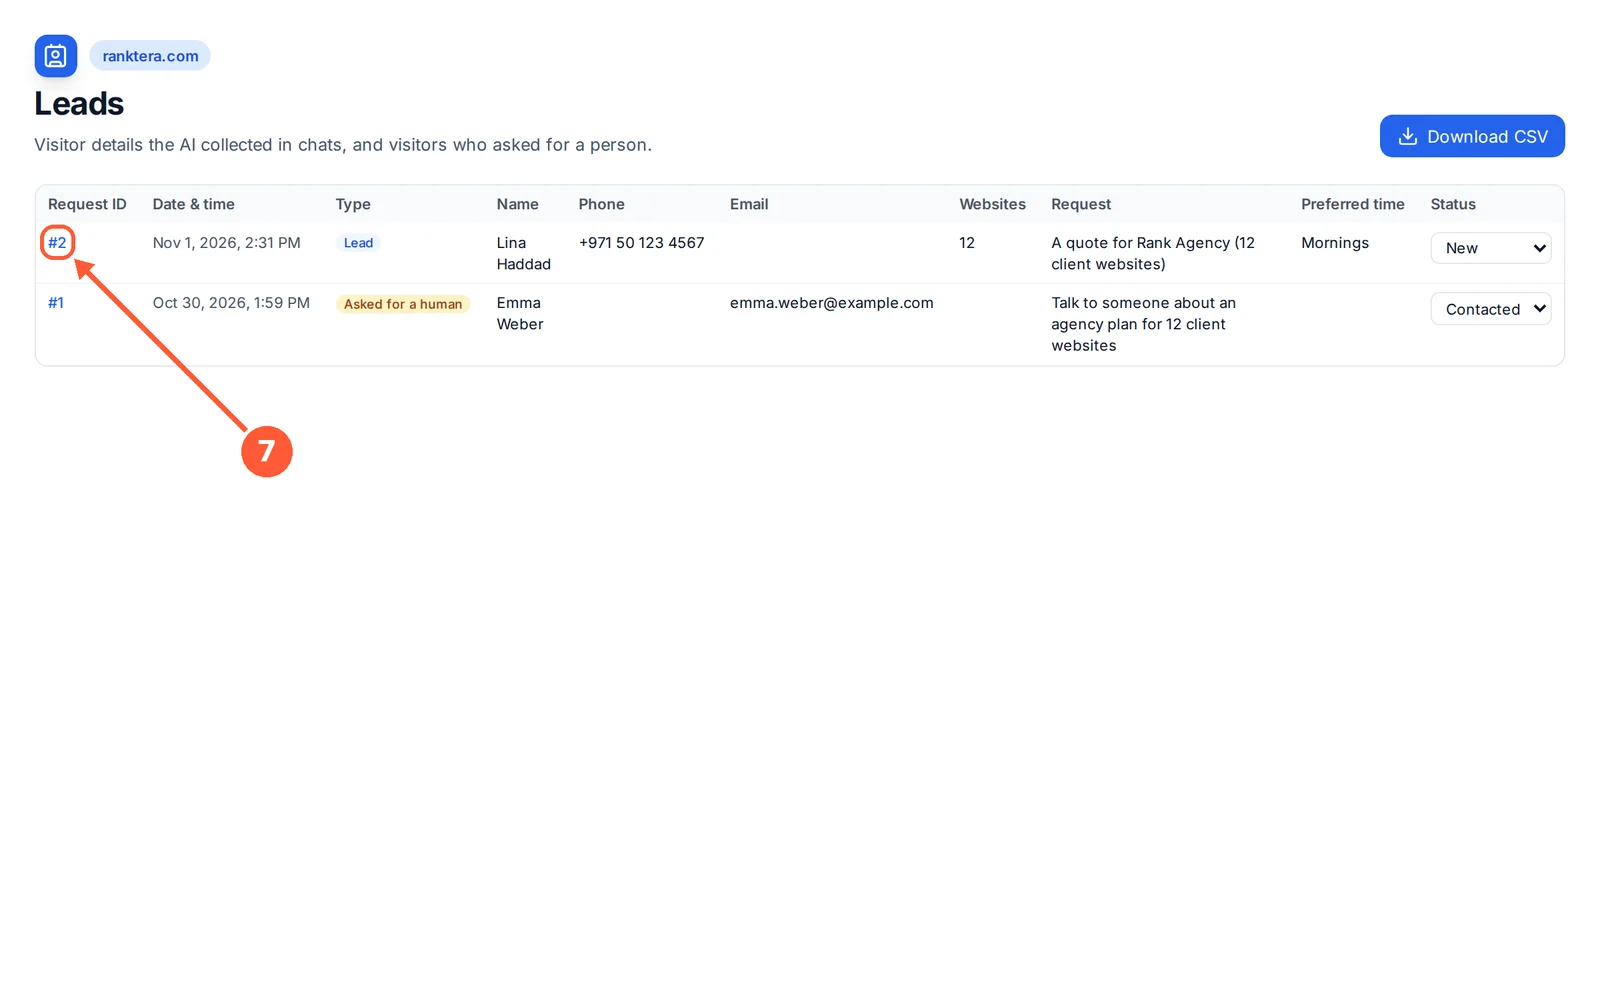
When a visitor asks for a person, your team is alerted and the chat shows Asked for a human in Conversations. Outside your working hours, the AI tells the visitor when your team is back and asks for their details.
A shift that ends after midnight (for example 22:00 to 06:00) belongs to the day it starts.
Track Your Results
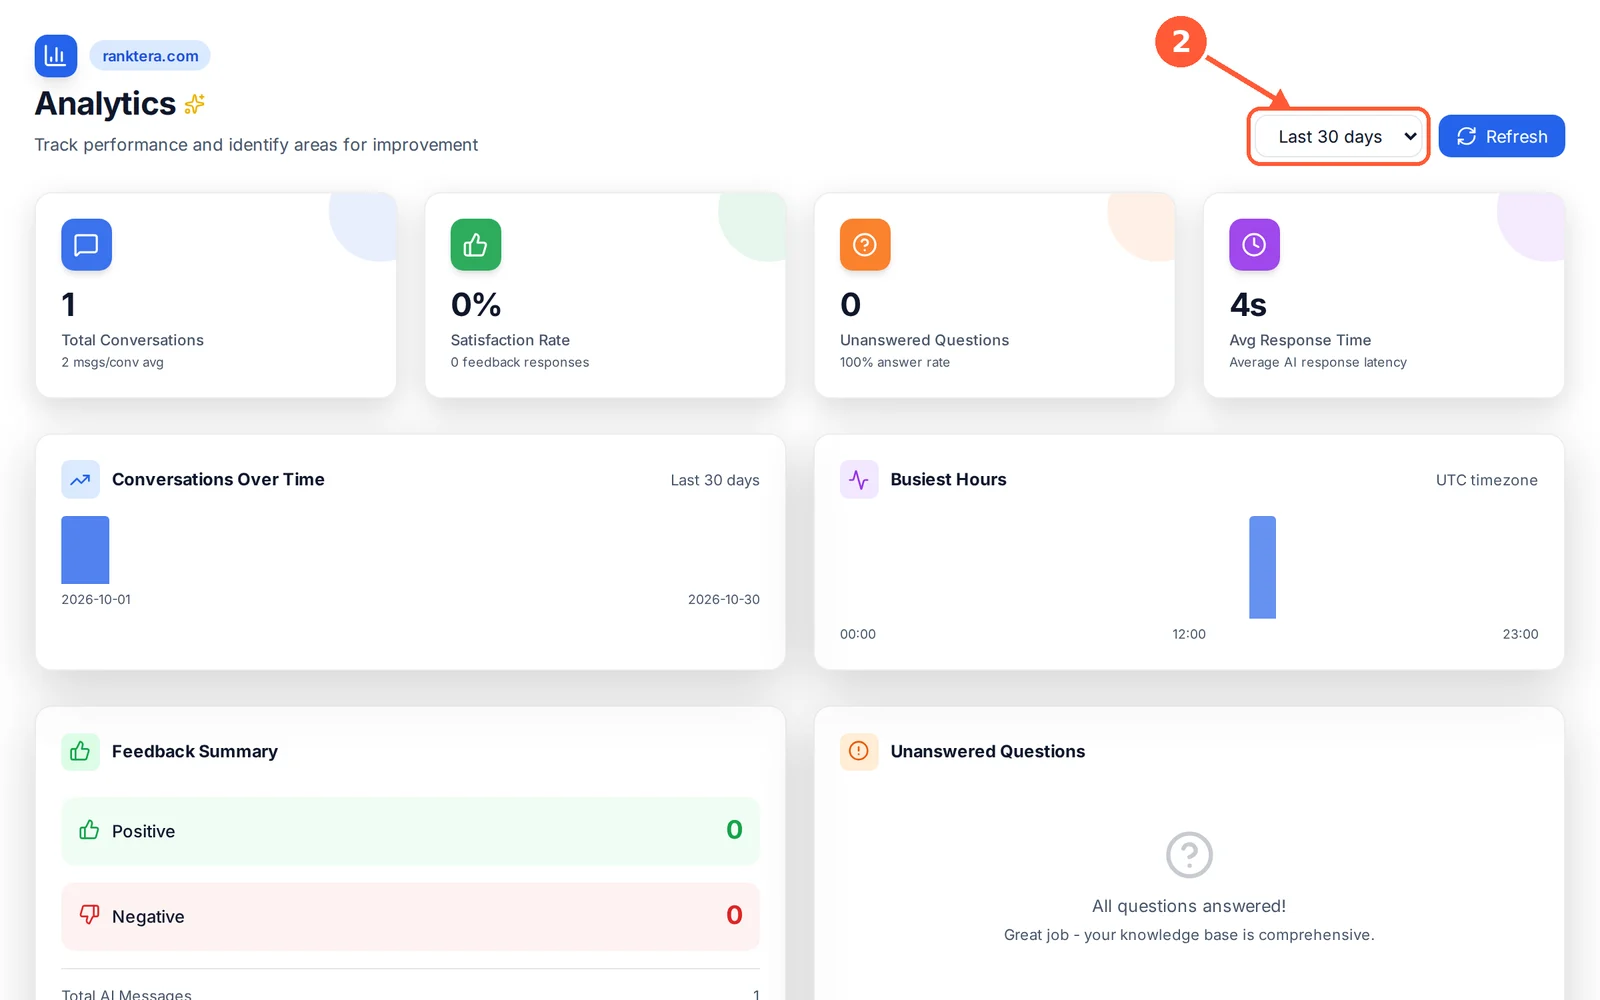
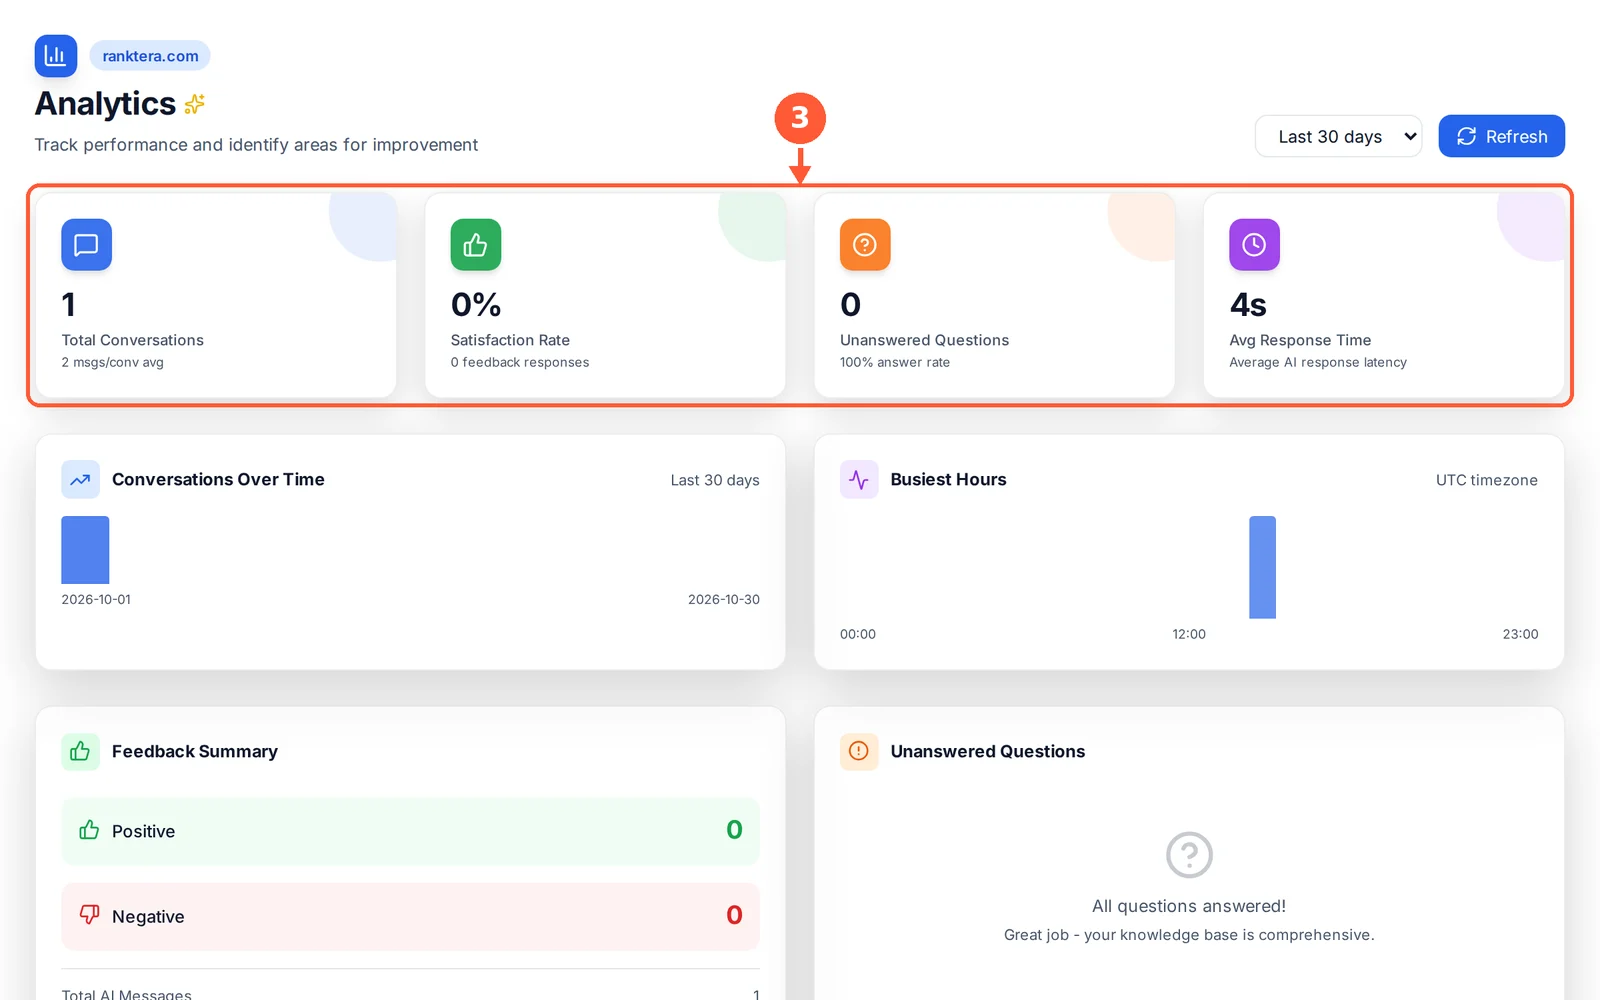
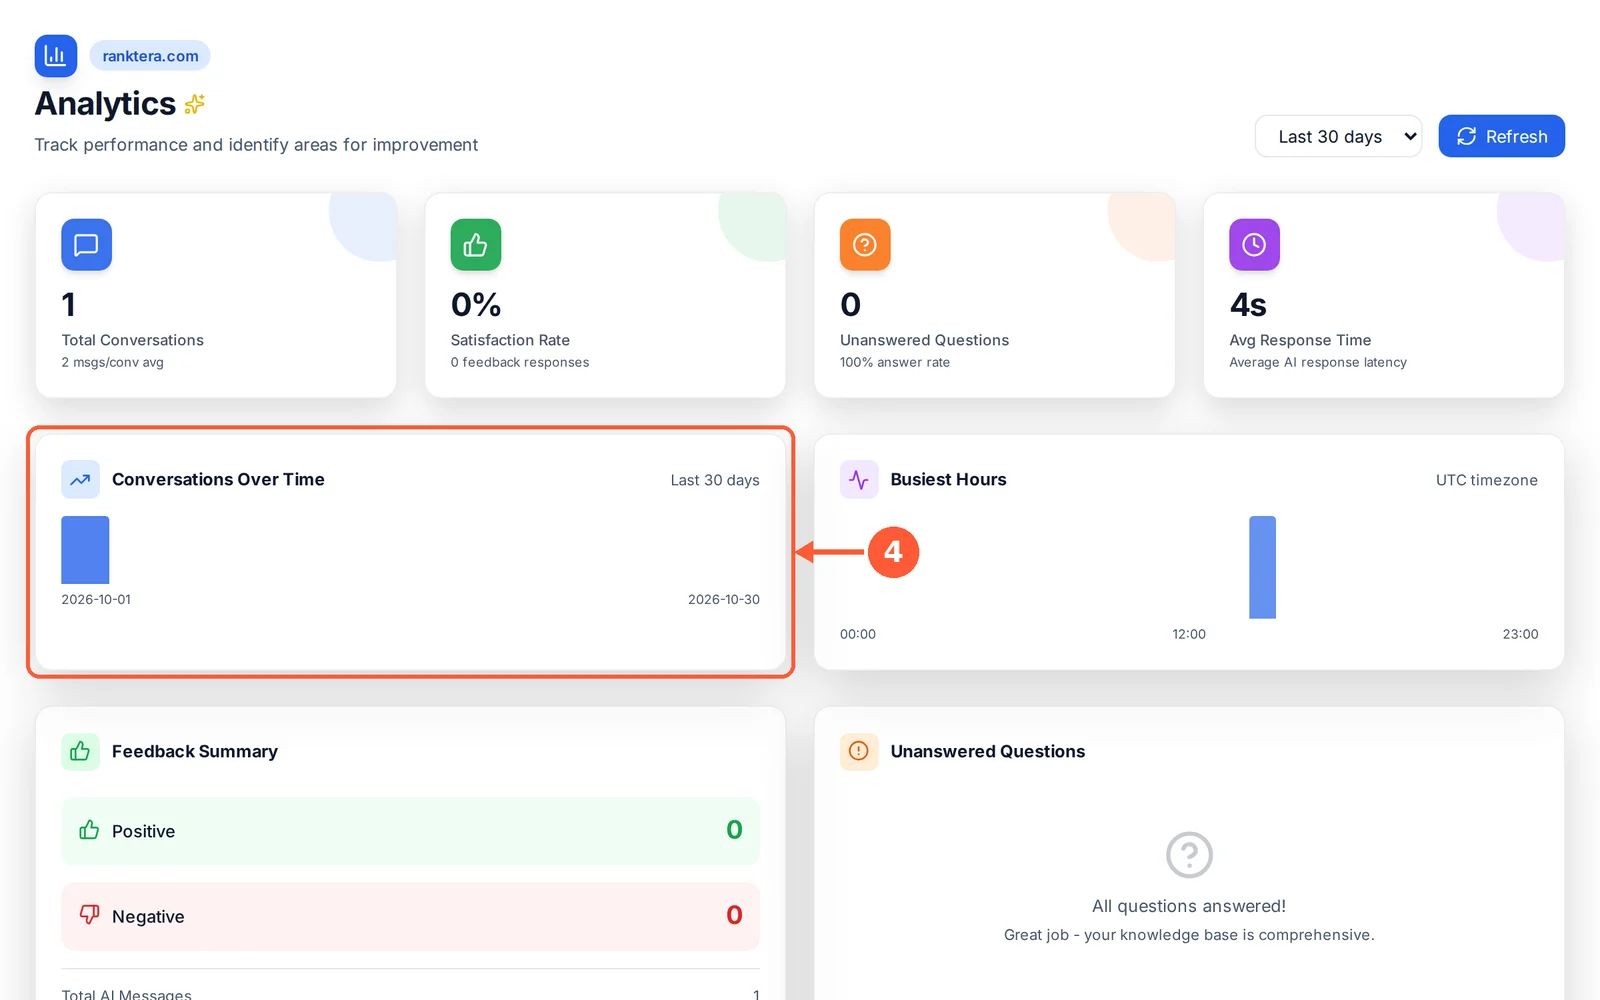
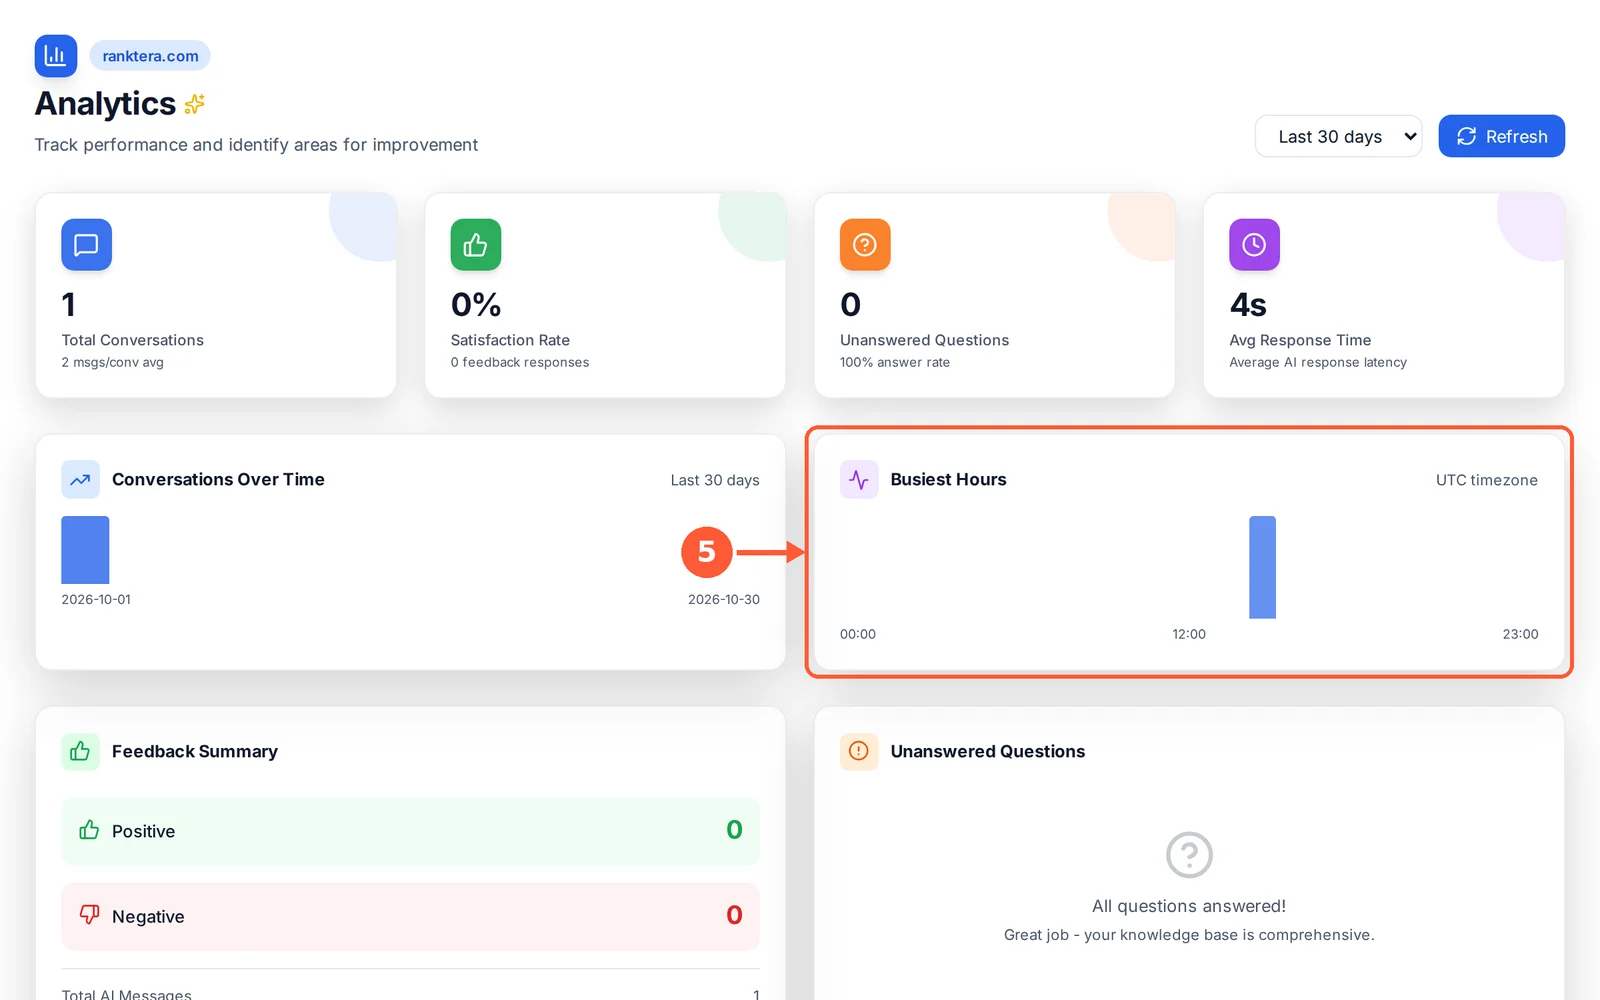
See how your chatbot is doing and what your visitors ask most.
⏱ About 2 minutes • 📍 Analytics
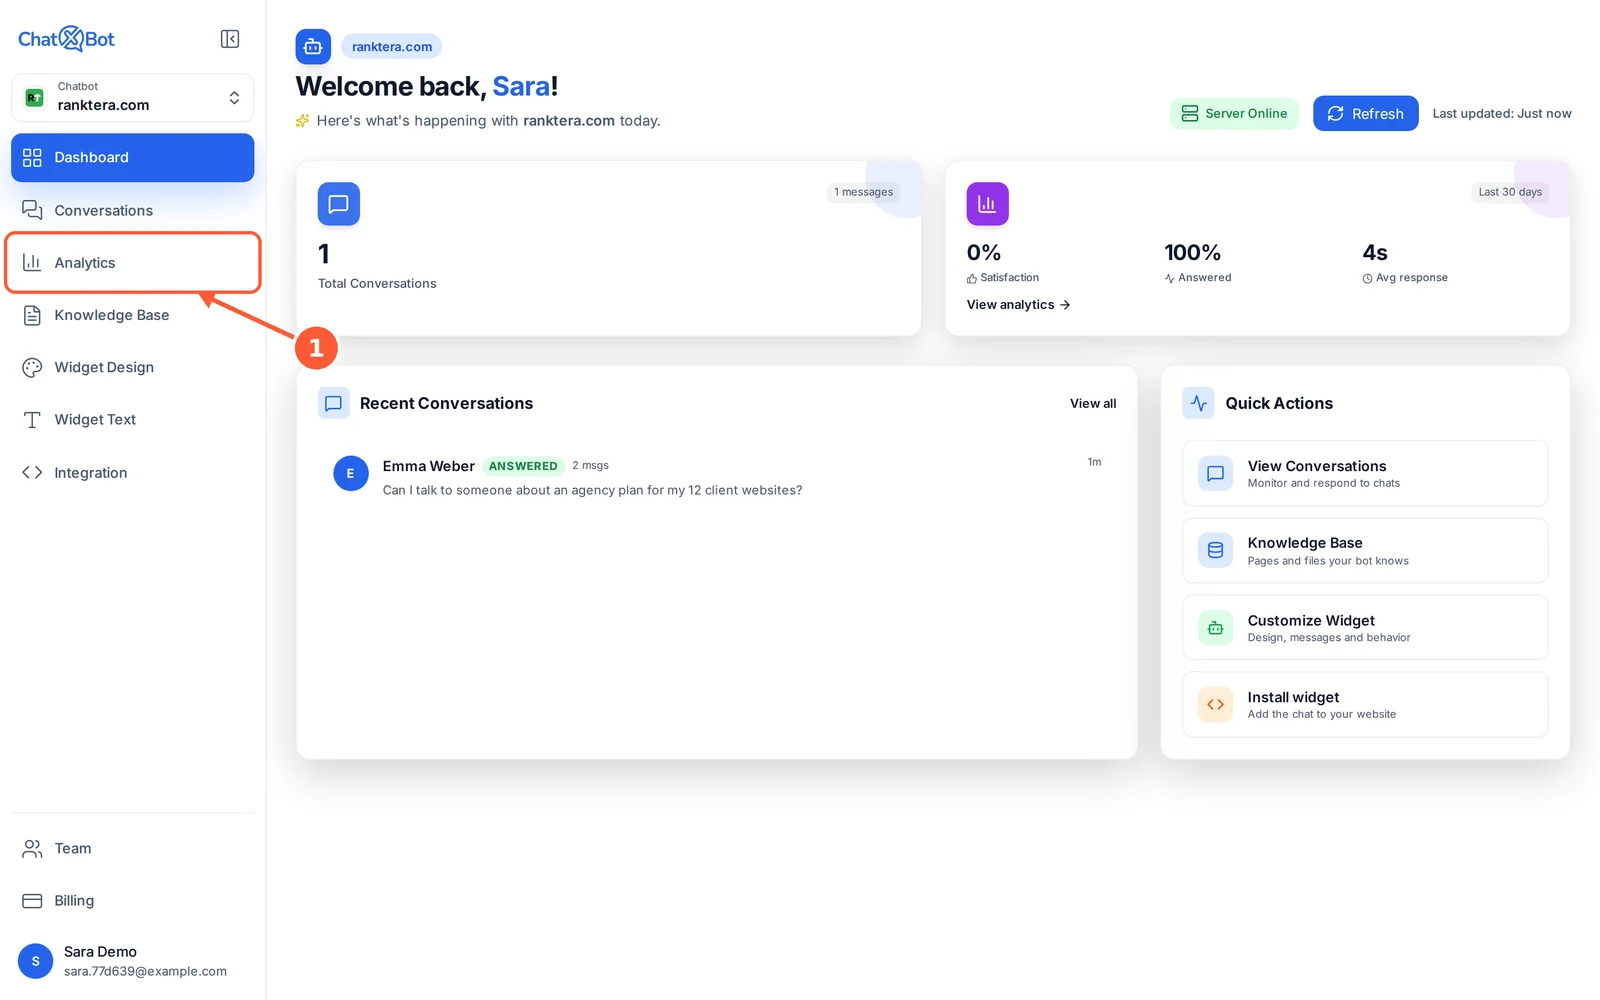
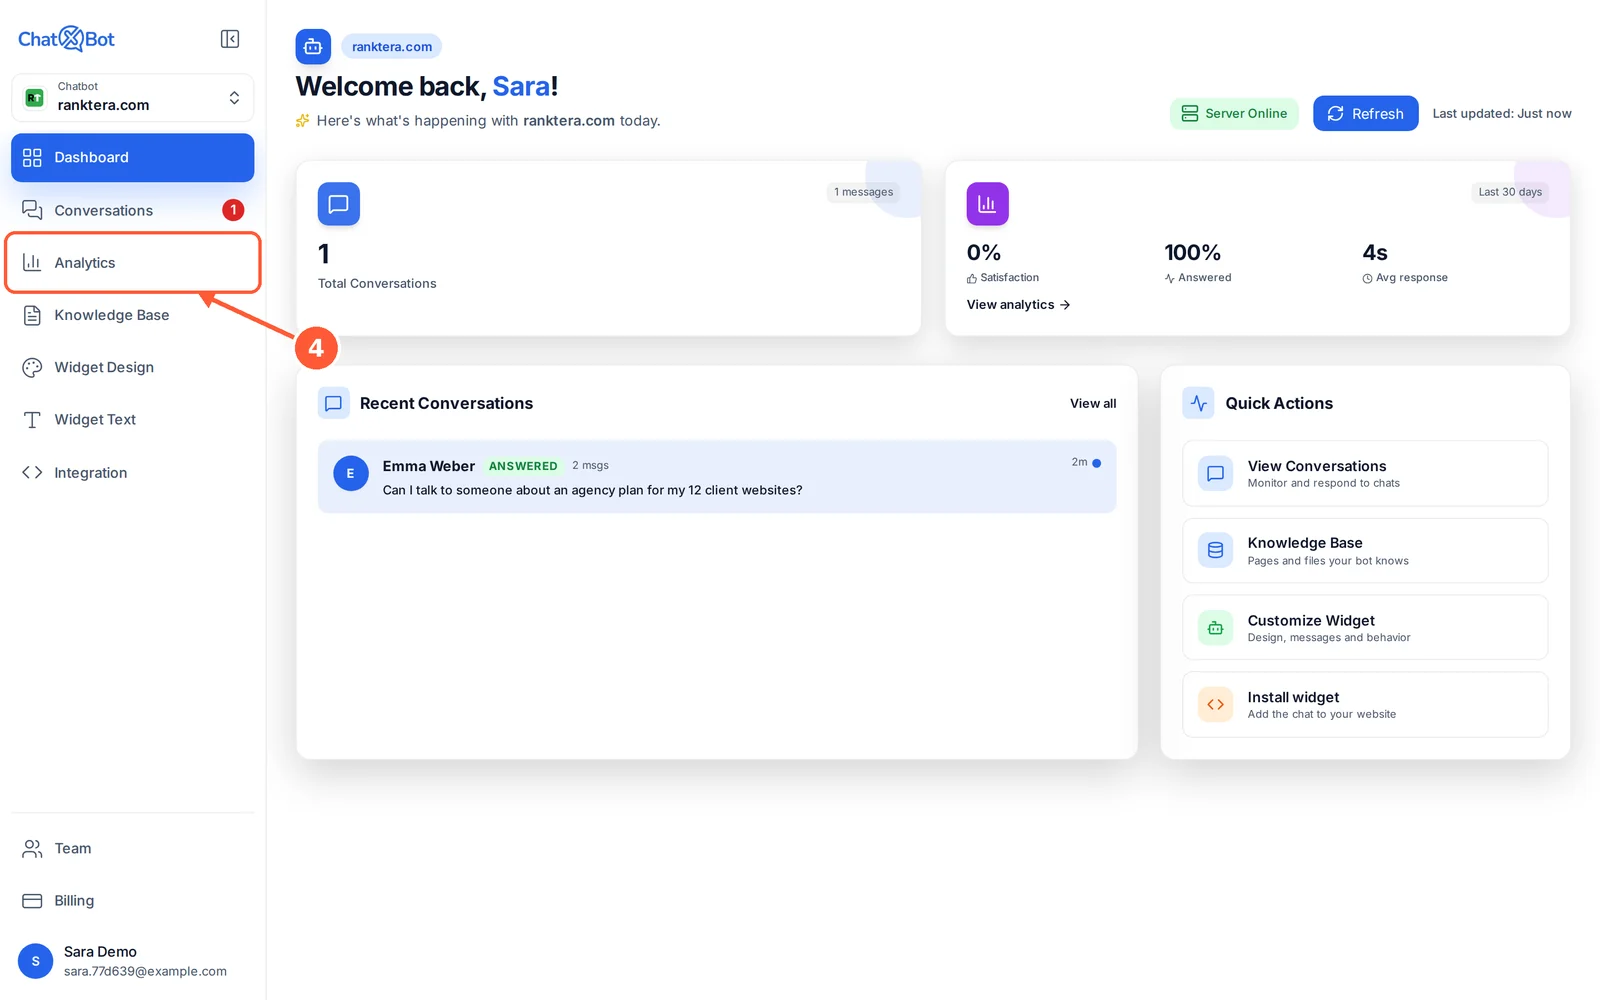
1Click Analytics in the menu.1 / 7
💡 Good to Know
Check Unanswered Questions every week, and add pages that answer them to your Knowledge Base.
Questions the chatbot couldn’t answer from your website count as unanswered.
Find Your Way Around
The menu on the left takes you everywhere:
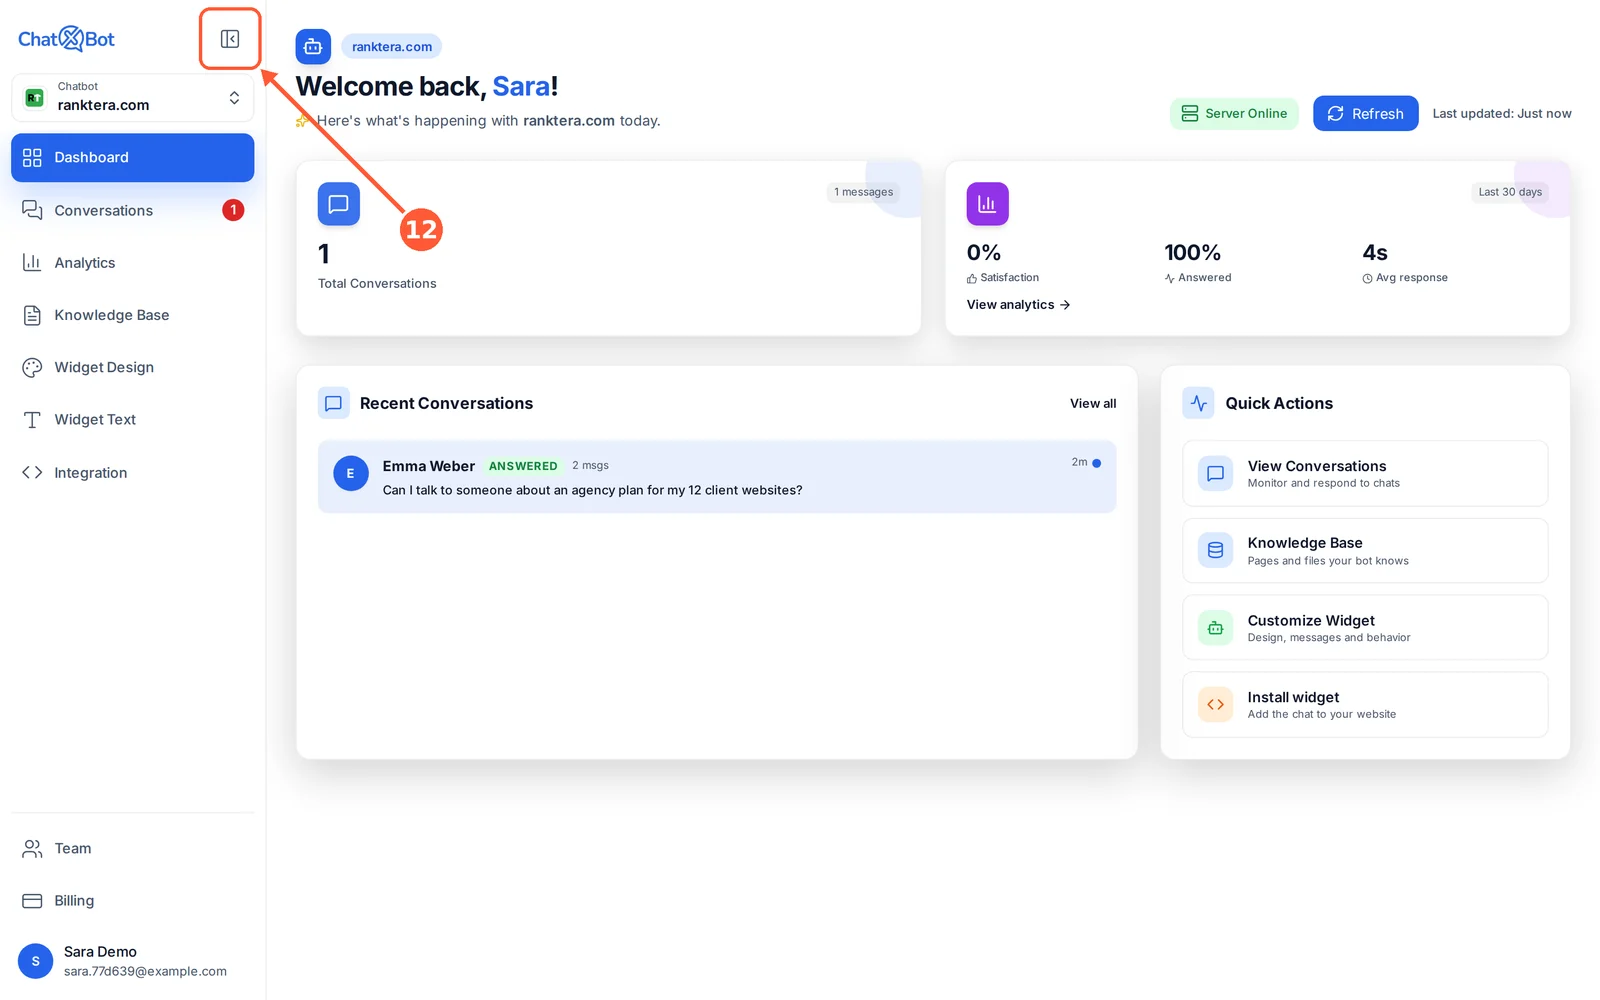
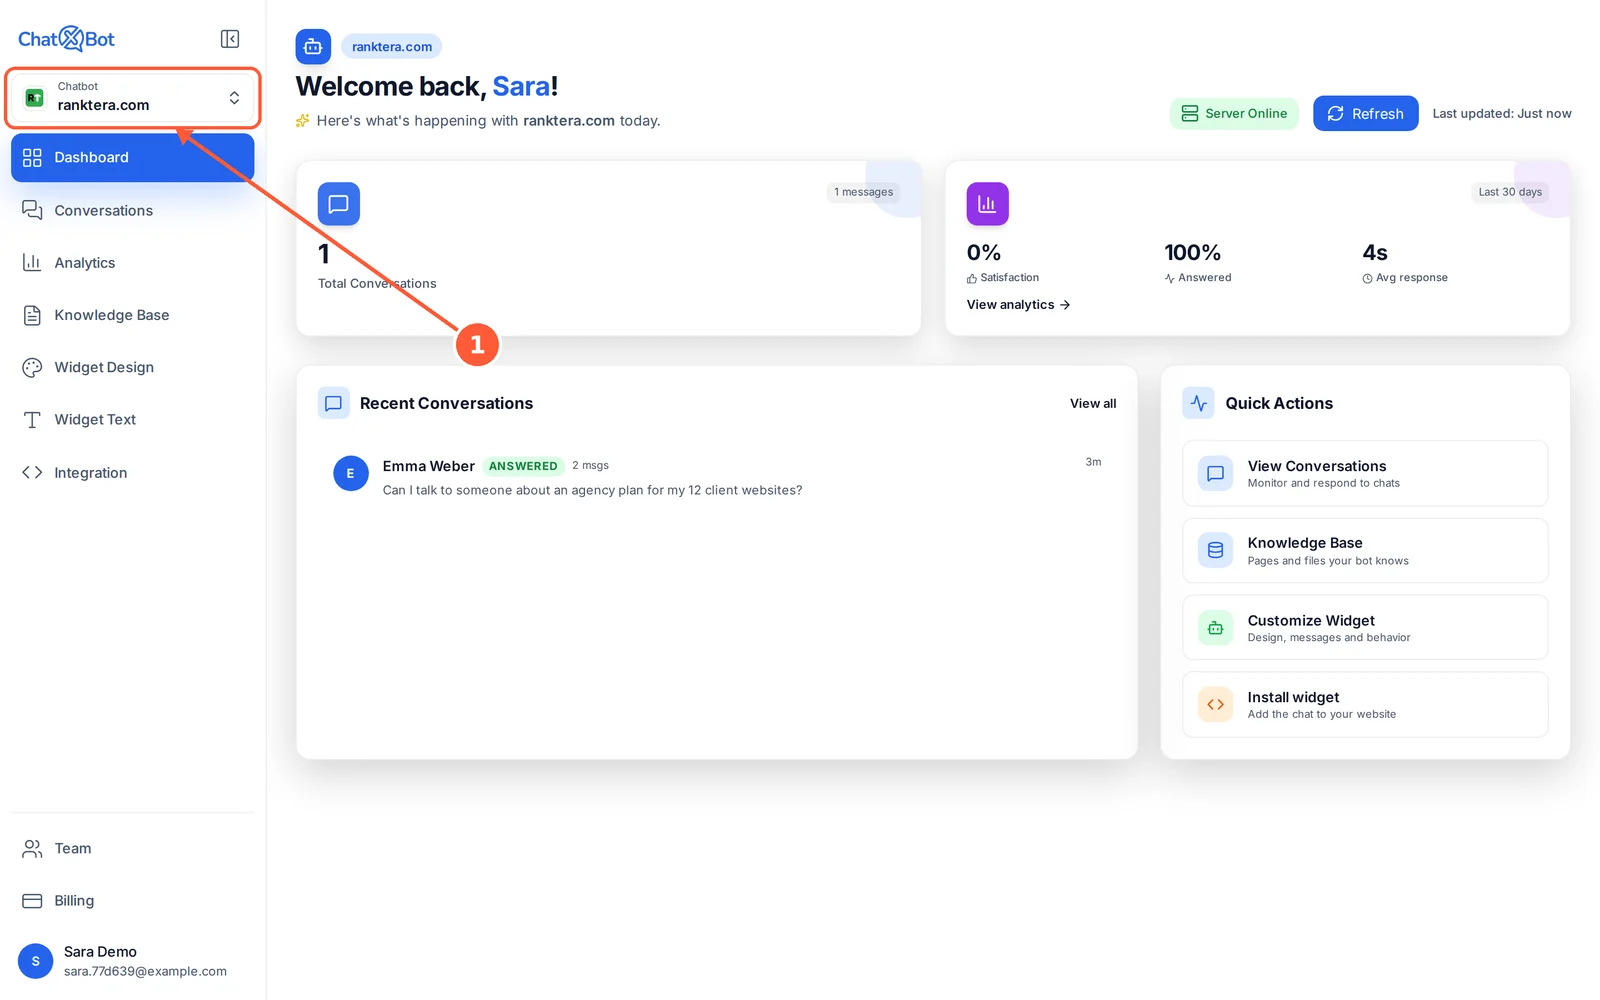
1Chatbot picker: the chatbot you’re working on; click it to switch, or to manage all your chatbots. A red dot means another chatbot has unread chats.1 / 12
💡 Good to Know
Switching chatbots keeps you on the same page and tab, so you can compare them quickly.
Add & Manage Your Pages and Files
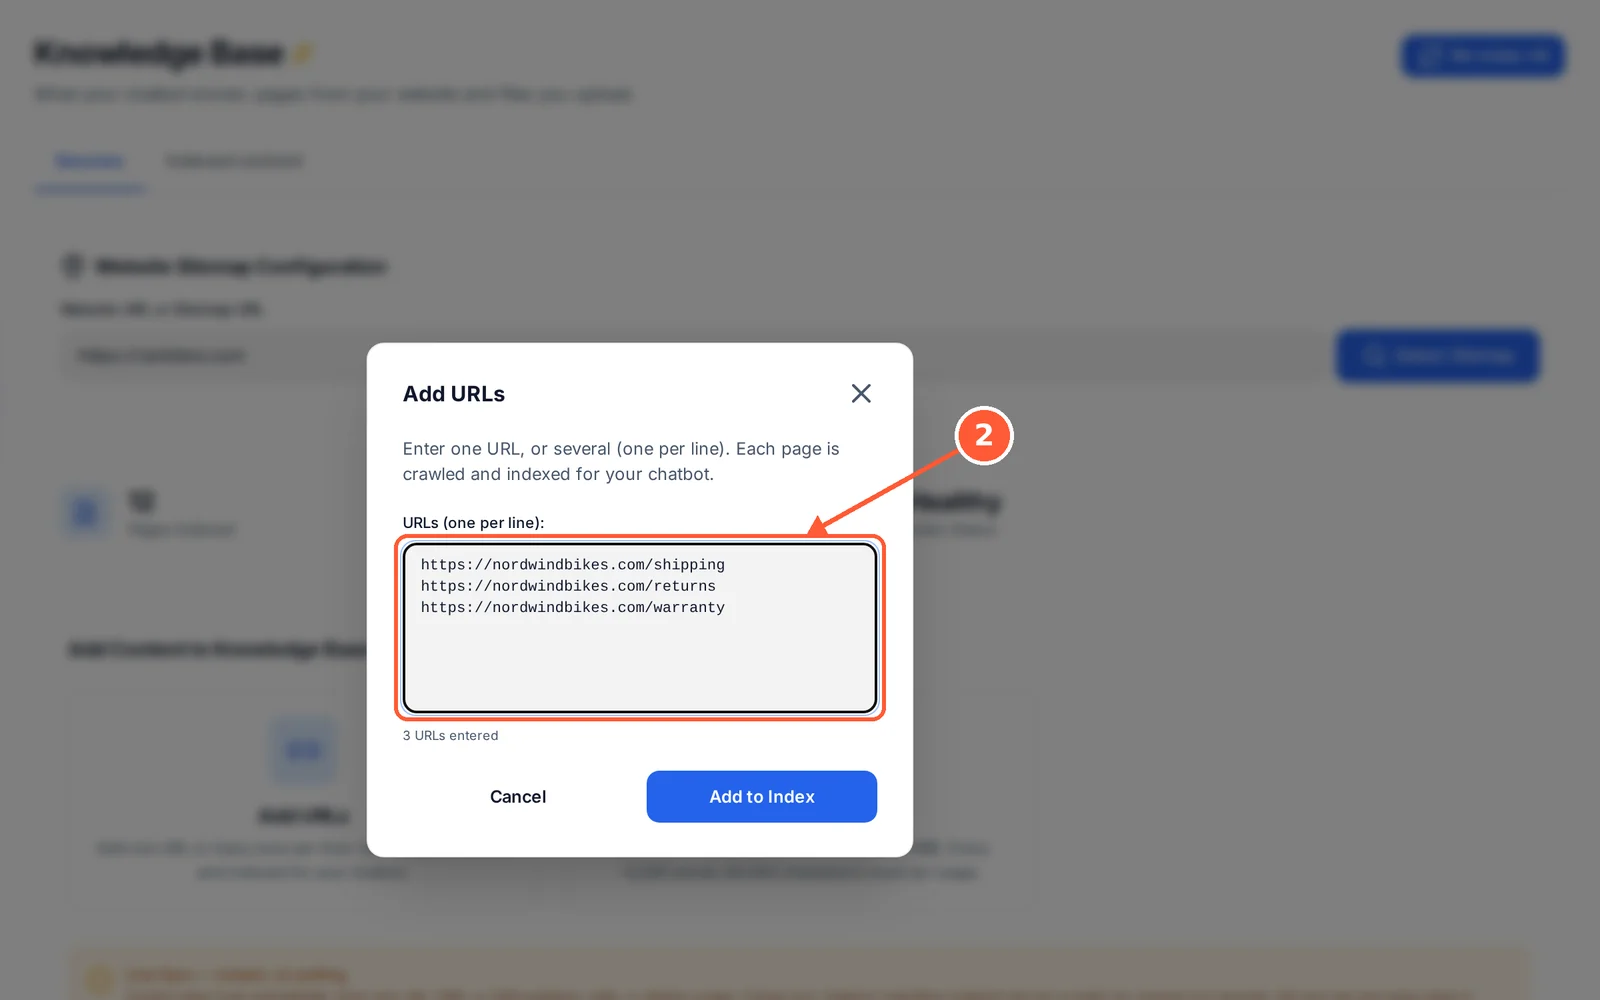
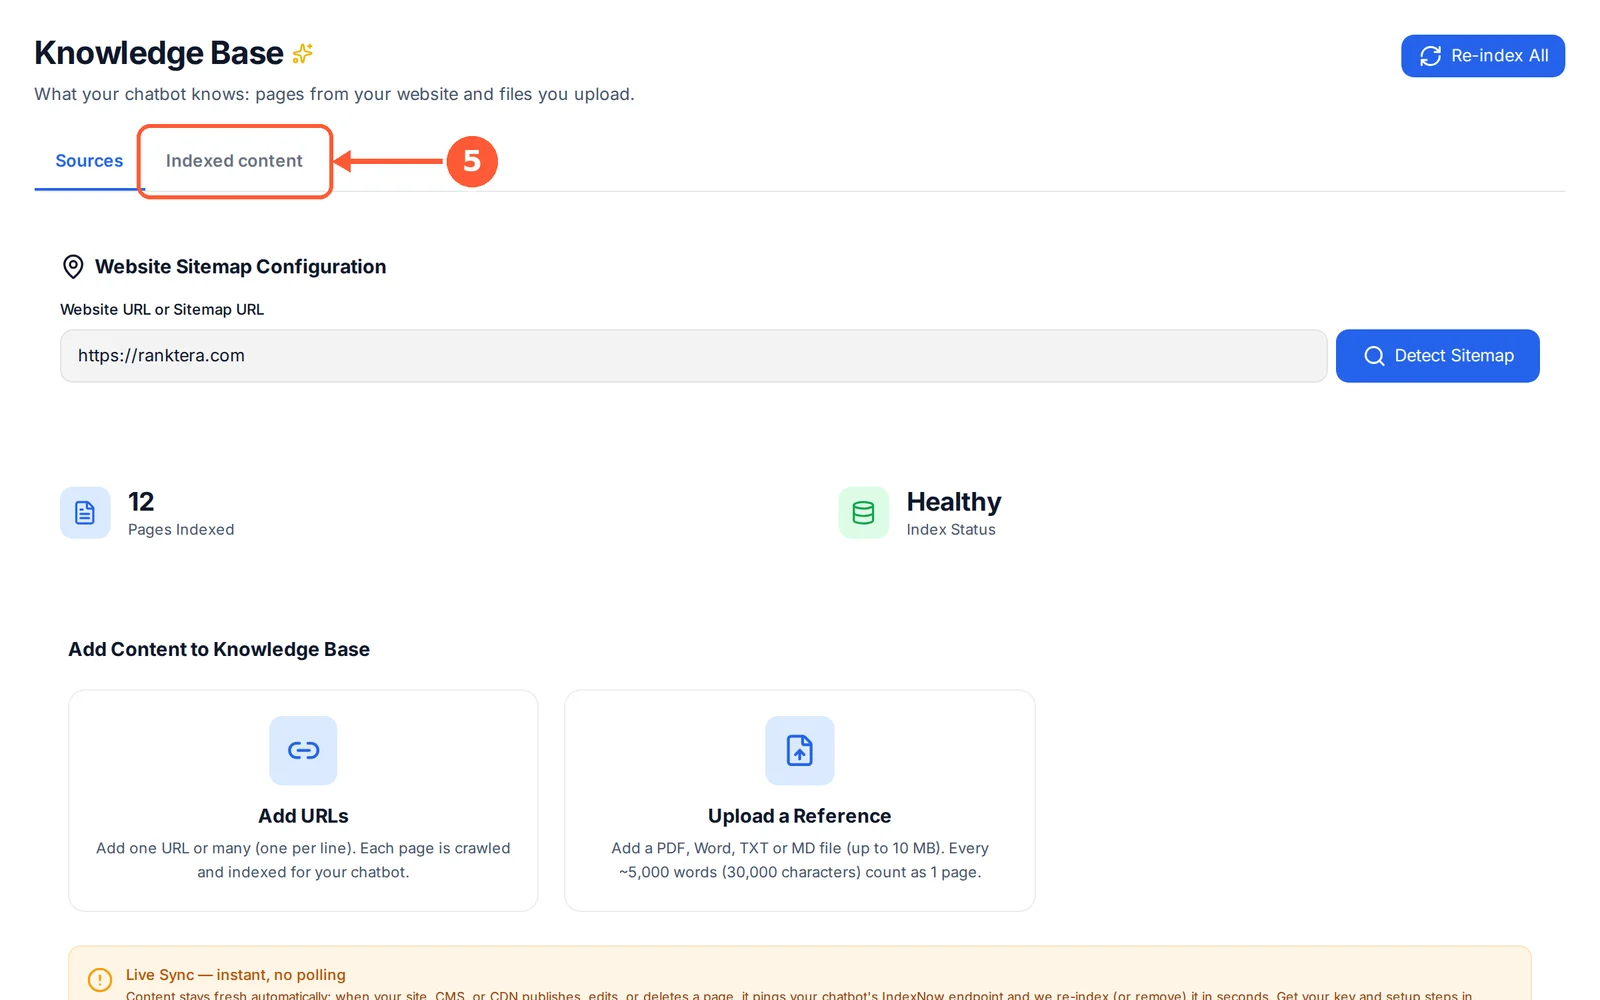
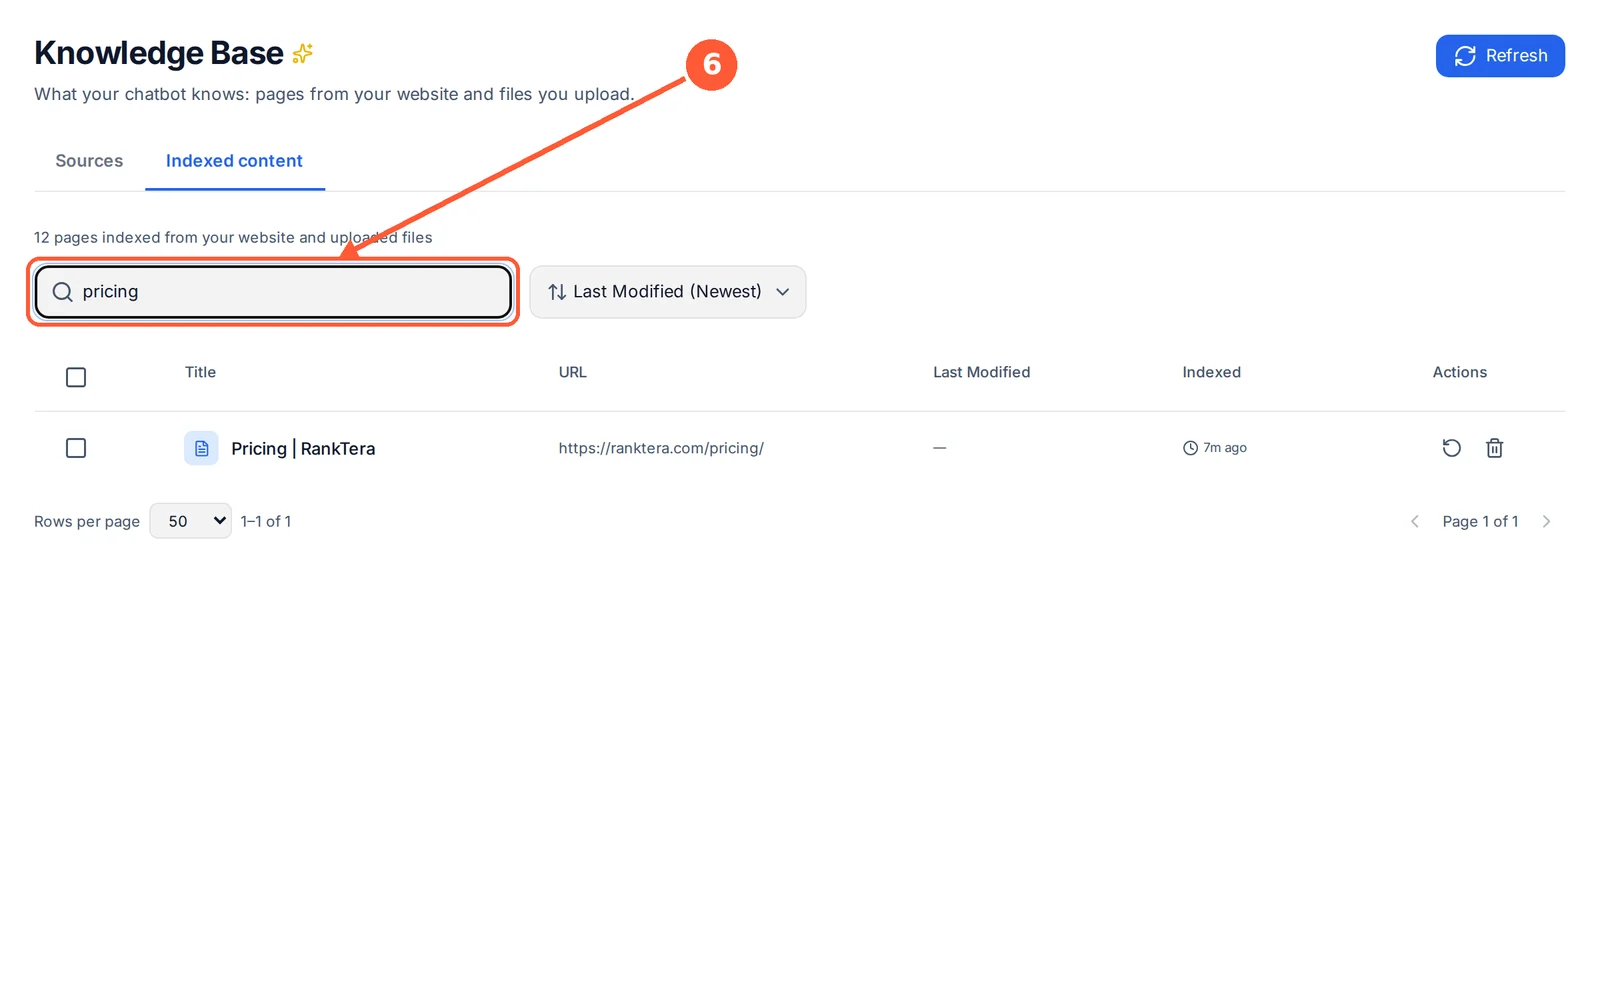
Add single pages, a list of pages or your own files, and see everything your chatbot has learned.
⏱ About 2 minutes • 📍 Knowledge Base
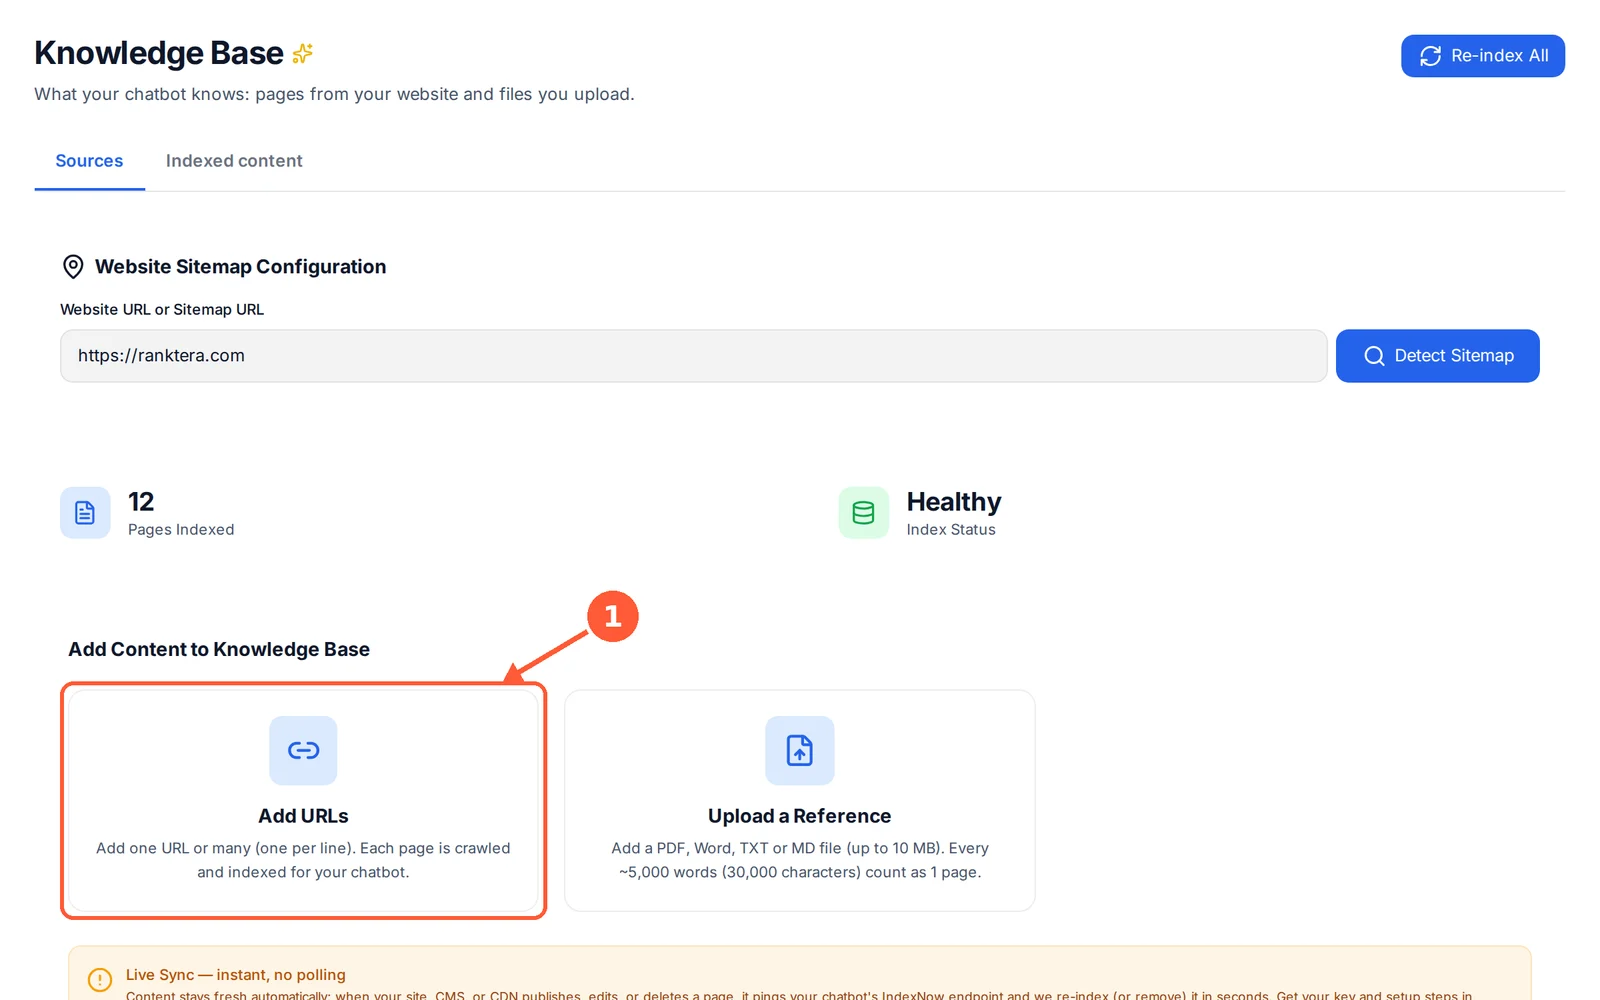
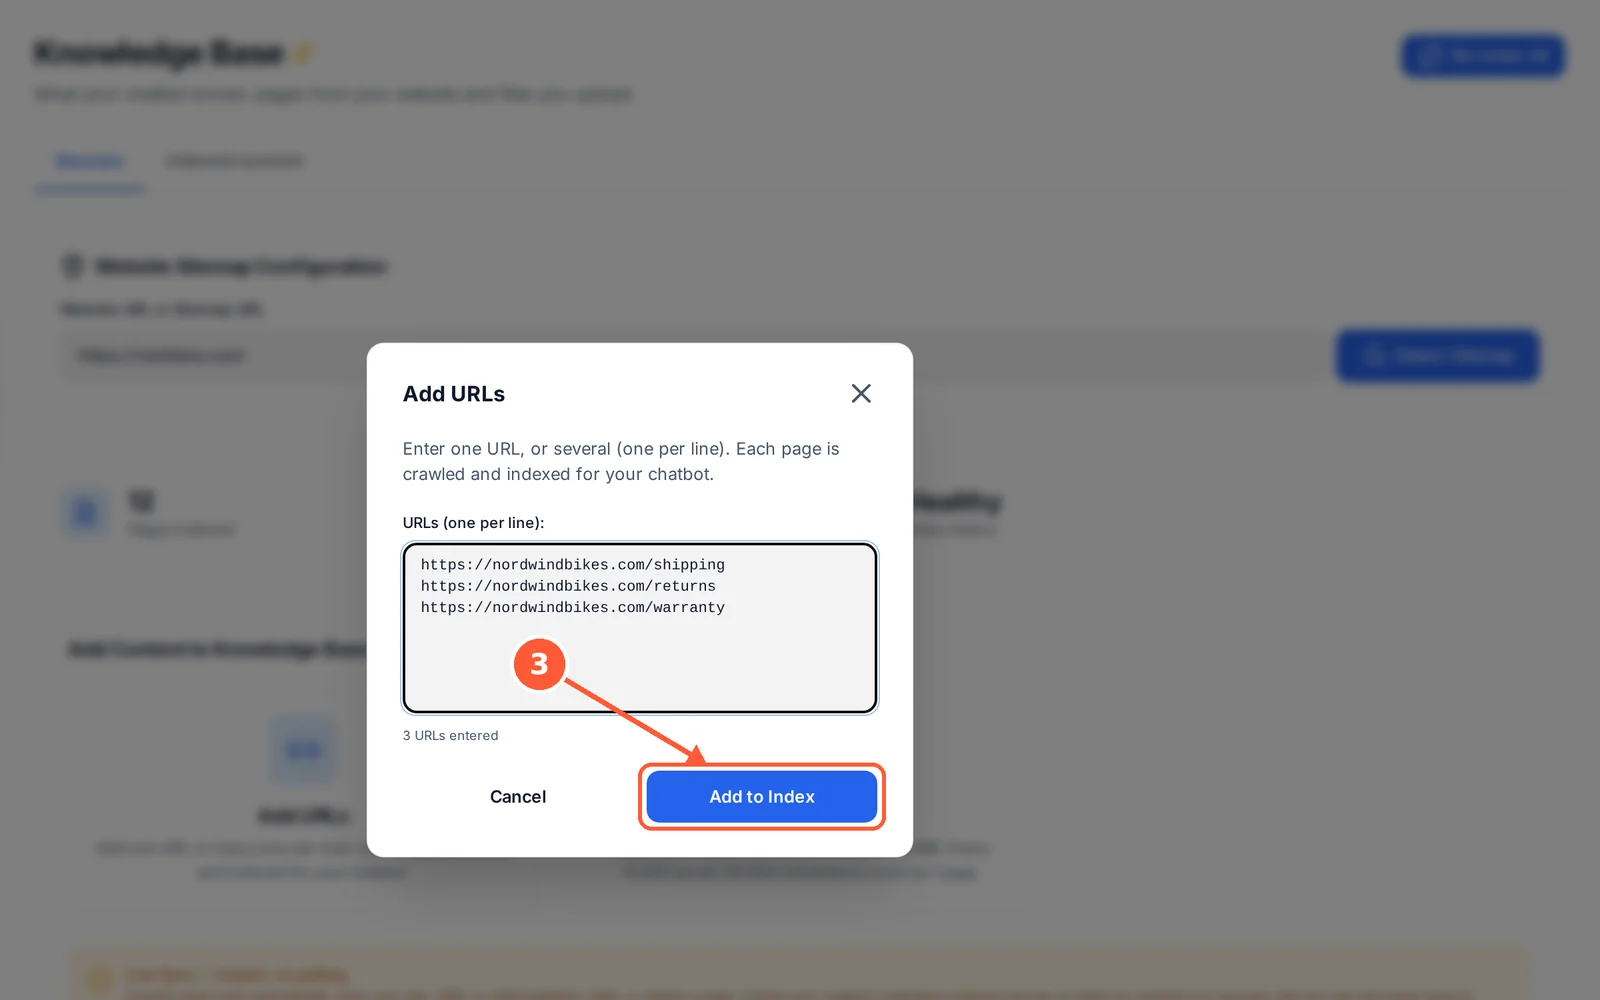
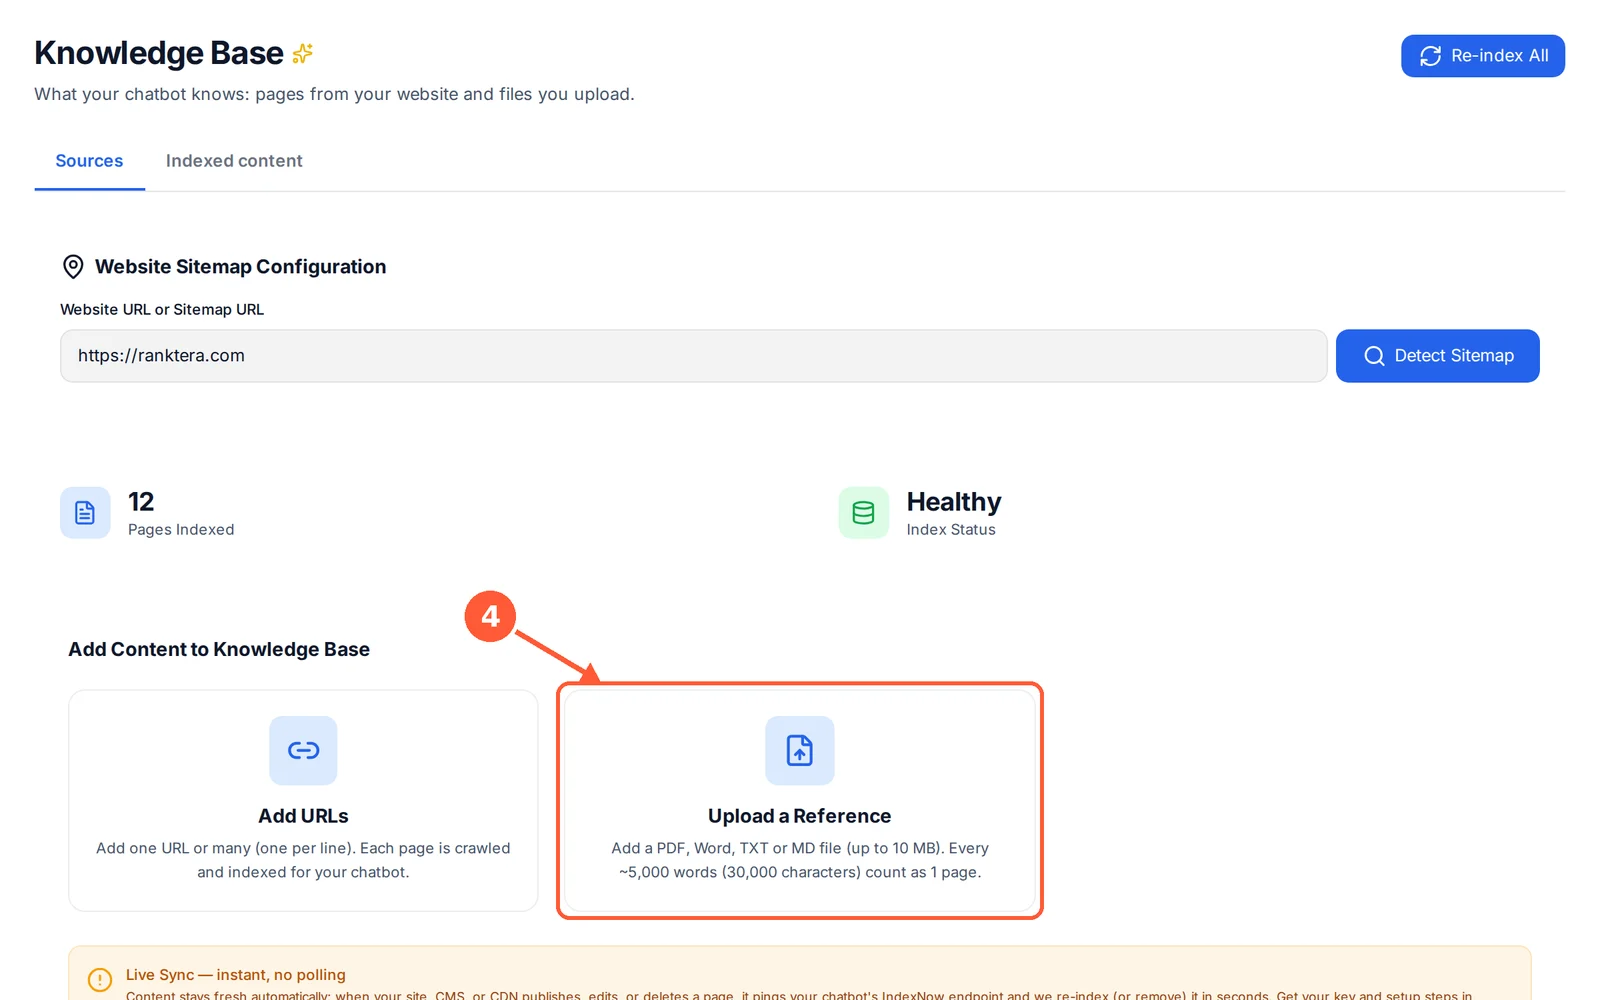
1Click Add URLs.1 / 7
💡 Good to Know
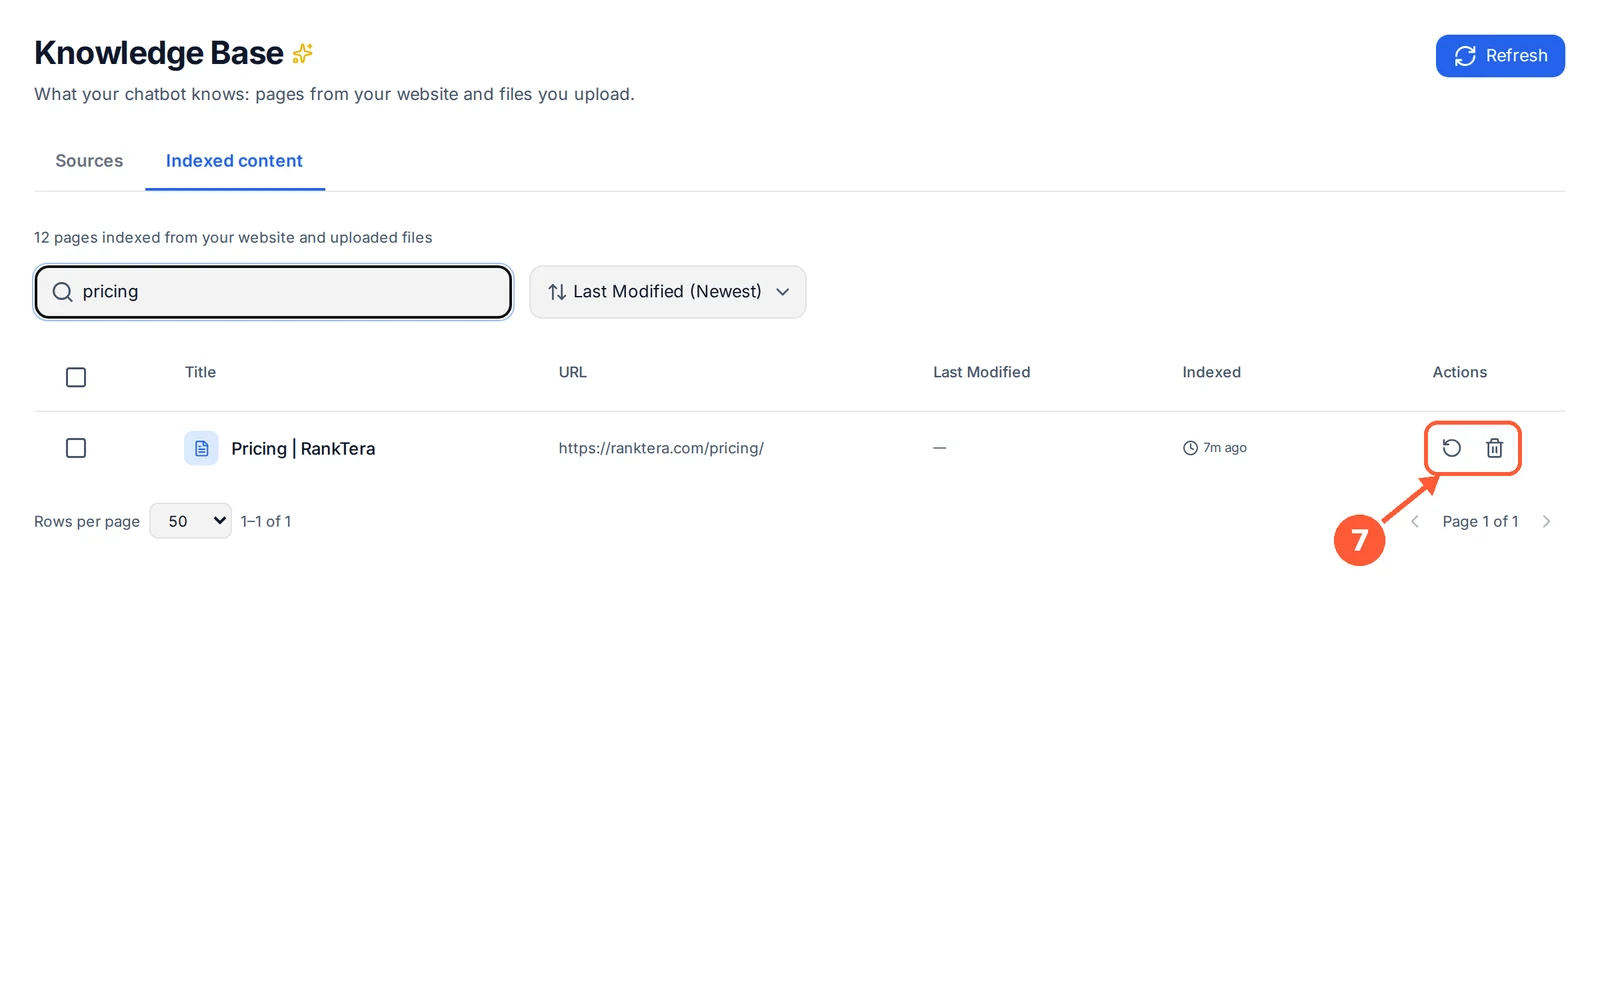
Removed web pages can be restored later. Removed uploaded files are deleted for good.
Uploading a file with the same name replaces the old one.
Keep Your Pages Fresh with Live Sync
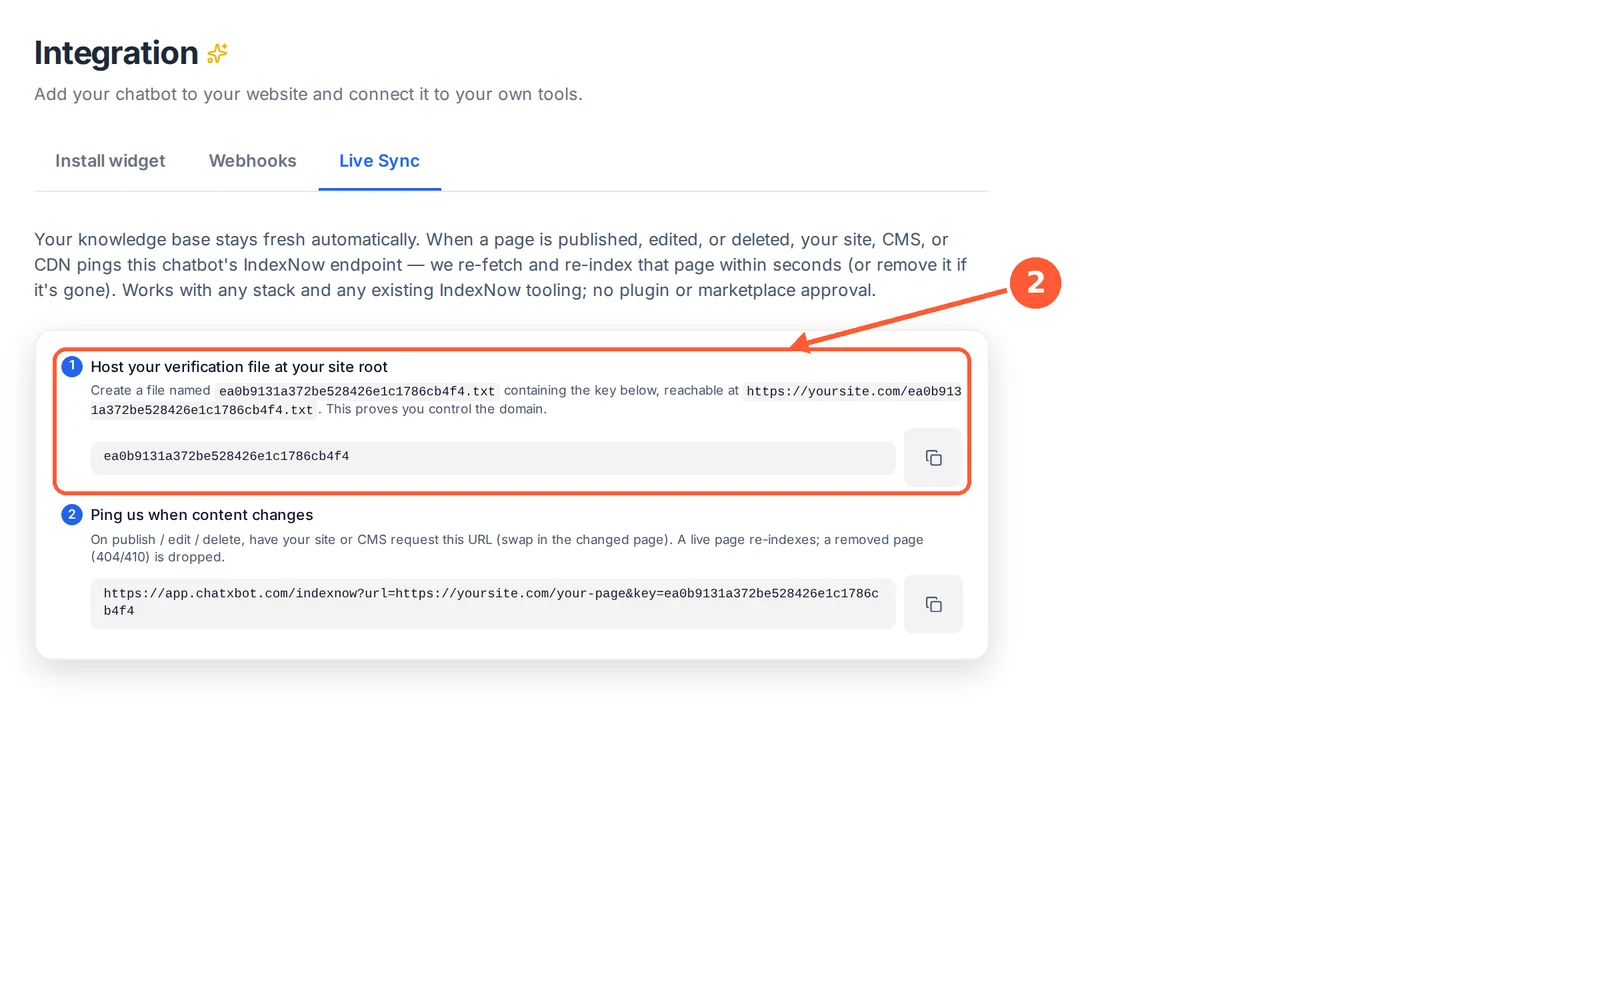
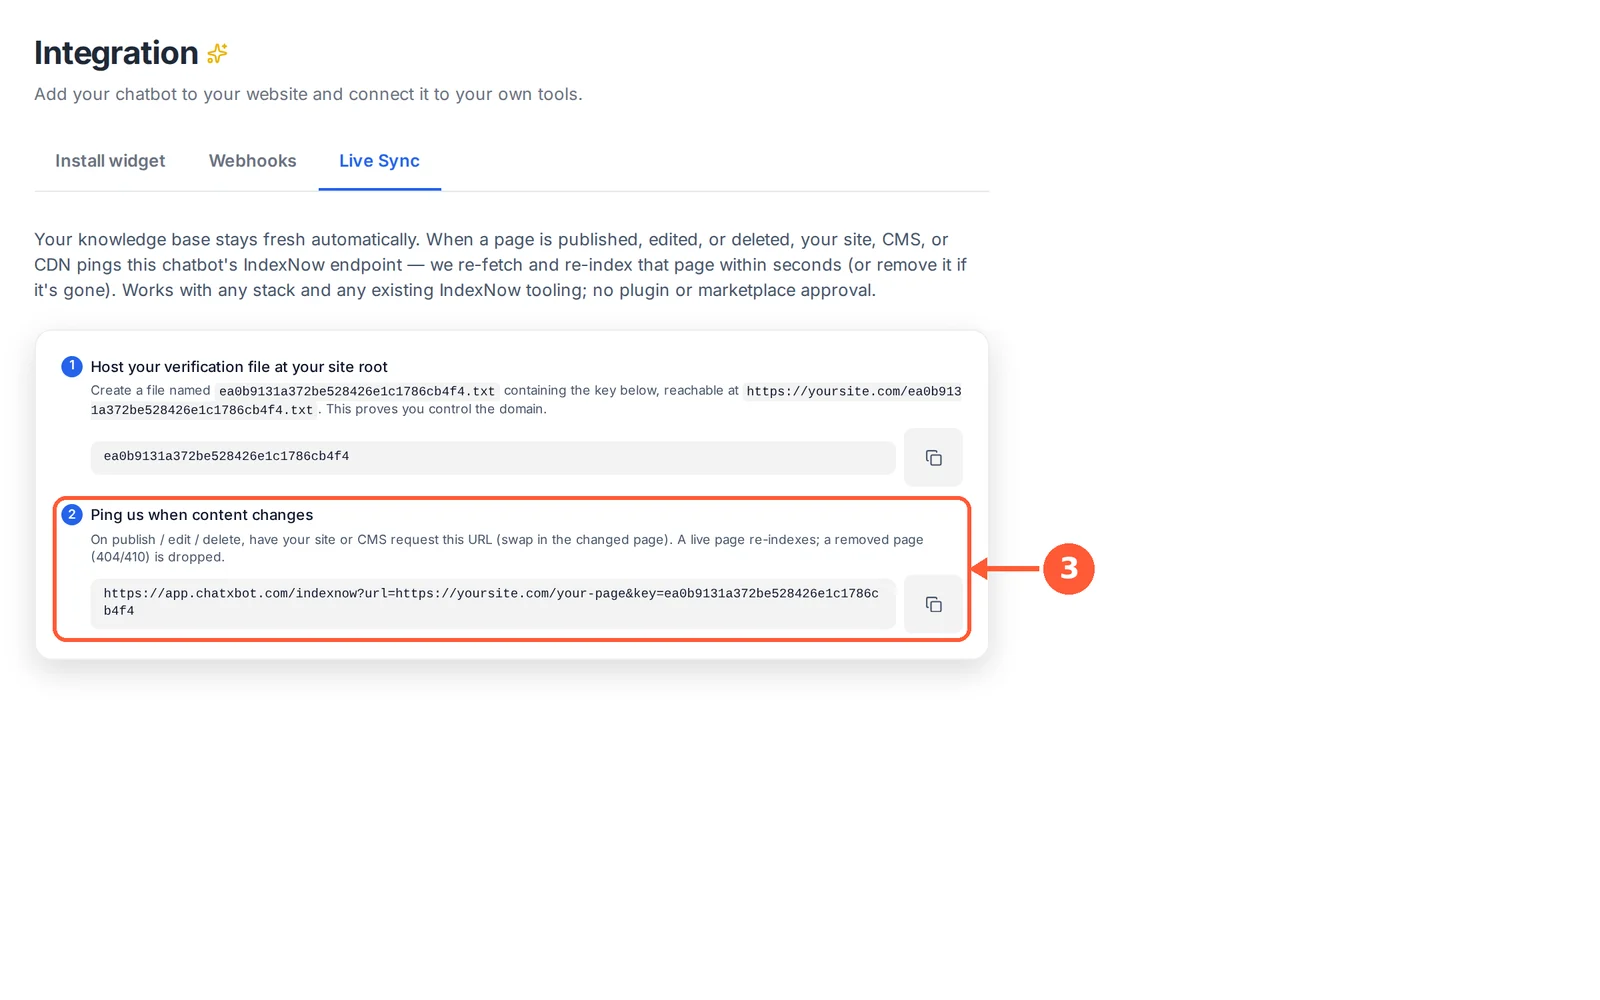
Live Sync updates your chatbot within seconds whenever your website publishes, edits or deletes a page. Your web developer sets it up once.
⏱ About 10 minutes (for your developer) • 📍 Integration › Live Sync
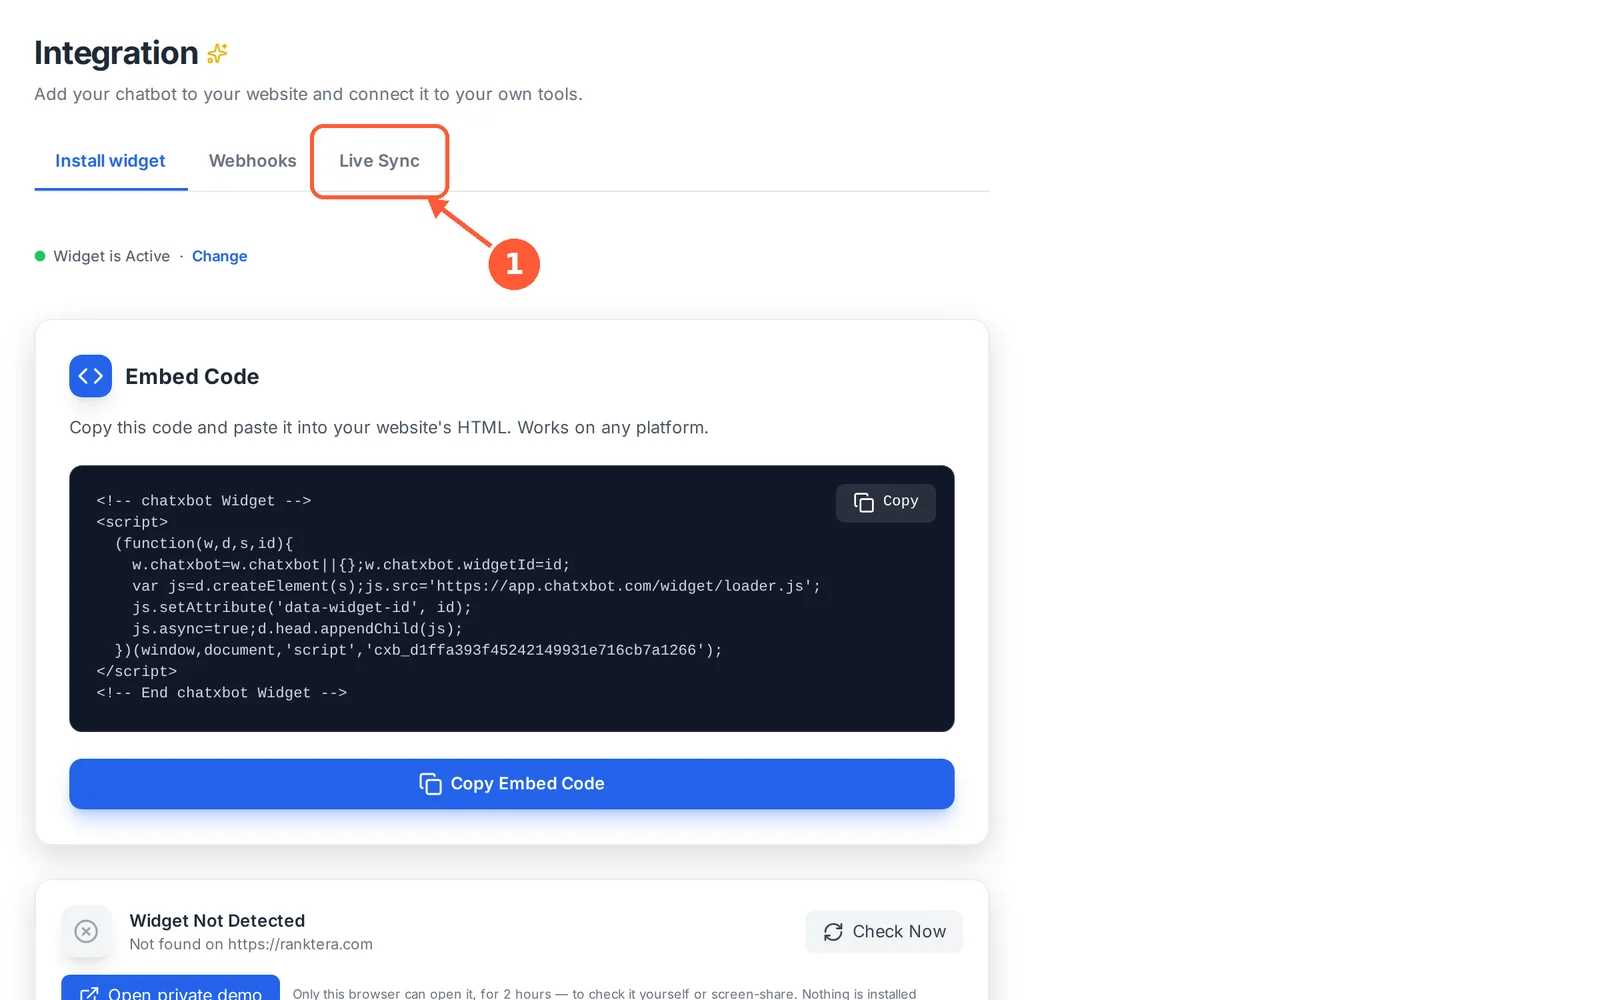
1Open the Live Sync tab in Integration.1 / 3
💡 Good to Know
Share this tab with your web developer. It works with any website and needs no plugin.
Invite Your Team
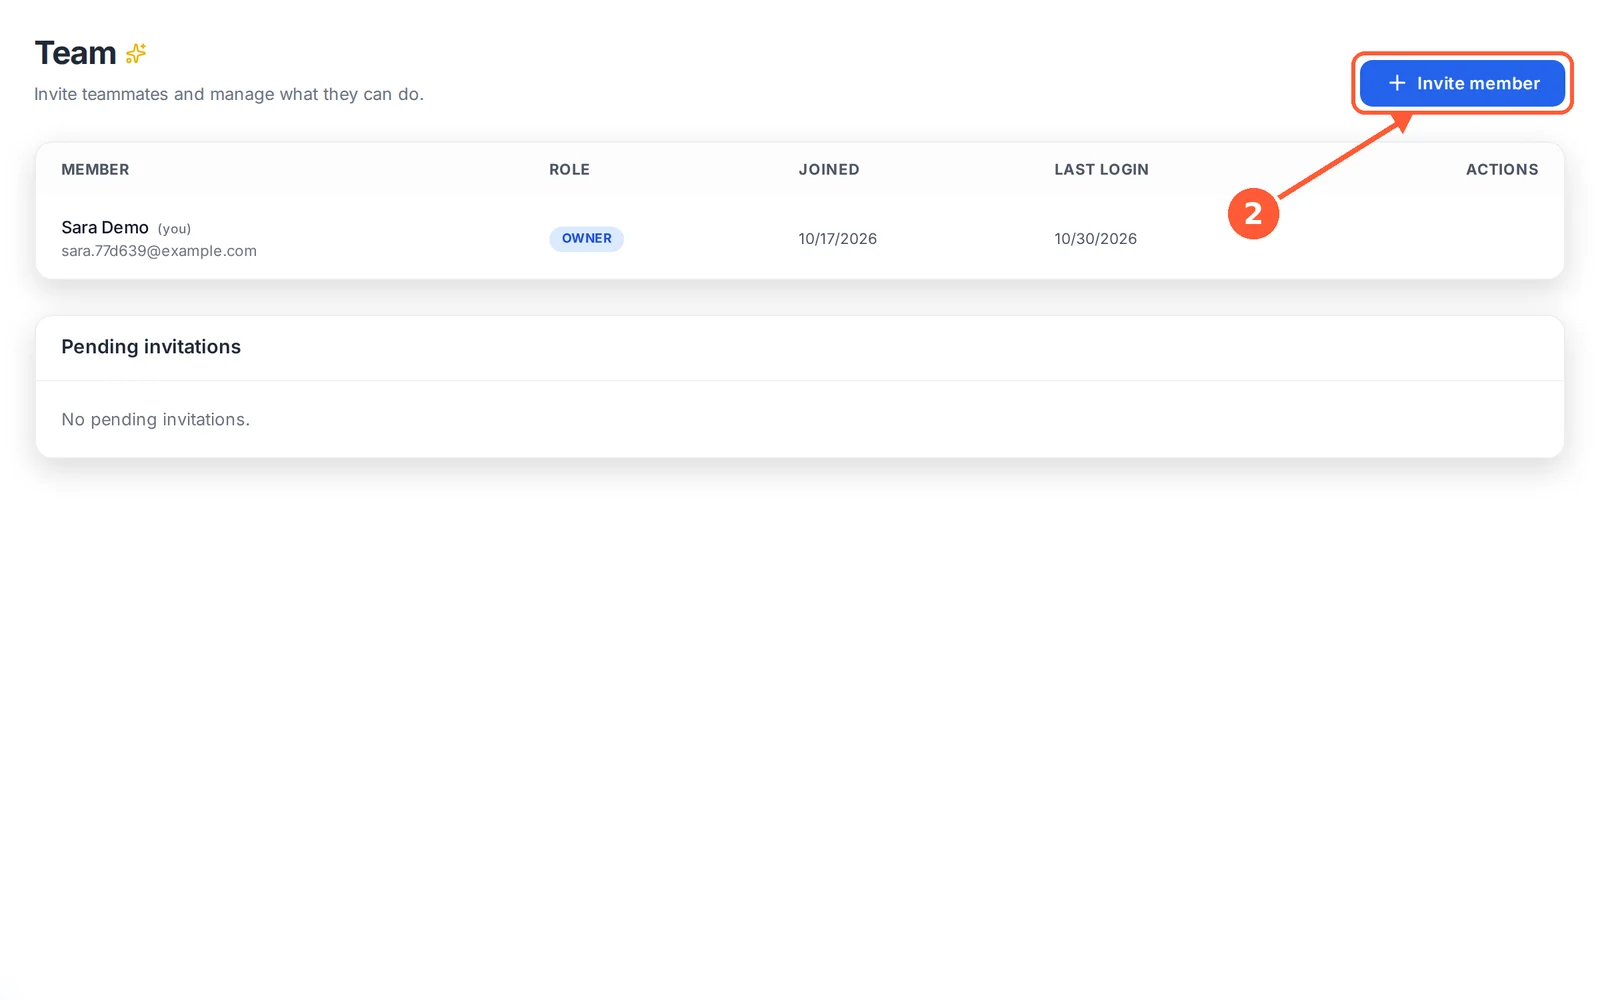
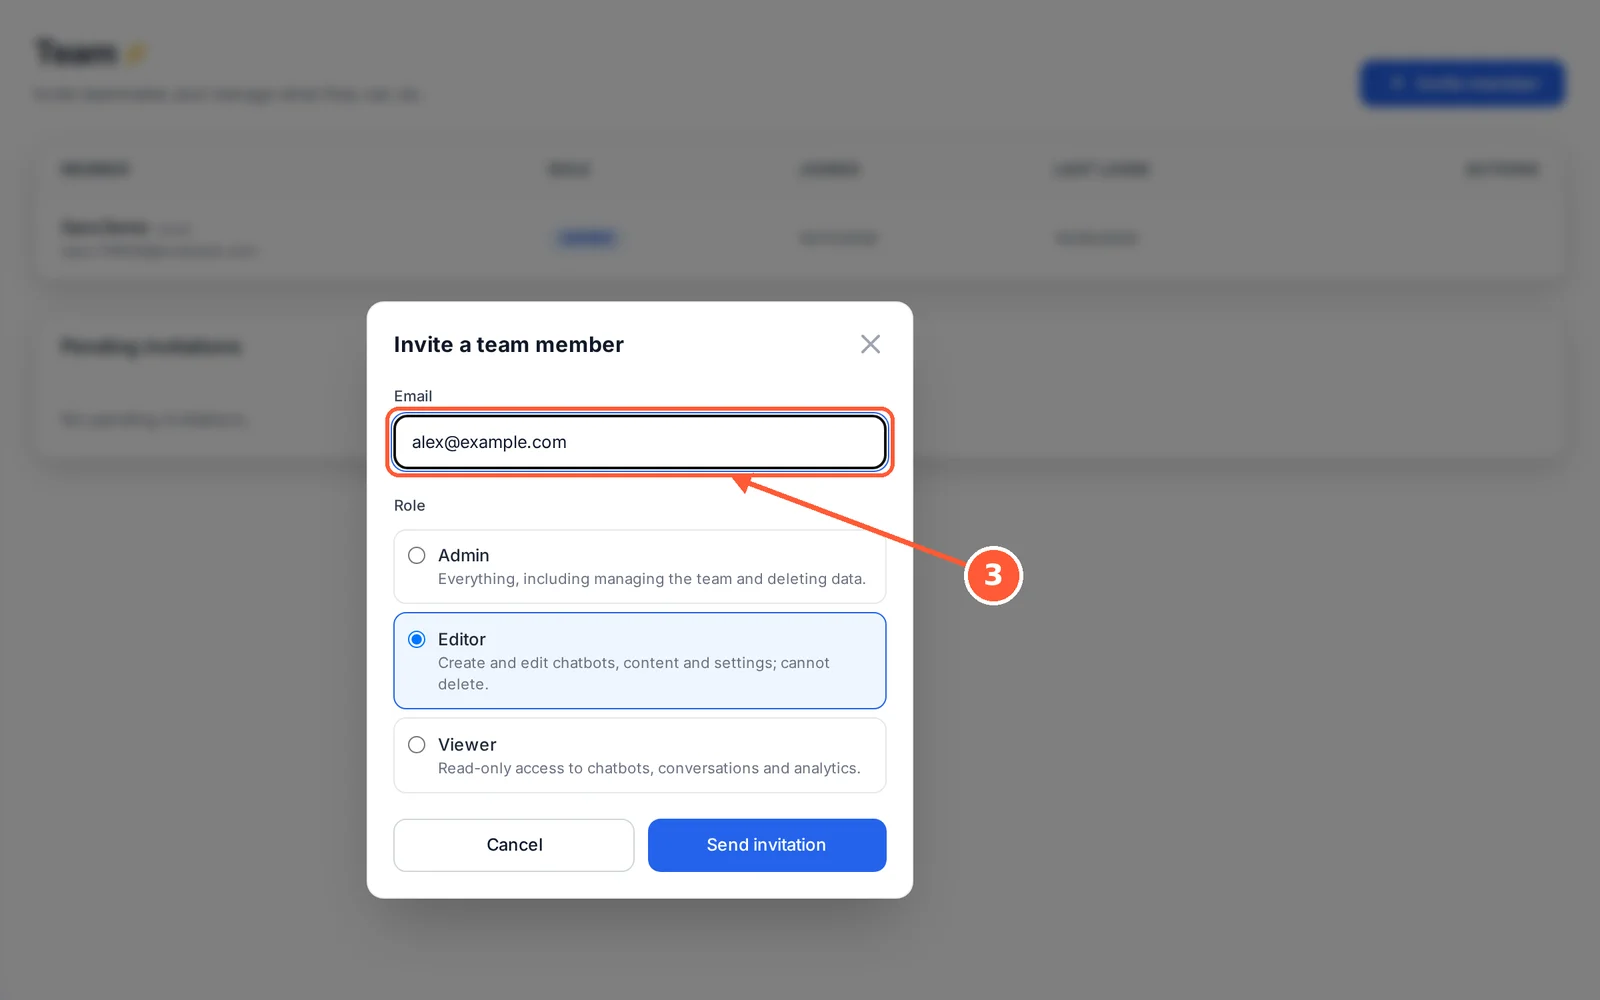
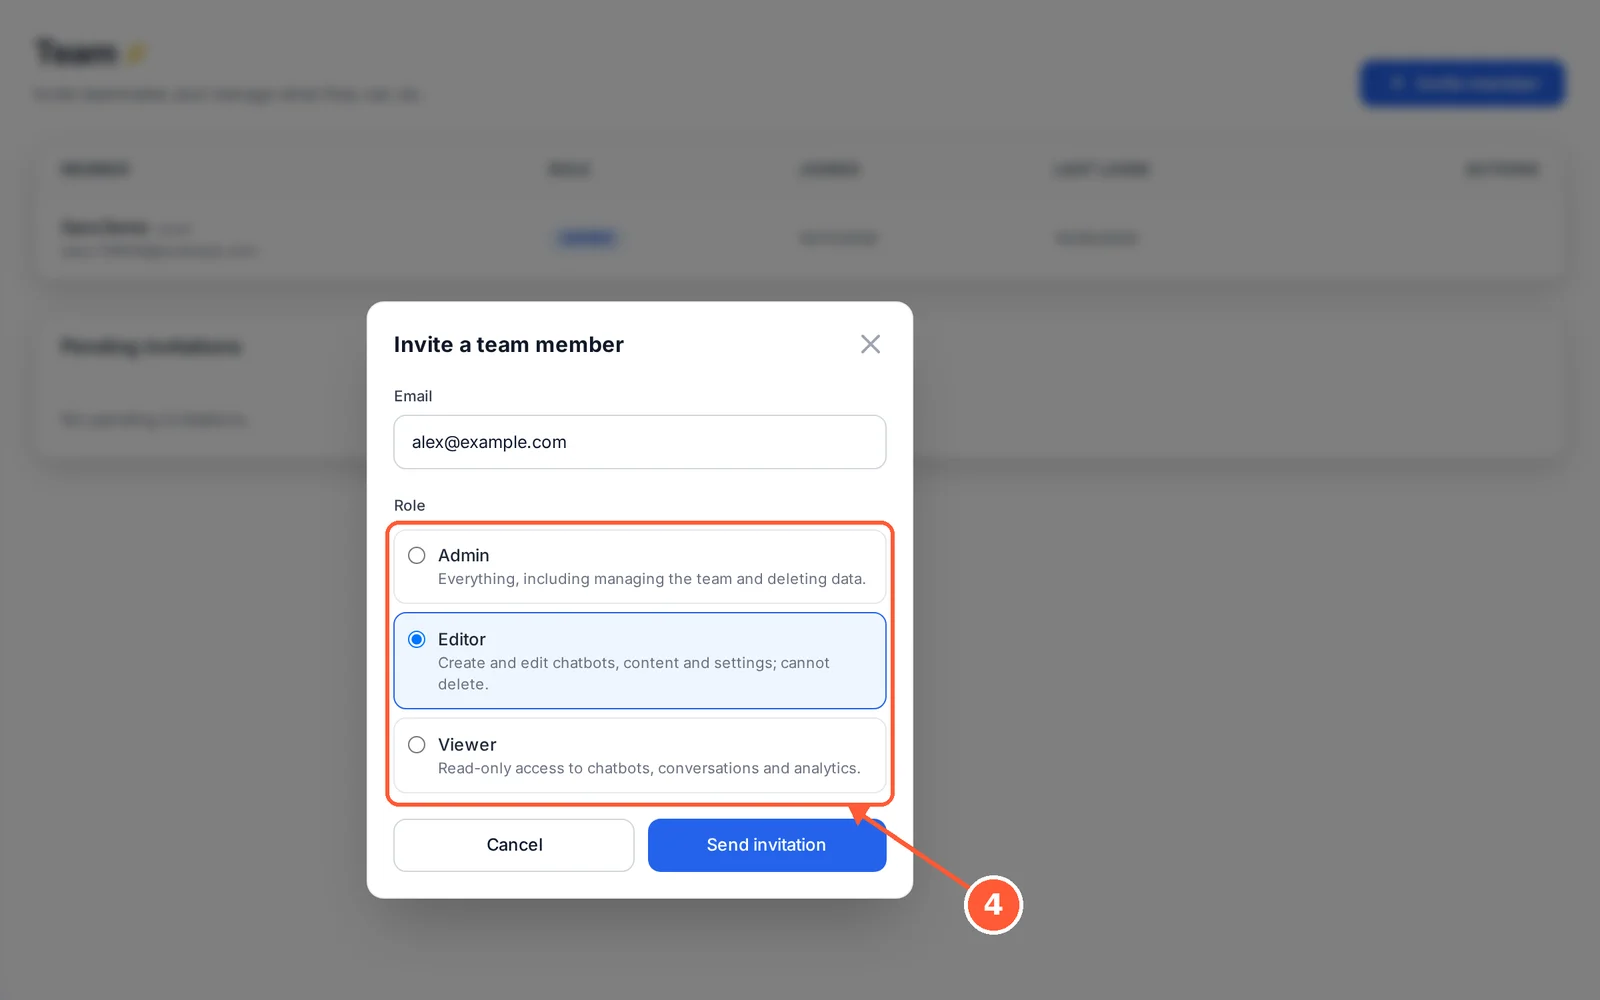
Invite teammates to help you answer chats and manage your content. Your team covers all your chatbots.
⏱ About 1 minute • 📍 Team
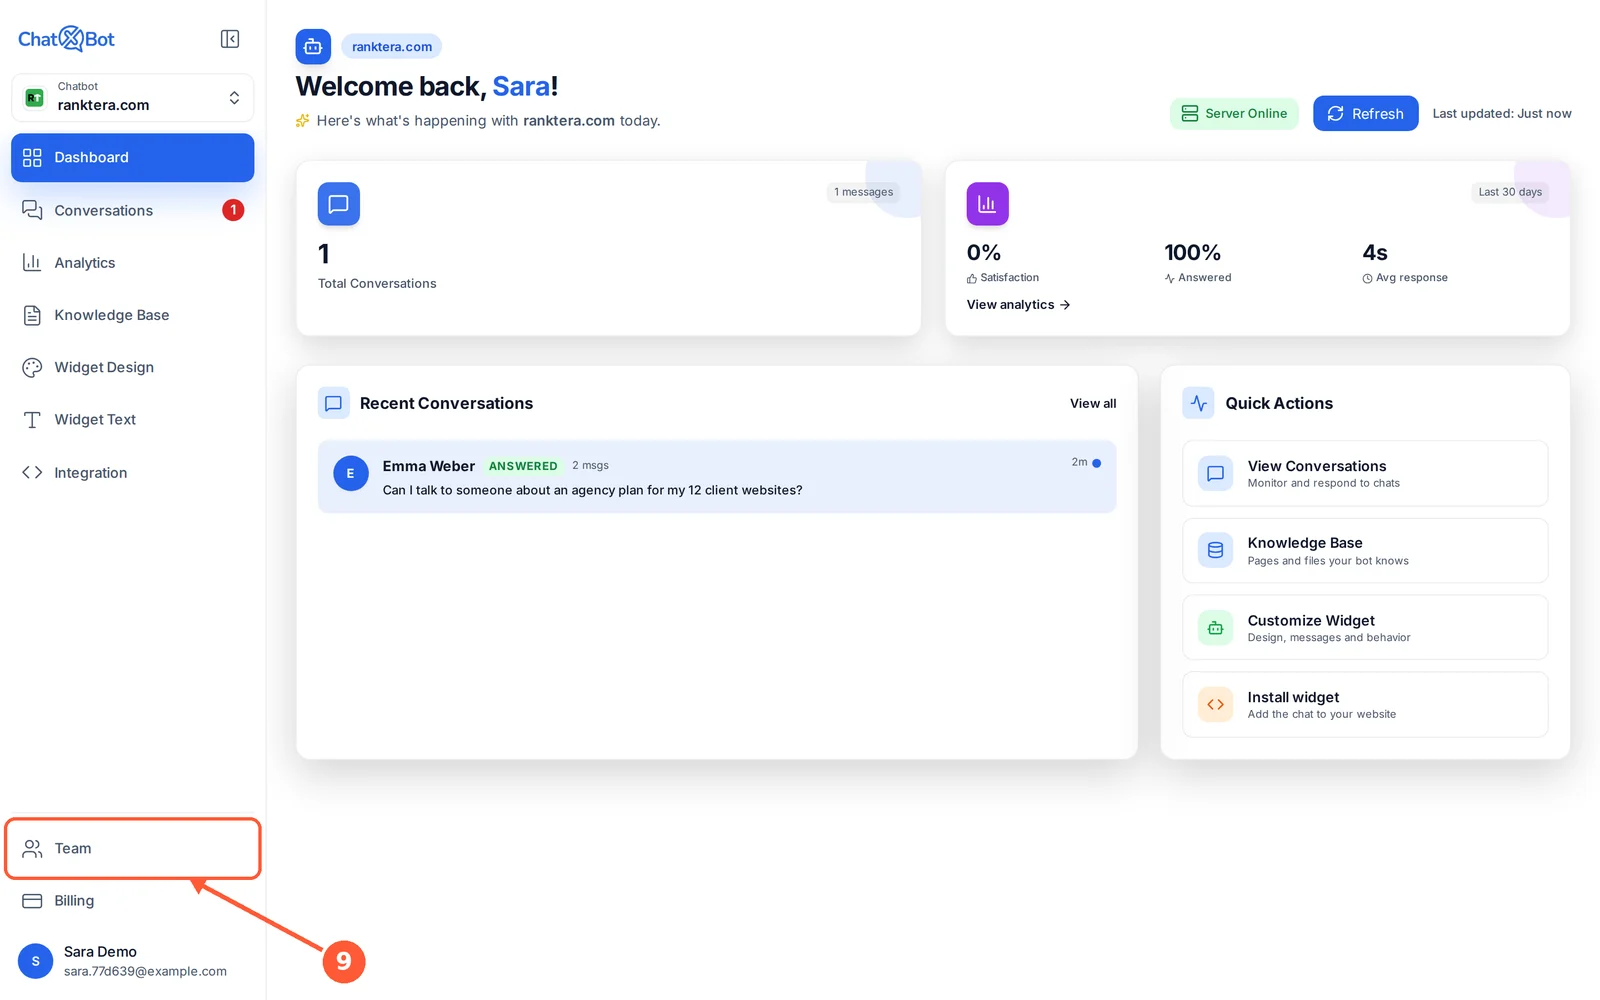
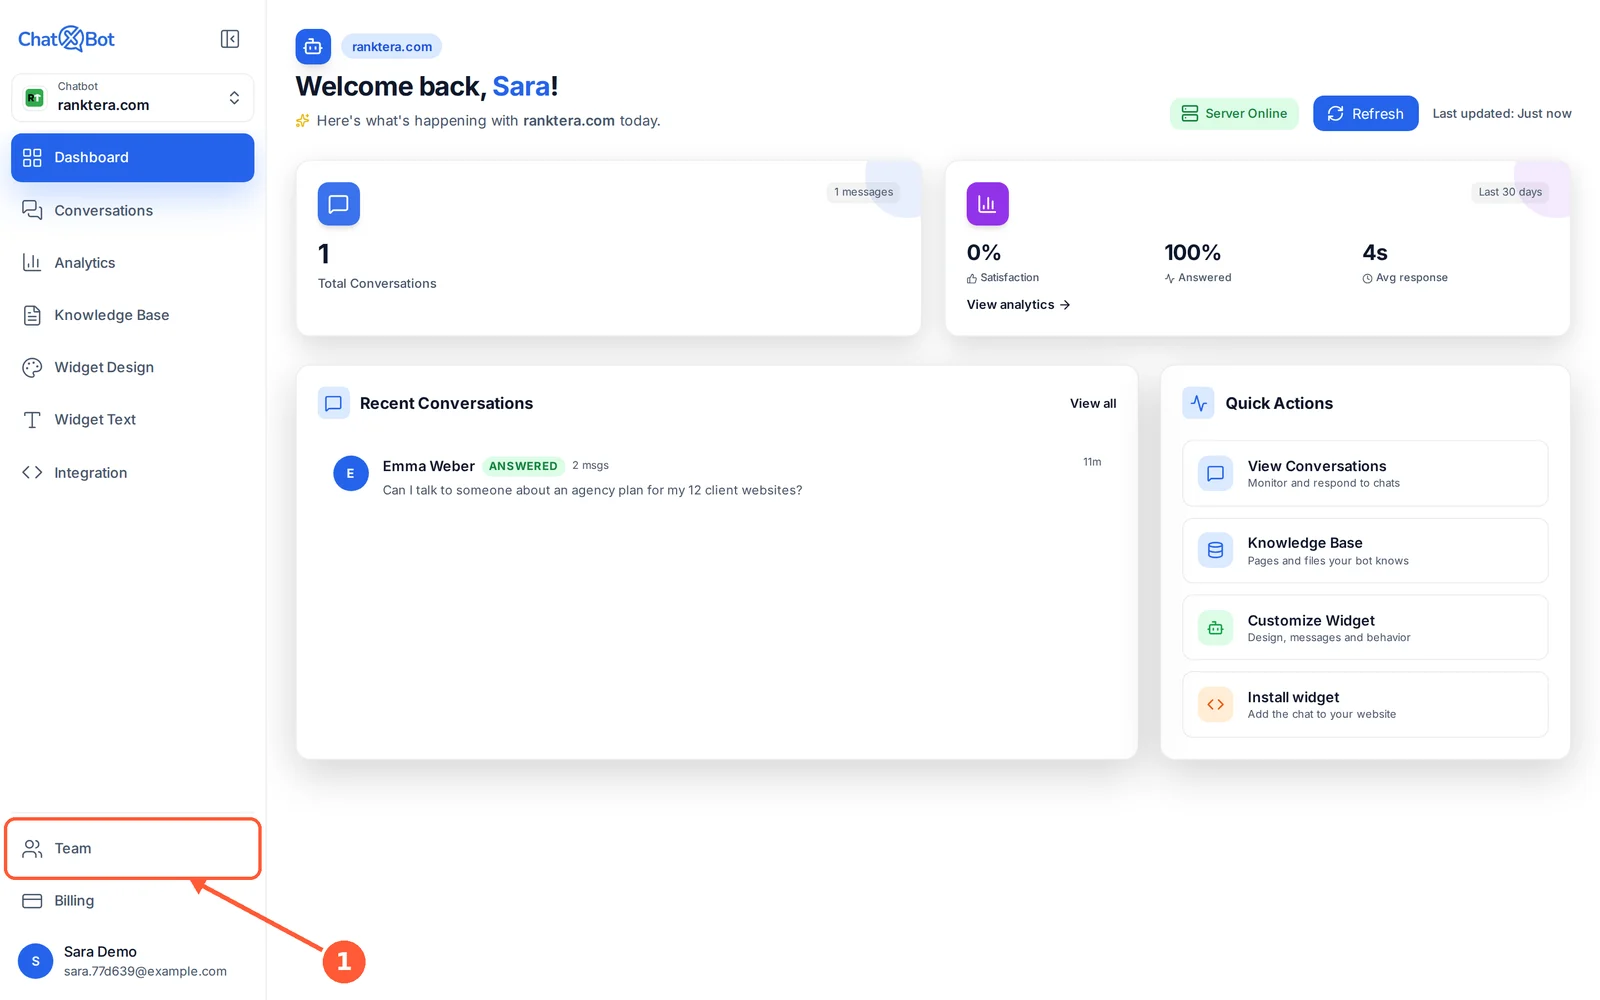
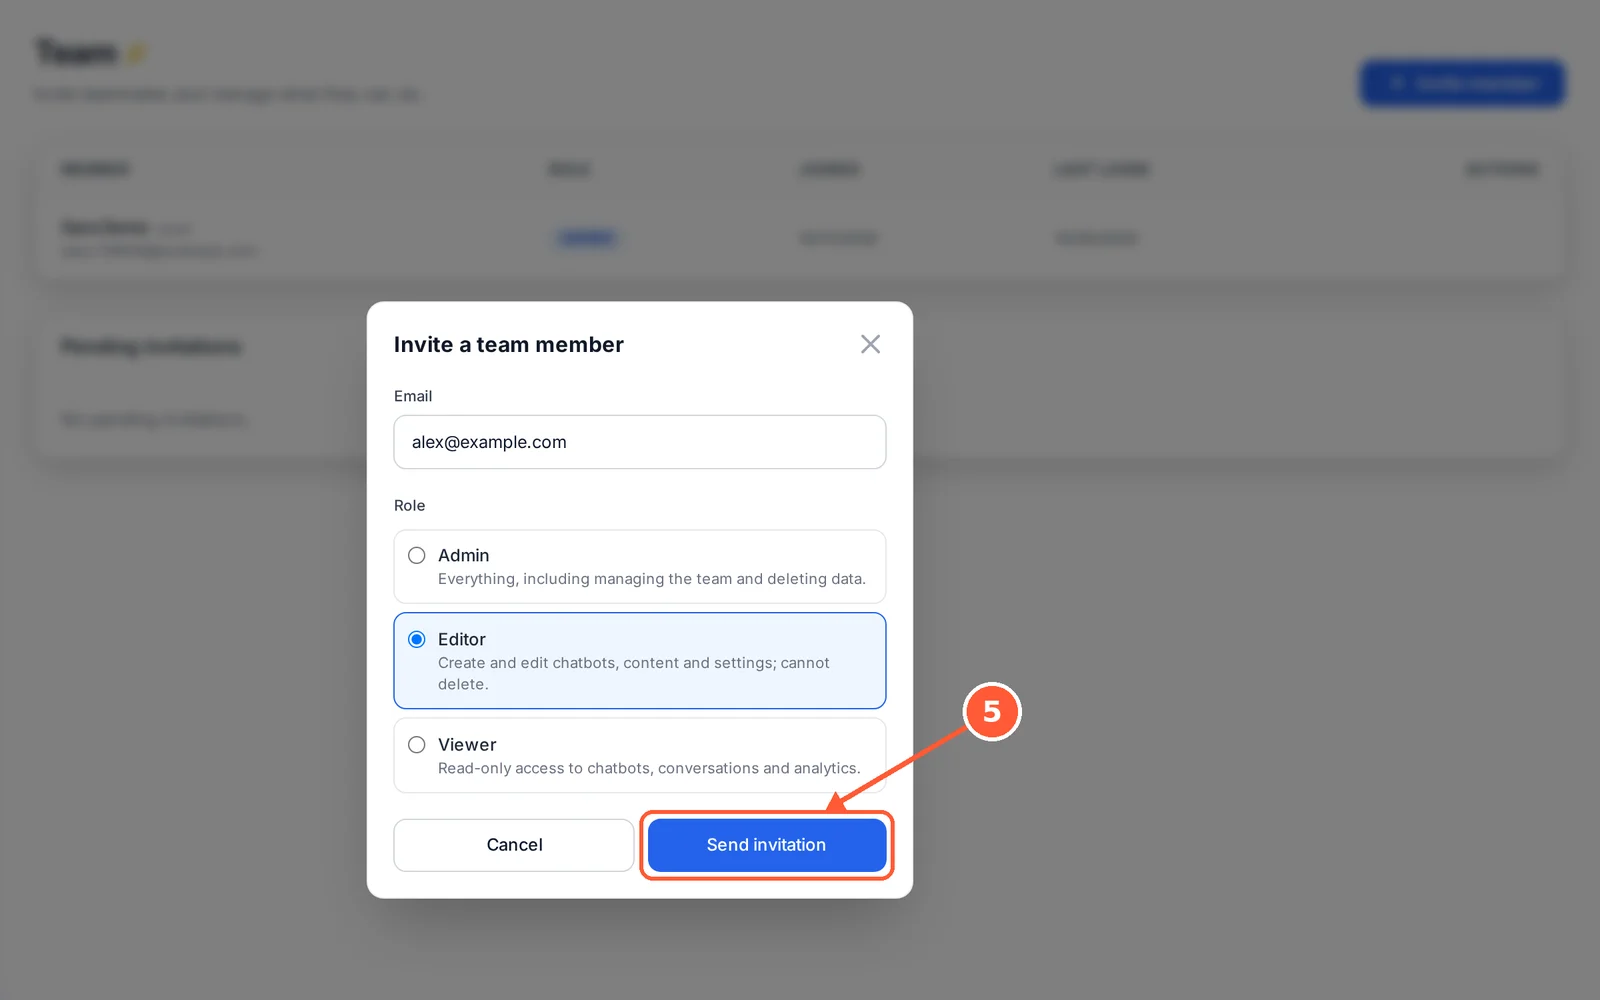
1Click Team in the menu.1 / 5
💡 Good to Know
Invitations stay under Pending invitations until your teammate accepts.
Team members per plan: Free 1, Starter 3, Pro 5, Business 25. Upgrade in Billing to add more.
Your Chatbots
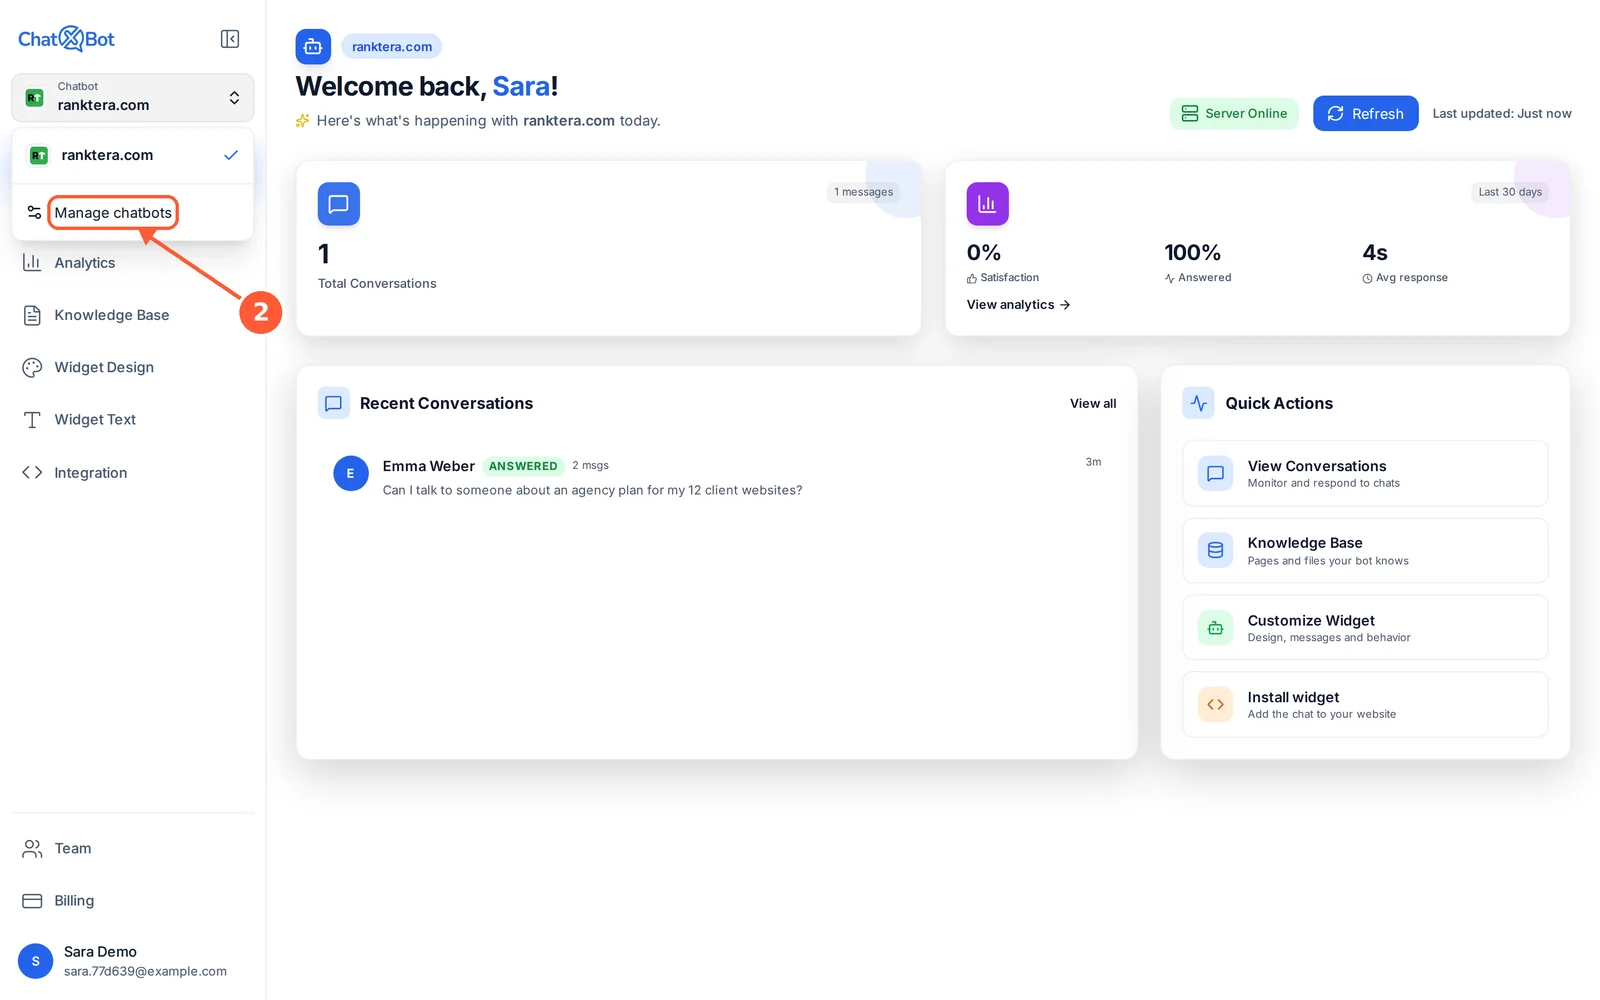
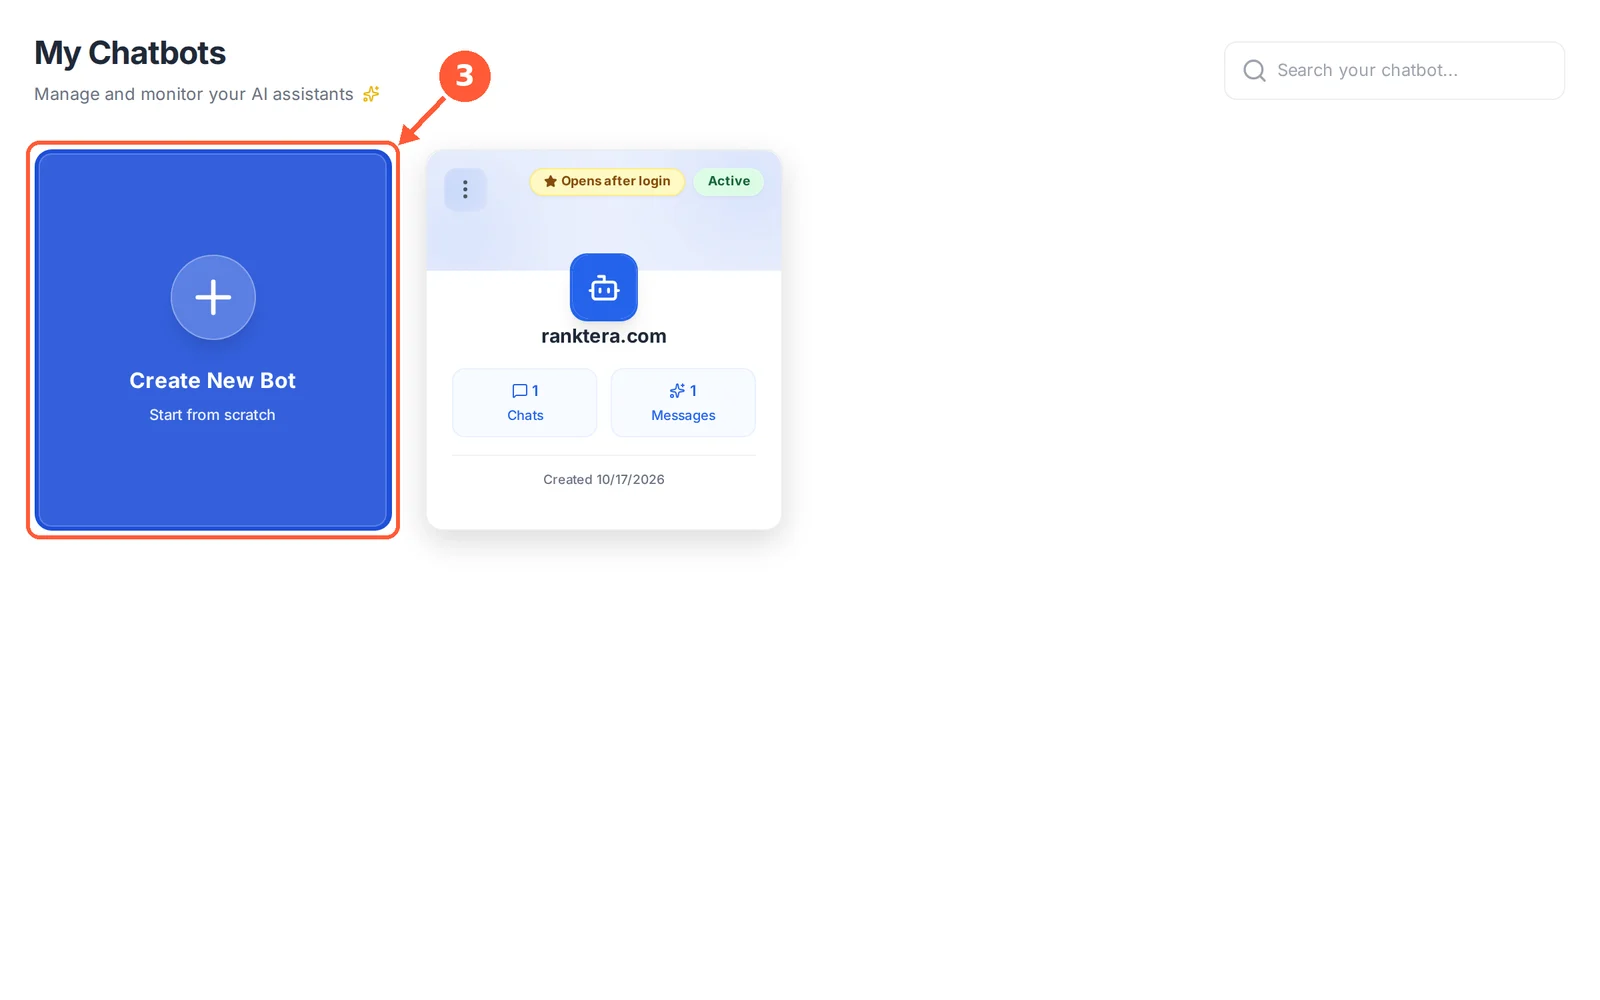
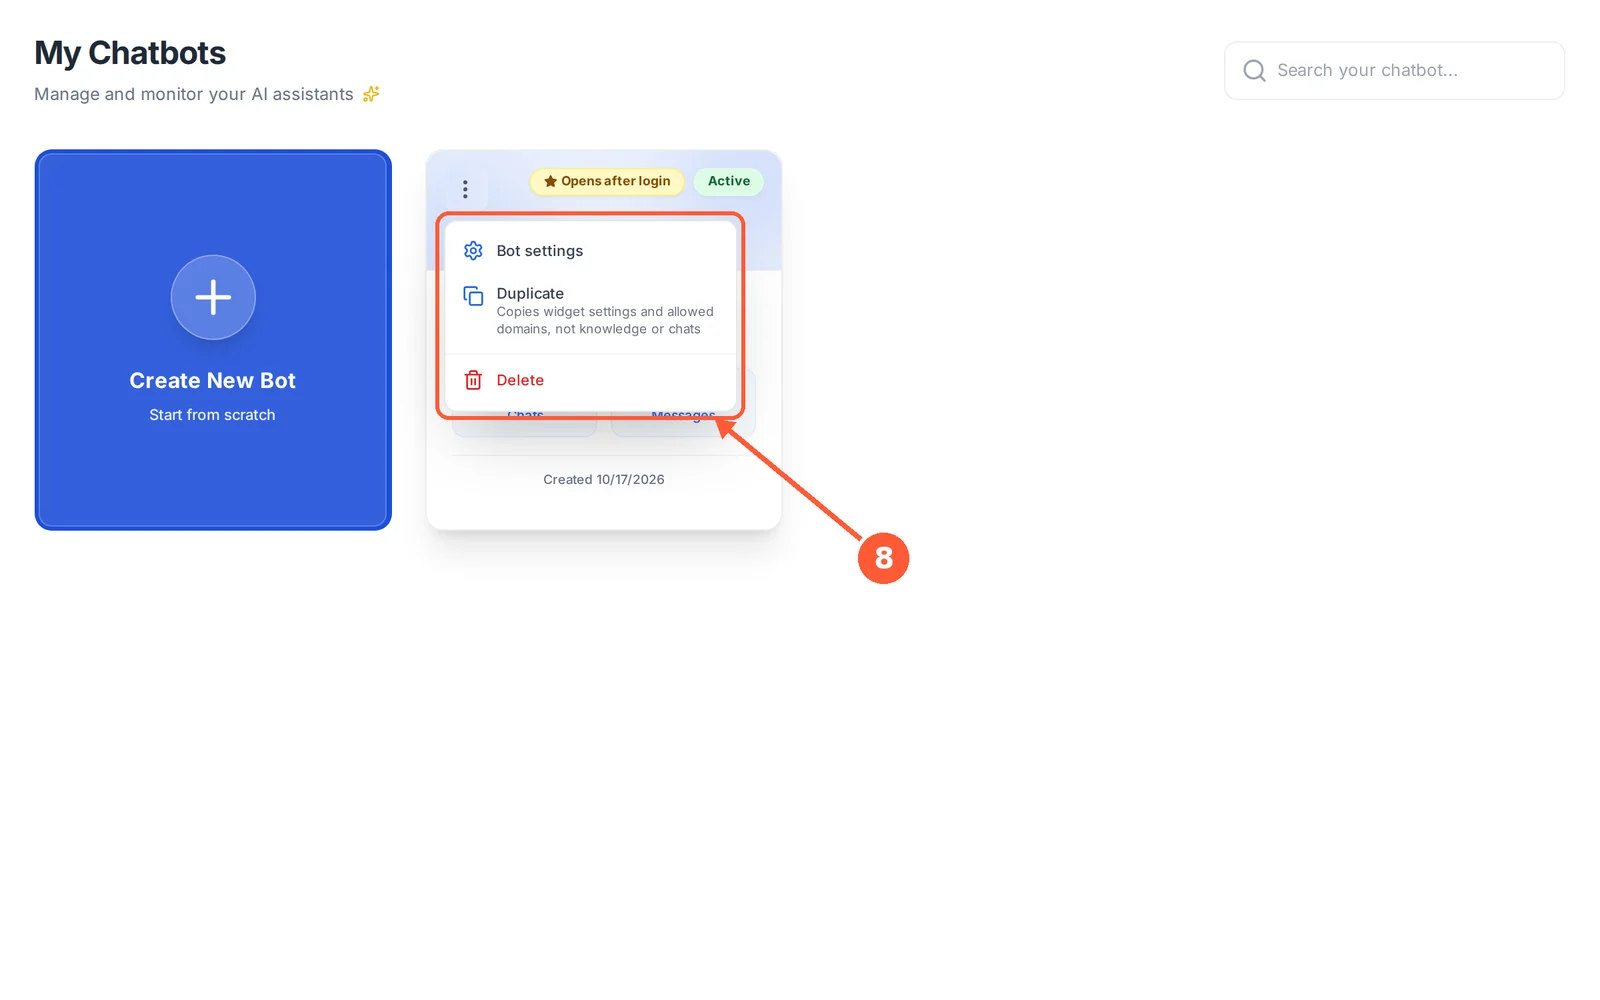
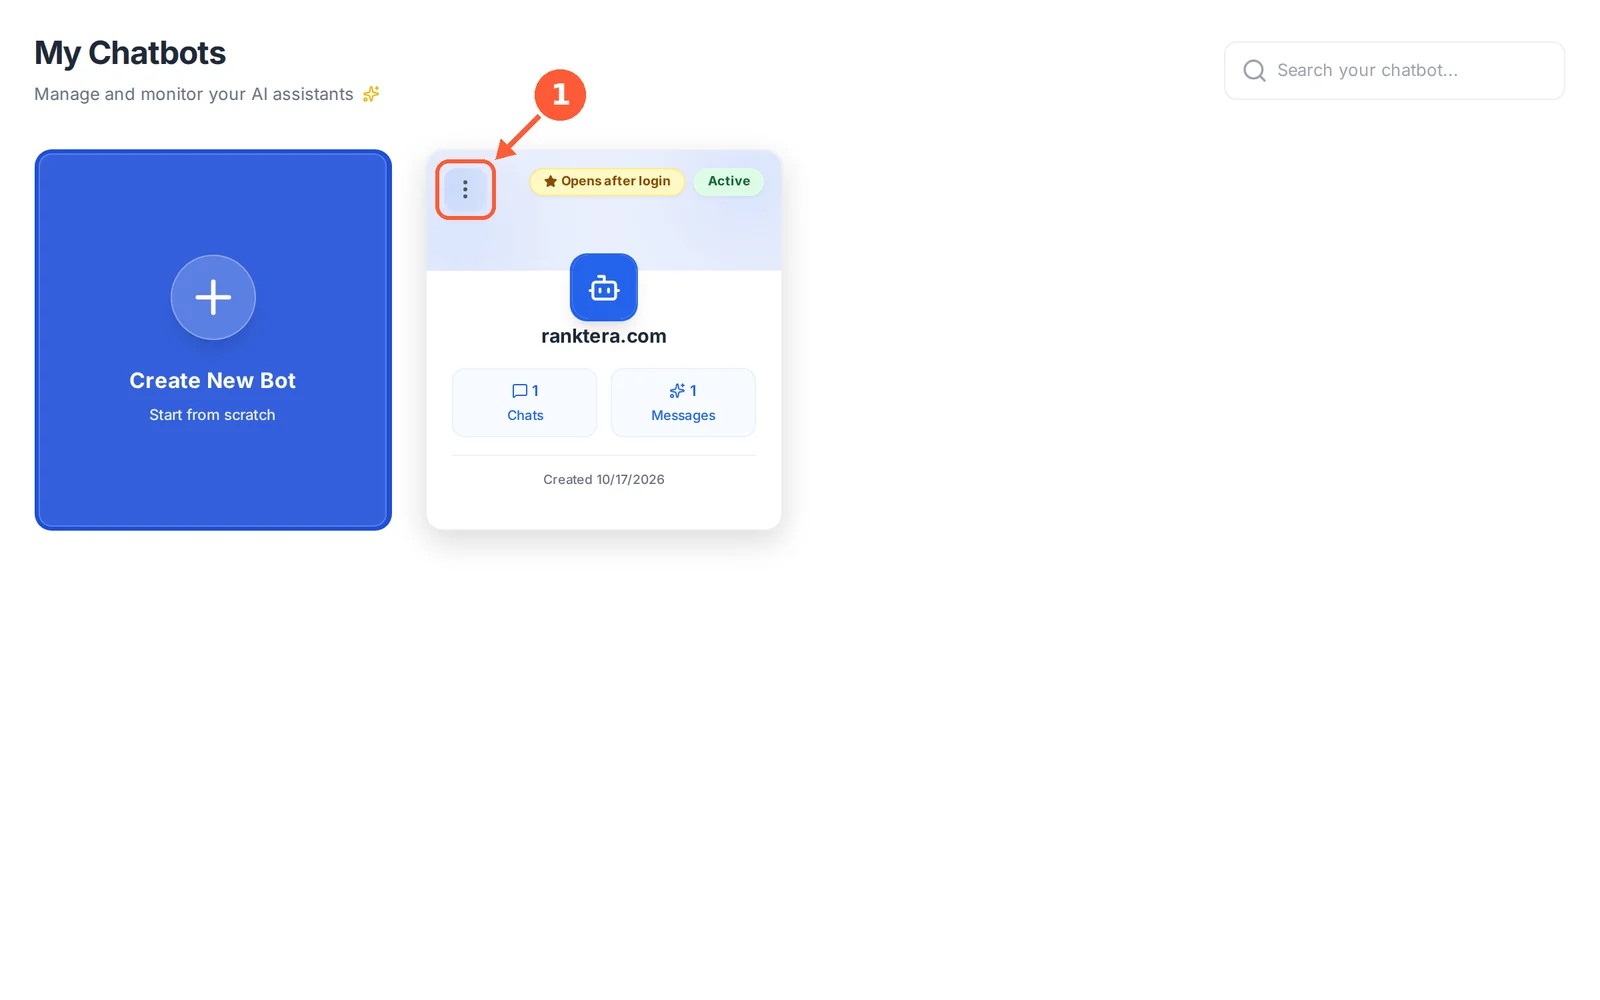
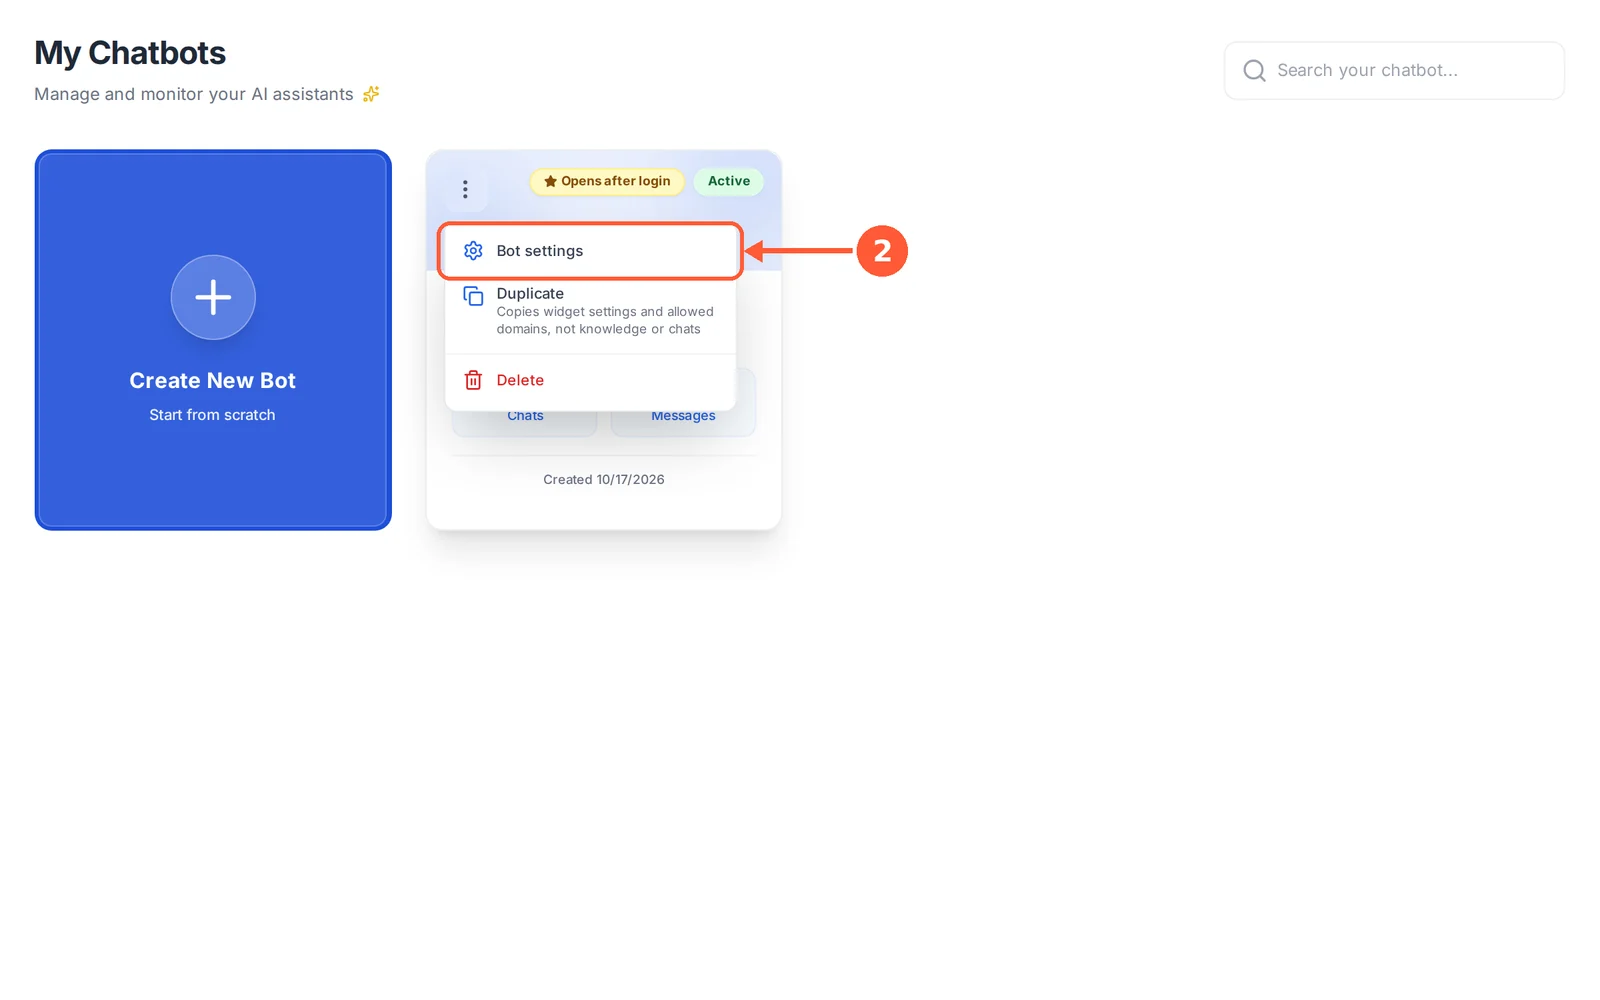
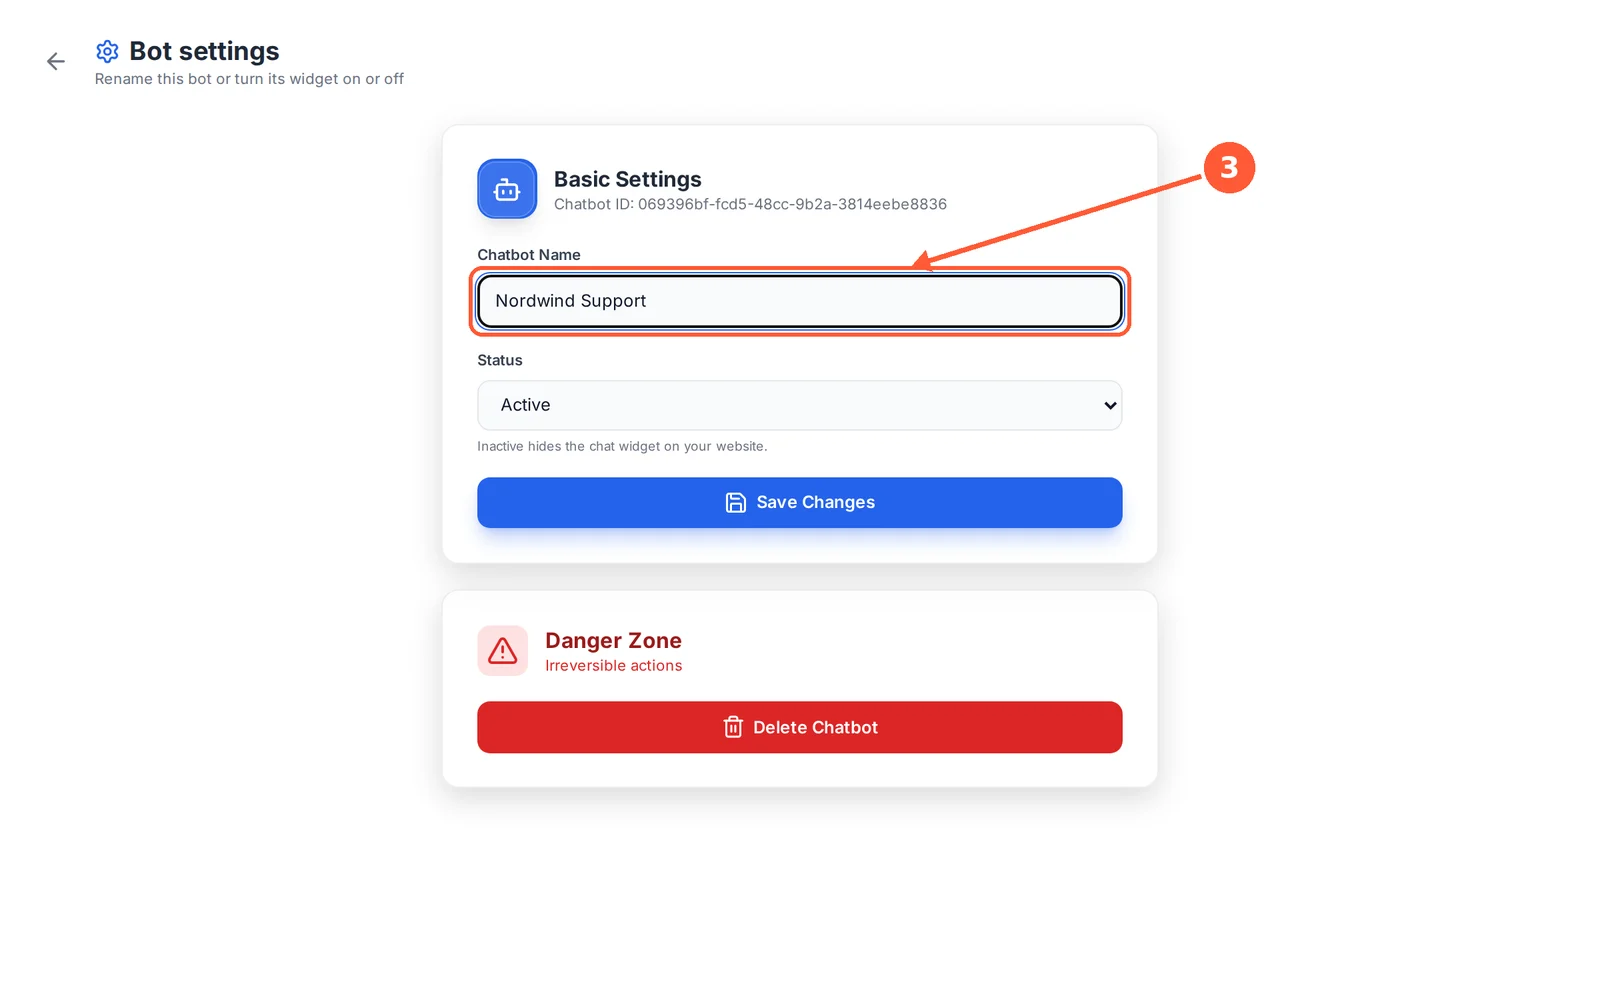
Run one chatbot for each website. The chatbot picker at the top of the menu shows which one you’re working on.
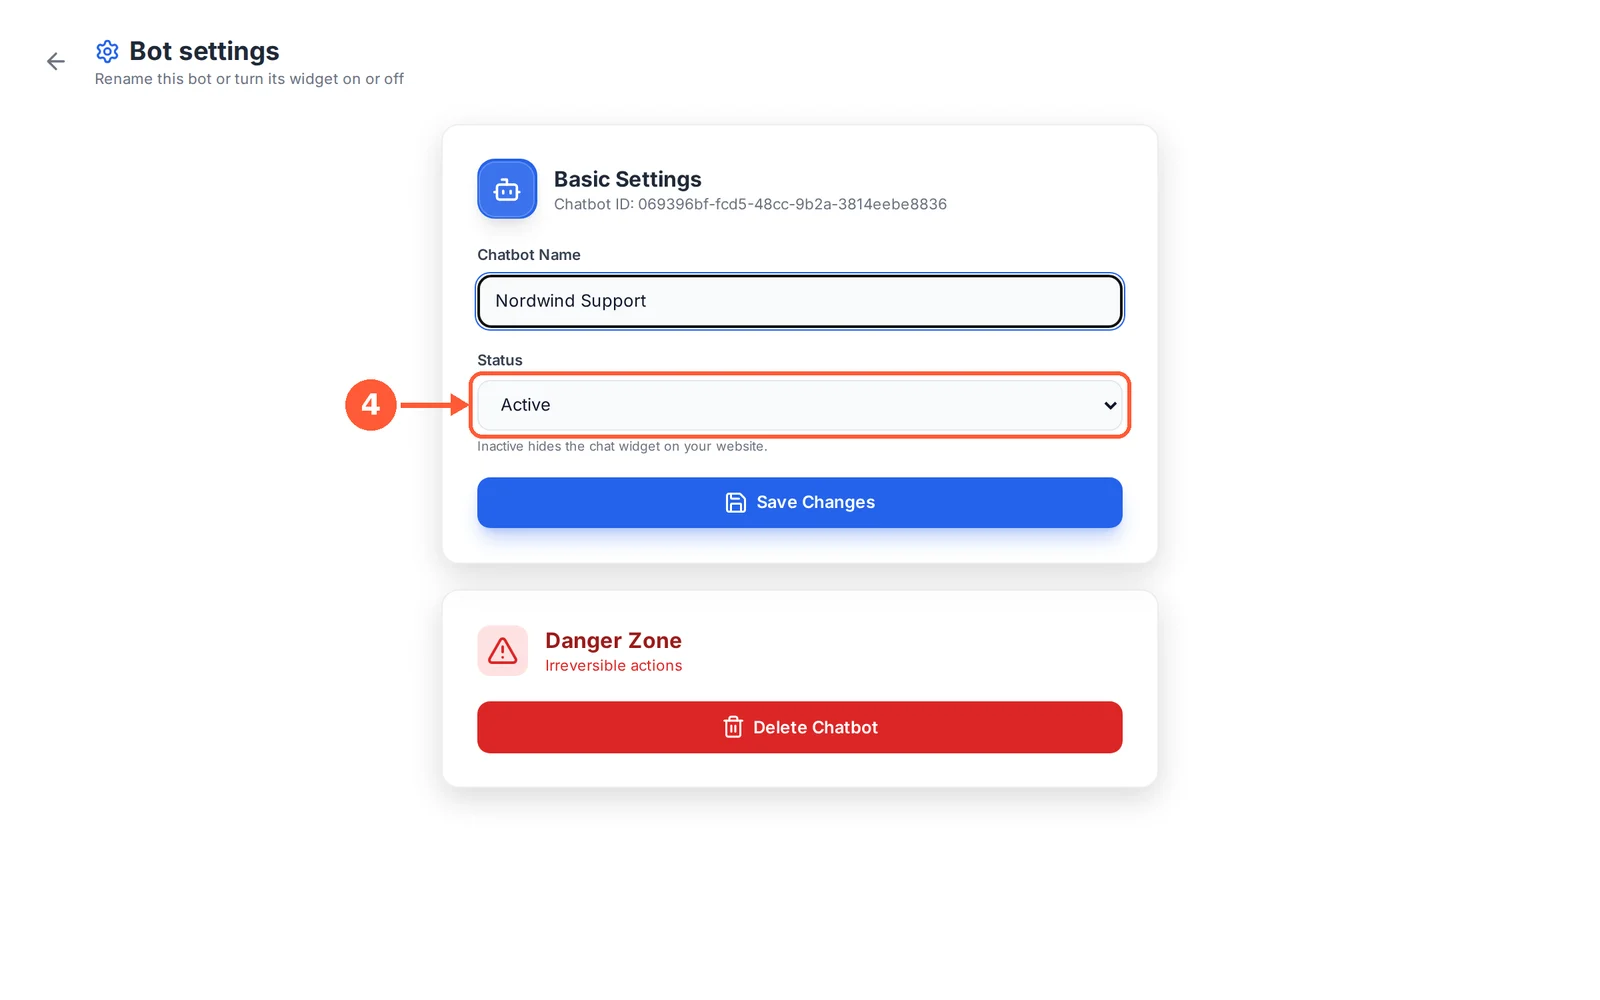
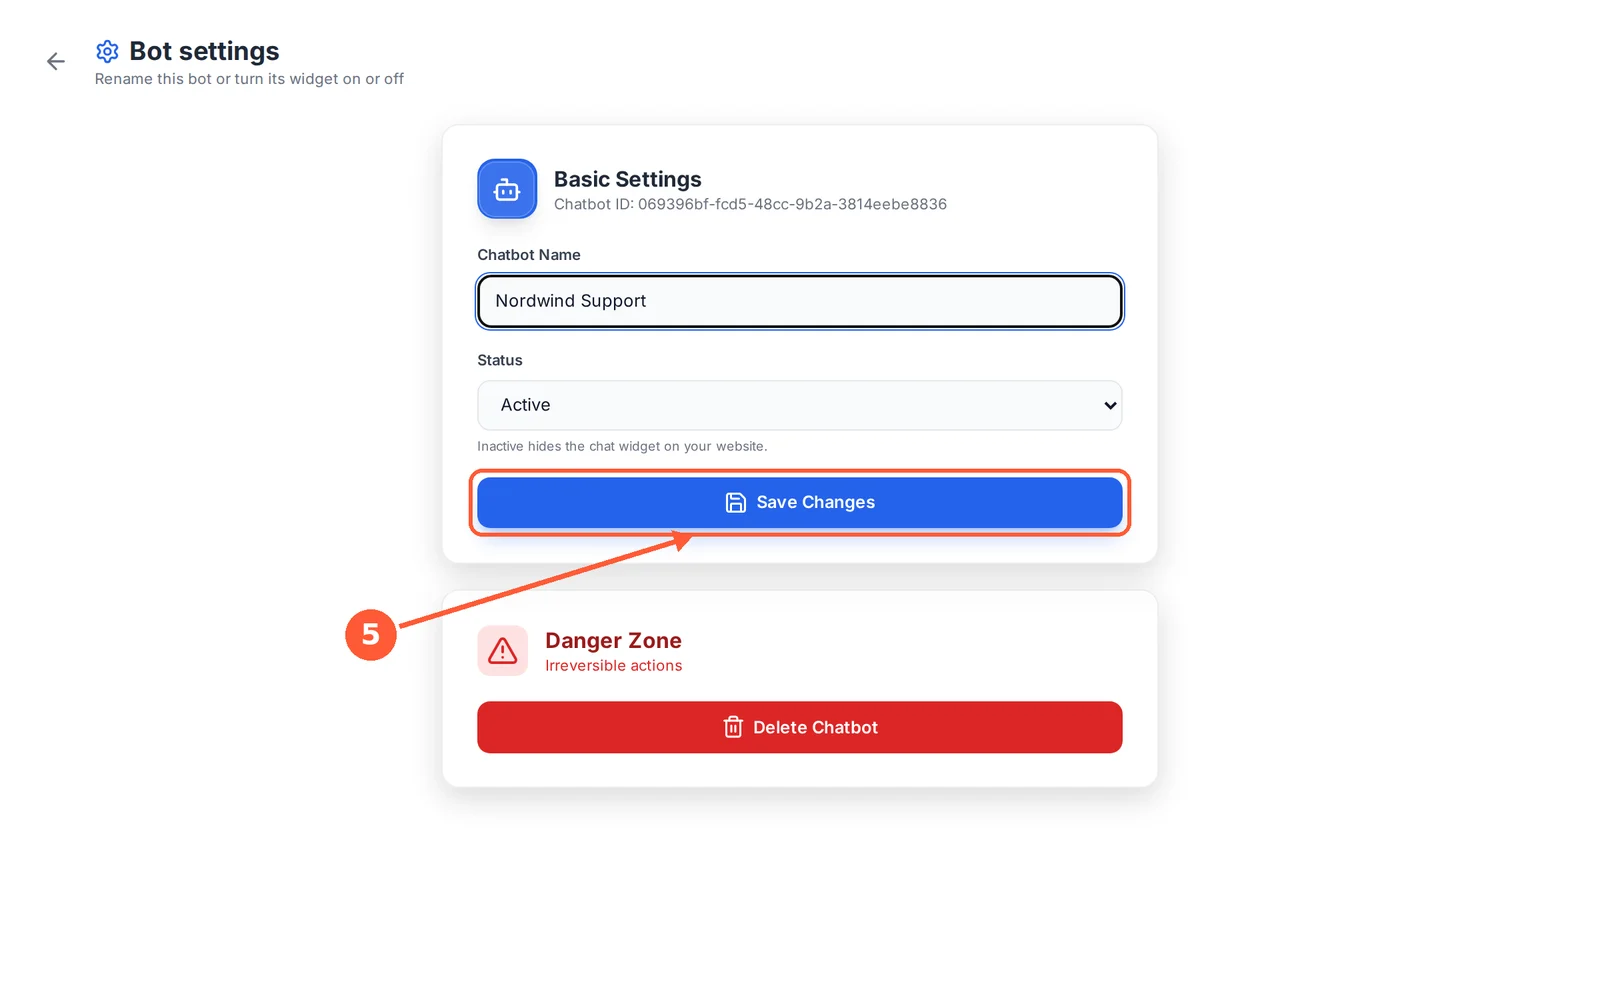
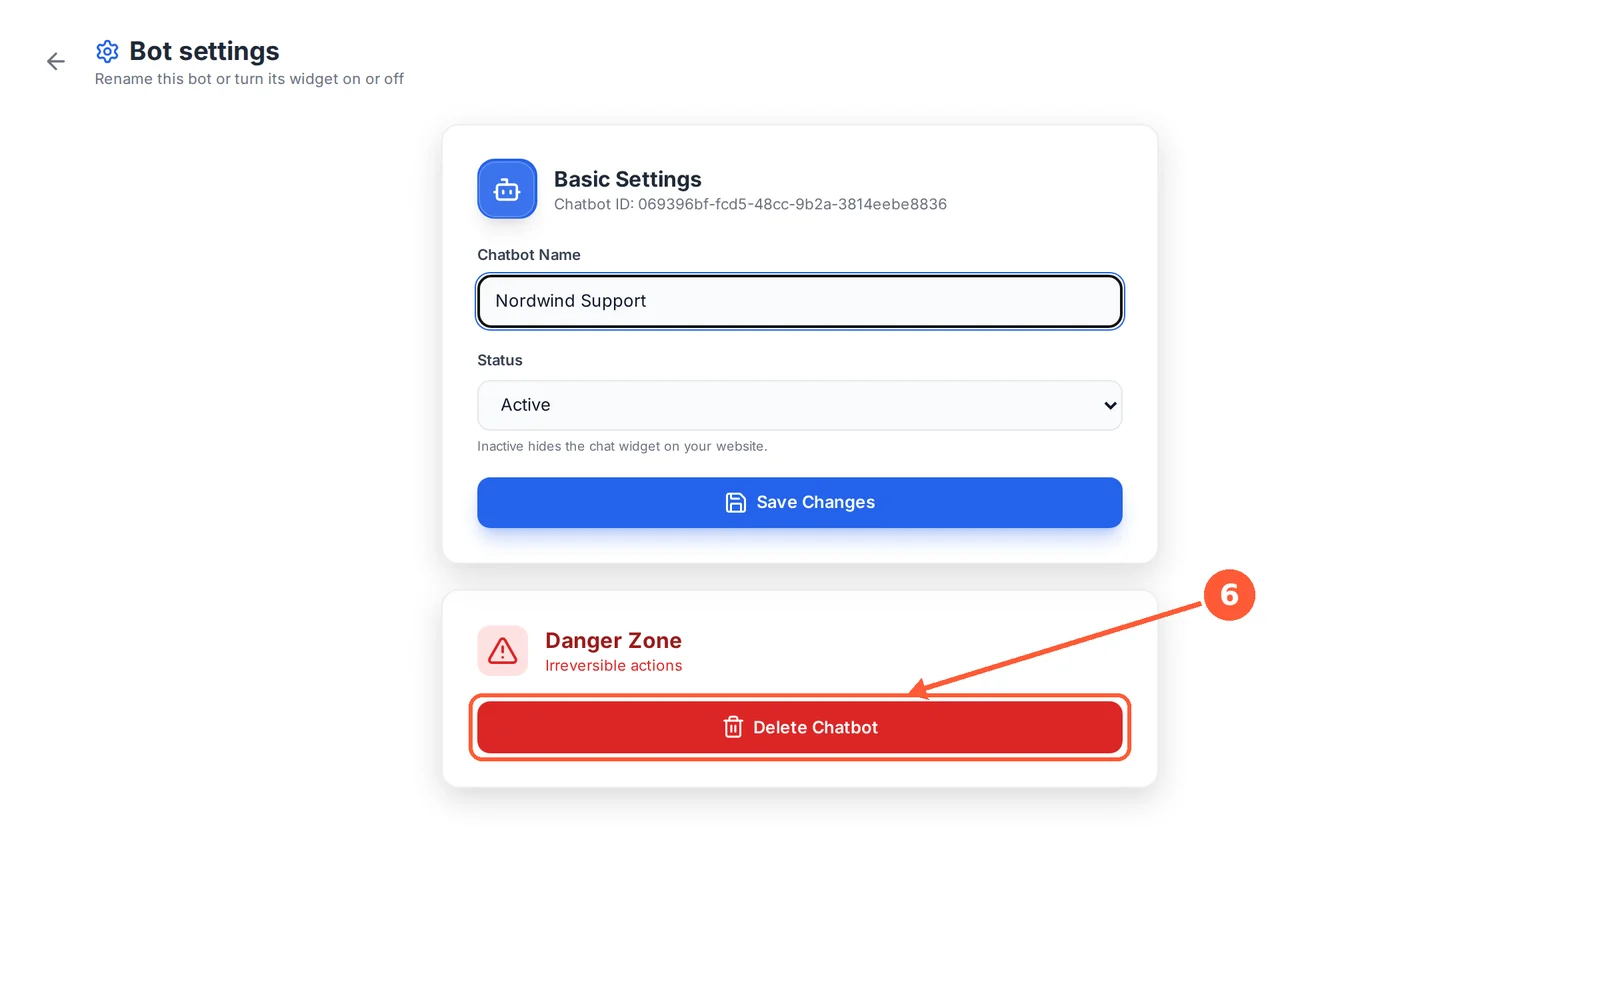
1Click the ⋮ menu on a chatbot card. To get here, open the chatbot picker and click Manage chatbots.1 / 7
💡 Good to Know
Opening a chatbot’s Bot settings also makes it the current chatbot in the picker.
Connect Other Apps with Webhooks (For Developers Only)
A webhook is a web address from another app (such as Zapier or your CRM) that ChatXBot notifies whenever something happens in your chats.
⏱ About 3 minutes • 📍 Integration › Webhooks
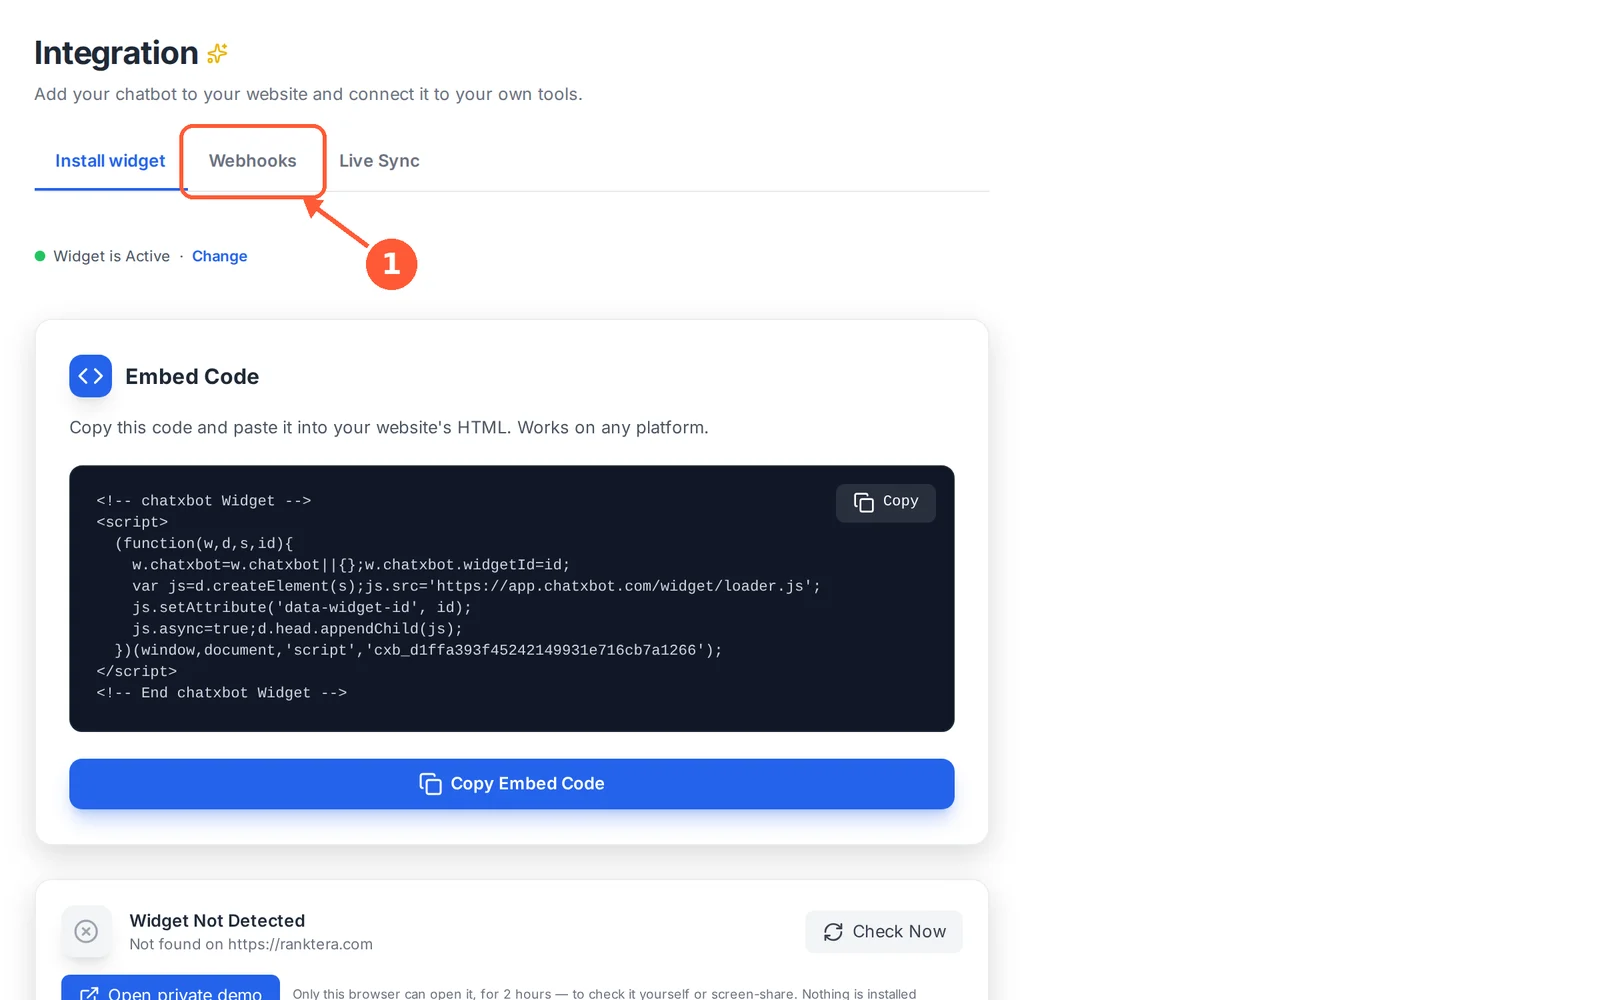
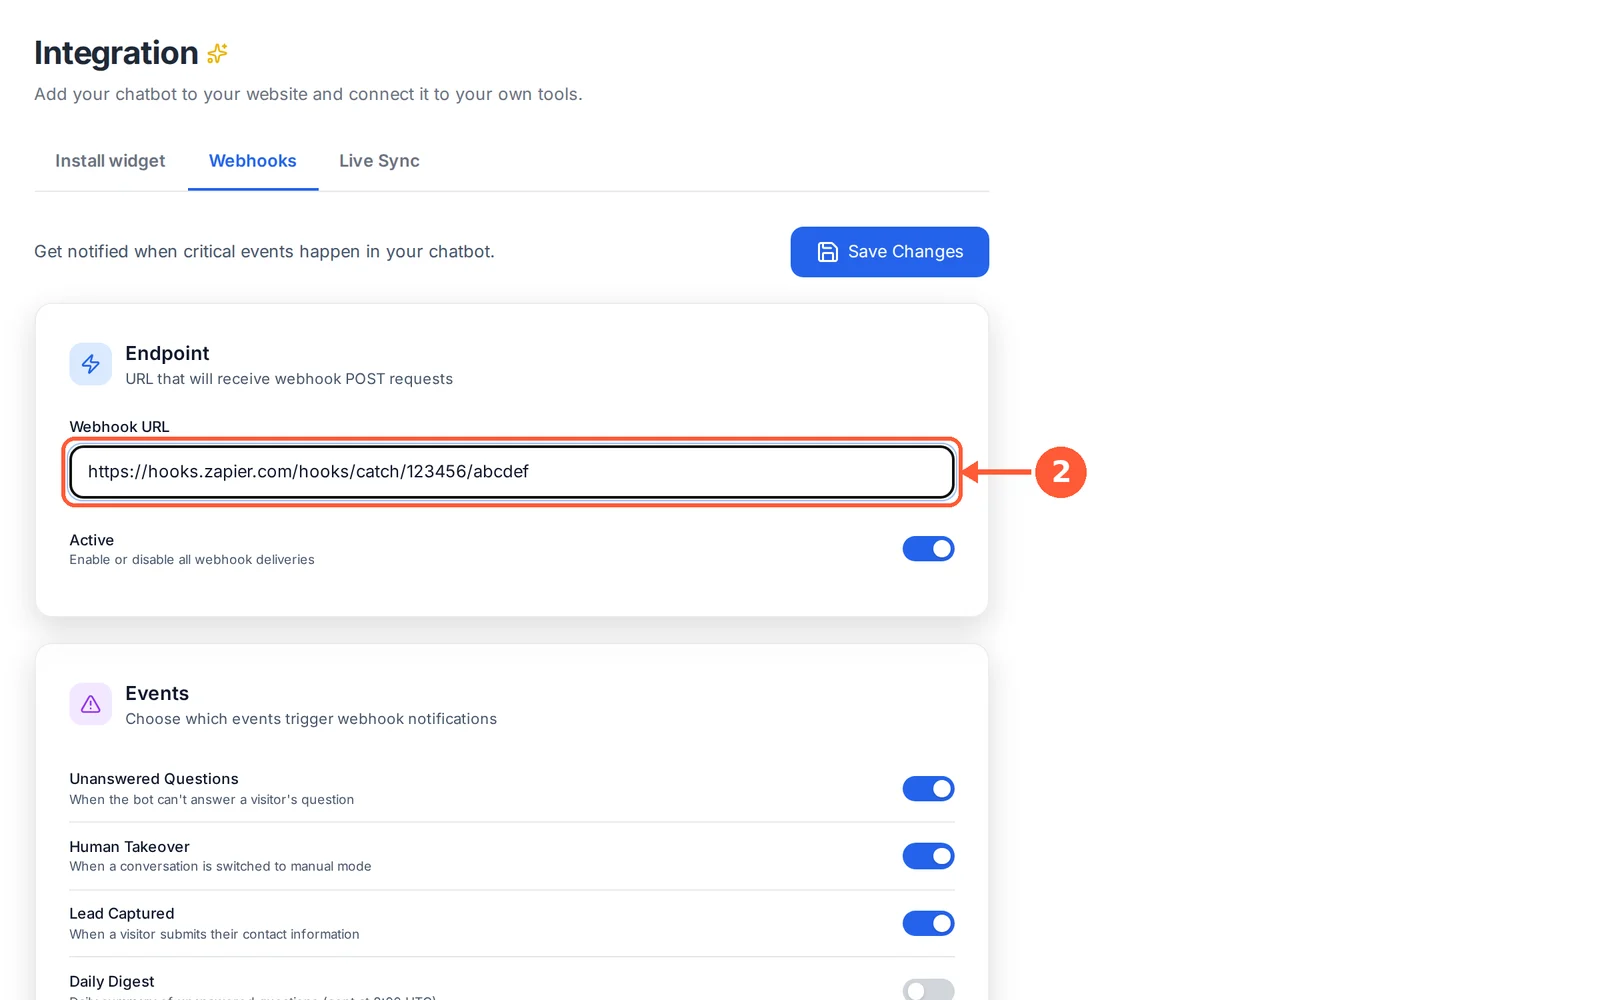
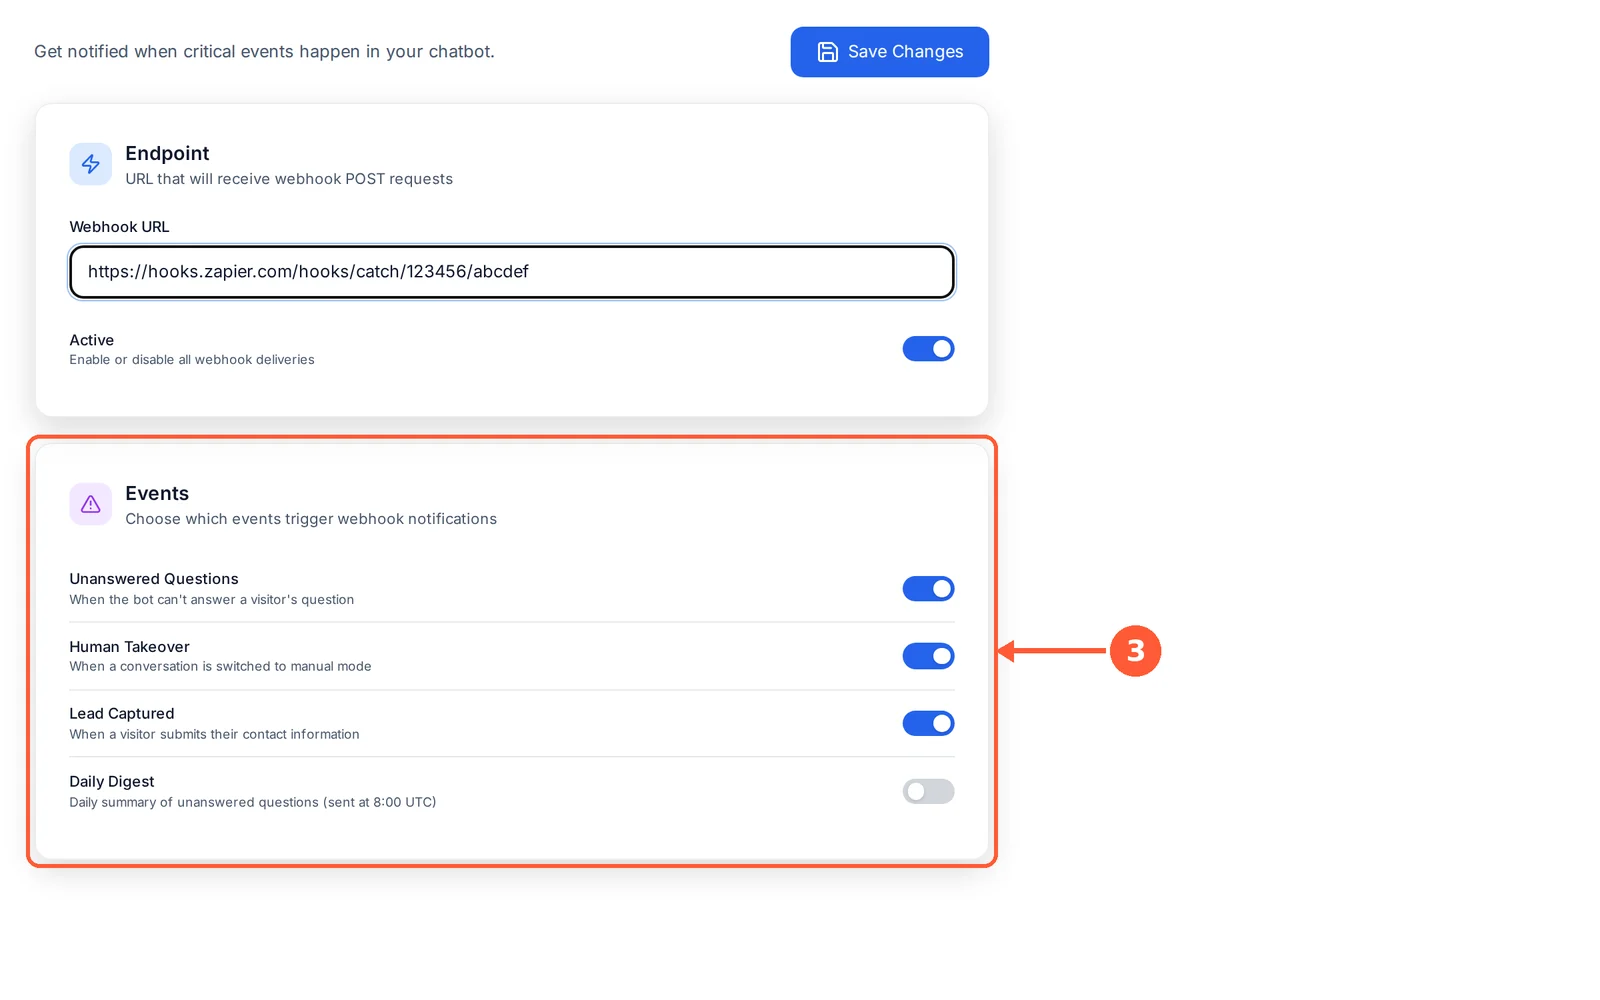
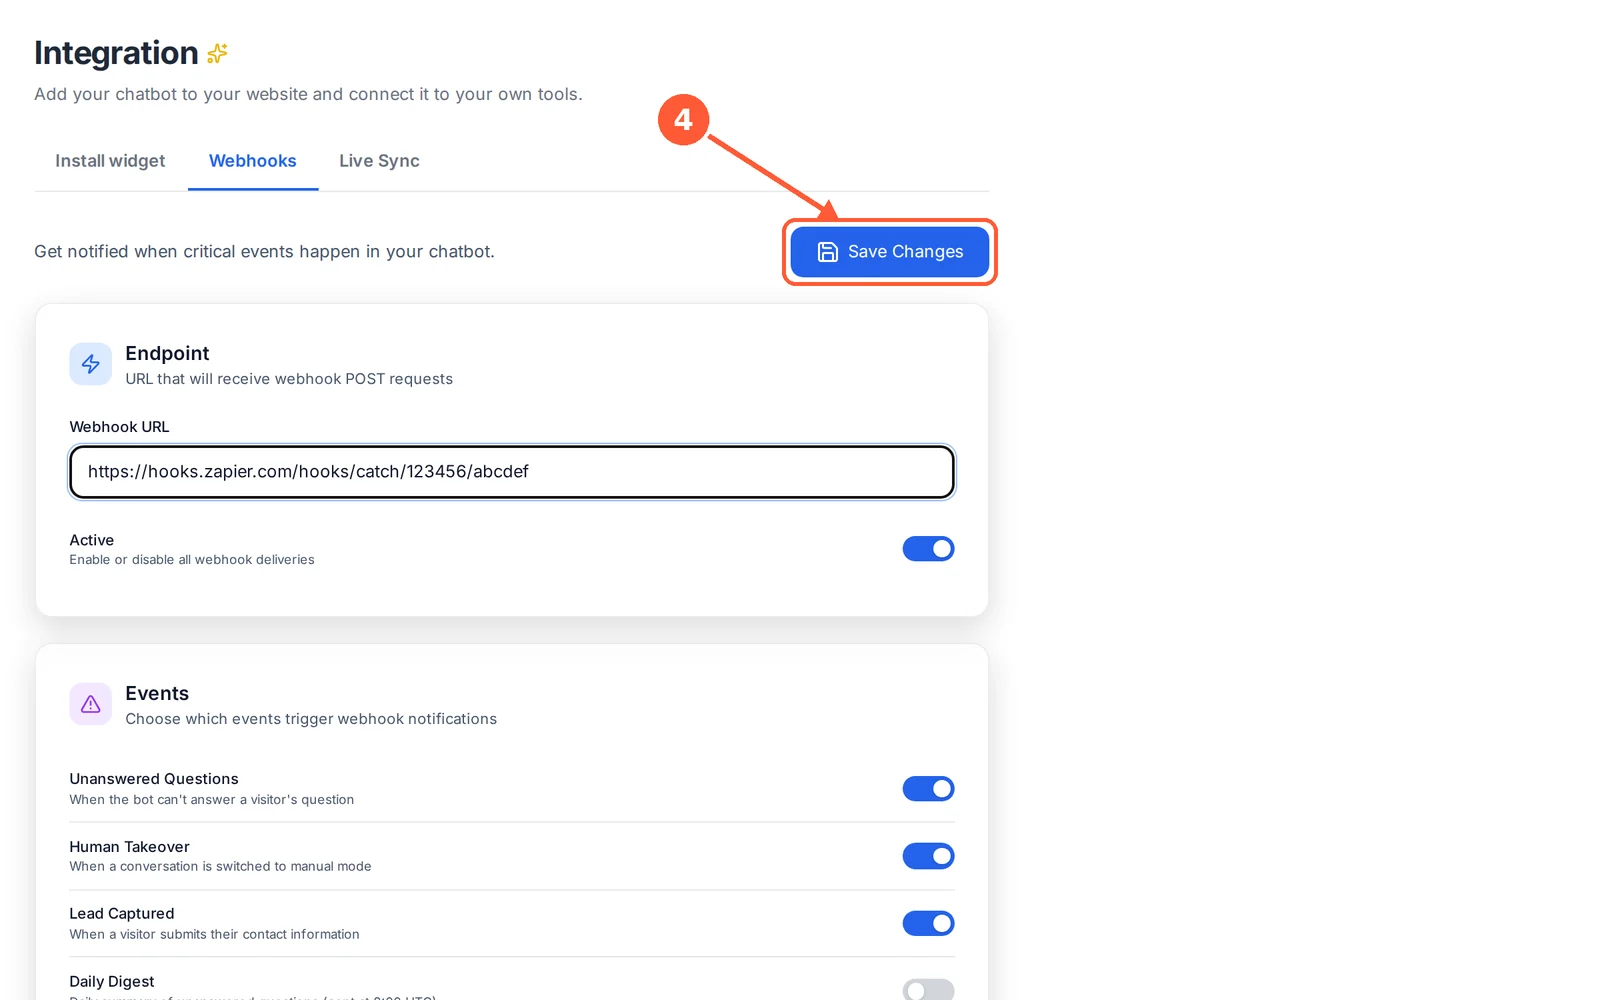
1Open the Webhooks tab in Integration.1 / 4
💡 Good to Know
Not sure what a webhook is? You can skip this. Your chatbot works perfectly without it.
Plans & Billing
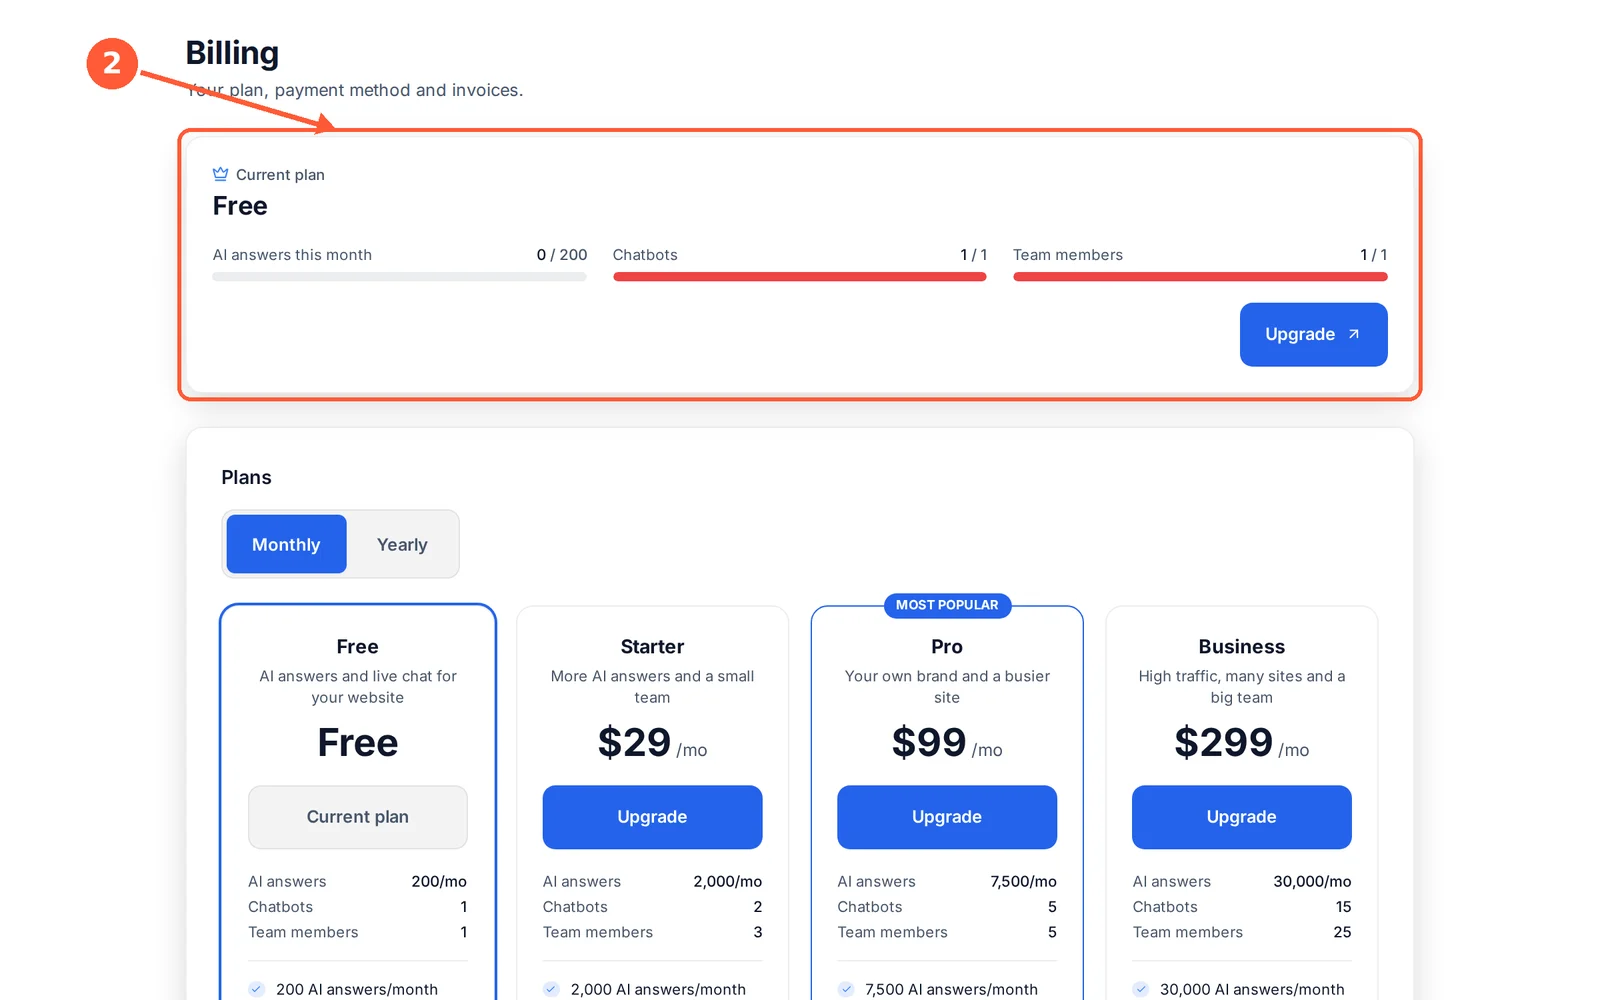
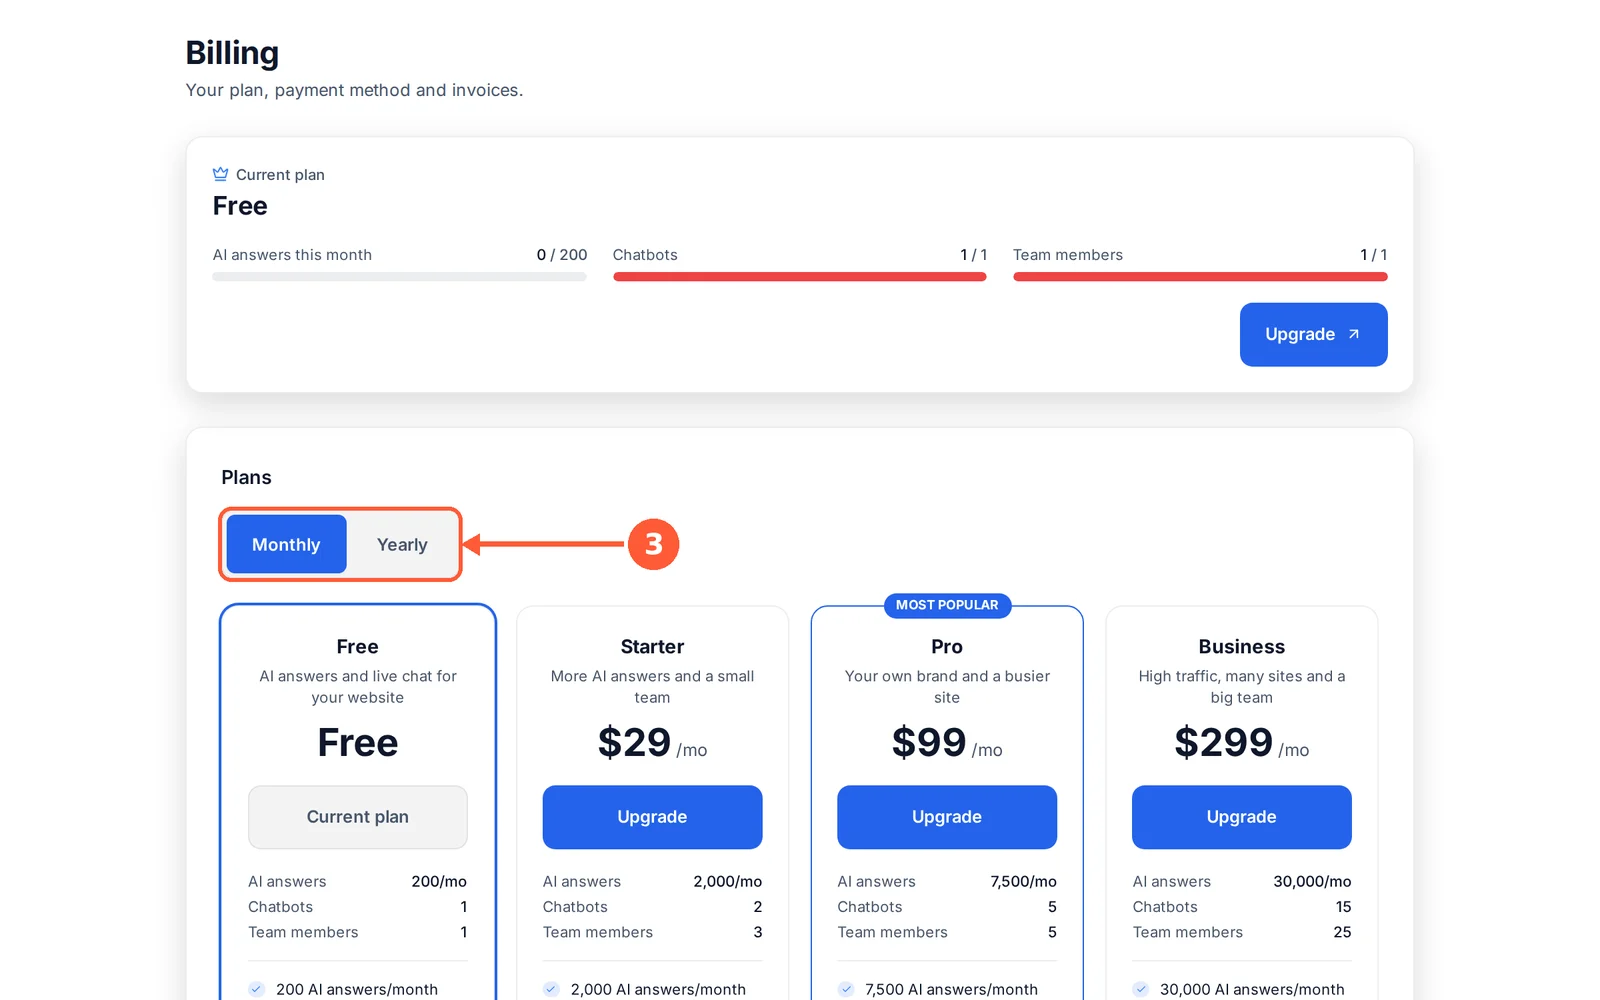
Every plan gets the AI and live chat. You pay for more AI answers, more chatbots and teammates, and from Pro, your own brand.
⏱ About 2 minutes • 📍 Billing
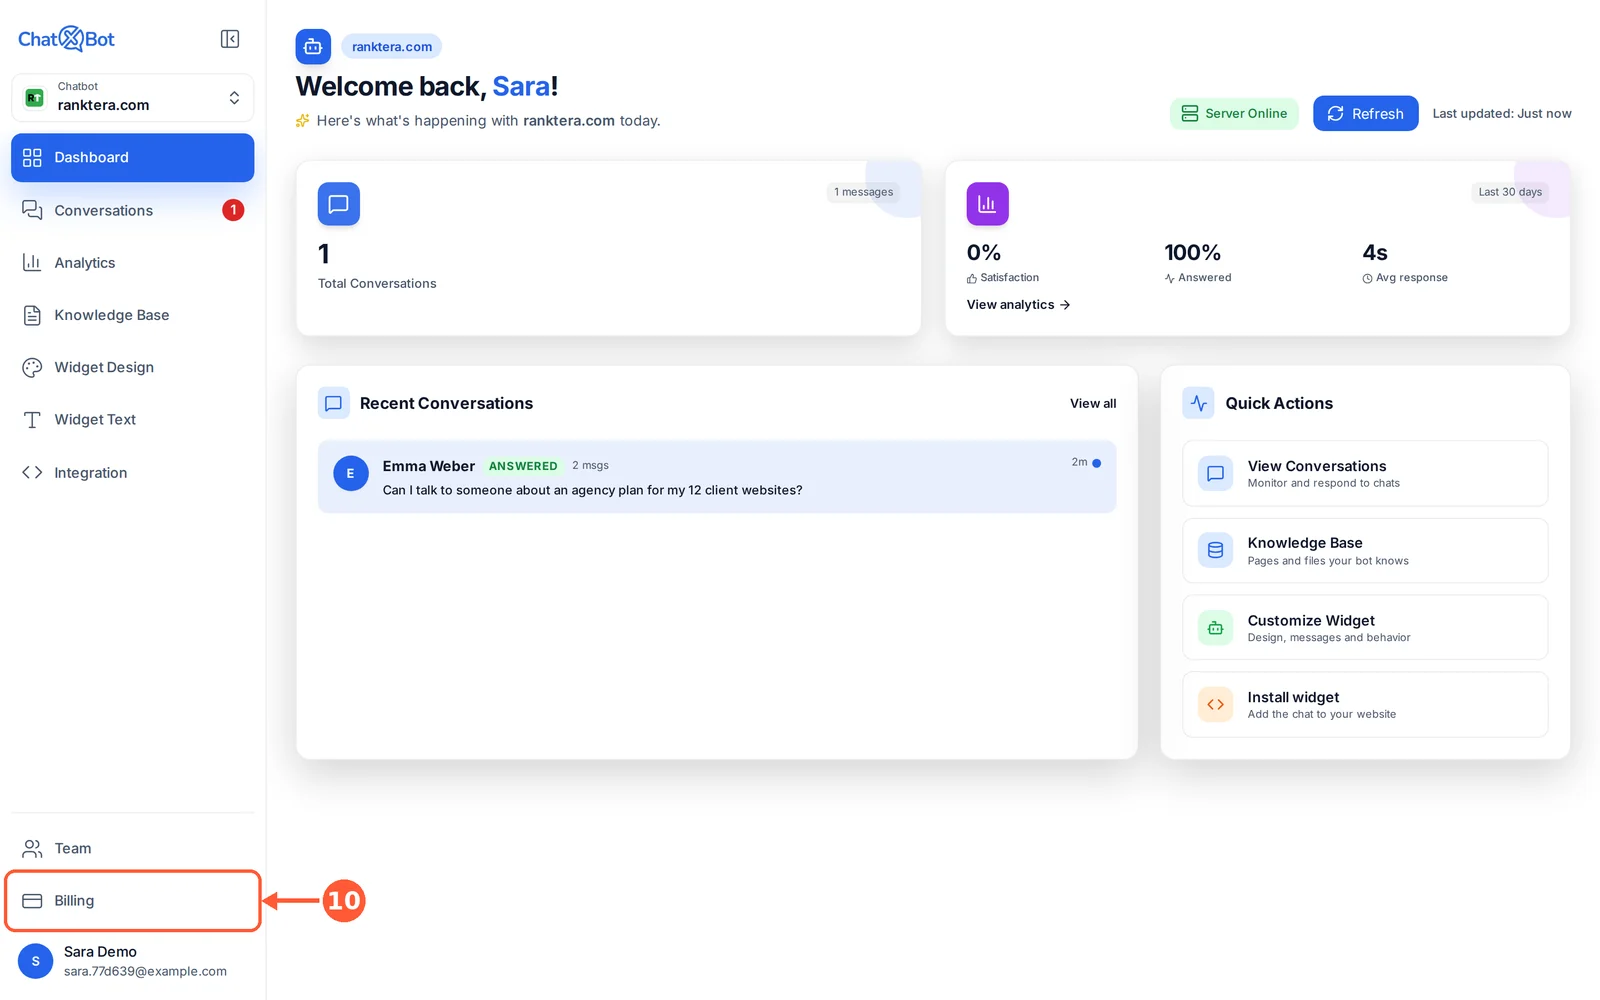
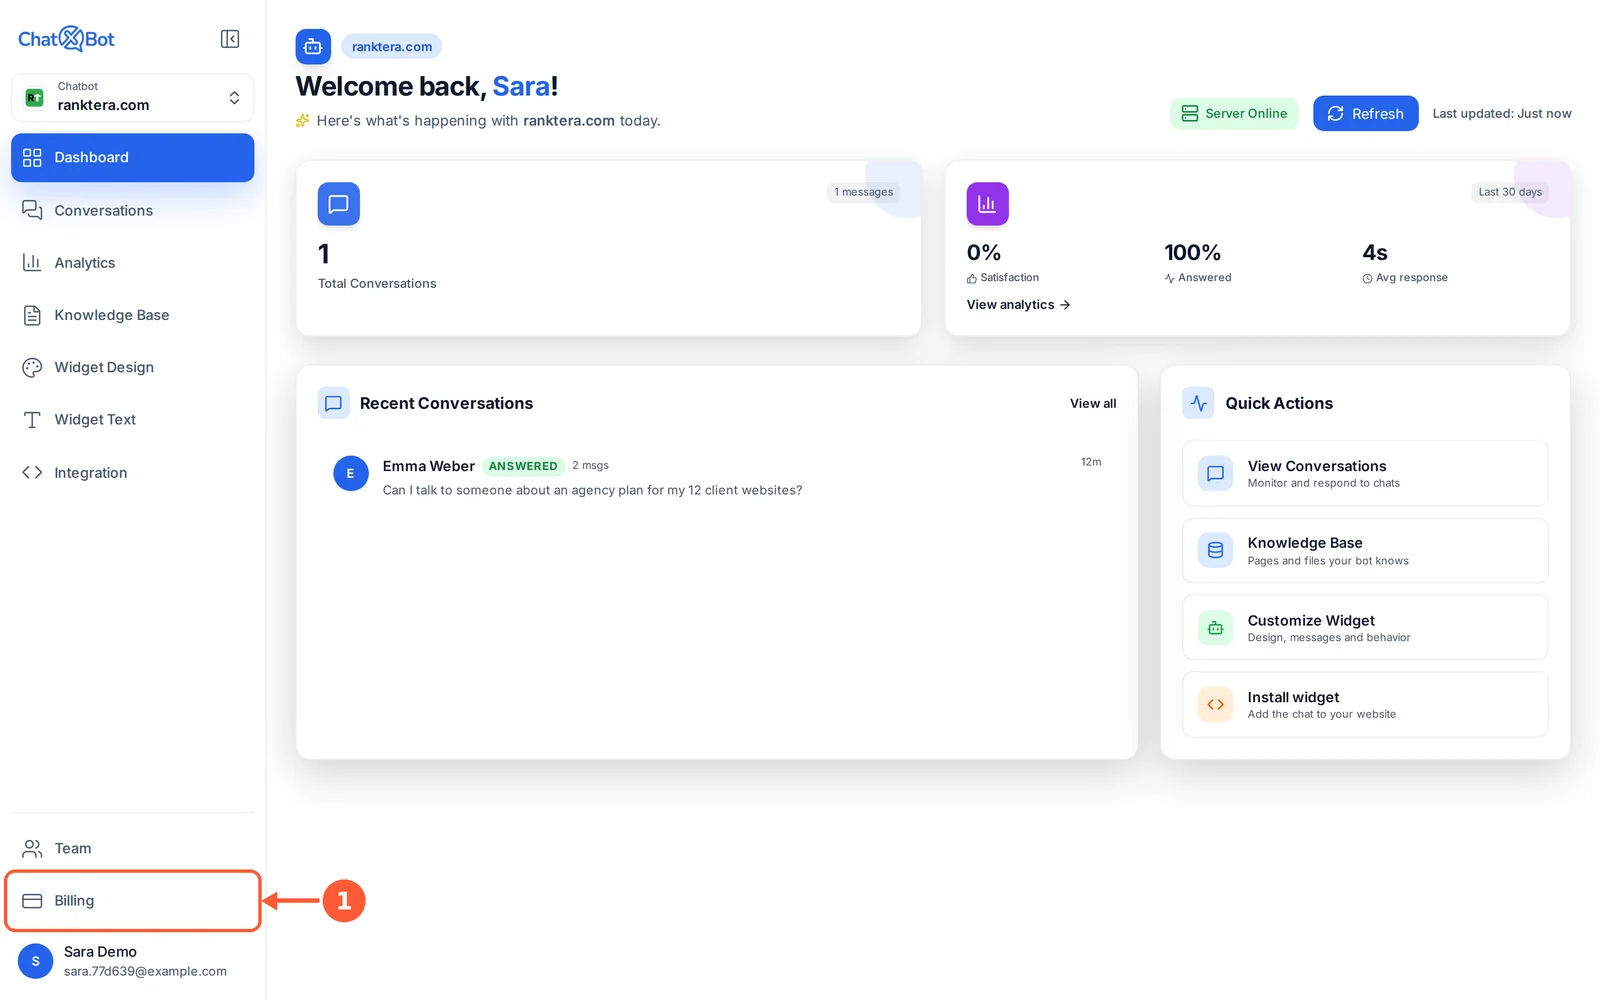
1Click Billing in the menu.1 / 4
💡 Good to Know
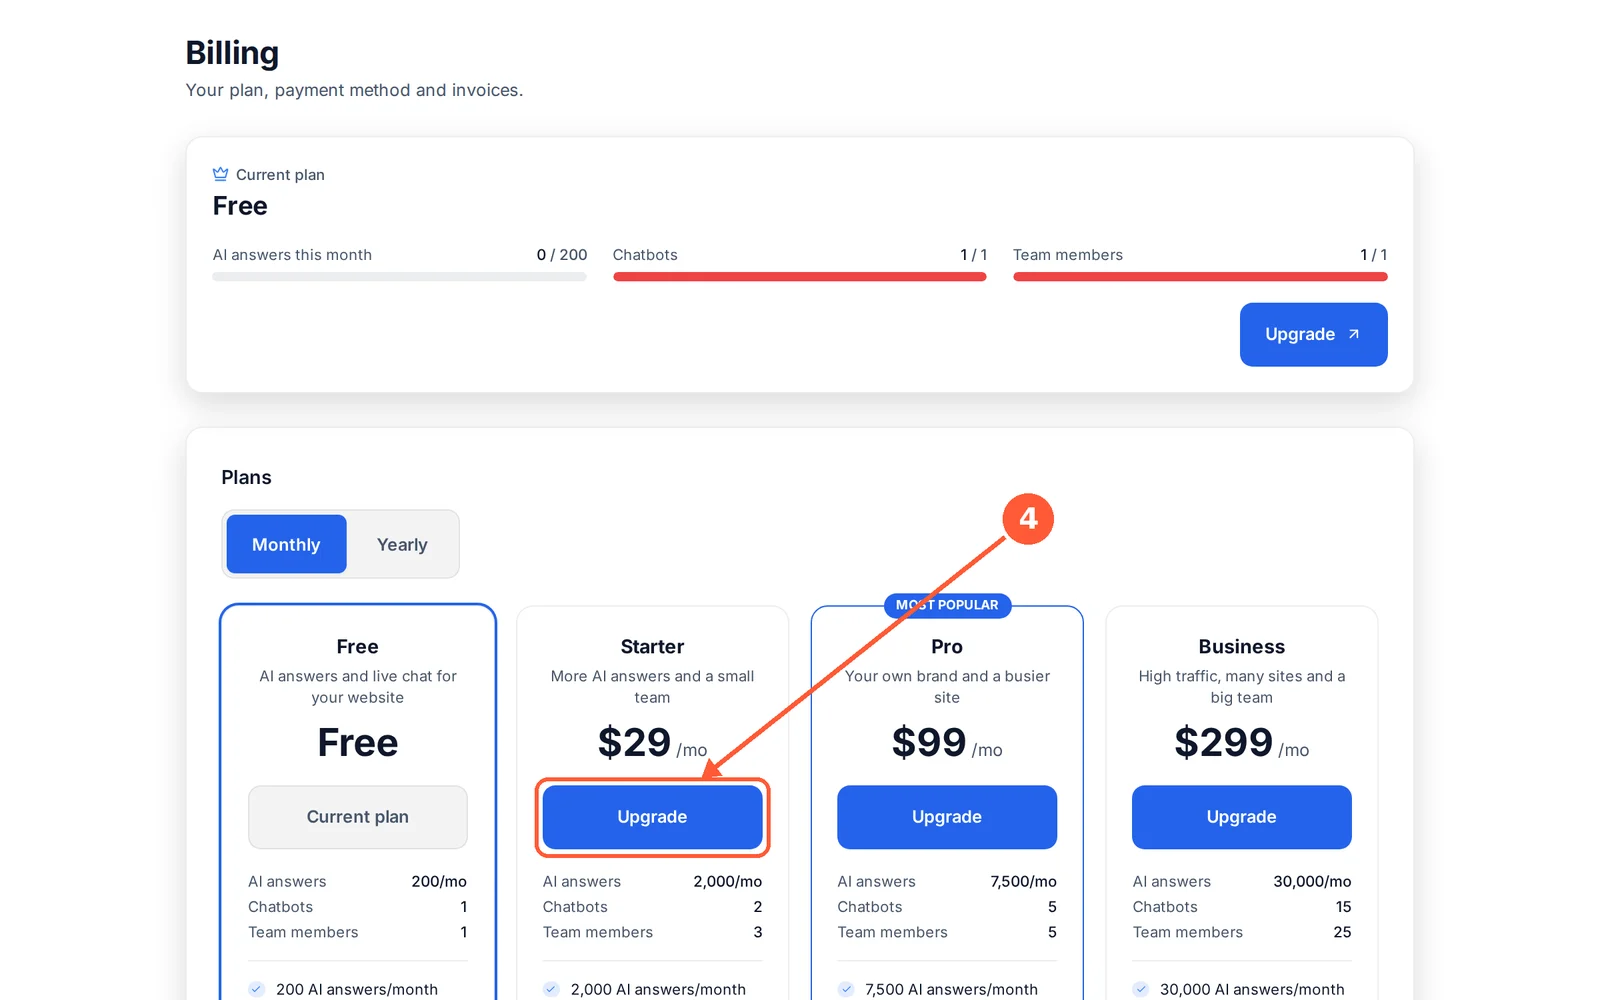
Free: 200 AI answers a month, 1 chatbot, 1 team member. Starter ($29/mo): 2,000 AI answers, 2 chatbots, 3 team members.
Pro ($99/mo): 7,500 AI answers, 5 chatbots, 5 team members, and you can remove the “Powered by ChatXBot” badge. Business ($299/mo): 30,000 AI answers, 15 chatbots, 25 team members.
Payments show on your statement as CODERTO* CHATXBOT. Cancel any time in Billing, and ask within 14 days of your first payment for a full refund.
AI Answers & Monthly Limits
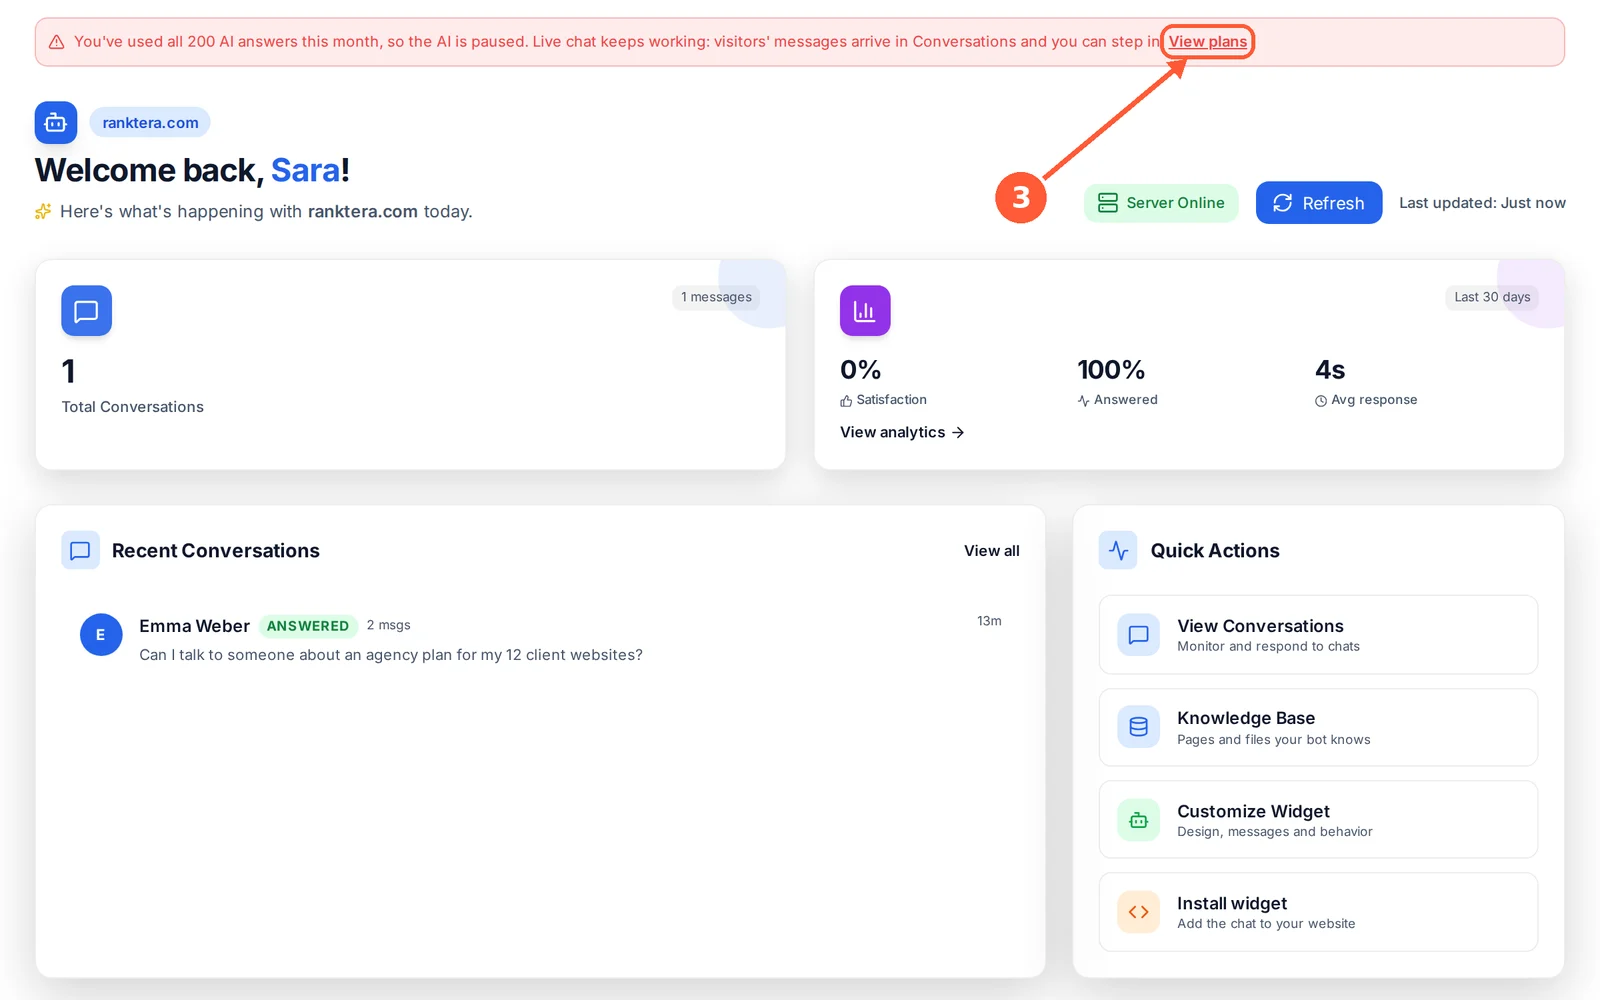
Your plan includes a number of AI answers each month. Here’s what counts, and what happens when you reach your limit.
⏱ About 2 minutes • 📍 Dashboard and Billing
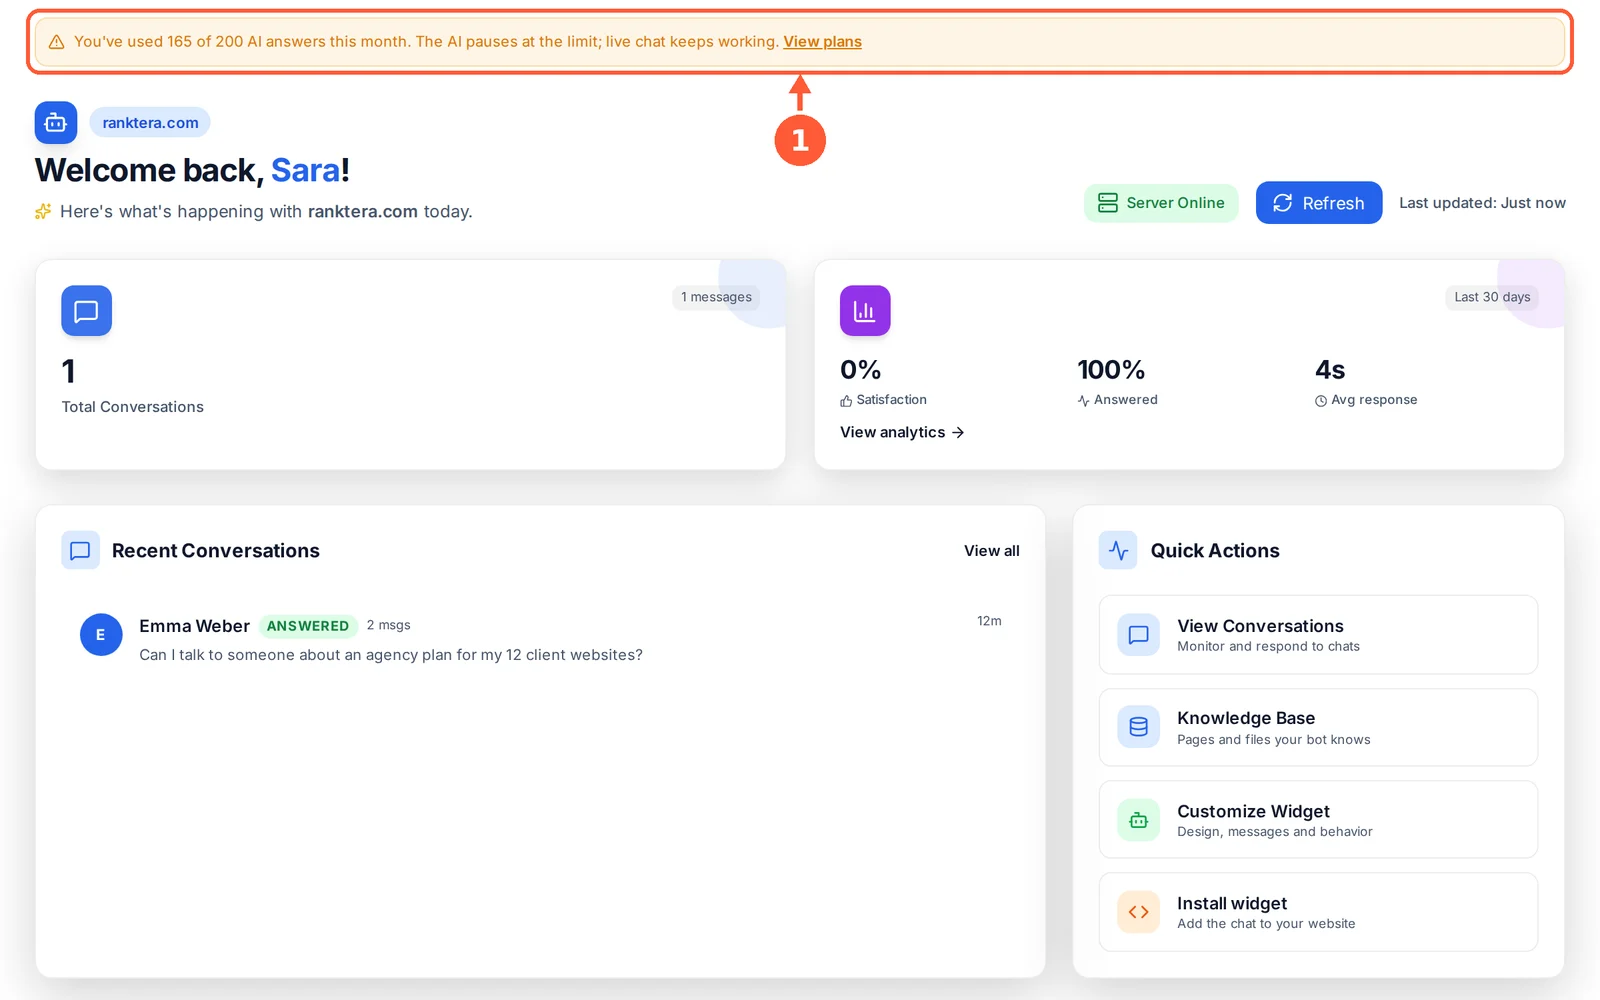
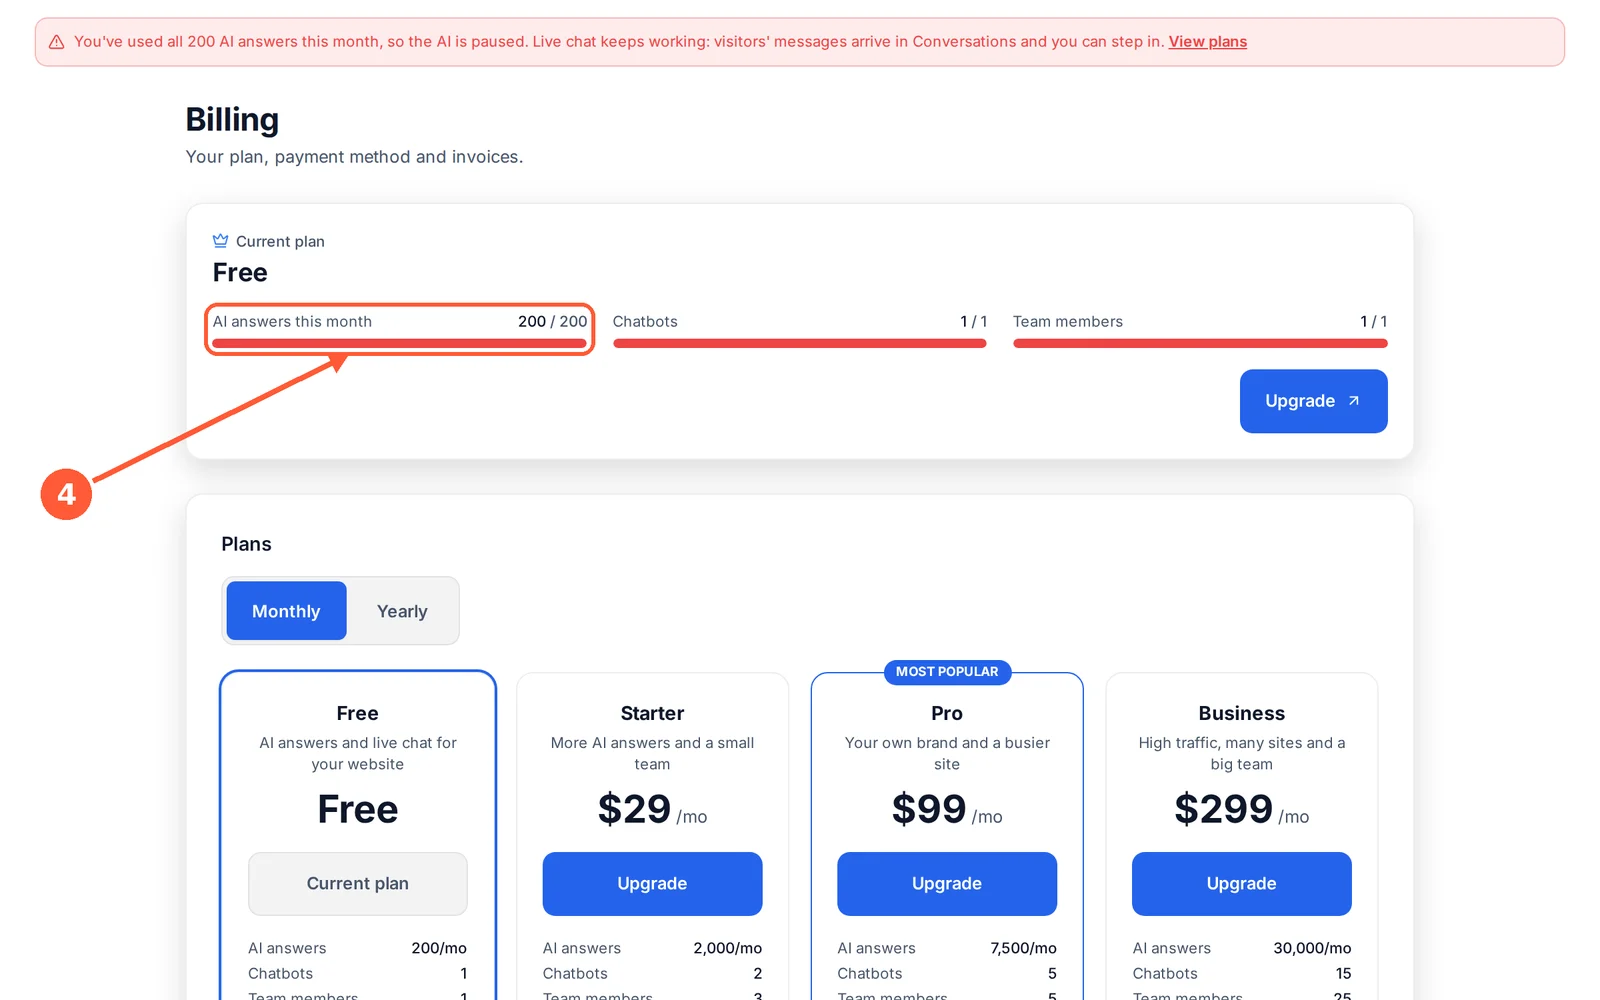
1At 80% of your monthly AI answers, a yellow banner appears at the top of the dashboard, and we email you.1 / 5
💡 Good to Know
1 AI answer = 1 answer the AI gives a visitor. Your team’s live-chat replies, automatic notices and “I don’t know” replies don’t count.
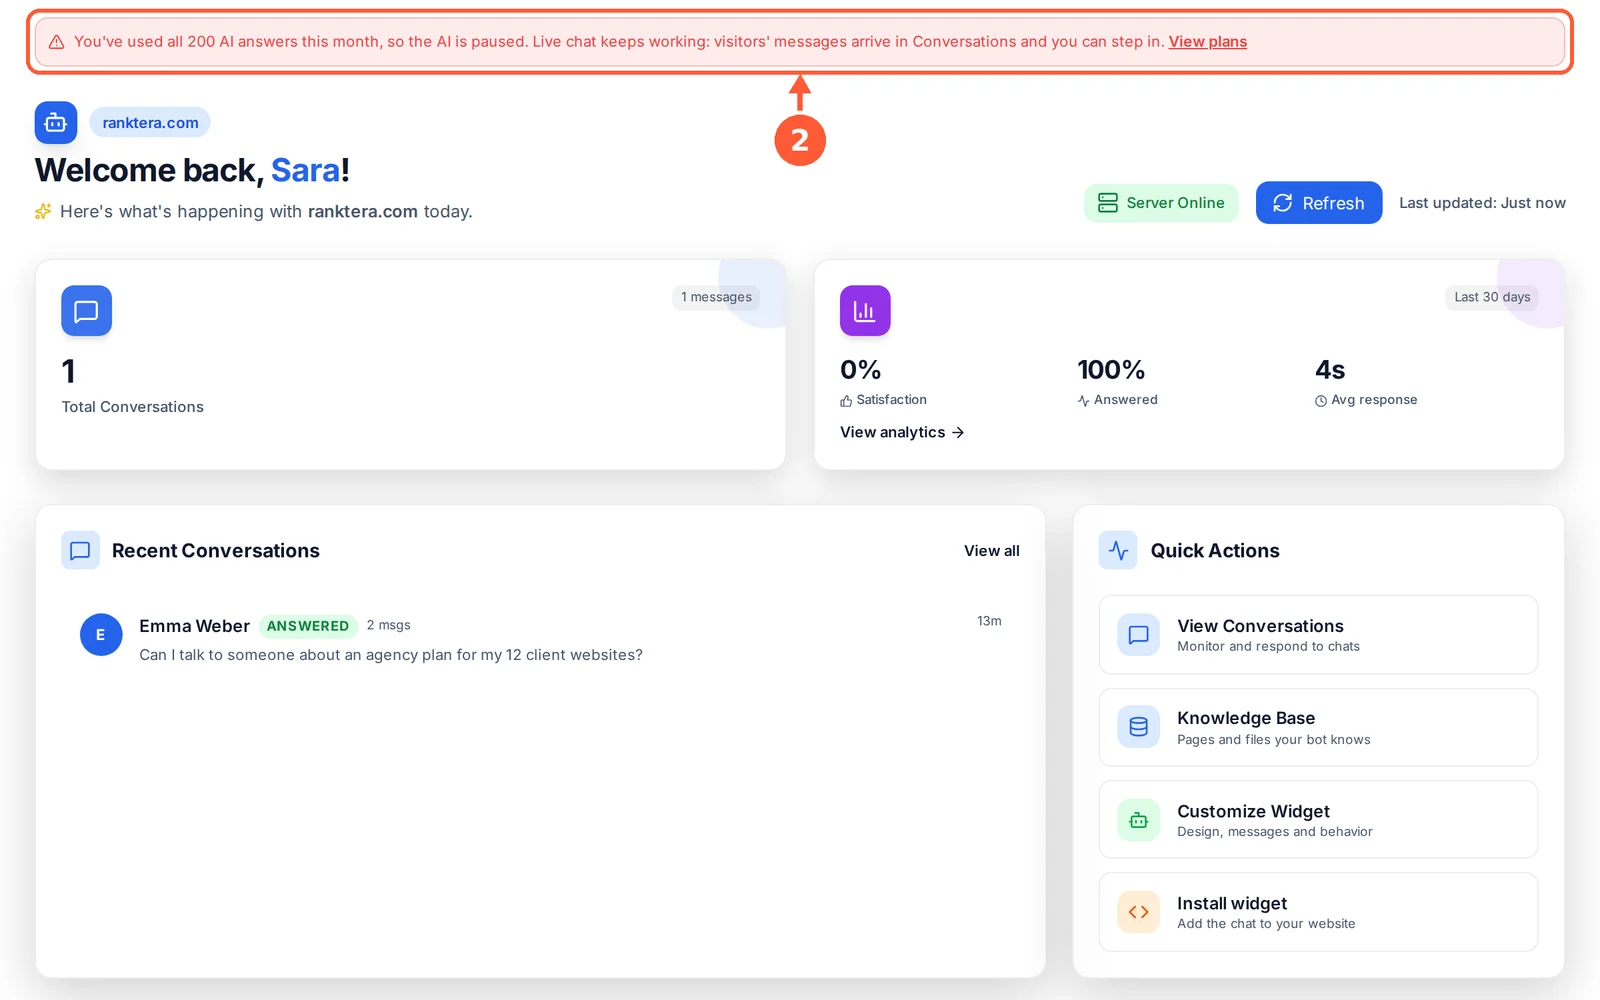
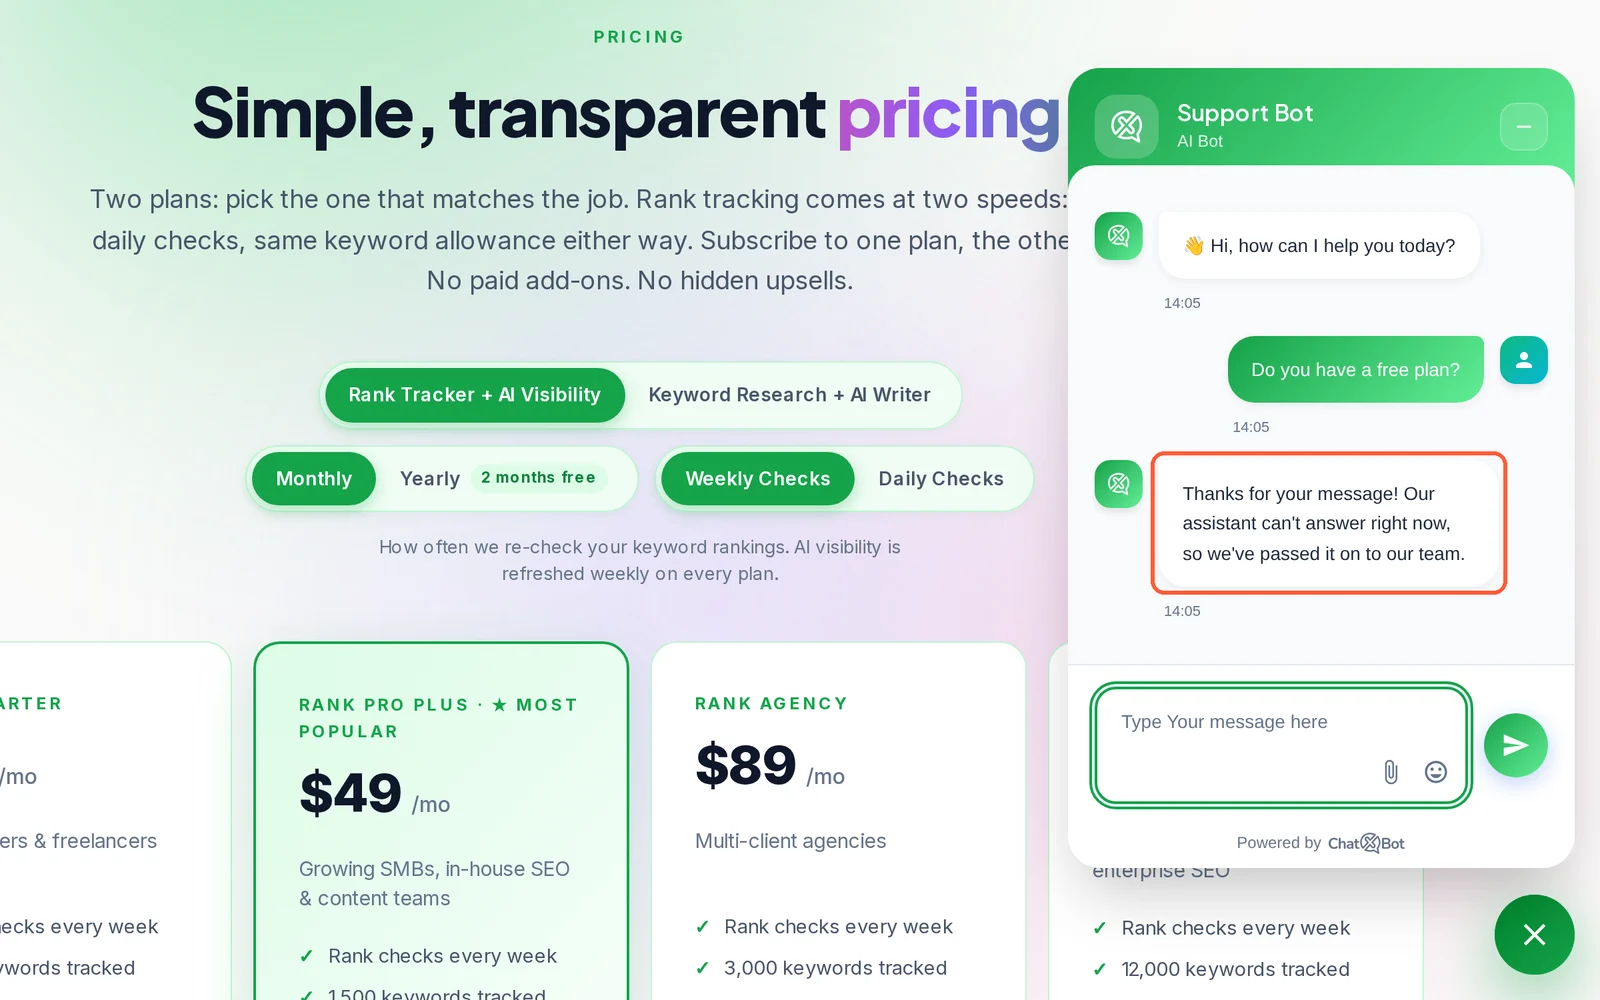
When the AI is paused, visitors can still write: their messages arrive in Conversations and your team can reply.
Usage restarts on the 1st of each month. Deleting chats or a chatbot doesn’t give answers back.
Manage Your Account
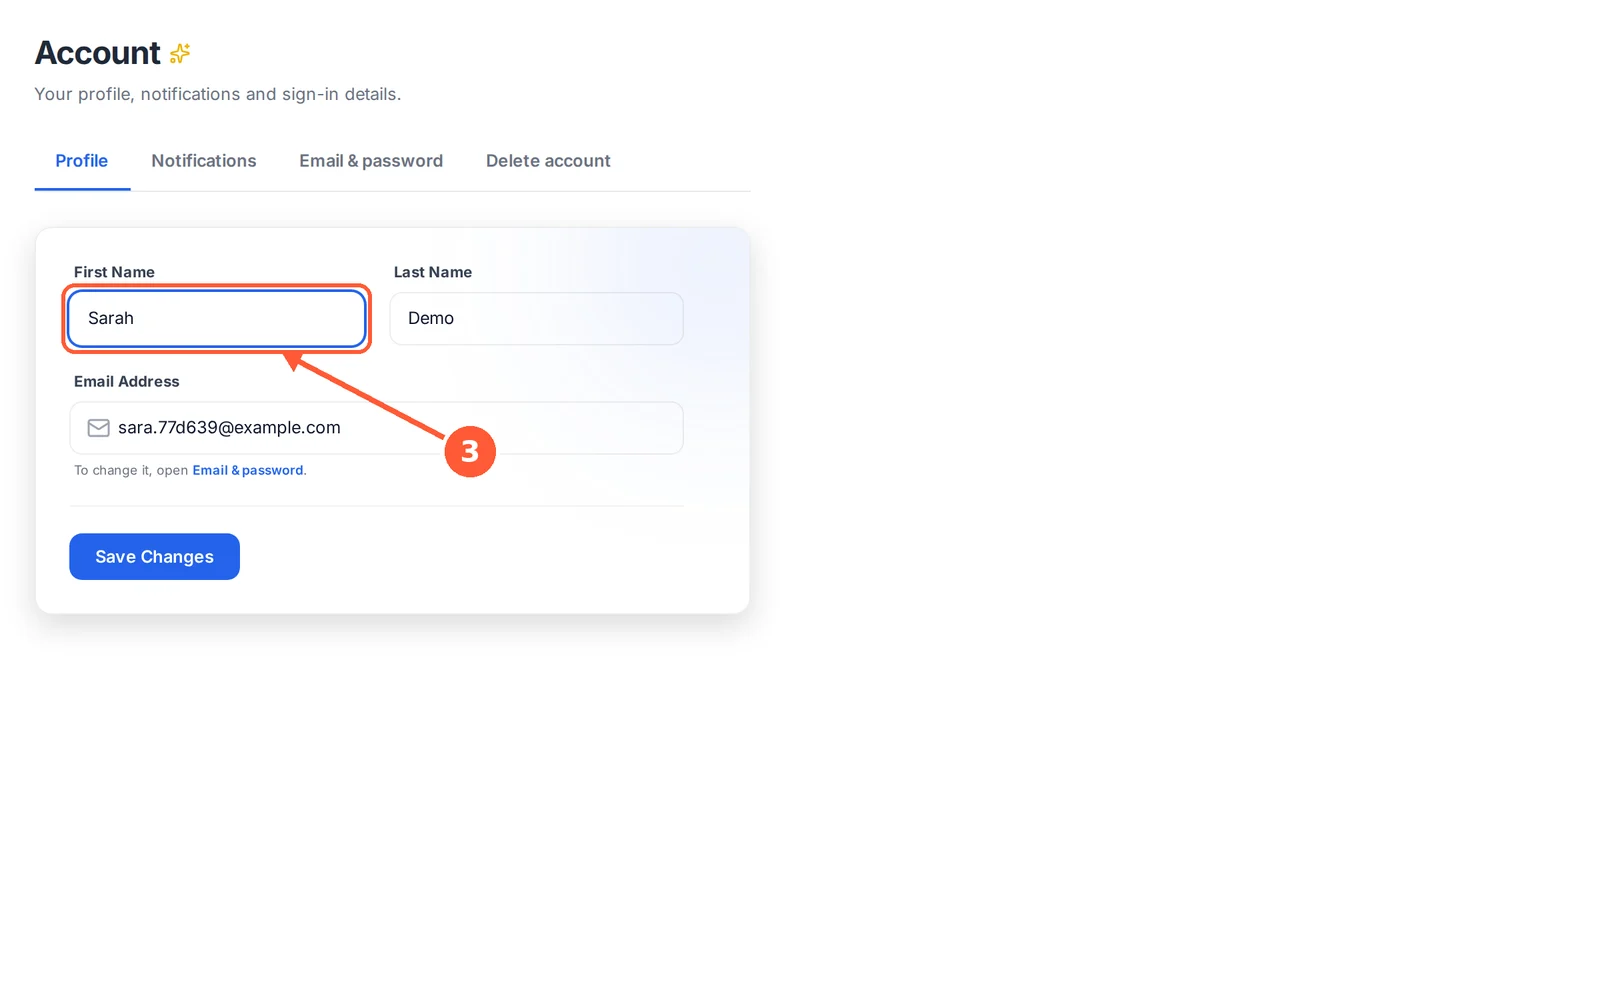
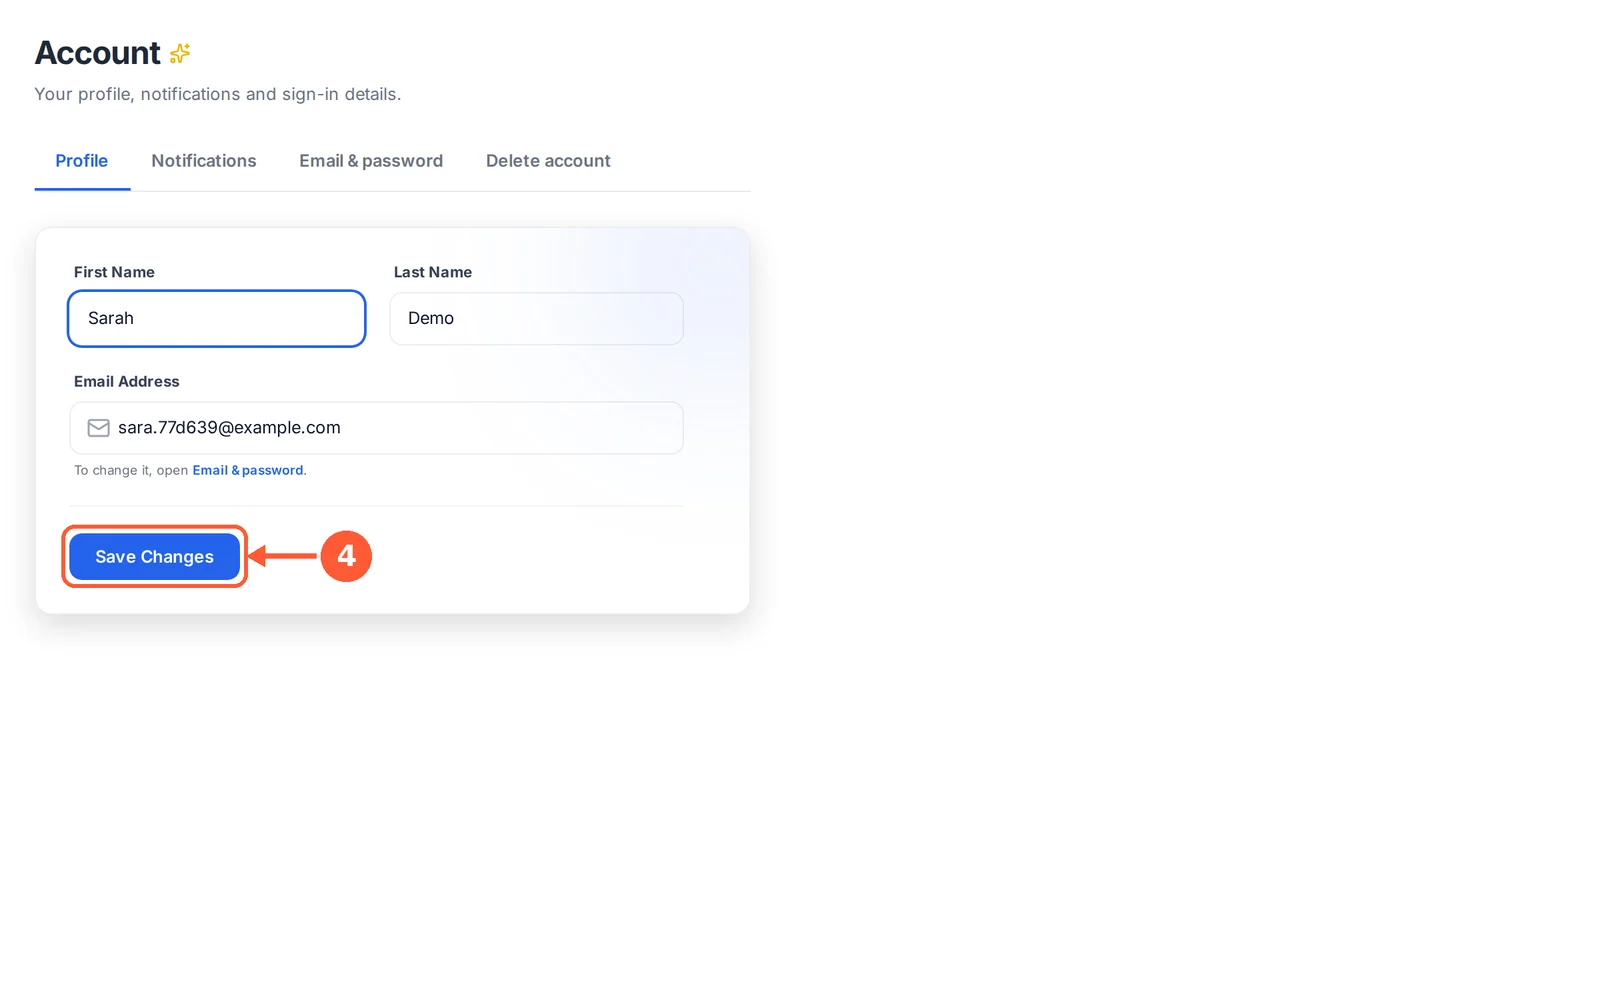
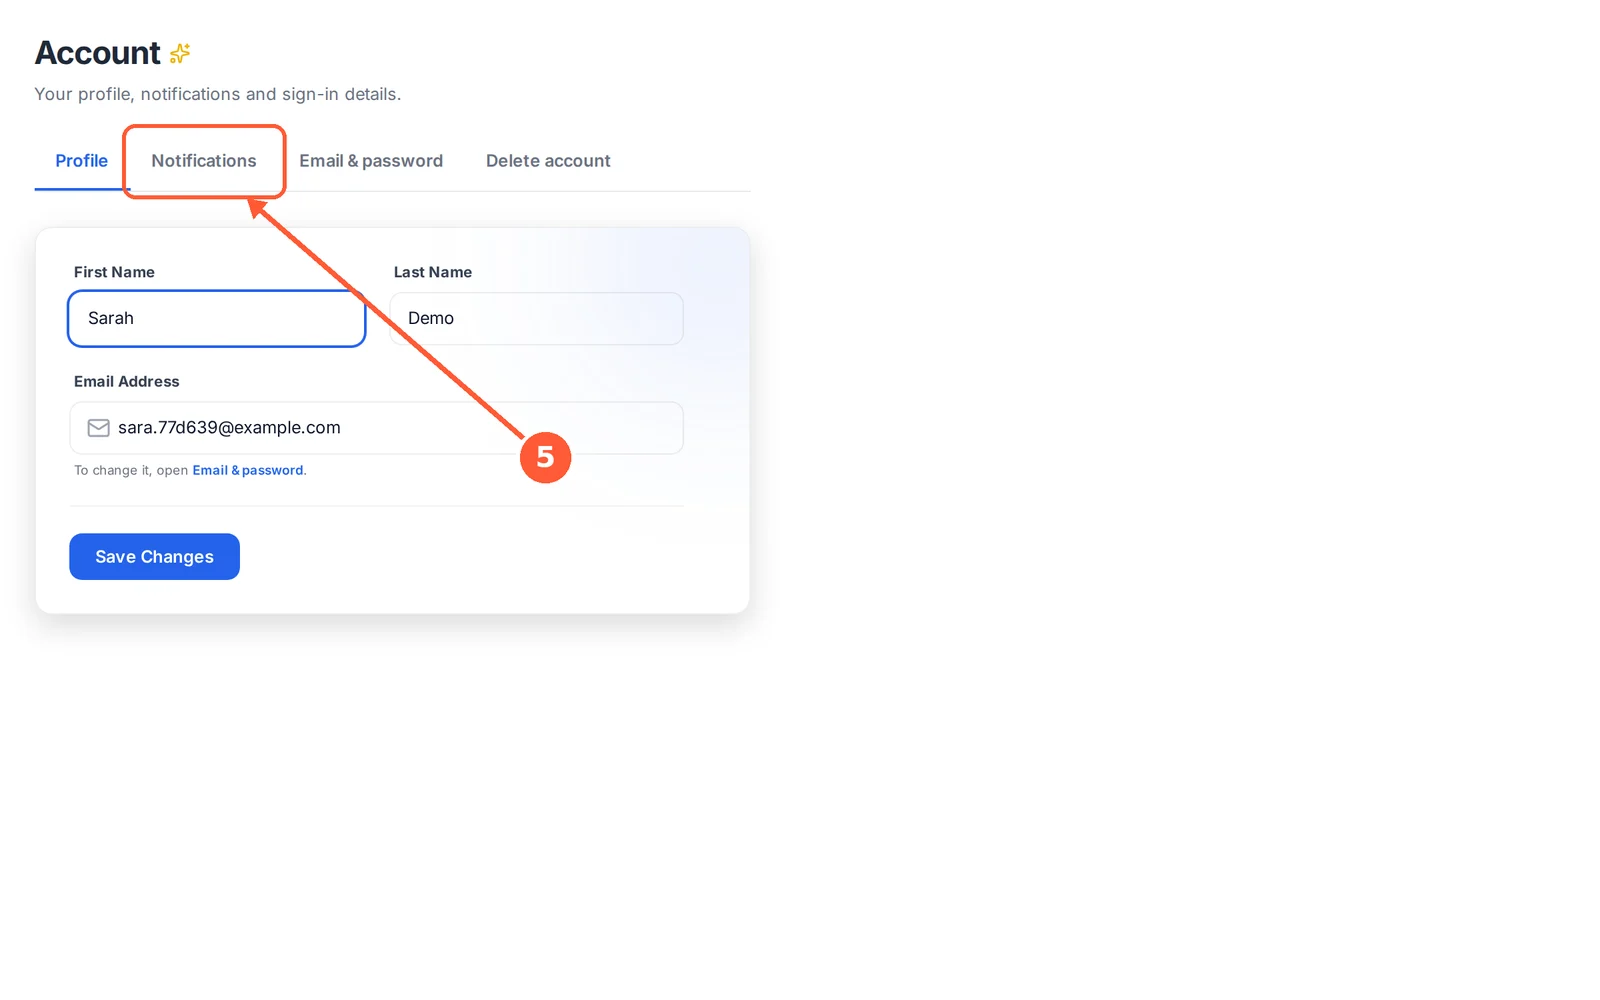
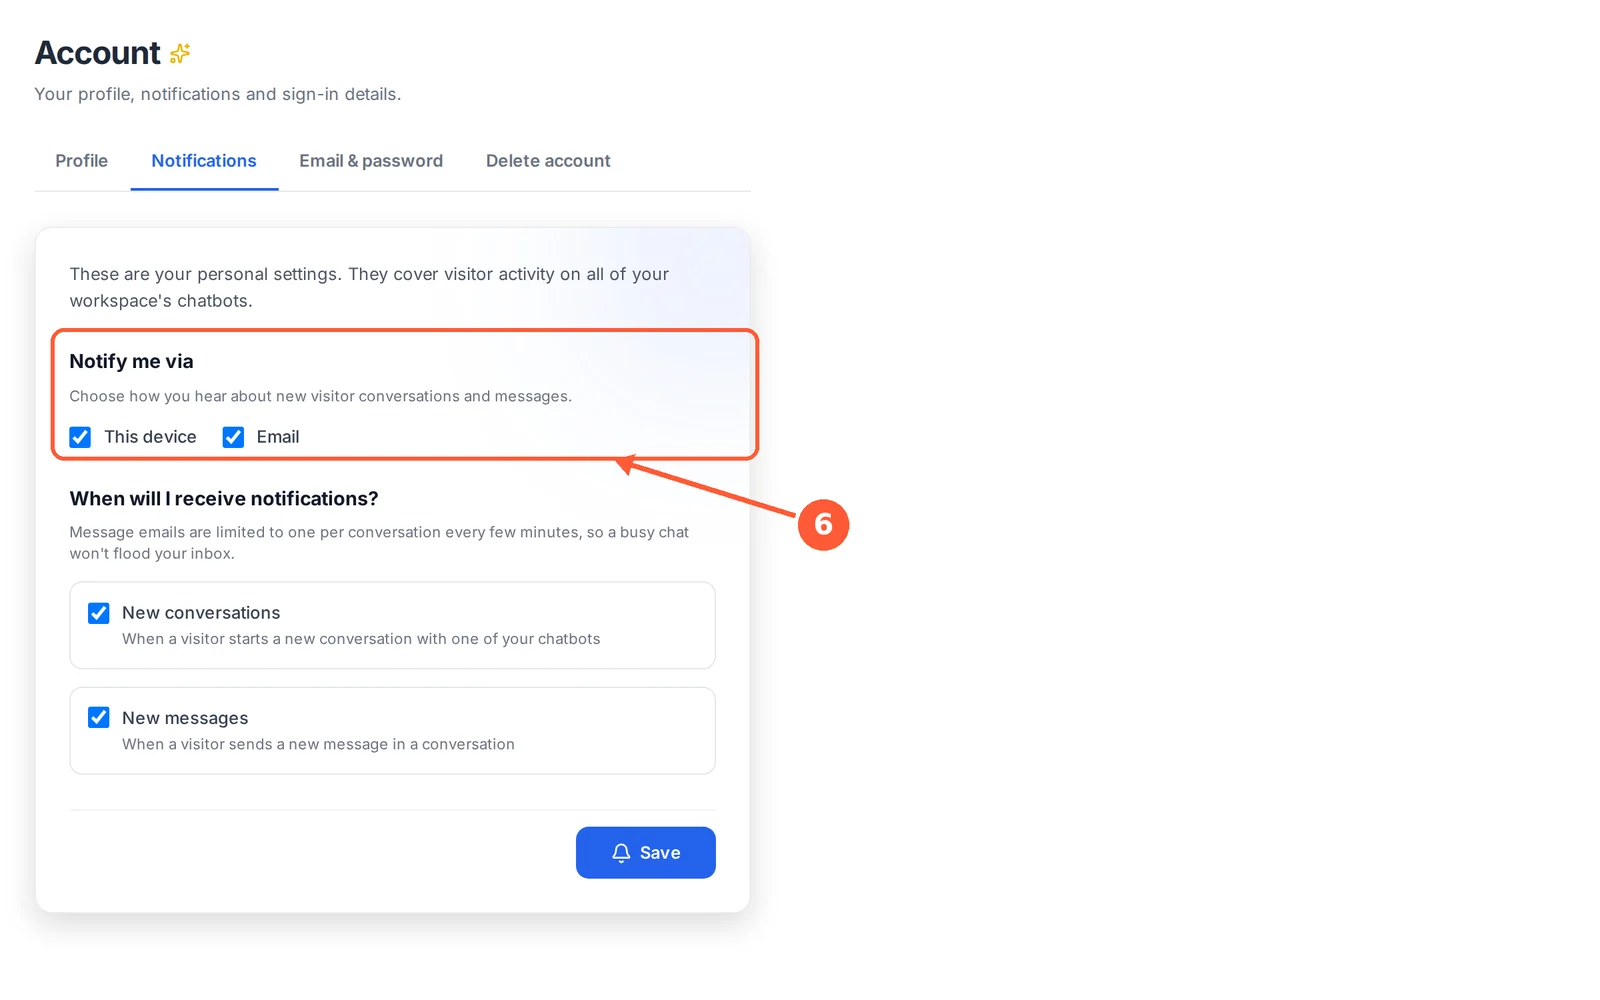
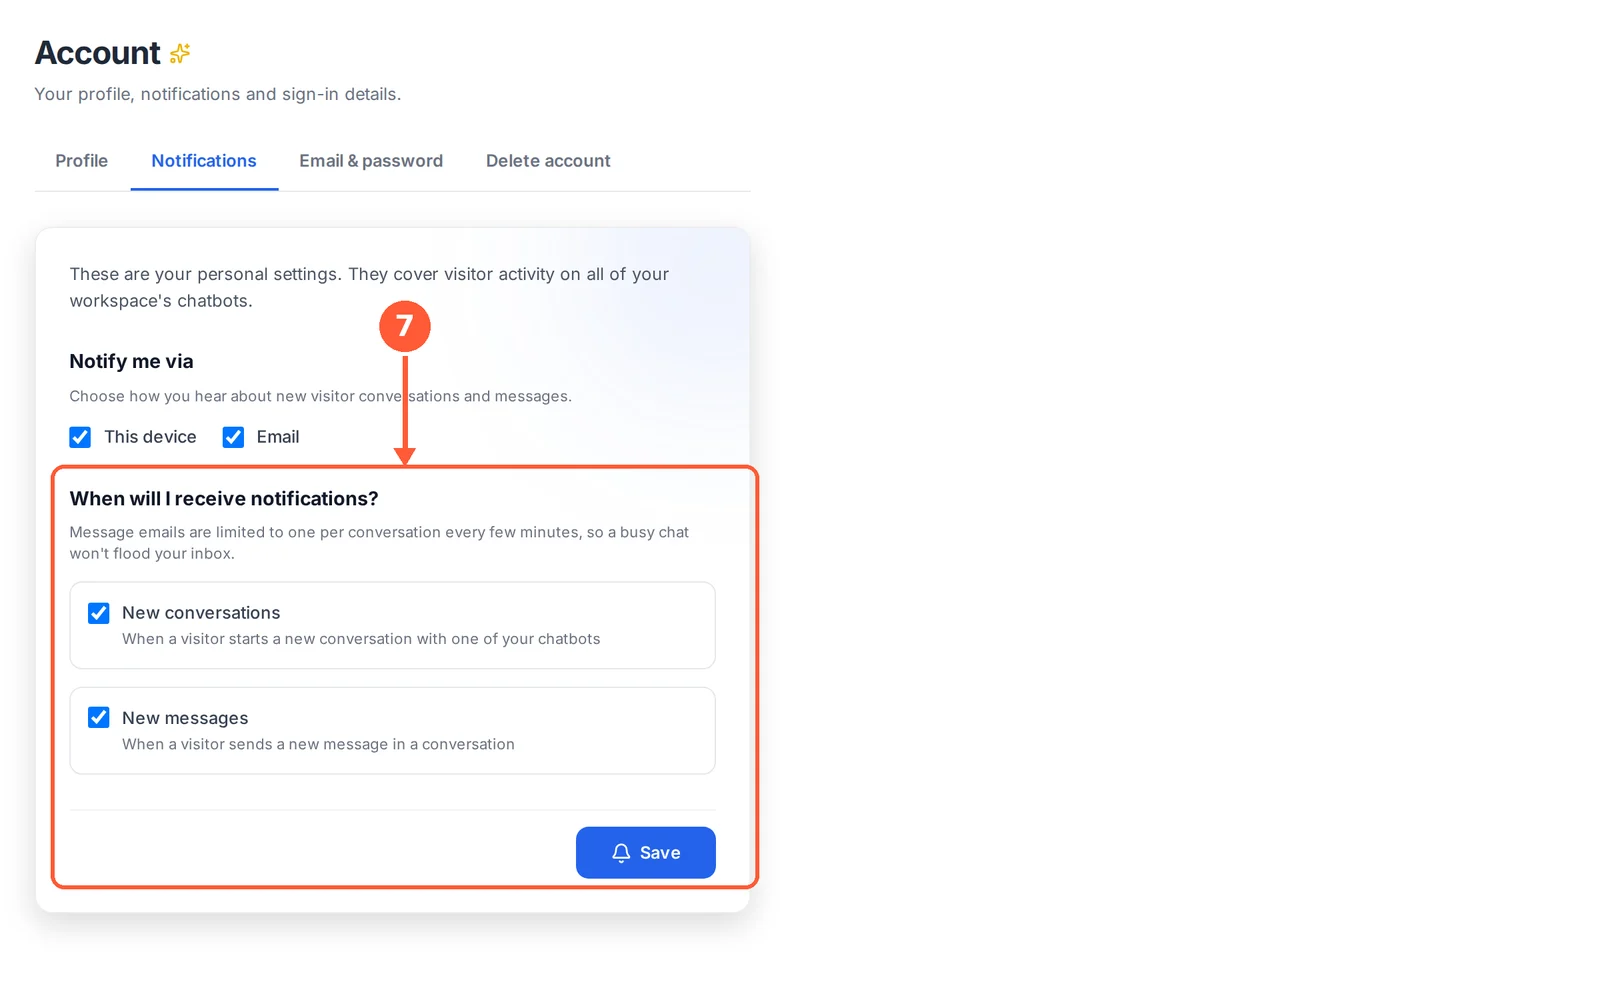
Update your name, choose your notifications, change your email or password, or delete your account.
⏱ About 2 minutes • 📍 Account
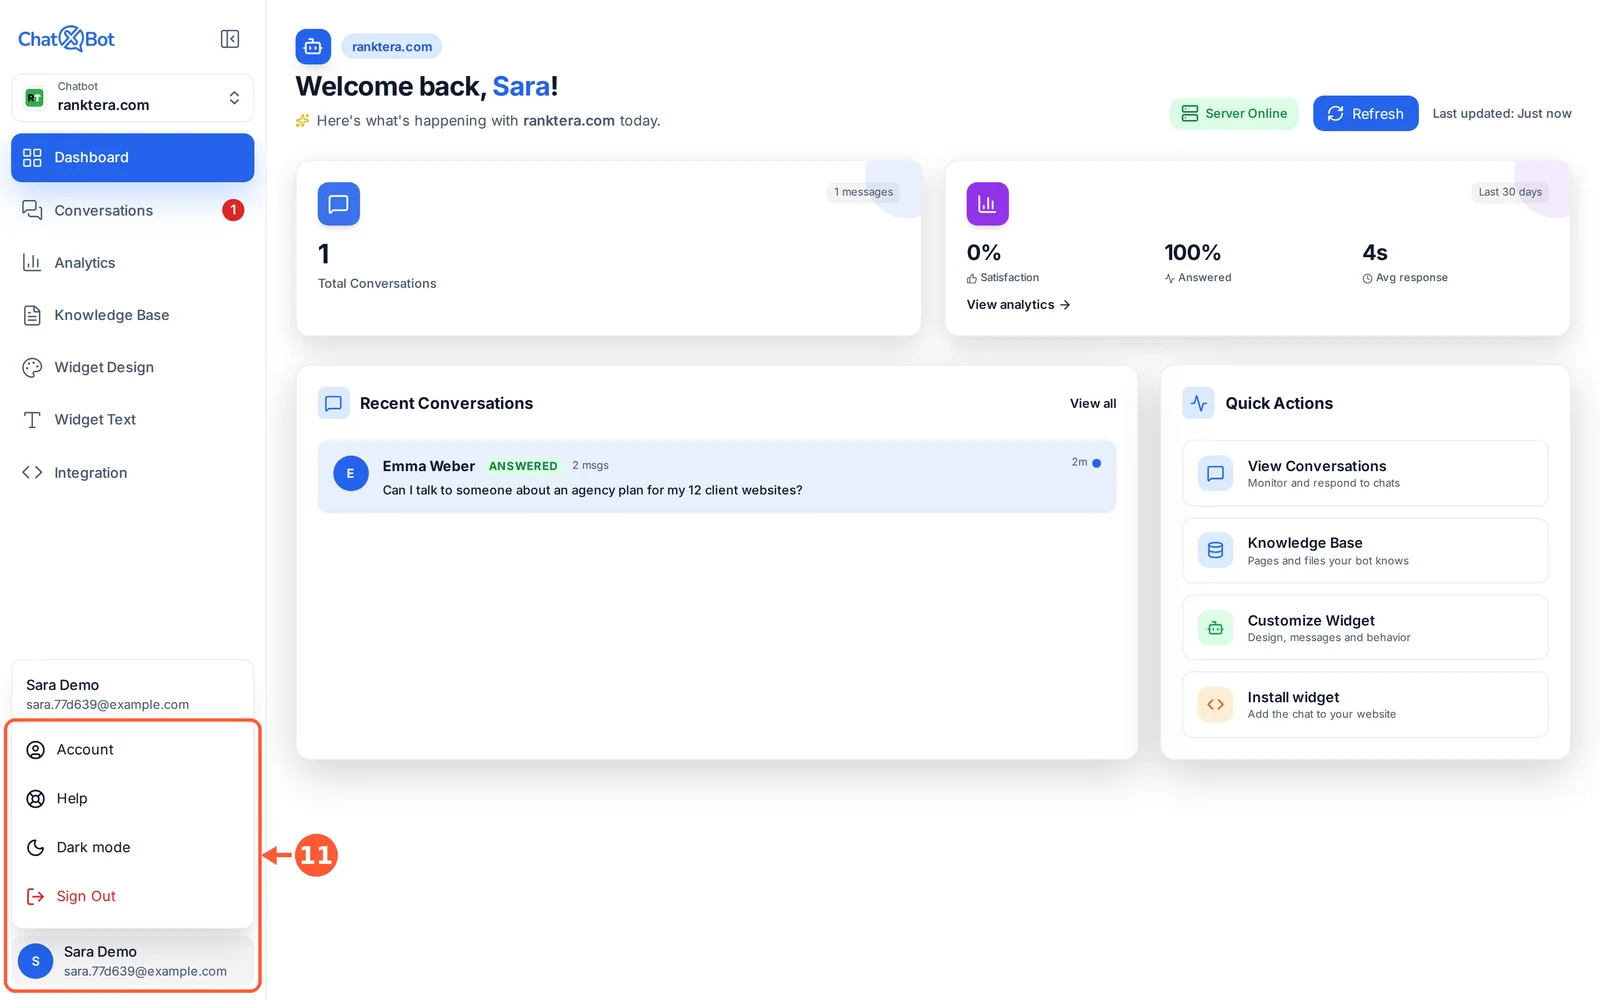
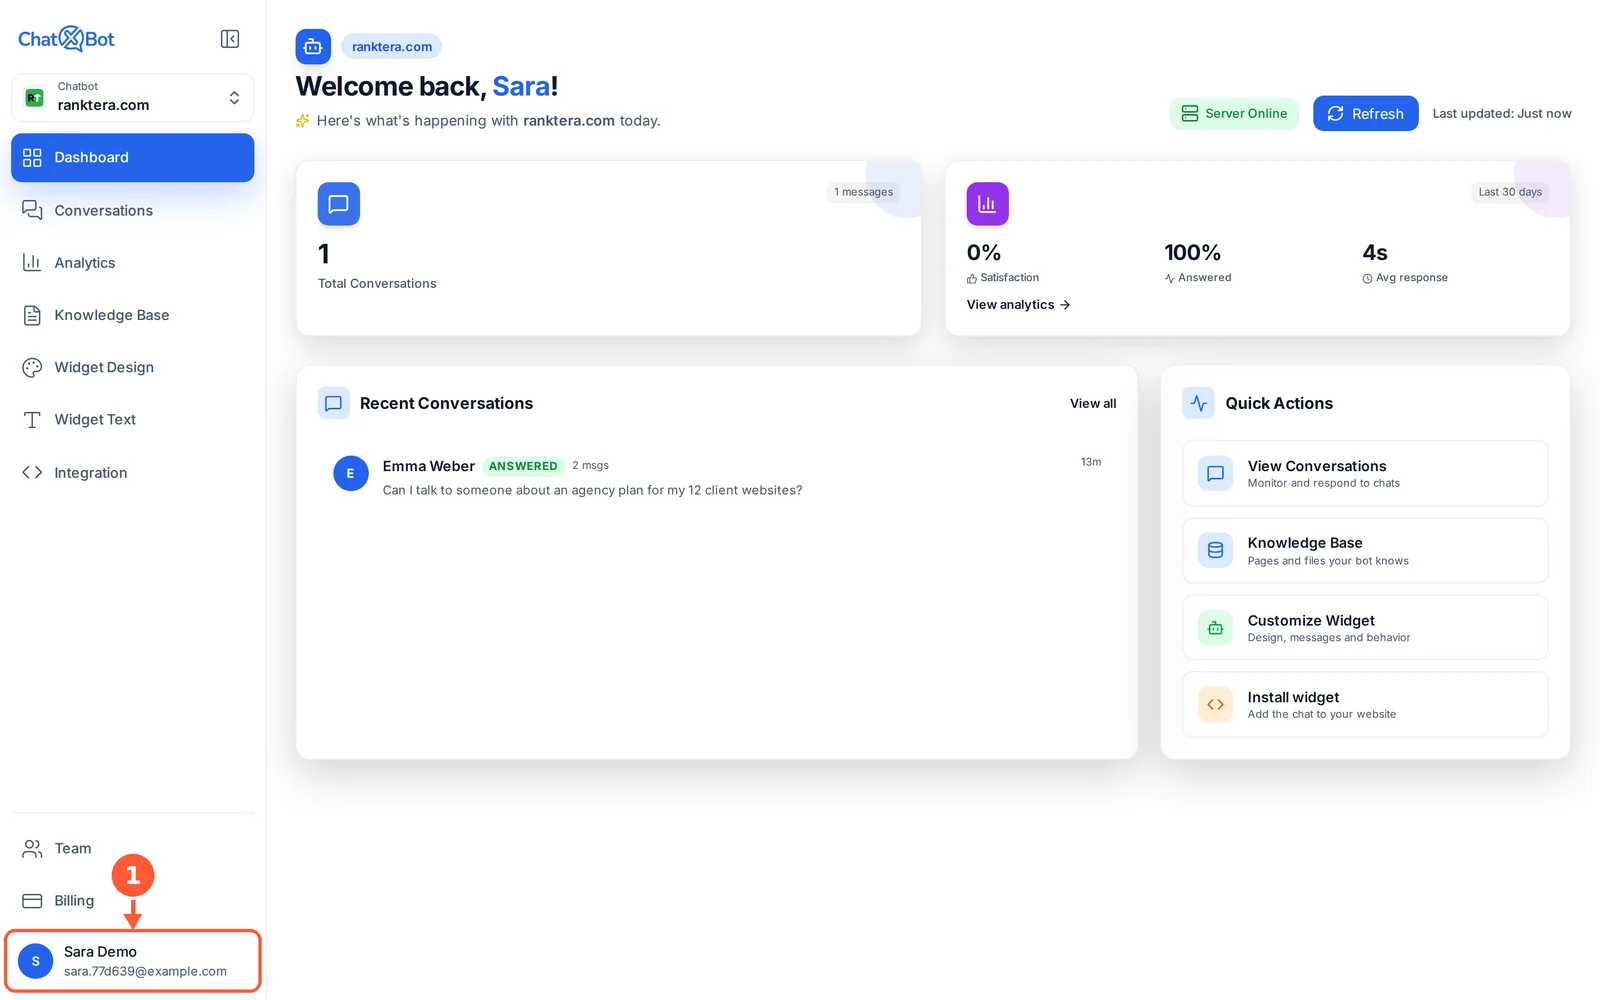
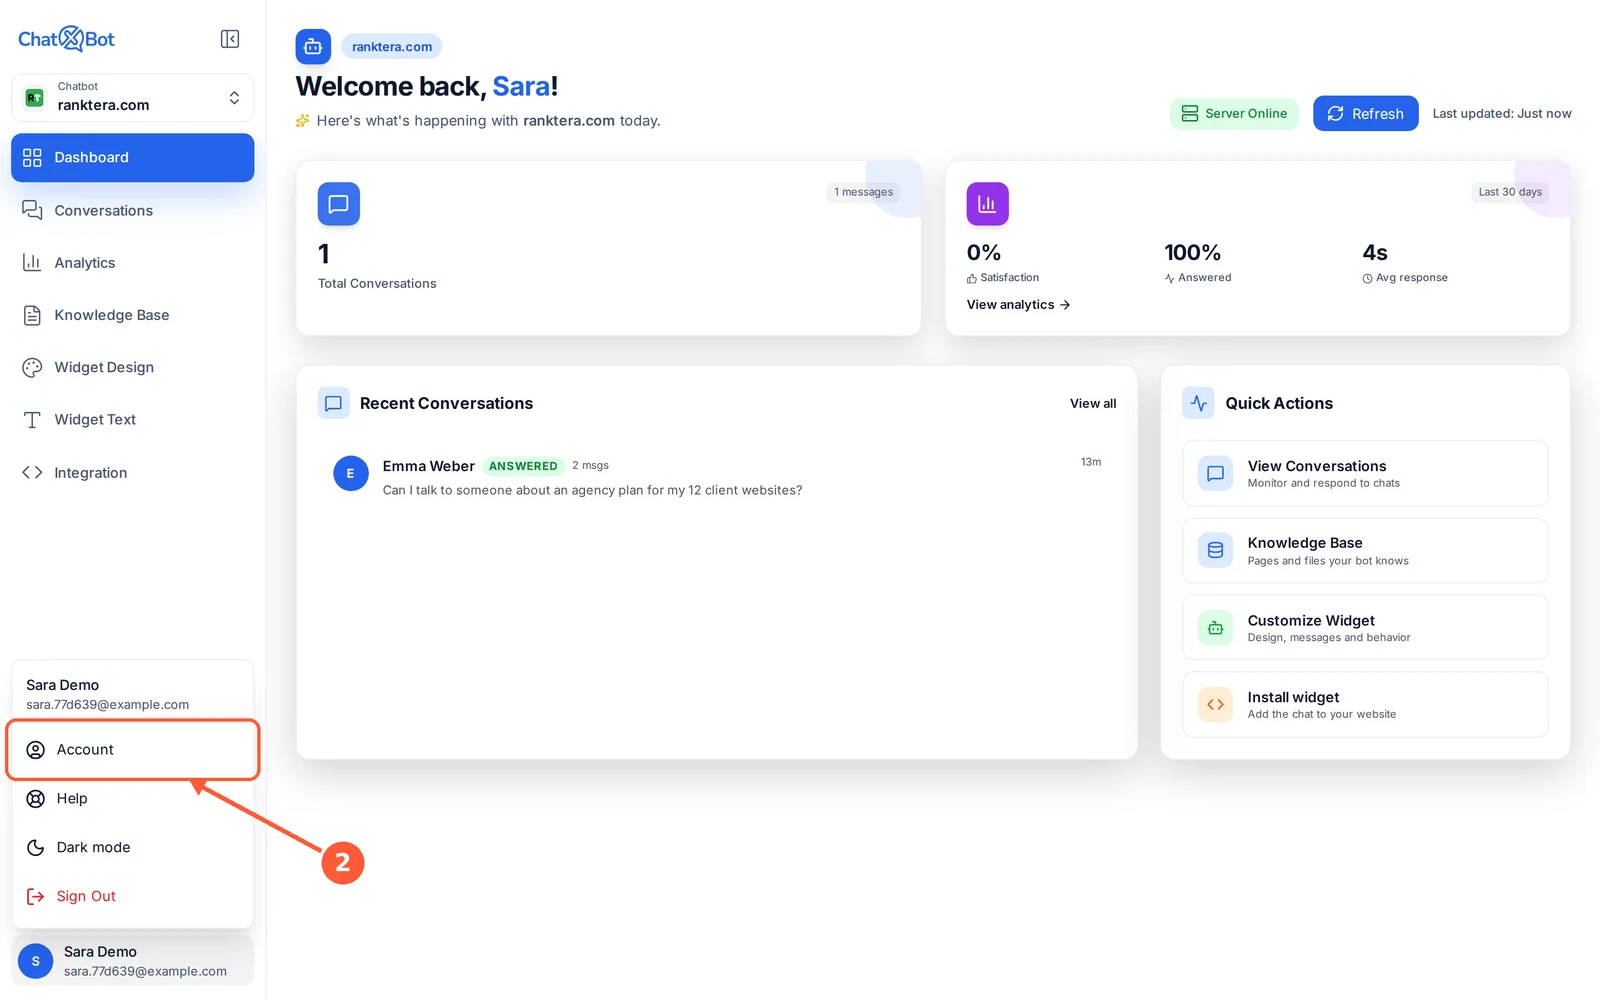
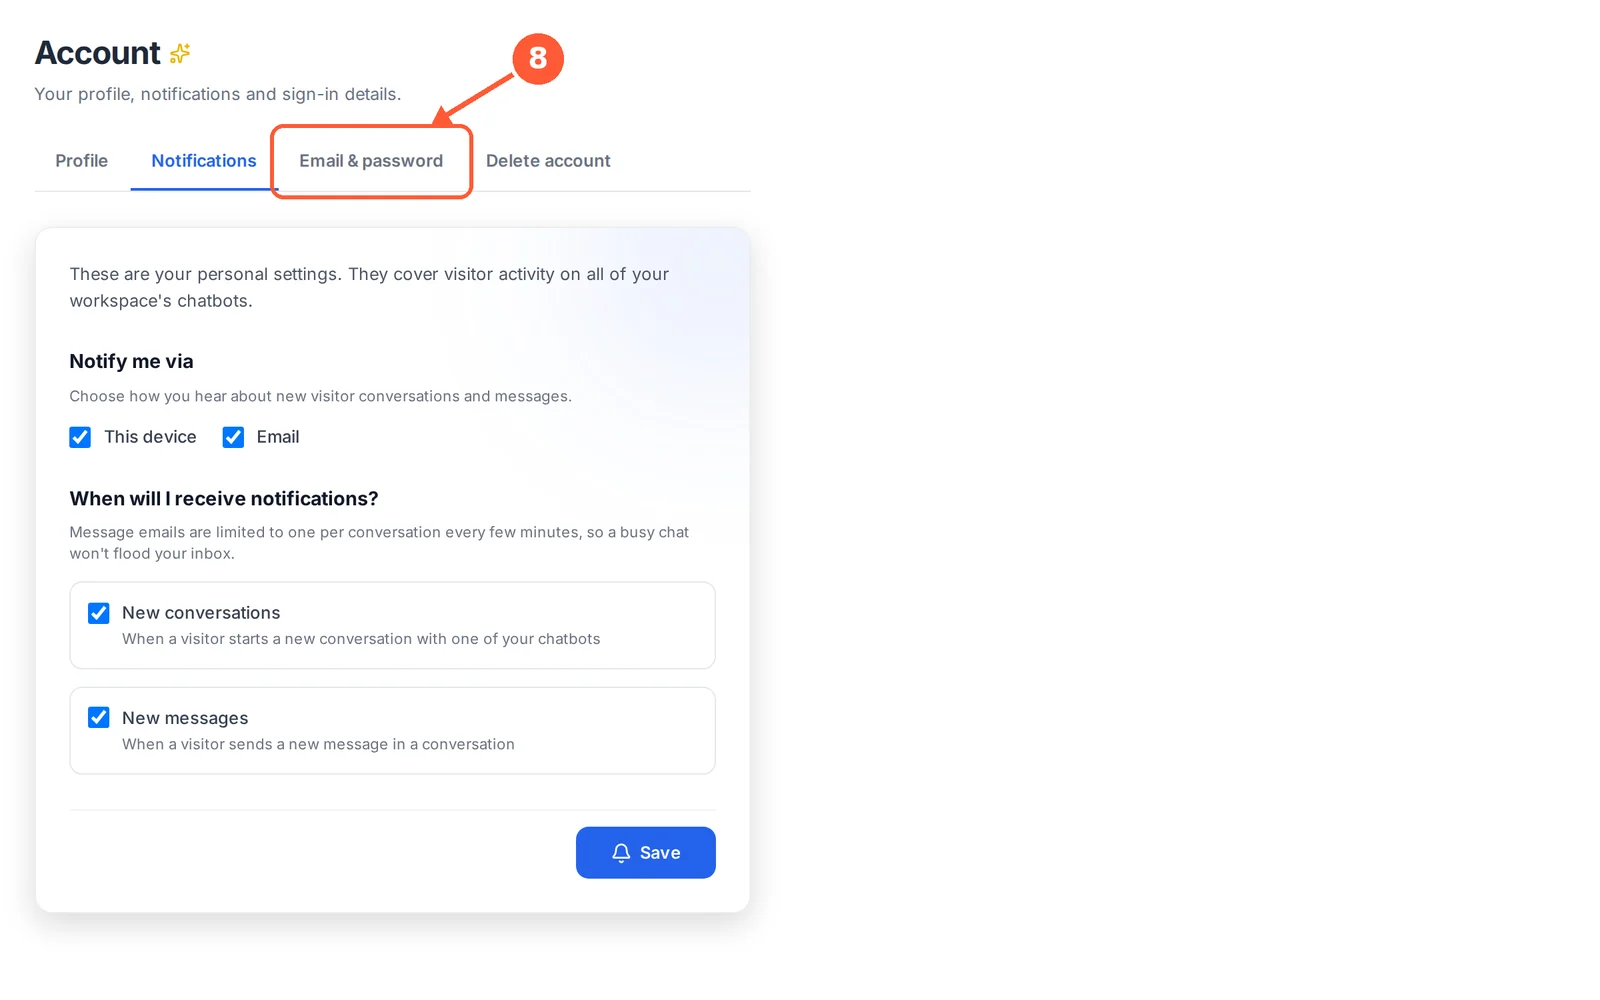
1Click your name at the bottom of the menu.1 / 8
💡 Good to Know
Each of your devices has its own This device switch. Once it’s on, click Send test notification to try it.
Delete account is its own tab, for account owners only. It can’t be undone.
Changing your email or deleting your account asks for your password, to keep your account safe.
Sign In & Reset Your Password
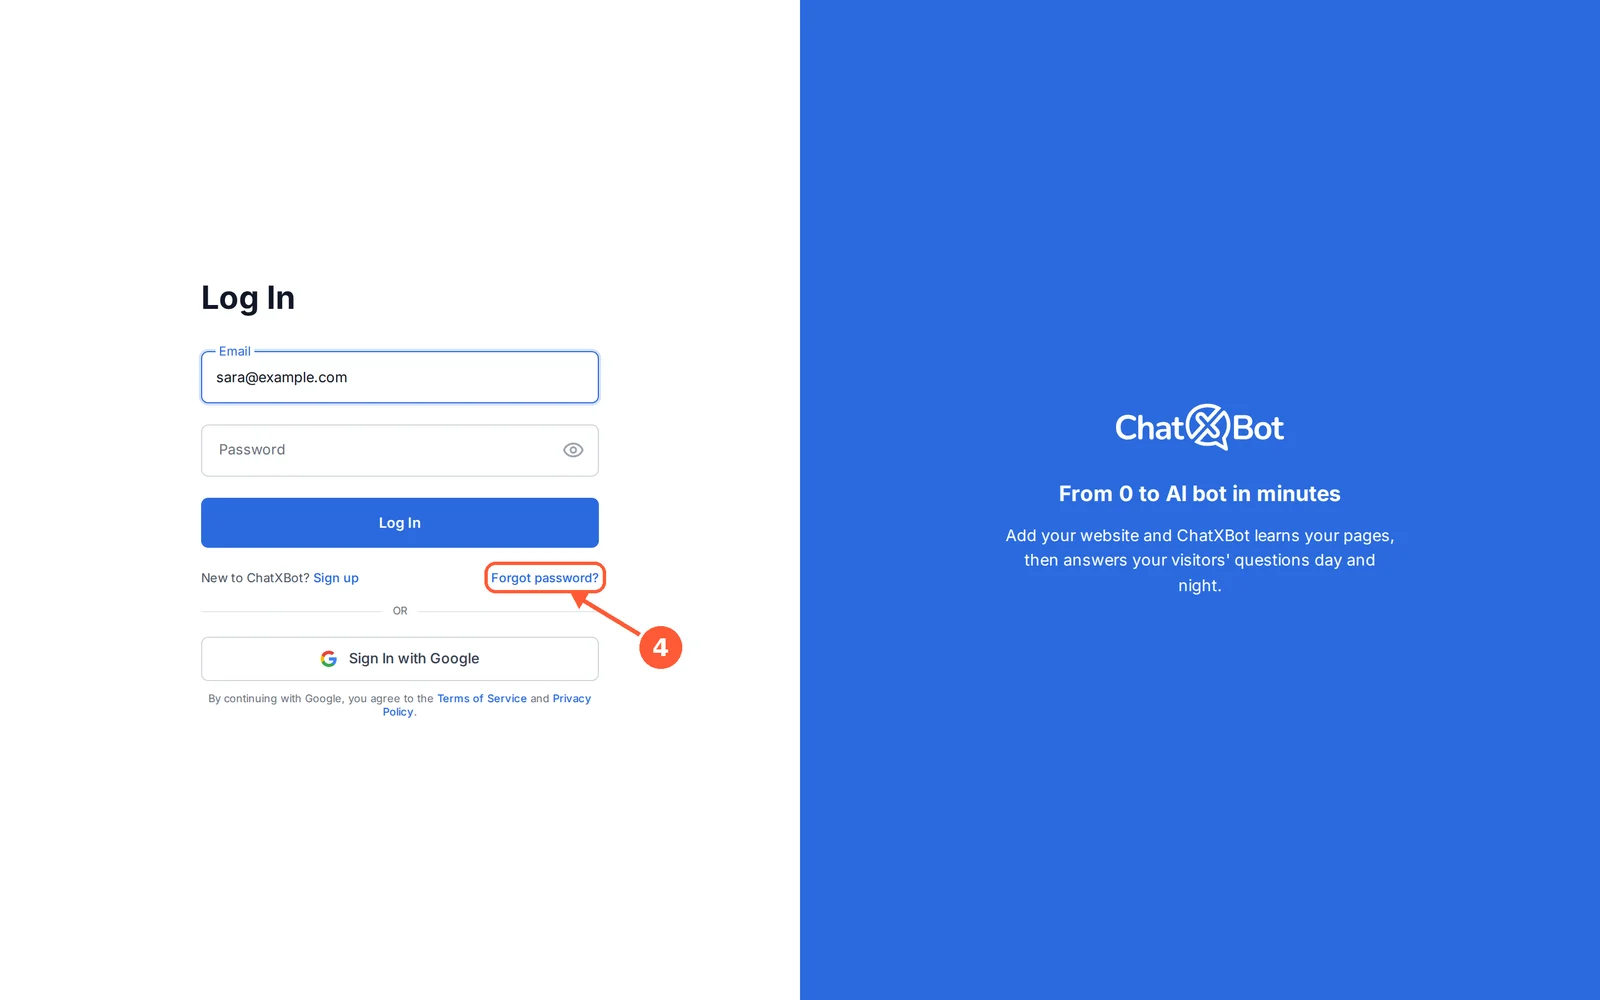
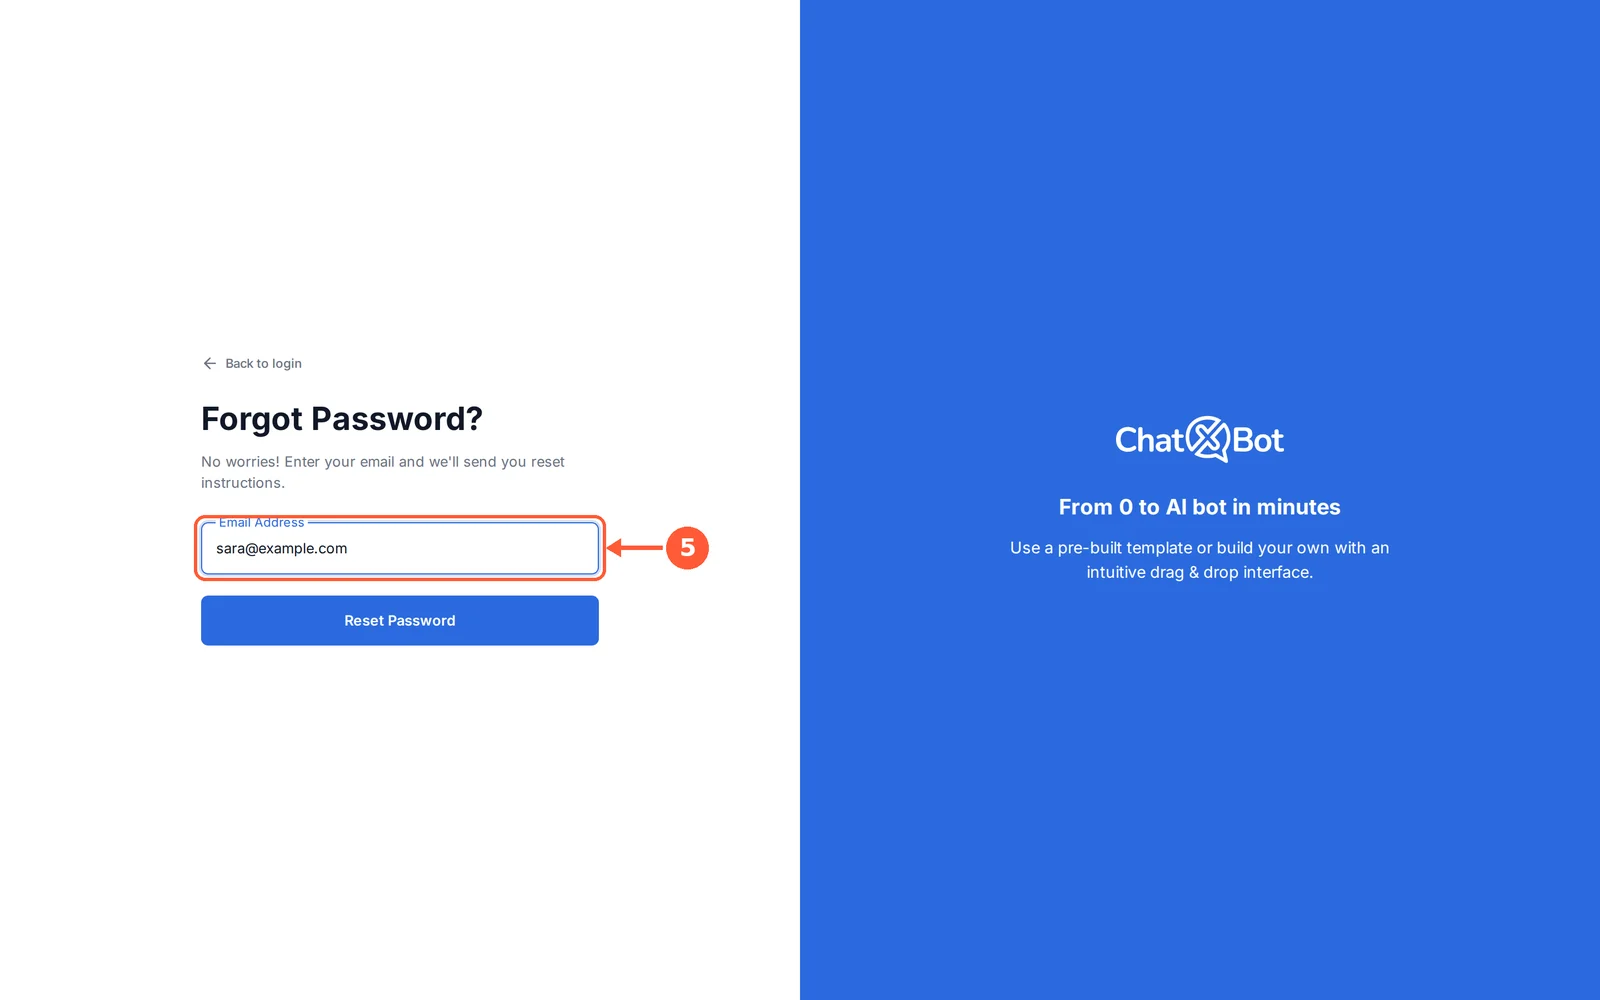
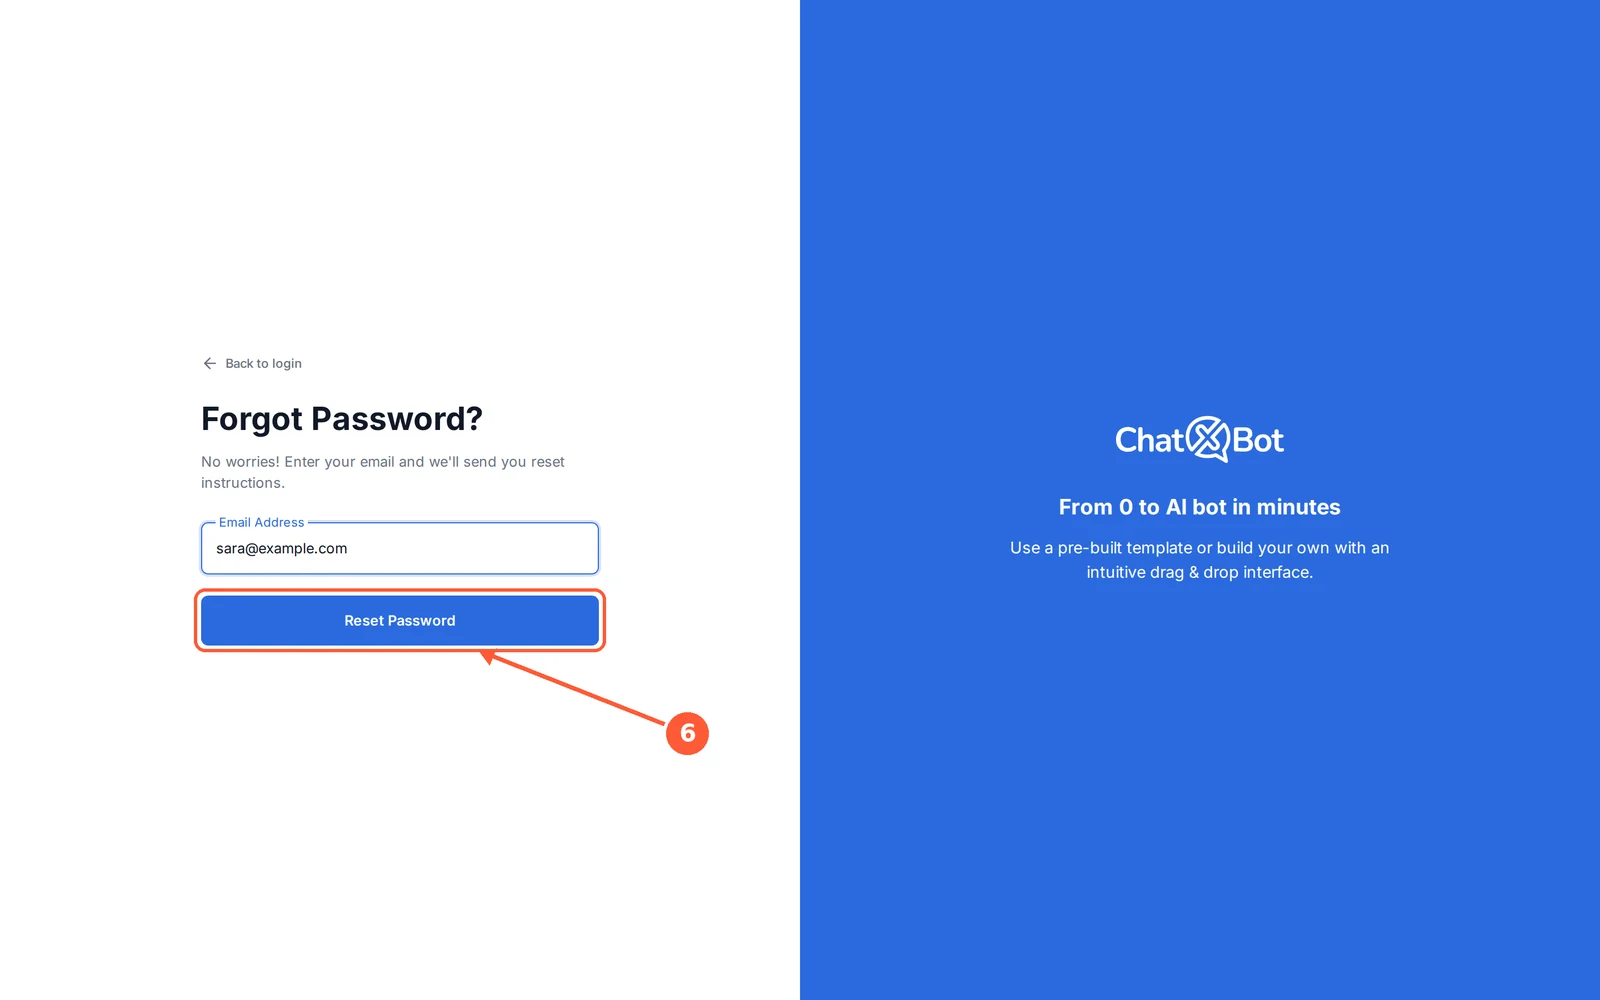
Come back any time to manage your chatbots. If you forget your password, you can set a new one in a few clicks.
⏱ 30 seconds • 📍 app.chatxbot.com
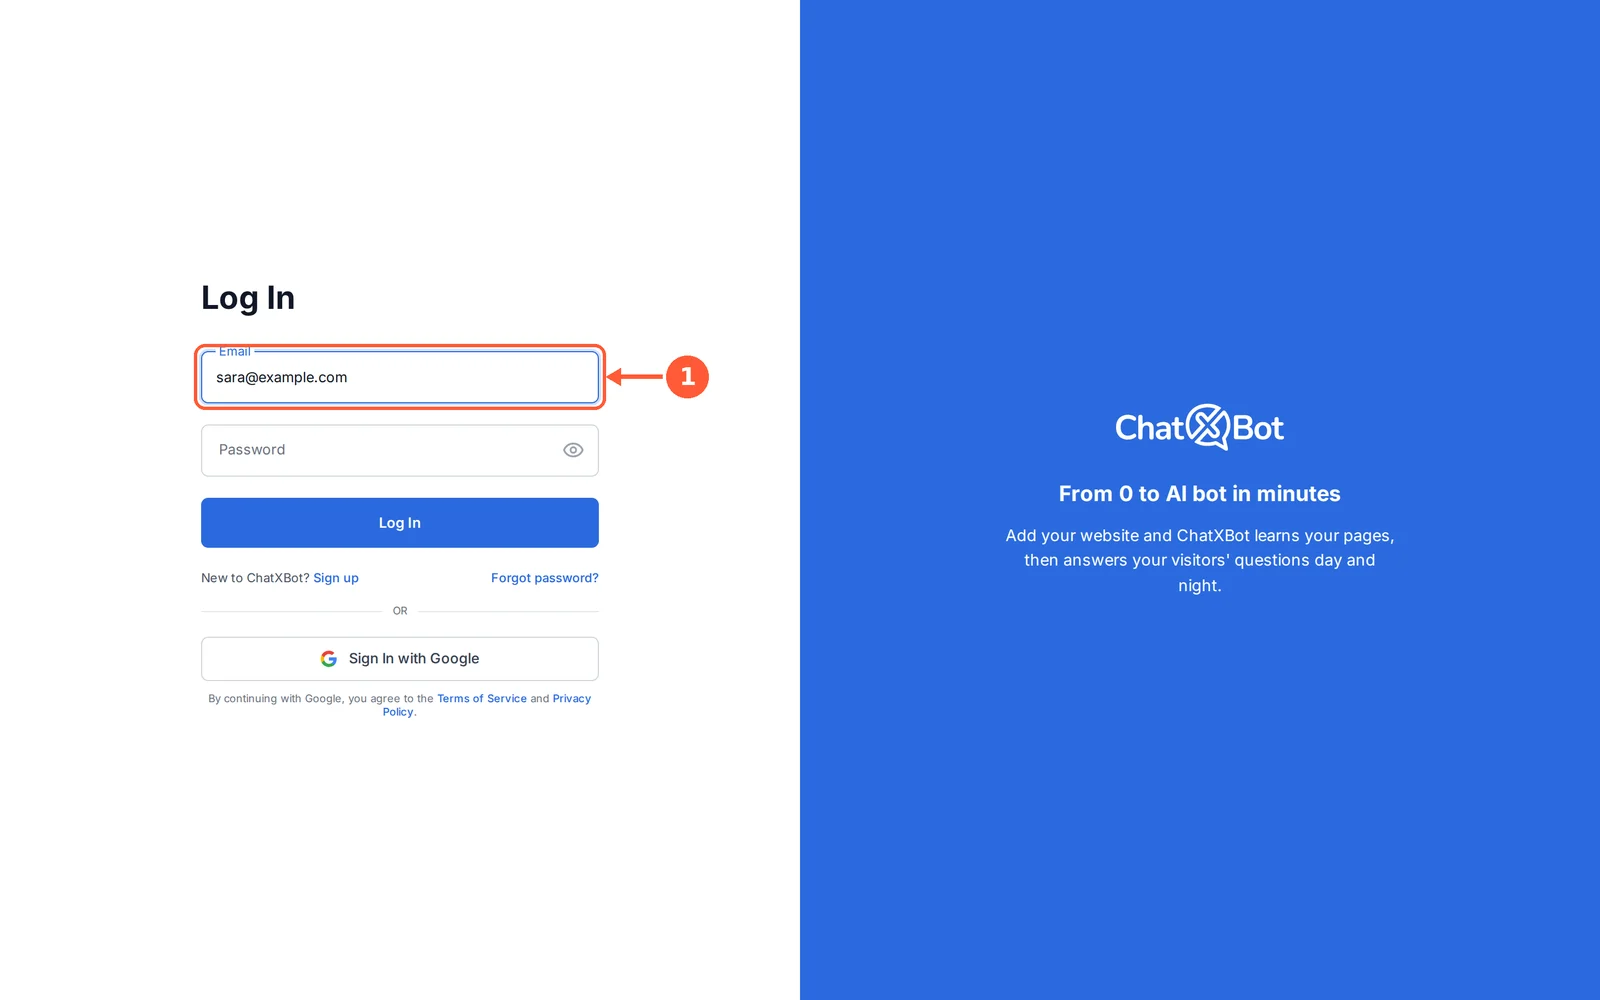
1Type your email address.1 / 6
💡 Good to Know
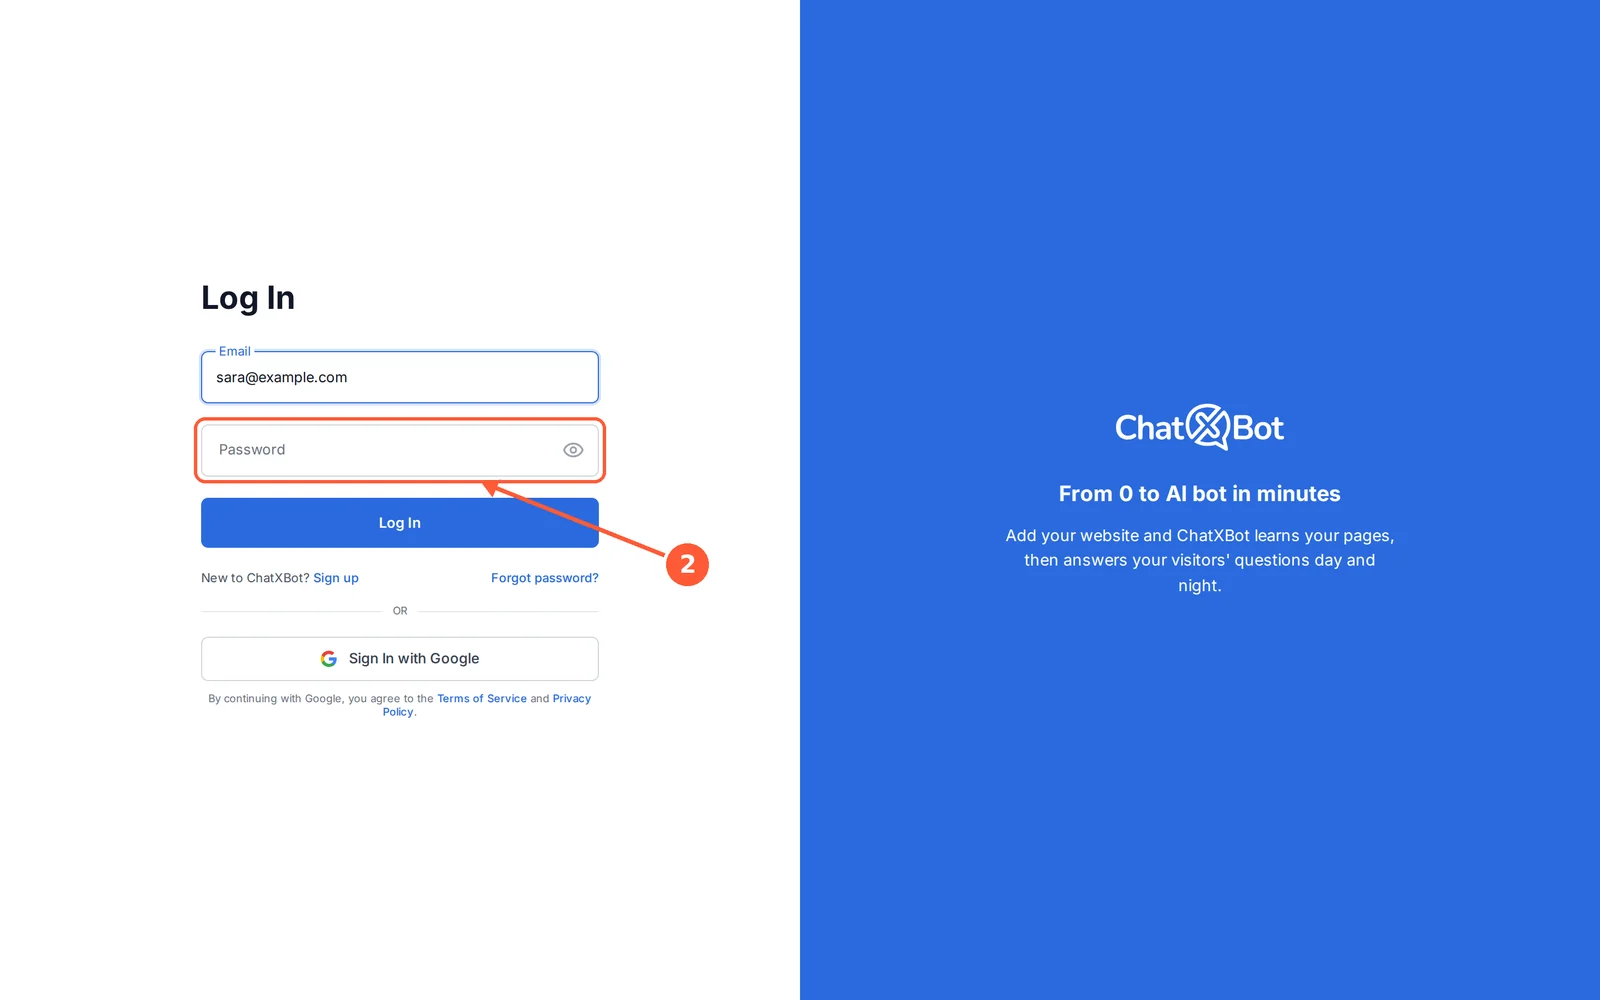
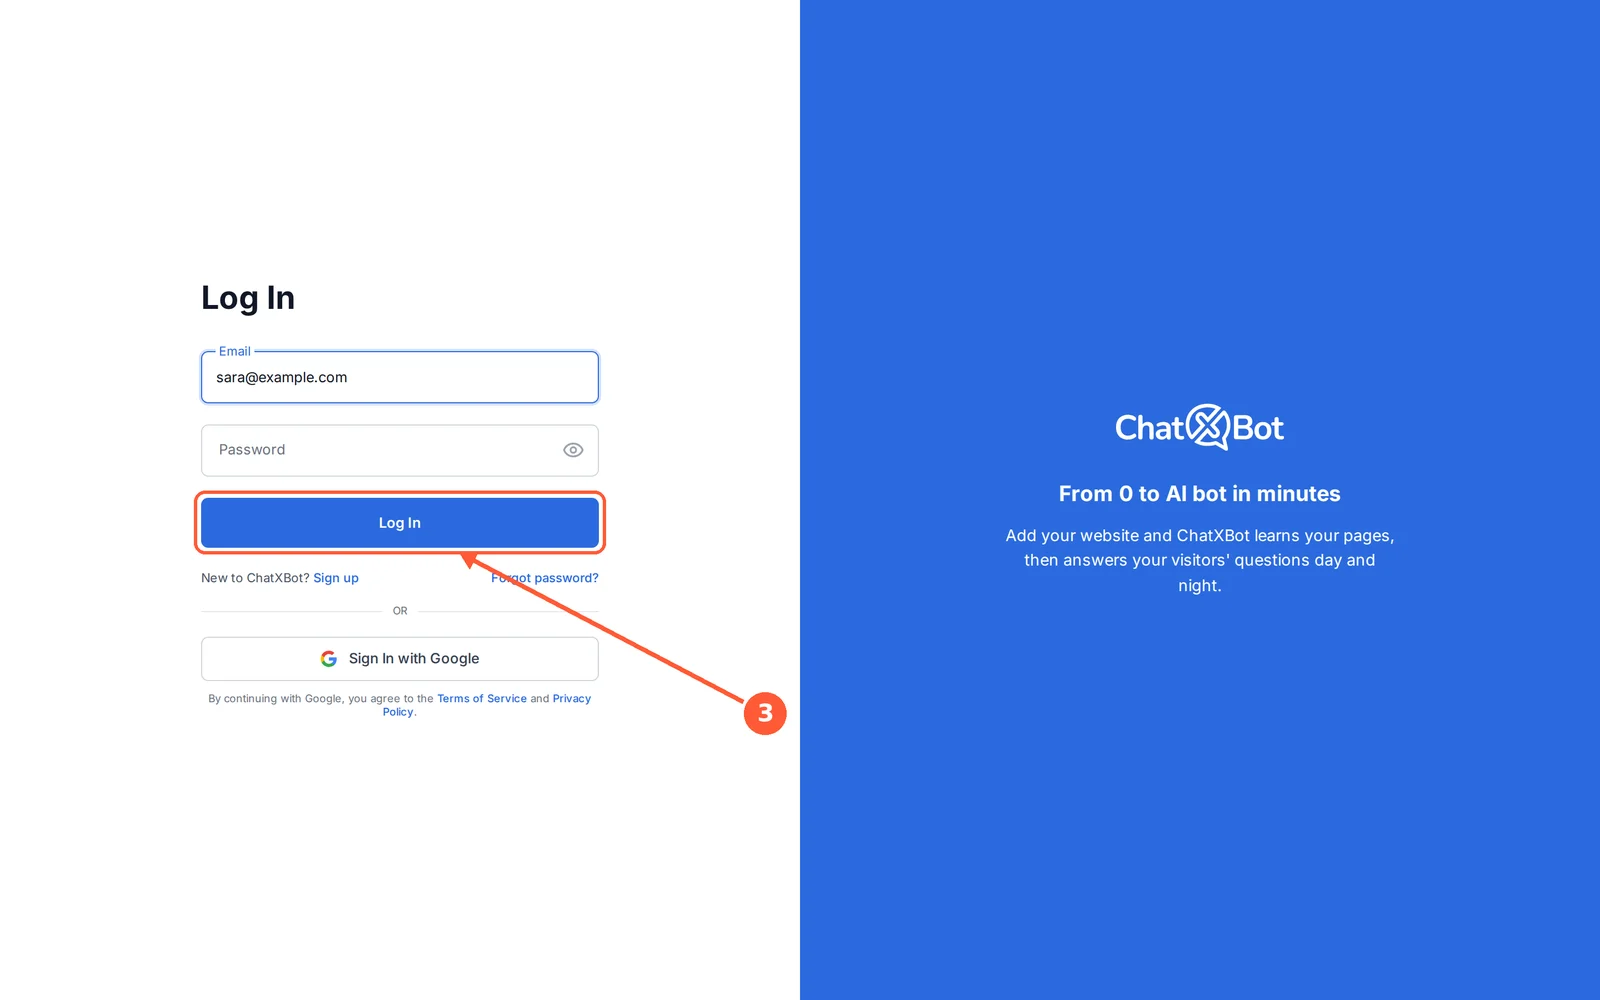
Signed up with Google? Click Sign In with Google instead of typing a password.
Get Help & Send Feedback
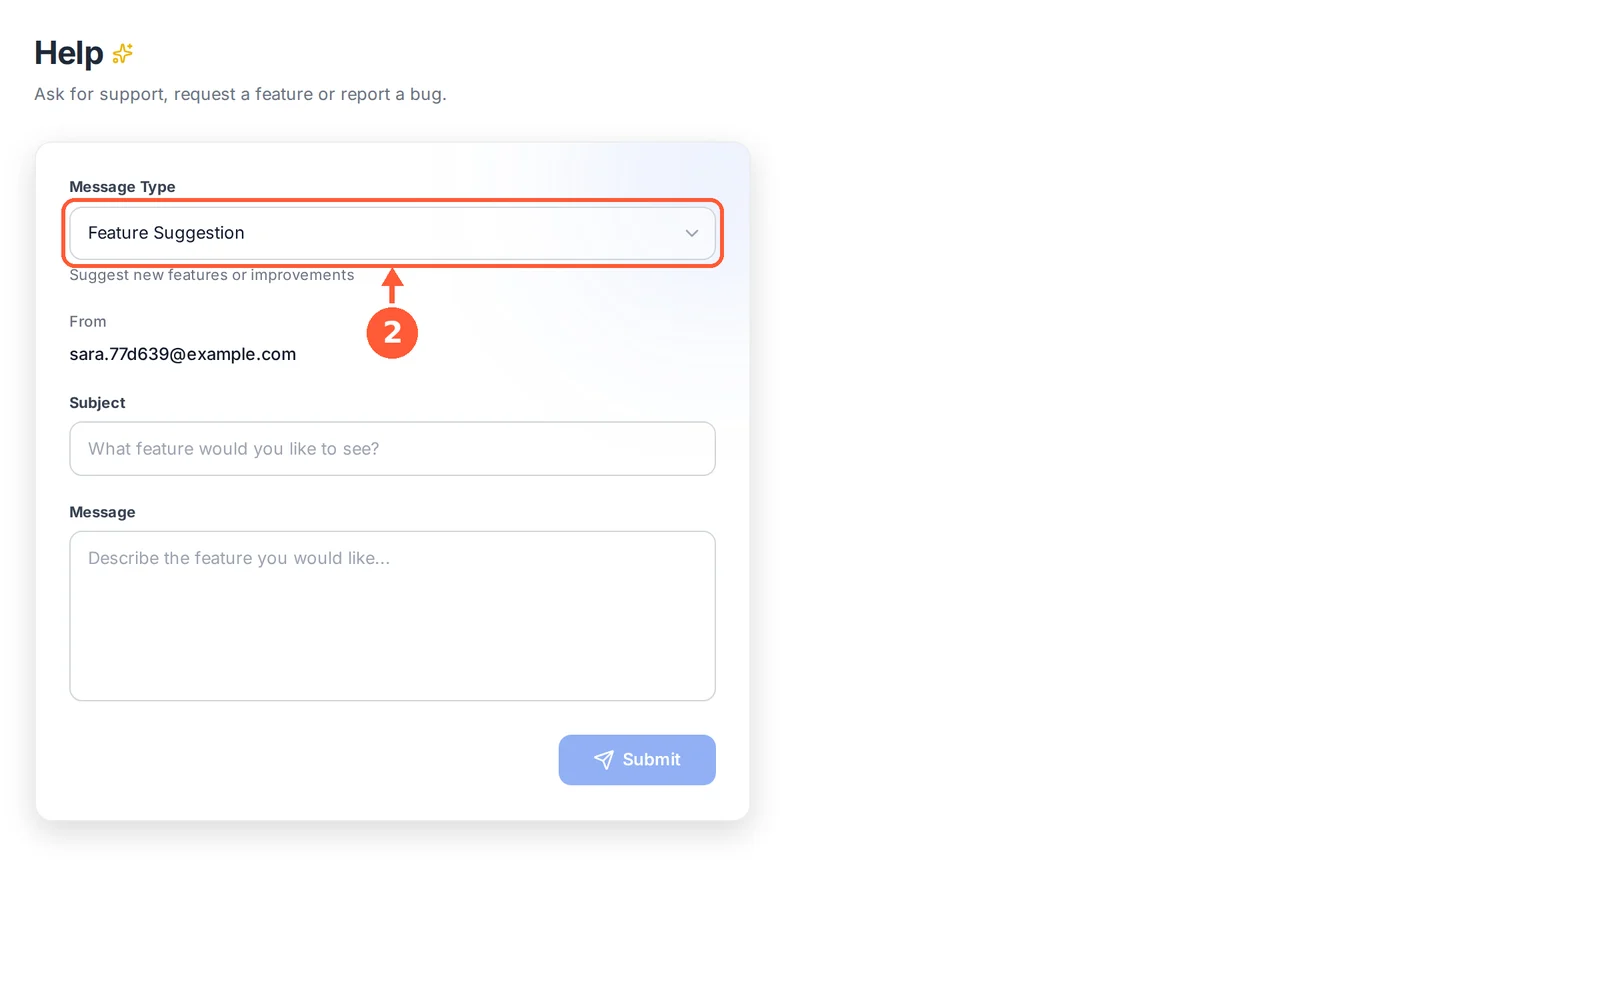
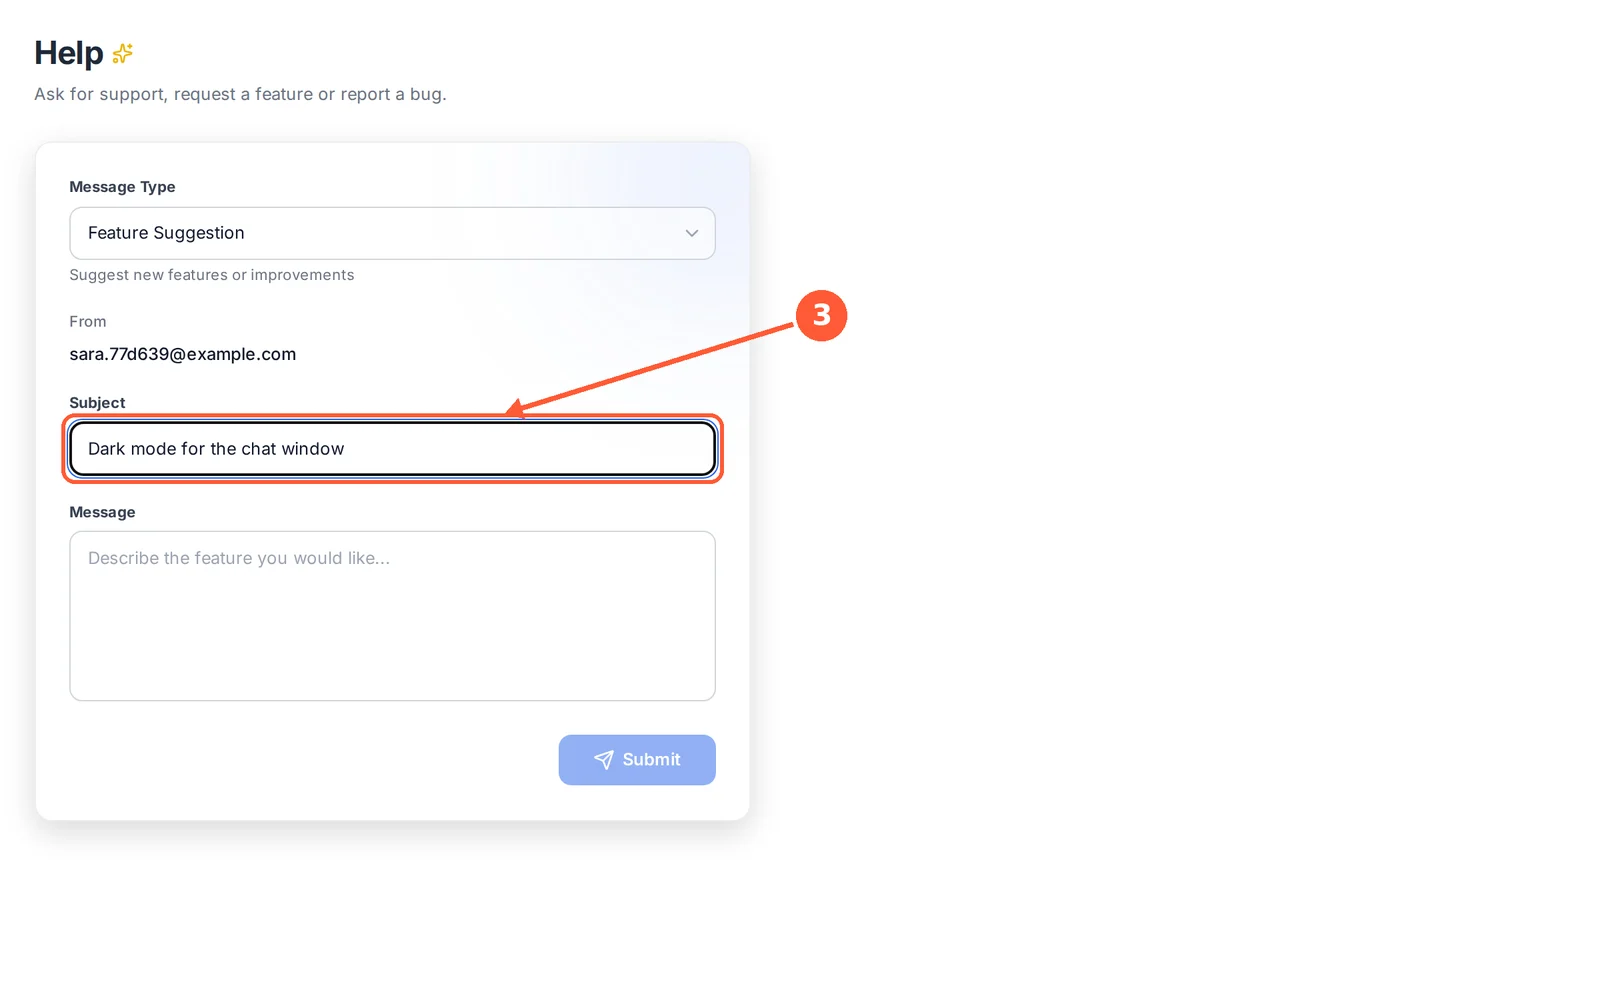
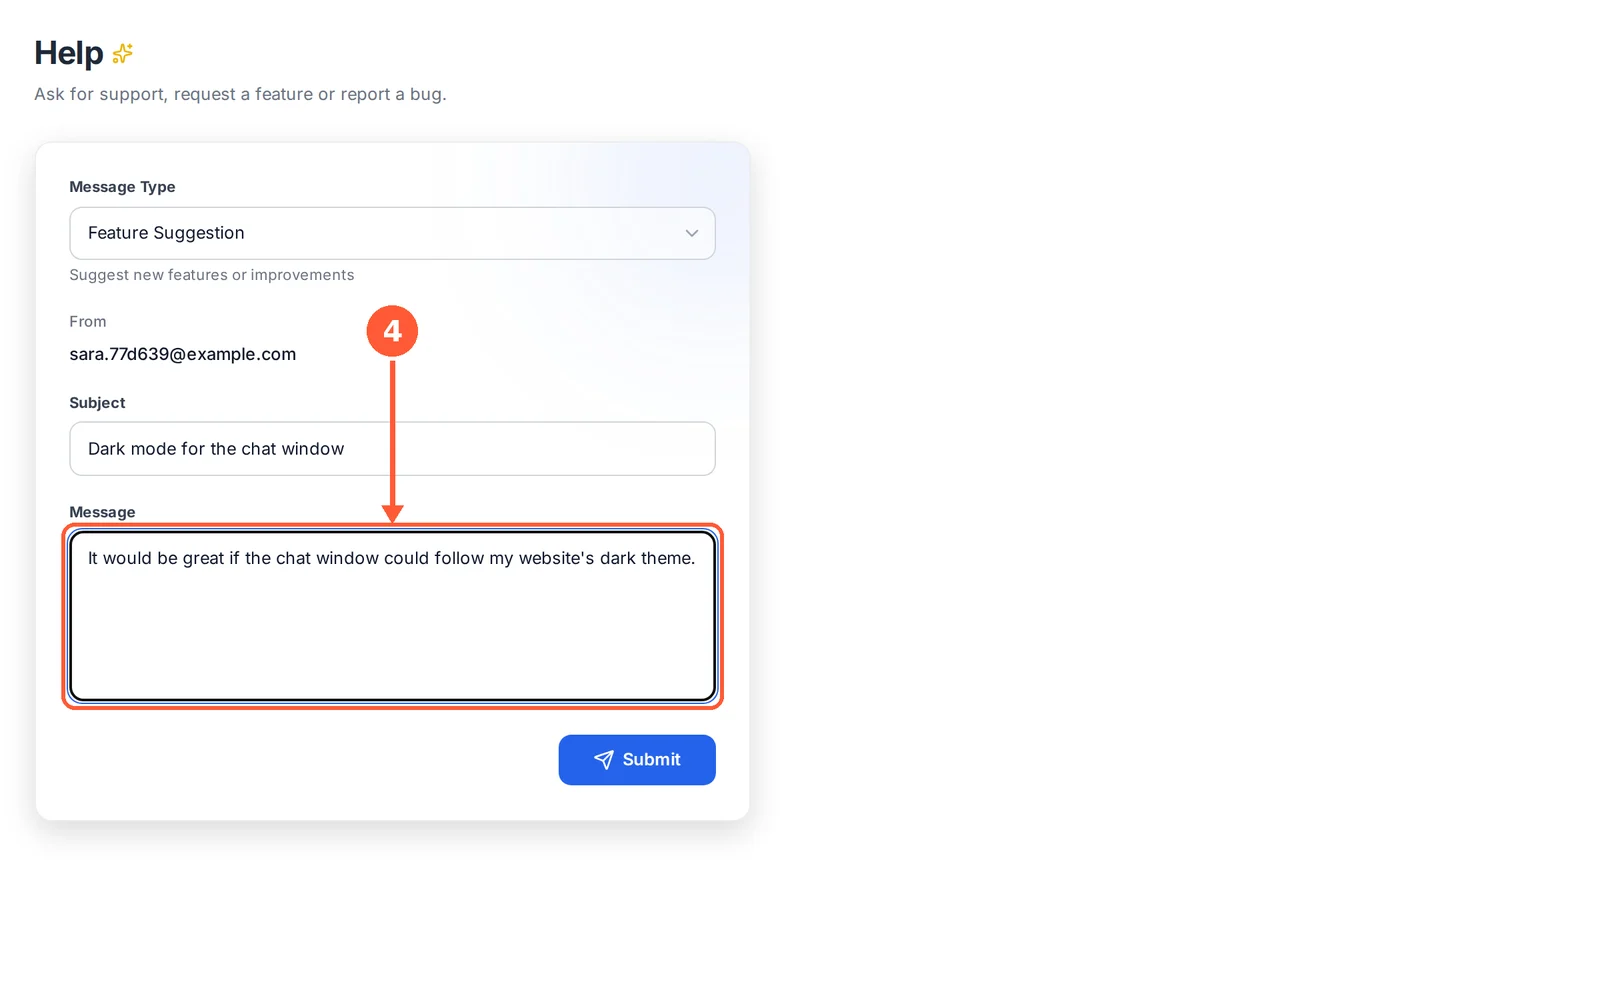
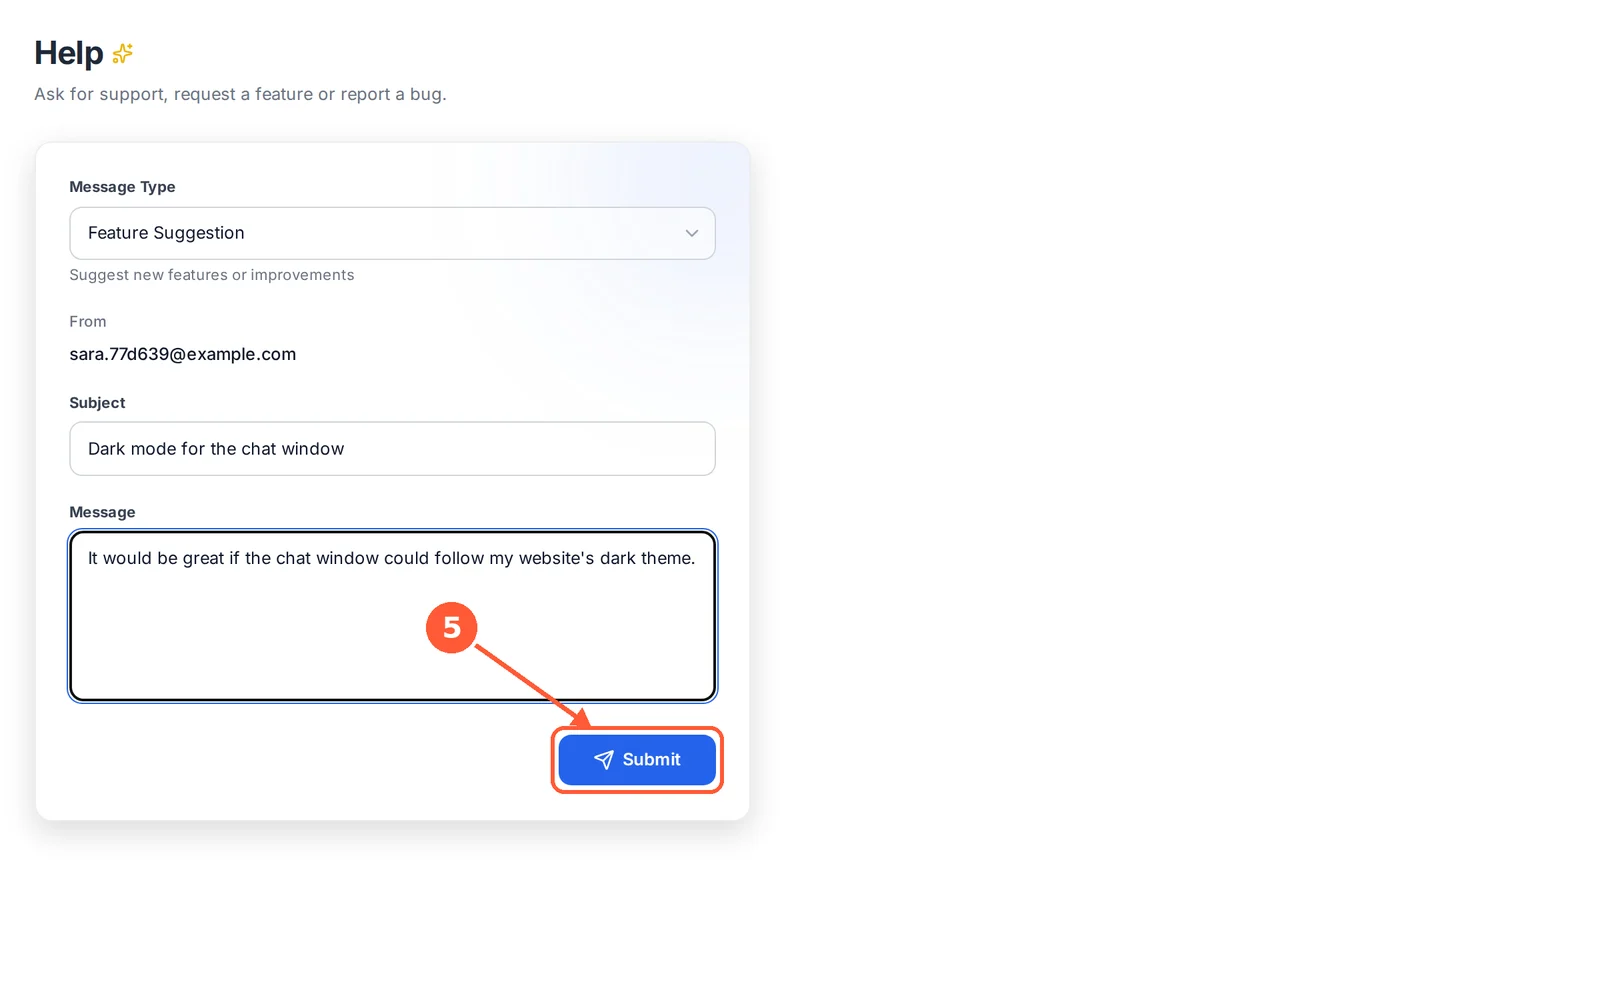
Ask us a question, report a problem, or suggest an idea.
⏱ About 1 minute • 📍 Help
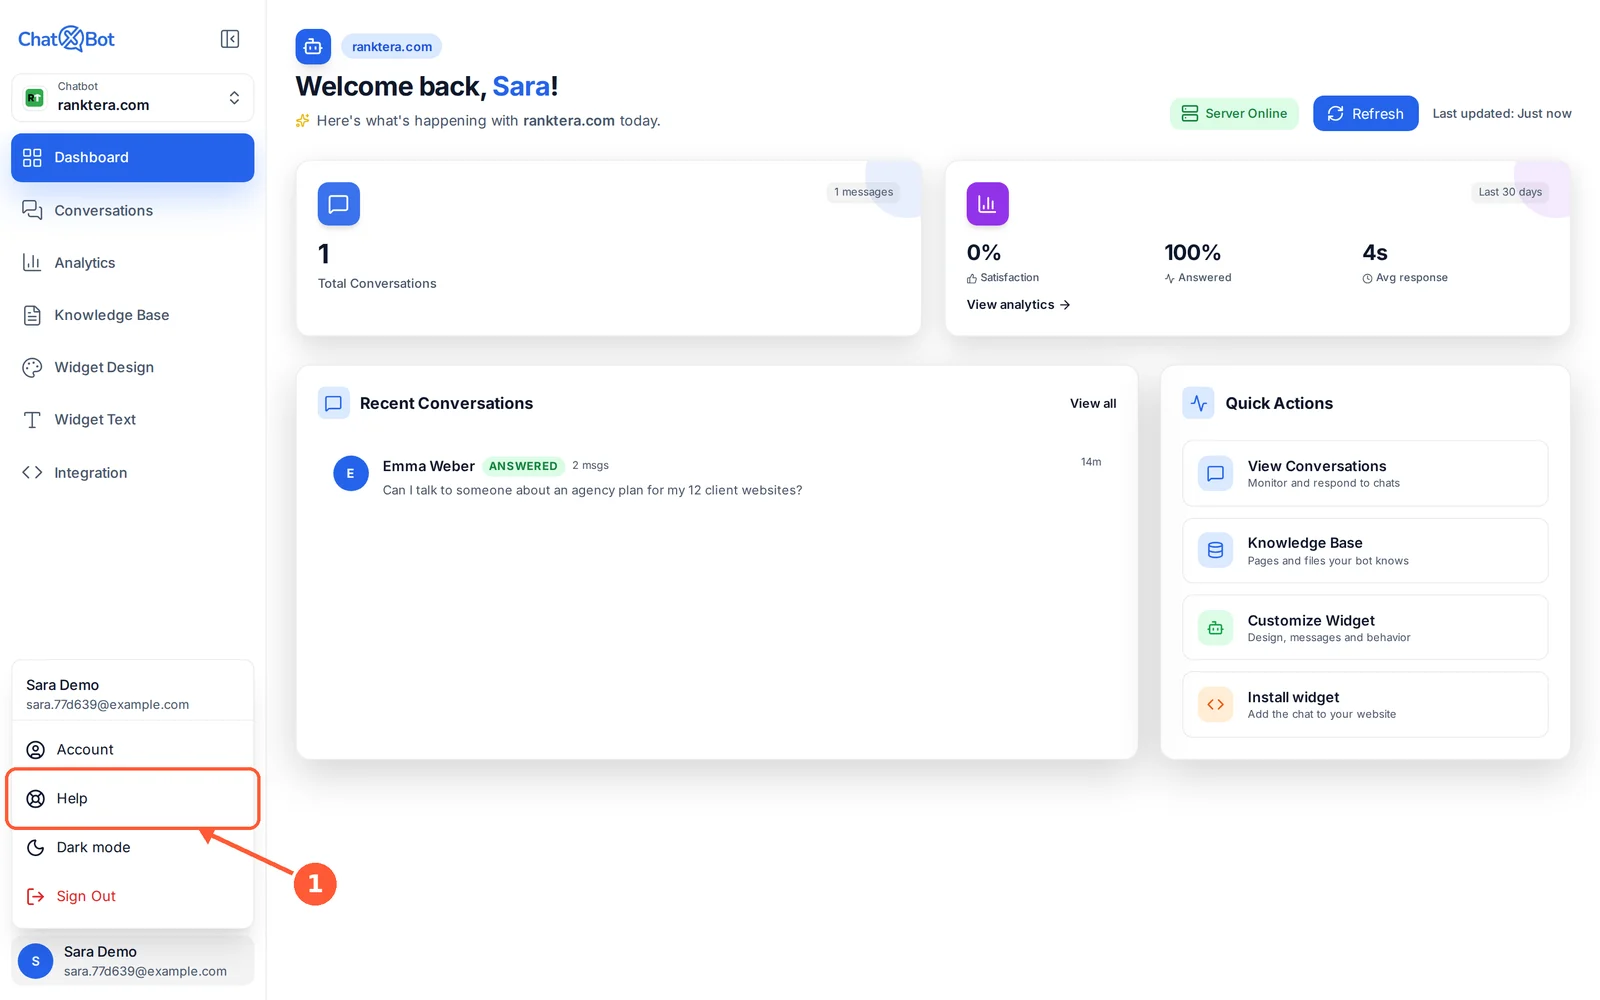
1Click your name at the bottom of the menu, then Help.1 / 5